Android笔记---Intent实现Activity跳转
学了之前的Android控件以及布局,我们就能够做一些UI的设计了,这里我结合之前的知识。以一个小的登录项目来解说下Activity之间跳转。
先看下效果图:
1.登录界面:

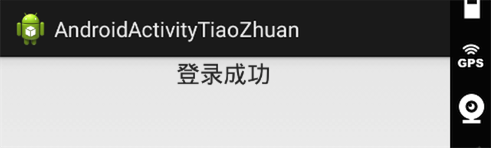
2.点击登录按钮跳转到另外一个Activity的界面,这个界面非常easy,就一个TextView:
首先我们须要建好两个Activity和两个xml布局文件,android程序启动会载入開始默认指定的MainActivity.java以及activity_main.xml。我们首先要做的是分别在两个Activity文件里设置好须要载入的xml布局以及须要处理的事情。
这里先直接给出两个xml布局文件的代码,用的是相对布局。须要自己熟悉这样的布局并进行对应的调整,能够參考我之前的博客:
activity_main.xml代码:
<RelativeLayout xmlns:android="http://schemas.android.com/apk/res/android"

    xmlns:tools="http://schemas.android.com/tools"

    android:layout_width="match_parent"

    android:layout_height="match_parent">

    <TextView

        android:id="@+id/tv1"

        android:layout_width="wrap_content"

        android:layout_height="wrap_content"

        android:text="username"

        android:textSize="25sp"/>

    <EditText

        android:id="@+id/et1"

        android:layout_width="match_parent"

        android:layout_height="wrap_content"

        android:layout_toRightOf="@id/tv1"

        android:layout_alignBottom ="@id/tv1"

        android:hint="请输入username"

        android:singleLine="true"/>

    <TextView

        android:id="@+id/tv2"

        android:layout_width="wrap_content"

        android:layout_height="wrap_content"

        android:layout_below="@id/tv1"

        android:layout_alignRight="@id/tv1"

        android:layout_alignLeft="@id/tv1"

        android:gravity="center"

        android:text="password"

        android:textSize="25sp"/>

    <EditText

        android:id="@+id/et2"

        android:layout_width="match_parent"

        android:layout_height="wrap_content"

        android:layout_toRightOf="@id/tv2"

        android:layout_alignBottom ="@id/tv2"

        android:hint="请输入password"

        android:password="true"

        android:singleLine="true"/>

    <Button

        android:id="@+id/bt1"

        android:layout_width="match_parent"

        android:layout_height="wrap_content"

        android:layout_below="@id/tv2"

        android:text="登录"/>

</RelativeLayout>activity_main.xml2代码:
<RelativeLayout xmlns:android="http://schemas.android.com/apk/res/android"

    xmlns:tools="http://schemas.android.com/tools"

    android:layout_width="match_parent"

    android:layout_height="match_parent">

    <TextView

        android:id="@+id/bv3"

        android:layout_width="match_parent"

        android:layout_height="wrap_content"

        android:gravity="center"

        android:textSize="20sp"

        android:text="登录成功" />

</RelativeLayout>
然后对于2个Activity,先在 AndroidManifest.xml 中为 SecondActivity进行注冊:
这里给出AndroidManifest.xml中的代码:
<?xml version="1.0" encoding="utf-8"?>

<manifest xmlns:android="http://schemas.android.com/apk/res/android"

    package="com.example.androidactivitytiaozhuan"

    android:versionCode="1"

    android:versionName="1.0" >

    <uses-sdk

        android:minSdkVersion="16"

        android:targetSdkVersion="22" />

    <application

        android:allowBackup="true"

        android:icon="@drawable/ic_launcher"

        android:label="@string/app_name"

        android:theme="@style/AppTheme" >

        <activity

            android:name=".MainActivity"

            android:label="@string/app_name" >

            <intent-filter>

                <action android:name="android.intent.action.MAIN" />

                <category android:name="android.intent.category.LAUNCHER" />

            </intent-filter>

        </activity>

        //注冊SecondActivity,因为不是主活动,因此不须要配置intent-filter标签里的内容

        <activity

            android:name=".SecondActivity" >

        </activity>

    </application>

</manifest>
接下来我们学习了解下Intent。
Intent是Android程序中各组件之间进行交互的一种重要方式,它不仅能够指明当前组件想要运行的动作,还能够在不同组件之间传递数据。Intent 一般可被用于启动活动、启动服务、以及发送广播等场景, 这里先仅仅讲下用Intent实现界面的跳转。
有非常多方法实现Activity之间的跳转,这里我仅仅给出一种使用显示的Intent(通过指定Intent组件名称来实现的,它一般用在知道目标组件名称的前提下,通常是在同样的应用程序内部实现的。
)方式,很多其它的能够參考浅谈显示Intent和隐式Intent。我们首先构建出了一个 Intent,传入MainActivity.this作为上下文,传入SecondActivity.class 作为目标活动,这样我们的“意图”就非常明显了,即在 MainActivity 这个活动的基础上打 开 SecondActivity 这个活动。
然后通过 startActivity()方法来运行这个 Intent。以下给出两个Activity中的代码。
MainActivity.java代码例如以下:
package com.example.androidactivitytiaozhuan;

import android.app.Activity;

import android.content.Intent;

import android.os.Bundle;

import android.view.View;

import android.view.View.OnClickListener;

import android.widget.Button;

public class MainActivity extends Activity {

    private Button button;

    @Override

    protected void onCreate(Bundle savedInstanceState) {

        super.onCreate(savedInstanceState);

        setContentView(R.layout.activity_main);

        button = (Button) findViewById(R.id.bt1);

        button.setOnClickListener(new OnClickListener() {

            @Override

            public void onClick(View v) {

                //显示方式声明Intent。直接启动SecondActivity

                Intent intent = new Intent(MainActivity.this, SecondActivity.class);

                startActivity(intent);

            }

        });

    }

}
SecondActivity.java代码例如以下:
package com.example.androidactivitytiaozhuan;

import android.app.Activity;

import android.os.Bundle;

public class SecondActivity extends Activity {

    @Override

    protected void onCreate(Bundle savedInstanceState) {

        super.onCreate(savedInstanceState);

        setContentView(R.layout.activity_main2);

    }

}
Android笔记---Intent实现Activity跳转的更多相关文章
- Android - 通过Intent启动Activity
通过Intent启动Activity 本文地址: http://blog.csdn.net/caroline_wendy 为了动态关联Activity界面,使用Intent启动.能够灵活绑定. 在In ...
- Android组件系列----当前Activity跳转到另一个Activity的详细过程
[声明] 欢迎转载,但请保留文章原始出处→_→ 生命壹号:http://www.cnblogs.com/smyhvae/ 文章来源:http://www.cnblogs.com/smyhvae/p/3 ...
- Android之Intent和Activity
Intent能够说是Android的灵魂,程序跳转和传递数据的时候基本上就是靠Intent了.Intent在Android应用中是相当重要的,理解Intent相应用编程非常有帮助.在Android的官 ...
- Android 笔记 Intent and Bundle day7
学习了Intent与Bundle的使用,进行应用中的交互 package com.example.intent; import android.app.Activity; import android ...
- Android学习手记(1) Activity跳转
新建Project,并将主页命名为MainActivity. 创建一个Activity 在App上“右键->New->Activity->Empty Activity”, 将新建的A ...
- [转]android笔记--Intent和IntentFilter详解
Intent用于启动Activity, Service, 以及BroadcastReceiver三种组件, 同时还是组件之间通信的重要媒介. 使用Intent启动组件的优势1, Intent为组件的启 ...
- android笔记--Intent和IntentFilter详解
本文转载自:https://www.cnblogs.com/liushengjie/archive/2012/08/30/2663066.html 本文转载自:https://www.cnblogs. ...
- Android 笔记-Fragment 与 Activity之间传递数据
Fragment 与 Activity之间传递数据有两种方法.一种是使用setArgument,一种是使用接口回调.以下先学习第一种方法. (1)使用setArgument方法: 为了便于理解,我在这 ...
- android笔记5——同一个Activity中Fragment的切换
今天来模拟一个注冊的界面过程: 点击"下一步"之后: watermark/2/text/aHR0cDovL2Jsb2cuY3Nkbi5uZXQvZW5zb24xNjg1NQ==/f ...
随机推荐
- python编程基础
Date: 2019-05-27 Author: Sun 1. 程序 为了完成某种特定功能,以某种程序设计语言编写的有序指令的集合.程序是指挥cpu工作的"工作手册".计算机只能执 ...
- MVC 设计模式
MVC 设计模式: 最早由 Trygve Teenskaug 在 1978 年提出,上世纪 80 年代是程序语言 Smalltalk 的一种内部架构.后来 MVC 被其他领域借鉴,成为了软件工程中的一 ...
- c标签迭代Map
<%@ page import="java.util.Map" %> <%@ page import="java.util.HashMap" ...
- 算法38---292. Nim游戏
1.题目: 你和你的朋友,两个人一起玩 Nim游戏:桌子上有一堆石头,每次你们轮流拿掉 1 - 3 块石头. 拿掉最后一块石头的人就是获胜者.你作为先手. 你们是聪明人,每一步都是最优解. 编写一个函 ...
- ip iproute2的典型应用
net-tools和iproute2的命令做对比,做到简单明了,分别演示如何去获取.配置和操作系统网络信息. 以下是net-tools和iproute2的大致对比: 4.1 ip link set-- ...
- 改造vue-quill-editor: 结合element-ui上传图片到服务器
前排提示:现在可以直接使用封装好的插件vue-quill-editor-upload 需求概述 vue-quill-editor是我们再使用vue框架的时候常用的一个富文本编辑器,在进行富文本编辑的时 ...
- scrapy爬取boss直聘实习生数据
这个..是我最近想找实习单位..结果发现boss上很多实习单位名字就叫‘实习生’.......太不讲究了 == 难怪一直搜不到..咳,其实是我自己水平有限,有些简历根本就投不出去 == 所以就想爬下b ...
- myssql数据库表名转驼峰 - PLAY - ITeye博客
原文:myssql数据库表名转驼峰 - PLAY - ITeye博客
- [android] 百度地图开发 (一).申请AK显示地图及解决显示空白网格问题
近期做android百度地图,可是使用baidumapapi_v2_3_1.jar和libBaiduMapSDK_v2_3_1.so显示百度地图时总是遇到问题--仅仅显示网格而没有显示地图,网 ...
- JAVA学习第四十六课 — 其它对象API(二)Date类 & Calendar类(重点掌握)
Date类(重点) 开发时,会时常遇见时间显示的情况,所以必须熟练Date的应用 <span style="font-family:KaiTi_GB2312;font-size:18p ...