Install Apache, PHP And MySQL On CentOS 7 (LAMP)
This tutorial shows how you can install an Apache2 webserver on a CentOS 7.0 server with PHP5 support (mod_php) and MySQL support. LAMP is short for Linux, Apache, MySQL, PHP.
1 Preliminary Note
In this tutorial I use the hostname server1.example.com with the IP address 192.168.0.100. These settings might differ for you, so you have to replace them where appropriate.
I will add EPEL-7 repo here to install latest phpMyAdmin as follows:
rpm -ivh http://dl.fedoraproject.org/pub/epel/beta/7/x86_64/epel-release-7-0.2.noarch.rpm
2 Installing MySQL 5
To install MySQL, we do install mariadb like this:
yum -y install mariadb-server mariadb
Then we create the system startup links for MySQL (so that MySQL starts automatically whenever the system boots) and start the MySQL server:
systemctl start mariadb.service
systemctl enable mariadb.service
Set passwords for the MySQL root account:
mysql_secure_installation
[root@server1 ~]# mysql_secure_installation/usr/bin/mysql_secure_installation: line 379: find_mysql_client: command not found
NOTE: RUNNING ALL PARTS OF THIS SCRIPT IS RECOMMENDED FOR ALL MariaDB
SERVERS IN PRODUCTION USE! PLEASE READ EACH STEP CAREFULLY!
In order to log into MariaDB to secure it, we'll need the current
password for the root user. If you've just installed MariaDB, and
you haven't set the root password yet, the password will be blank,
so you should just press enter here.
Enter current password for root (enter for none): <--ENTER
OK, successfully used password, moving on...
Setting the root password ensures that nobody can log into the MariaDB
root user without the proper authorisation.
Set root password? [Y/n]
New password: <--yourmariadbpassword
Re-enter new password: <--yourmariadbpassword
Password updated successfully!
Reloading privilege tables..
... Success!
By default, a MariaDB installation has an anonymous user, allowing anyone
to log into MariaDB without having to have a user account created for
them. This is intended only for testing, and to make the installation
go a bit smoother. You should remove them before moving into a
production environment.
Remove anonymous users? [Y/n] <--ENTER
... Success!
Normally, root should only be allowed to connect from 'localhost'. This
ensures that someone cannot guess at the root password from the network.
Disallow root login remotely? [Y/n] <--ENTER
... Success!
By default, MariaDB comes with a database named 'test' that anyone can
access. This is also intended only for testing, and should be removed
before moving into a production environment.
Remove test database and access to it? [Y/n] <--ENTER
- Dropping test database...
... Success!
- Removing privileges on test database...
... Success!
Reloading the privilege tables will ensure that all changes made so far
will take effect immediately.
Reload privilege tables now? [Y/n] <--ENTER
... Success!
Cleaning up...
All done! If you've completed all of the above steps, your MariaDB
installation should now be secure.
Thanks for using MariaDB!
[root@server1 ~]#
3 Installing Apache2
CentOS 7.0 ships with apache 2.4. Apache2 is directly available as a CentOS 7.0 package, therefore we can install it like this:
yum -y install httpd
[root@server1 ~]# yum install httpdLoaded plugins: fastestmirror, langpacks
Loading mirror speeds from cached hostfile
* base: ftp.plusline.de
* extras: mirror.23media.de
* updates: mirror.23media.de
Package httpd-2.4.6-17.el7.centos.1.x86_64 already installed and latest version
Nothing to do
[root@server1 ~]#
By default apache will be installed, if-not then please install it as shown above
Now configure your system to start Apache at boot time...
systemctl start httpd.service
systemctl enable httpd.service
In CentOS 7.0 uses Firewall-cmd, so I will customize it to allow external access to port 80 (http) and 443 (https).
firewall-cmd --permanent --zone=public --add-service=http
firewall-cmd --permanent --zone=public --add-service=https
firewall-cmd --reload
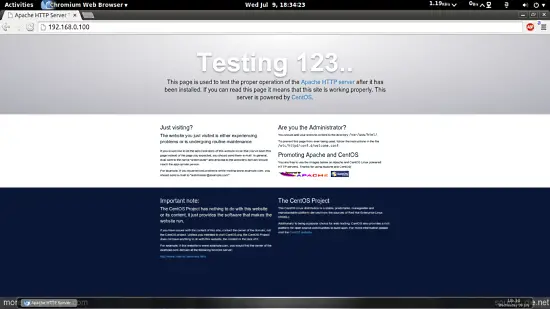
Now direct your browser to http://192.168.0.100, and you should see the Apache2 placeholder page:
4 Installing PHP5
We can install PHP5 and the Apache PHP5 module as follows:
yum -y install php
We must restart Apache afterwards:
systemctl restart httpd.service
5 Testing PHP5 / Getting Details About Your PHP5 Installation
The document root of the default web site is /var/www/html. We will
now create a small PHP file (info.php) in that directory and call it in a
browser. The file will display lots of useful details about our PHP
installation, such as the installed PHP version.
vi /var/www/html/info.php
<?php |
Now we call that file in a browser (e.g. http://192.168.0.100/info.php):
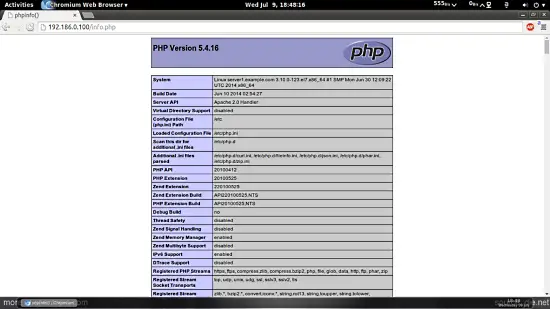
As you see, PHP5 is working, and it's working through the Apache 2.0 Handler, as shown in the Server API line. If you scroll further down, you will see all modules that are already enabled in PHP5. MySQL is not listed there which means we don't have MySQL support in PHP5 yet.
6 Getting MySQL Support In PHP5
To get MySQL support in PHP, we can install the php-mysql package. It's a good idea to install some other PHP5 modules as well as you might need them for your applications. You can search for available PHP5 modules like this:
yum search php
Pick the ones you need and install them like this:
yum -y install php-mysql
In the next step I will install some common PHP modules that are required by CMS Systems like Wordpress, Joomla and Drupal:
yum -y install php-gd php-ldap php-odbc php-pear php-xml php-xmlrpc php-mbstring php-snmp php-soap curl curl-devel
Now restart Apache2:
systemctl restart httpd.service
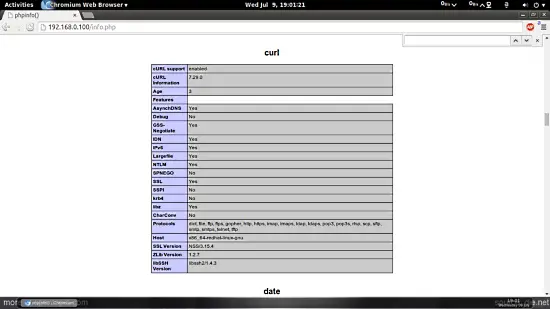
Now reload http://192.168.0.100/info.php in your browser and scroll down to the modules section again. You should now find lots of new modules like curl etc there.:
7 phpMyAdmin installation
phpMyAdmin is a web interface through which you can manage your MySQL databases.
phpMyAdmin can now be installed as follows:
yum install phpMyAdmin
Now we configure phpMyAdmin. We change the Apache configuration so
that phpMyAdmin allows connections not just from localhost (by
commenting out the <Directory "/usr/share/phpmyadmin"> stanza):
vi /etc/httpd/conf.d/phpMyAdmin.conf
[...] |
Next we change the authentication in phpMyAdmin from cookie to http:
vi /etc/phpMyAdmin/config.inc.php
[...] |
Restart Apache:
systemctl restart httpd.service
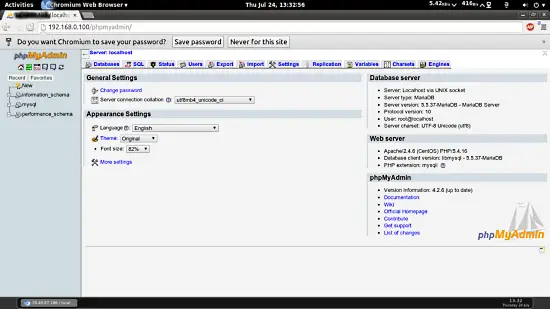
Afterwards, you can access phpMyAdmin under http://192.168.0.100/phpmyadmin/:
8 Links
Apache: http://httpd.apache.org/
PHP: http://www.php.net/
MySQL: http://www.mysql.com/
CentOS: http://www.centos.org/
phpMyAdmin: http://www.phpmyadmin.net/
refer: https://www.howtoforge.com/apache_php_mysql_on_centos_7_lamp
Install Apache, PHP And MySQL On CentOS 7 (LAMP)的更多相关文章
- How to Install Apache Solr 4.5 on CentOS 6.4
By Shay Anderson on October 2013 Knowledge Base / Linux / How to Install Apache Solr 4.5 on Cent ...
- How to Install Apache Tomcat 8.5 on CentOS 7.3
How to Install Apache Tomcat 8.5 on CentOS 7.3 From: https://www.howtoforge.com/tutorial/how-to-inst ...
- Installing Apache, PHP, and MySQL on Mac OS X
I have installed Apache, PHP, and MySQL on Mac OS X since Leopard. Each time doing so by hand. Each ...
- Install Apache 2.2.15, MySQL 5.5.34 & PHP 5.5.4 on RHEL/CentOS 6.4/5.9 & Fedora 19-12 [转]
Step 1: Installing Remi Repository ## Install Remi Repository on Fedora , , , , ## rpm -Uvh http://d ...
- Centos6.5 install Python2.7 & django & mysql & apache
#! /bin/bash#su root#get python2.7wget https://www.python.org/ftp/python/2.7.9/Python-2.7.9.tgz #ins ...
- How to Install MySQL on CentOS 7
CentOS 7的yum源中貌似没有正常安装mysql时的mysql-sever文件,需要去官网上下载 # wget http://dev.mysql.com/get/mysql-communit ...
- vm虚拟机上安装apache+php+ftp+mysql
我在vm虚拟机上想安装 winxp和linux,然后在linux机上装apache+php+ftp+mysql,以下为我的按装过程: 1:连通虚拟机:两个虚拟机都选Host-Onl,查看主机Virt ...
- centos 安装 Lamp(Linux + Apache + PHP) 并安装 phpmyadmin
来源:http://www.laozhe.net/302.html 一般情况下,安装的都是最新的正式版,除非你有特殊需求,要安装指定的版本,本文暂不讨论.从最基础的开始,一点点完成一个可用的 Linu ...
- yum mysql on centos 7
参考:https://www.linode.com/docs/databases/mysql/how-to-install-mysql-on-centos-7 centos 7上没有办法使用yum i ...
随机推荐
- hdu 2665 Kth number
划分树 /* HDU 2665 Kth number 划分树 */ #include<stdio.h> #include<iostream> #include<strin ...
- 110. Balanced Binary Tree
Given a binary tree, determine if it is height-balanced. For this problem, a height-balanced binary ...
- iOS8适配工作
1 按钮,菜单文字被加上下划线的问题. 2 状态栏被遮挡的问题.(iPhone6明显,iPhone4S无) 3 使用xcode6最新版本进行编译出现的通知无法呈现的问题(也不进行提示) 4 权限检测( ...
- WebRTC录音(1)-实现通话双向录音
最近公司的iPad项目中一个功能点涉及到了VOIP通讯中的录音,需要在已有的WebRTC引擎中增加录音功能,录制通话双方的声音参考了往上一位兄弟的博文(链接在此 http://blog.csdn.ne ...
- tyvj1023 - 奶牛的锻炼 ——DP
题目链接:https://www.tyvj.cn/Problem_Show.aspx?id=1023 #include <cstdio> #include <algorithm> ...
- js部分---数组及练习题;
数据存储--数组: 强类型语言数组 1.同一类型的数据存储的集合,在内存中是连续的 2.定义的时候需要制定长度 弱类型语言数组 1.可以存储任意类型的数据 2.在内存中不连续,不需要制定长度 定义一个 ...
- Codeforces Round #120 (Div. 2)
A. Vasya and the Bus 根据\(n,m\)是否为0分类讨论下. B. Surrounded 判断两圆是否有交点,否则构造的圆与两圆相切. C. STL 看代码比较清楚. void t ...
- SPI相位跟极性介绍
[详解]SPI中的极性CPOL和相位CPHA是什么以及如何设置 2012-03-0214:34:10| 分类:单片机 | 标签: |字号大中小 订阅 版本:2011-08-15 作者:crif ...
- jQuery Easing 动画效果扩展 ,全屏滚动案例
http://www.helloweba.com/view-blog-212.html $(element).animate({ height:500, width:600 } ...
- JavaScript-闭包注意事项
闭包允许内层函数引用父函数中的变量,但是该变量是最终值