[心得体会]Spring注解基本使用方法
涨知识系列
Environment environment = context.getEnvironment();
在Spring中所有被加载到spring中的配置文件都会出现在这个环境变量中, 其中还包括系统中的环境变量也会存在
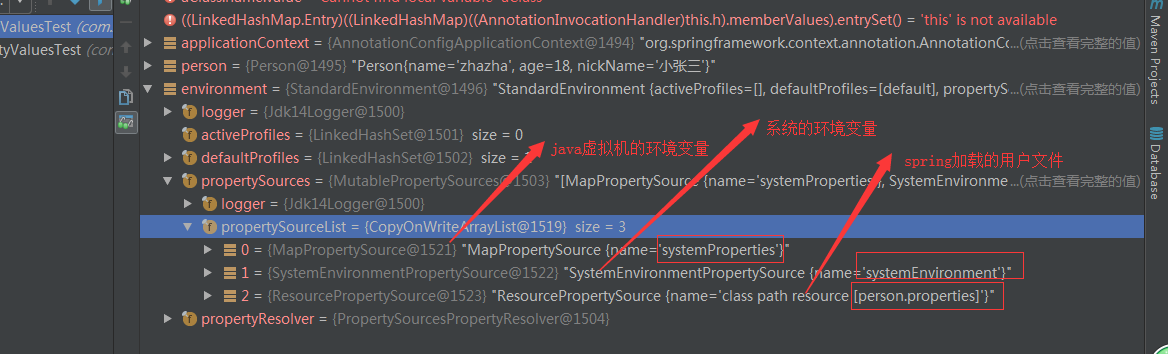
Environment = system + jvm + user
1. maven pom.xml
<?xml version="1.0" encoding="UTF-8"?>
<project xmlns="http://maven.apache.org/POM/4.0.0"
    xmlns:xsi="http://www.w3.org/2001/XMLSchema-instance"
    xsi:schemaLocation="http://maven.apache.org/POM/4.0.0 http://maven.apache.org/xsd/maven-4.0.0.xsd">
    <modelVersion>4.0.0</modelVersion>

    <groupId>com.zhazha</groupId>
    <artifactId>spring-annotation</artifactId>
    <version>1.0-SNAPSHOT</version>

    <dependencies>
        <dependency>
            <groupId>org.springframework</groupId>
            <artifactId>spring-context</artifactId>
            <version>4.3.18.RELEASE</version>
        </dependency>
        <!-- 使用inject注解的时候使用  -->
        <dependency>
            <groupId>javax.inject</groupId>
            <artifactId>javax.inject</artifactId>
            <version>1</version>
        </dependency>
        <dependency>
            <groupId>com.mchange</groupId>
            <artifactId>c3p0</artifactId>
            <version>0.9.5.2</version>
        </dependency>
        <dependency>
            <groupId>mysql</groupId>
            <artifactId>mysql-connector-java</artifactId>
            <version>5.1.44</version>
        </dependency>
        <dependency>
            <groupId>org.springframework</groupId>
            <artifactId>spring-aspects</artifactId>
            <version>4.3.18.RELEASE</version>
        </dependency>

        <dependency>
            <groupId>org.springframework</groupId>
            <artifactId>spring-jdbc</artifactId>
            <version>4.3.18.RELEASE</version>
        </dependency>

        <dependency>
            <groupId>org.springframework</groupId>
            <artifactId>spring-orm</artifactId>
            <version>4.3.18.RELEASE</version>
        </dependency>

    </dependencies>

</project>
2. 设置spring配置对象
package com.zhazha.config;

import com.mchange.v2.c3p0.ComboPooledDataSource;
import com.zhazha.bean.Person;
import com.zhazha.configuration.CustomFilter;

import org.springframework.context.annotation.Bean;
import org.springframework.context.annotation.ComponentScan;
import org.springframework.context.annotation.Configuration;
import org.springframework.context.annotation.FilterType;
import org.springframework.jdbc.core.JdbcTemplate;

import java.beans.PropertyVetoException;

import javax.sql.DataSource;

@Configuration

/**
 * 测试自己的过滤器
 */
@ComponentScan(value = "com.zhazha", includeFilters = {
        @ComponentScan.Filter(type = FilterType.CUSTOM, classes = {
                CustomFilter.class
        })
}, useDefaultFilters = false)

/**
 * 测试包含
 */
// @ComponentScan(value = "com.zhazha", includeFilters = {
//         @ComponentScan.Filter(type = FilterType.ANNOTATION, value = {
//                 Controller.class
//         })
// }, useDefaultFilters = false)
/**
 * 测试排除
 */
// @ComponentScan(value = "com.zhazha", excludeFilters = {
//         @ComponentScan.Filter(type = FilterType.ANNOTATION, value = {
//                 Controller.class
//         })
// })

public class SpringBaseConfig {

    @Bean(name = "person")
    public Person person() {
        return new Person("zhazha", 20);
    }

    @Bean
    public DataSource dataSource() throws PropertyVetoException {
        ComboPooledDataSource dataSource = new ComboPooledDataSource();
        dataSource.setUser("root");
        dataSource.setPassword("r4t5#$%y6u7");
        dataSource.setJdbcUrl("jdbc:mysql://192.168.1.11:3306/xrj_edu?characterEncoding=utf8");
        dataSource.setDriverClass("com.mysql.jdbc.Driver");
        return dataSource;
    }

    // @Bean
    // public JdbcTemplate jdbcTemplate() throws PropertyVetoException {
    //     JdbcTemplate jdbcTemplate = new JdbcTemplate();
    //     jdbcTemplate.setDataSource(dataSource());
    //     return jdbcTemplate;
    // }

    /**
     *
     * @param dataSource
     *      spring ioc 会自动注入这个对象
     * @return
     */
    @Bean
    public JdbcTemplate jdbcTemplate(DataSource dataSource) {
        JdbcTemplate jdbcTemplate = new JdbcTemplate();
        jdbcTemplate.setDataSource(dataSource);
        return jdbcTemplate;
    }

}
package com.zhazha.test;

import com.zhazha.config.SpringBaseConfig;

import org.springframework.context.annotation.AnnotationConfigApplicationContext;

/**
 * @author zhengwei
 * @version 1.0.0
 * @date 2018/8/23 11:37
 * @msg 基本方法使用
 **/
public class BaseTest01 {
    public static void main(String[] args) {
        AnnotationConfigApplicationContext applicationContext = new AnnotationConfigApplicationContext(SpringBaseConfig.class);
        String[] names = applicationContext.getBeanDefinitionNames();
        for (String name : names) {
            System.err.println(name);
        }
    }
}
3. 单例多例案例
package com.zhazha.test;

import com.zhazha.config.SpringScopeConfig;

import org.springframework.context.annotation.AnnotationConfigApplicationContext;

/**
 * @author zhengwei
 * @version 1.0.0
 * @date 2018/8/23 11:36
 * @msg 单利多例
 **/
public class ScopeTest02 {

    public static void main(String[] args) {
        AnnotationConfigApplicationContext applicationContext = new AnnotationConfigApplicationContext(SpringScopeConfig.class);
        Object person = applicationContext.getBean("person");
        Object person1 = applicationContext.getBean("person");
        System.err.println(person == person1);
    }

}
package com.zhazha.config;

import com.zhazha.bean.Person;

import org.springframework.context.annotation.Bean;
import org.springframework.context.annotation.Configuration;
import org.springframework.context.annotation.Scope;

/**
 * 单例多例
 */
@Configuration
public class SpringScopeConfig {

    /**
     * prototype
     * singleton
     * request
     * session
     */
    // @Scope(scopeName = "prototype") // 多例 在ioc在过去对象的时候会去创建我们的对象, 而且是每次都创建对象
    @Scope(scopeName = "singleton") // 单例 默认, 如果是单实例的情况下默认在ioc容器启动的时候便被创建
    @Bean(name = "person")
    public Person person() {
        return new Person("zhazha", 20);
    }

}
4. 懒加载
package com.zhazha.test;

import com.zhazha.bean.Person;
import com.zhazha.config.SpringLazy;

import org.springframework.context.annotation.AnnotationConfigApplicationContext;

import java.util.Arrays;

/**
 * @author zhengwei
 * @version 1.0.0
 * @date 2018/8/23 11:20
 * @msg 为什么被设置为懒加载还是加载到了对象????
 **/
public class LazyTest03 {
    public static void main(String[] args) {
        AnnotationConfigApplicationContext applicationContext = new AnnotationConfigApplicationContext(SpringLazy.class);
        String[] beanDefinitionNames = applicationContext.getBeanDefinitionNames();
        int count = applicationContext.getBeanDefinitionCount();
        System.out.println(" count = " + count + " " + Arrays.asList(beanDefinitionNames));
        Person person = (Person) applicationContext.getBean("person");
        count = applicationContext.getBeanDefinitionCount();
        beanDefinitionNames = applicationContext.getBeanDefinitionNames();
        System.out.println(" count = " + count + " " + Arrays.asList(beanDefinitionNames));
        System.out.println(person.getNickName());
    }
}
package com.zhazha.config;

import com.zhazha.bean.Person;

import org.springframework.context.annotation.Bean;
import org.springframework.context.annotation.Configuration;
import org.springframework.context.annotation.Lazy;
import org.springframework.context.annotation.PropertySource;

/**
 * 懒加载
 */
@Configuration
@PropertySource(value = {"classpath:person.properties"}, encoding = "utf-8")
public class SpringLazy {

    @Lazy // 懒加载只针对单例
    @Bean(name = "person")
    public Person person() {
        System.out.println("person 对象被加载");
        return new Person("zhazha", 20);
    }

}
5. ioc加载对象条件 @Conditional 注解的使用
package com.zhazha.test;

import com.zhazha.bean.Person;
import com.zhazha.config.StringCondition;

import org.springframework.context.annotation.AnnotationConfigApplicationContext;

import java.util.Map;
import java.util.Set;

/**
 * @author zhengwei
 * @version 1.0.0
 * @date 2018/8/23 11:19
 * @msg
 **/
public class ConditionTest04 {

    /**
     * 条件new  Conditional   >>>>>>>>>>>>
     * 需要实现 Condition 接口
     * 通过@Conditional({LinuxCondition.class})注解和 实现的Condition返回值来判断
     * ioc是否加载对象
     */
    public static void main(String[] args) {
        AnnotationConfigApplicationContext applicationContext = new AnnotationConfigApplicationContext(StringCondition.class);
        Map<String, Person> beansOfType = applicationContext.getBeansOfType(Person.class);
        Set<Map.Entry<String, Person>> entries = beansOfType.entrySet();
        for (Map.Entry<String, Person> entry : entries) {
            System.out.println("key = " + entry.getKey() + " value = " + entry.getValue() + " class = " + entry.getClass().getName());
        }
    }
}
package com.zhazha.config;

import com.zhazha.configuration.ColorFactoryBean;
import com.zhazha.configuration.LinuxCondition;
import com.zhazha.configuration.WindowsCondition;
import com.zhazha.bean.Person;

import org.springframework.context.annotation.Bean;
import org.springframework.context.annotation.Conditional;
import org.springframework.context.annotation.Configuration;

@Configuration
public class StringCondition {

    @Bean(name = "person")
    public Person person() {
        System.out.println("person 对象被加载");
        return new Person("zhazha", 20);
    }

    @Conditional({LinuxCondition.class}) // 这个对象还能配置在类上
    @Bean("linus")
    public Person linuxPerson() {
        System.out.println("new linux");
        return new Person("linus", 48);
    }

    @Bean("bill")
    @Conditional({WindowsCondition.class})
    public Person windowPerson() {
        System.out.println("new window");
        return new Person("bill gates", 66);
    }

    /**
     * Bean 创建的一种方式通过继承 FactoryBean
     * @return
     */
    @Bean("colorBean")
    public ColorFactoryBean getColorFactoryBean() {
        return new ColorFactoryBean();
    }

}
/**
 * window的条件判断
 */
public class WindowsCondition implements Condition {
    public boolean matches(ConditionContext context, AnnotatedTypeMetadata metadata) {
        Environment environment = context.getEnvironment();
        String property = environment.getProperty("os.name");
        if (property.contains("Window") || property.contains("window")) {
            return true;
        }
        return false;
    }
}
package com.zhazha.configuration;

import org.springframework.context.annotation.Condition;
import org.springframework.context.annotation.ConditionContext;
import org.springframework.core.env.Environment;
import org.springframework.core.type.AnnotatedTypeMetadata;

/**
 * linux 的条件判断
 */
public class LinuxCondition implements Condition {
    public boolean matches(ConditionContext context, AnnotatedTypeMetadata metadata) {
        Environment environment = context.getEnvironment();
        String property = environment.getProperty("os.name");
        if (property.contains("Linux") || property.contains("Linux")) {
            return true;
        }
        return false;
    }

}
6. spring对象主动注入ioc的方法 (Import五种方法)
package com.zhazha.test;

import com.zhazha.config.AutoImportConfig;
import org.springframework.context.annotation.AnnotationConfigApplicationContext;

public class AutoImportBeanTest05 {

    /**
     * bean 主动创建方式导入
     * (1) 可以实现 ImportBeanDefinitionRegistrar 接口来实现对象的注入
     * (2) Import 注解 + 对象.class 直接输入ioc容器
     * (3)
     */
    public static void main(String[] args) {
        /**
         * spring ioc 去加载配置类中的配置的类和扫描出来的Bean
         * 配置(载入)Bean的方式有很多种
         *      (1) 主动在配置类中显示的使用@Bean方法  *****
         *      (2) 在类的上面添加 @Controller @Service @Repository @Component 等然后在配置类中进行@ComponentScan(value = {"com.zhazha.configuration"})扫描  *****
         *      (3) 使用@Import的三种方式   * @see Configuration  @see ImportSelector  ImportBeanDefinitionRegistrar
         *          1) @see Configuration 直接使用Import  @Import(value = {Red.class}) *****
         *          2) @see ImportSelector  ***
         *          3) ImportBeanDefinitionRegistrar  *****
         */
        AnnotationConfigApplicationContext applicationContext = new AnnotationConfigApplicationContext(AutoImportConfig.class);
        applicationContext.close();
    }
}
package com.zhazha.config;

import com.zhazha.bean.Blue;
import com.zhazha.bean.Red;
import com.zhazha.configuration.MyBeanFactoryPostProcessor;
import com.zhazha.configuration.MyImportBeanDefinitionRegistrar;

import org.springframework.context.annotation.Bean;
import org.springframework.context.annotation.Configuration;
import org.springframework.context.annotation.Import;

/**
 * Bean的注入
 */
@Configuration
// @ComponentScan(value = {"com.zhazha.configuration"}) // (5) 方式装载Bean         由于这个扫描的话会扫描出好多类, 所以使用后面的方式扫描
// @Import(value = {Red.class}) // (2) 方式装载Bean
// @Import(value = MyImportSelector.class) // (3) 方式装载Bean
@Import(value = {MyImportBeanDefinitionRegistrar.class}) // (4) 方式装载Bean
public class AutoImportConfig {

    // (1) 方式装载Bean
    @Bean
    public Blue blue() {
        return new Blue();
    }

    @Bean
    public Red red() {
        return new Red();
    }

    @Bean
    public MyBeanFactoryPostProcessor myBeanFactoryPostProcessor() {
        return new MyBeanFactoryPostProcessor();
    }
}
package com.zhazha.configuration;

import org.springframework.beans.BeansException;
import org.springframework.beans.factory.config.BeanFactoryPostProcessor;
import org.springframework.beans.factory.config.ConfigurableListableBeanFactory;
import org.springframework.stereotype.Component;

import java.util.Arrays;

/**
 * @author zhengwei
 * @version 1.0.0
 * @date 2018/8/23 10:45
 * @msg
 **/
@Component
public class MyBeanFactoryPostProcessor implements BeanFactoryPostProcessor {

    @Override
    public void postProcessBeanFactory(ConfigurableListableBeanFactory beanFactory) throws BeansException {
        int count = beanFactory.getBeanDefinitionCount();
        String[] beanDefinitionNames = beanFactory.getBeanDefinitionNames();
        System.out.println(Arrays.asList(beanDefinitionNames) + " count = " + count);
    }
}
package com.zhazha.configuration;

import com.zhazha.bean.Dog;

import org.springframework.context.annotation.ImportSelector;
import org.springframework.core.type.AnnotationMetadata;

/**
 * @author zhengwei
 * @version 1.0.0
 * @date 2018/8/23 11:02
 * @msg 自动装载方式之一
 **/
public class MyImportSelector implements ImportSelector {

    @Override
    public String[] selectImports(AnnotationMetadata importingClassMetadata) {
        return new String[]{Dog.class.getName()};
    }
}
package com.zhazha.test;

import com.zhazha.config.LifeCycleConfig;

import org.springframework.context.annotation.AnnotationConfigApplicationContext;

public class LiftCycleTest06 {
    /**
     * 对象声明周期的监控
     * 方式有三种:
     * (1) 使用 @Bean(initMethod = "init", destroyMethod = "destroy")  **
     * (2) 继承继承接口的方式进行 public class Cat implements InitializingBean, DisposableBean
     * (3) 使用注解的方式   @PreDestroy  public void destroy()
     *                     @PostConstruct public void init()
     */

    public static void main(String[] args) {
        AnnotationConfigApplicationContext applicationContext = new AnnotationConfigApplicationContext(LifeCycleConfig.class);
        applicationContext.close();
    }
}
package com.zhazha.config;

import com.zhazha.bean.Car;
import com.zhazha.bean.Cat;
import com.zhazha.bean.Dog;

import org.springframework.context.annotation.Bean;
import org.springframework.context.annotation.Configuration;
import org.springframework.context.annotation.Import;

/**
 * @author bangiao
 * @version 1.0.0
 * @date 2018/8/17 22:44
 * @msg spring 对象的生命周期   创建   初始化   销毁
 * 我们自定义spring对象的初始化和销毁方法
 **/
@Configuration
@Import(value = {Cat.class, Dog.class}) // 第二种方式和第三种方式
public class LifeCycleConfig {

    // (1) 第一种方式
    @Bean(initMethod = "init", destroyMethod = "destroy")
    public Car car() {
        return new Car();
    }

}
package com.zhazha.bean;

import org.springframework.beans.factory.DisposableBean;
import org.springframework.beans.factory.InitializingBean;
import org.springframework.stereotype.Component;

/**
 * @author bangiao
 * @version 1.0.0
 * @date 2018/8/17 22:59
 * @msg
 **/
@Component
public class Cat implements InitializingBean, DisposableBean {

    public Cat() {
        System.out.println("cat constructor... ");
    }

    public void destroy() throws Exception {
        System.out.println("cat destroy ... ");
    }

    public void afterPropertiesSet() throws Exception {
        System.out.println(" cat init ... ");
    }

    public void playBefore() {
        System.out.println("喵之前");
    }

    public void playAfter() {
        System.out.println("喵之后");
    }

}
package com.zhazha.bean;

import org.springframework.stereotype.Component;

import javax.annotation.PostConstruct;
import javax.annotation.PreDestroy;

/**
 * @author bangiao
 * @version 1.0.0
 * @date 2018/8/17 23:55
 * @msg
 **/
@Component
public class Dog {

    public Dog() {
        System.out.println("Dog constructor... ");
    }

    /**
     * 注解方式 捕捉对象生命周期
     * @throws Exception
     */
    @PreDestroy
    public void destroy() throws Exception {
        System.out.println("Dog destroy ... ");
    }

    @PostConstruct
    public void init() throws Exception {
        System.out.println(" Dog init ... ");
    }
}
public class SpringValuesTest {

    /**
     * 使用 @Value 赋值
     * 1. 基本数值
     * 2. 可以写 SpEL, #{}
     * 3. 可以写${} 去出配置文件中的值(在运行环境变量里面配)
     */
    public static void main(String[] args) {
        ApplicationContext applicationContext = new AnnotationConfigApplicationContext(SpringValuesConfig.class);
        Person person = (Person) applicationContext.getBean("person");
        System.out.println(person);
        Environment environment = applicationContext.getEnvironment();
        System.out.println(environment);
    }

}
public class Person {

    /**
     * 使用 @Value 赋值
     * 1. 基本数值
     * 2. 可以写 SpEL, #{}
     * 3. 可以写${} 去出配置文件中的值(在运行环境变量里面配)
     */
    @Value("zhazha")
    private String  name;
    @Value("#{20 - 2}")
    private Integer age;
    @Value("${person.nickName}")
    private String nickName;

    public Person() {
    }

    public String getNickName() {
        return nickName;
    }

    public void setNickName(String nickName) {
        this.nickName = nickName;
    }

    public Person(String name, Integer age) {
        this.name = name;
        this.age = age;
    }

    public Integer getAge() {
        return age;
    }

    public void setAge(Integer age) {
        this.age = age;
    }

    public String getName() {
        return name;
    }

    public void setName(String name) {
        this.name = name;
    }

    @Override
    public String toString() {
        return "Person{" +
                "name='" + name + '\'' +
                ", age=" + age +
                ", nickName='" + nickName + '\'' +
                '}';
    }
}
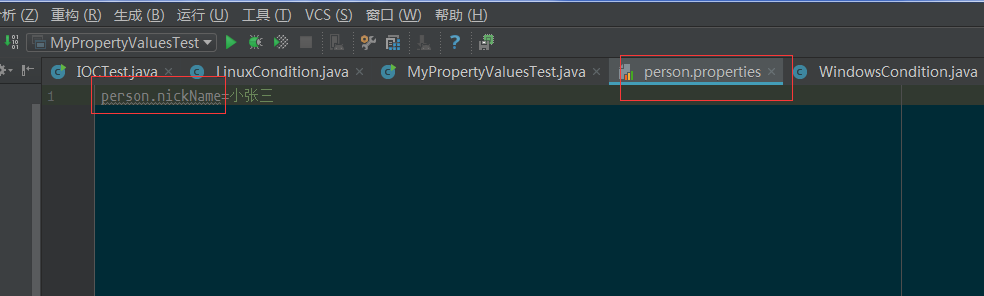
#person.properties
person.nickName=小张三
@PropertySource(value = "classpath:person.properties", encoding = "utf-8")
@Configuration
public class SpringValuesConfig {
    @Bean
    public Person person() {
        return new Person();
    }

}
10. 自动装配 装配 @Autowired
/**
 * 自动装配
 * Spring 利用依赖注入(DI), 完成对IOC容器中各个组件的依赖关系赋值
 * (1) @Autowired 自动注入:
 * 1) 默认优先按类型去容器中找对应的组件: applicationContext.getBean(BookDao.class)
 * 2) 如果根据类型找到多个dao对象, 则根据变量的名字查找对象
 * 3) 也可以通过@Qualifier("bookDao") // 可以通过这个注解设置别名
 * 这样的话主动装配注解将直接走名字而不知类型
 *
 * @Autowired private BookDao bookDao;  // bookDao 根据这个名字, 如果为 bookDao2 的话找bookDao2的对象
 * 4) Spring 还支持使用 @Resource(JSR250) 和 @Inject(jsr330) java规范
 * @Resource: 可以装配, 但是默认使用组件名称进行装配
 * 没有支持@Primary 功能没有支持 @Autowired(required = false)
 * @Inject: 需要导入javax.inject的包, 和Autowired的功能一样, 没有required = false
 * Autowired 是spring定义的, Resource和Inject是java的规范
 * AutowiredAnnotationBeanPostProcessor: 解析完成自动装配的功能
 * Autowired: 构造器, 参数, 方法, 属性
 * 标在:
 * 属性: 调用无参构造器
 * 无参构造器: 调用无参构造器
 * 有参构造器: 调用有参构造器
 * set方法: 调用set方法
 * 参数: 调用无参构造器
 */
public class SpringAutowiredTest08 {

    public static void main(String[] args) {
        AnnotationConfigApplicationContext applicationContext = new AnnotationConfigApplicationContext(AutowiredConfig.class);
        BookService bookService = (BookService) applicationContext.getBean("bookService");
        bookService.print();

        Color color = (Color) applicationContext.getBean("color_car");
        Car car = color.getCar();
        Car car1 = applicationContext.getBean(Car.class);
        System.out.println(car == car1);
    }
}
@Configuration
@ComponentScan(value = {"com.zhazha"}, includeFilters = {
        @ComponentScan.Filter(value = {
                Service.class, Repository.class
        })
}, useDefaultFilters = false)
@Import(value = {Color.class, Car.class})
public class AutowiredConfig {

    @Bean(value = "bookDao2")
    // @Primary // 首选注入
    public BookDao bookDao() {
        BookDaoImpl bookDao = new BookDaoImpl();
        bookDao.setLaBel(2);
        return bookDao;
    }

    @Bean(value = "color_car")
    public Color color(Car car) {
        Color color = new Color();
        color.setCar(car);
        return color;
    }

    @Bean
    public DataSource dataSource() throws PropertyVetoException {
        ComboPooledDataSource dataSource = new ComboPooledDataSource();
        dataSource.setUser("root");
        dataSource.setPassword("r4t5#$%y6u7");
        dataSource.setJdbcUrl("jdbc:mysql://192.168.1.11:3306/xrj_edu?characterEncoding=utf8");
        dataSource.setDriverClass("com.mysql.jdbc.Driver");
        return dataSource;
    }

    @Bean
    public JdbcTemplate jdbcTemplate() throws PropertyVetoException {
        JdbcTemplate jdbcTemplate = new JdbcTemplate();
        jdbcTemplate.setDataSource(dataSource());
        return jdbcTemplate;
    }

}
@Service(value = "bookService")
public class BookServiceImpl implements BookService {

    @Autowired(required = false) // 指定可不不必须关系
    @Qualifier("bookDao") // 可以通过这个注解设置别名
    // @Resource(name = "bookDao2")
    // @Inject
    private BookDao bookDao;

    public void print() {
        System.out.println("Spring bookDao print: " + bookDao.getLaBel());
    }
}
@Repository(value = "bookDao")
public class BookDaoImpl implements BookDao {

    private Integer label = 1;

    public void setLaBel(Integer laBel) {
        this.label = laBel;
    }

    public Integer getLaBel() {
        return this.label;
    }
}
11. ProFile系统注解方式使用(测试/开发/线上环境区别方法专用)
/**
 * Profile:
 * Spring 为我们提供的可以根据当前环境, 动态激活和切换一系列组件的功能
 * 开发环境, 测试环境, 生产环境
 * 切换数据源(数据库)案例
 *
 * @Profile 指定组件在哪个环境的情况下才能被注册到容器中, 不指定, 任何环境下都能注册这个组件
 * 默认是default环境
 * 1) 在虚拟机上面添加参数 -Dspring.profiles.active=dev 或者 test
 * 2) 使用代码的方式实现
 *      没有配置任何ProFile注解的Bean对象默认都会被加载
 */
public class ProFileTest09 {

    public static void main(String[] args) {
        // test1();
        test2();
    }

    /**
     * 代码方式实现
     */
    public static void test2() {
        // 1. 设置 applicationContext
        AnnotationConfigApplicationContext applicationContext = new AnnotationConfigApplicationContext();
        // 2. 设置需要激活的环境
        applicationContext.getEnvironment().setActiveProfiles("test", "dev");
        // 3. 注册配置类
        applicationContext.register(ProfileConfig.class);
        // 4. 启动刷新容器
        applicationContext.refresh();
        String[] beanNamesForType = applicationContext.getBeanNamesForType(DataSource.class);
        for (String dataSource : beanNamesForType) {
            System.out.println(dataSource);
        }
    }

    /**
     * 环境变量方式实现
     */
    public static void test1() {
        AnnotationConfigApplicationContext applicationContext = new AnnotationConfigApplicationContext(ProfileConfig.class);
        String[] beanNamesForType = applicationContext.getBeanNamesForType(DataSource.class);
        for (String dataSource : beanNamesForType) {
            System.out.println(dataSource);
        }
    }

}
@Configuration
@PropertySource(value = {"classpath:dbconfig.properties"})
public class ProfileConfig implements EmbeddedValueResolverAware {

    @Value("${db.user}")
    private String user;

    private String dirverName;

    @Profile("test")
    @Bean
    public Yellow yellow() {
        return new Yellow();
    }

    /**
     * 测试
     *
     * @param pwd
     * @return
     * @throws PropertyVetoException
     */
    @Profile("test")
    @Bean("testDataSource")
    public DataSource dataSourceTest(@Value("db.pwd") String pwd) throws PropertyVetoException {
        ComboPooledDataSource dataSource = new ComboPooledDataSource();
        dataSource.setUser(user);
        dataSource.setPassword(pwd);
        dataSource.setJdbcUrl("jdbc:mysql://localhost:3306/taotao");
        dataSource.setDriverClass(dirverName);
        return dataSource;
    }

    /**
     * 开发
     *
     * @param pwd
     * @return
     * @throws PropertyVetoException
     */
    @Profile("dev")
    @Bean("devDataSource")
    public DataSource dataSourceDev(@Value("db.pwd") String pwd) throws PropertyVetoException {
        ComboPooledDataSource dataSource = new ComboPooledDataSource();
        dataSource.setUser(user);
        dataSource.setPassword(pwd);
        dataSource.setJdbcUrl("jdbc:mysql://localhost:3306/ssm");
        dataSource.setDriverClass(dirverName);
        return dataSource;
    }

    /**
     * 线上
     *
     * @param pwd
     * @return
     * @throws PropertyVetoException
     */
    @Profile("prod")
    @Bean("prodDataSource")
    public DataSource dataSourceProd(@Value("db.pwd") String pwd) throws PropertyVetoException {
        ComboPooledDataSource dataSource = new ComboPooledDataSource();
        dataSource.setUser(user);
        dataSource.setPassword(pwd);
        dataSource.setJdbcUrl("jdbc:mysql://localhost:3306/springmvc");
        dataSource.setDriverClass(dirverName);
        return dataSource;
    }

    @Override
    public void setEmbeddedValueResolver(StringValueResolver resolver) {
        dirverName = resolver.resolveStringValue("${db.driver}");
    }
}
12. 事务的使用(@EnableTransactionManagement)
public class TxTest {

    /**
     * 声明式事务:
     *
     * 环境搭建:
     * 1、导入相关依赖
     *        数据源、数据库驱动、Spring-jdbc模块
     * 2、配置数据源、JdbcTemplate(Spring提供的简化数据库操作的工具)操作数据
     * 3、给方法上标注 @Transactional 表示当前方法是一个事务方法;
     * 4、 @EnableTransactionManagement 开启基于注解的事务管理功能;
     *        @EnableXXX
     * 5、配置事务管理器来控制事务;
     *        @Bean
     *        public PlatformTransactionManager transactionManager()
     *
     *
     * 原理:
     * 1)、@EnableTransactionManagement
     *           利用TransactionManagementConfigurationSelector给容器中会导入组件
     *           导入两个组件
     *           AutoProxyRegistrar
     *           ProxyTransactionManagementConfiguration
     * 2)、AutoProxyRegistrar:
     *           给容器中注册一个 InfrastructureAdvisorAutoProxyCreator 组件;
     *           InfrastructureAdvisorAutoProxyCreator:?
     *           利用后置处理器机制在对象创建以后,包装对象,返回一个代理对象(增强器),代理对象执行方法利用拦截器链进行调用;
     *
     * 3)、ProxyTransactionManagementConfiguration 做了什么?
     *           1、给容器中注册事务增强器;
     *              1)、事务增强器要用事务注解的信息,AnnotationTransactionAttributeSource解析事务注解
     *              2)、事务拦截器:
     *                 TransactionInterceptor;保存了事务属性信息,事务管理器;
     *                 他是一个 MethodInterceptor;
     *                 在目标方法执行的时候;
     *                    执行拦截器链;
     *                    事务拦截器:
     *                       1)、先获取事务相关的属性
     *                       2)、再获取PlatformTransactionManager,如果事先没有添加指定任何transactionmanger
     *                          最终会从容器中按照类型获取一个PlatformTransactionManager;
     *                       3)、执行目标方法
     *                          如果异常,获取到事务管理器,利用事务管理回滚操作;
     *                          如果正常,利用事务管理器,提交事务
     *
     */
    public static void main(String[] args) {
        AnnotationConfigApplicationContext applicationContext = new AnnotationConfigApplicationContext(TxConfig.class);
        UserService userService = (UserService) applicationContext.getBean("userService");
        userService.insert();
    }
}
@Configuration
@PropertySource(value = {"classpath:dbconfig.properties"})
@ComponentScan(value = "com.zhazha.tx", excludeFilters = {
        @ComponentScan.Filter(type = FilterType.ANNOTATION, classes = Controller.class)
})
@EnableTransactionManagement
public class TxConfig implements EmbeddedValueResolverAware {

    private StringValueResolver resolver;
    private JdbcTemplate jdbcTemplate;

    @Bean
    public DataSource dataSource() throws PropertyVetoException {
        ComboPooledDataSource dataSource = new ComboPooledDataSource();
        dataSource.setDriverClass(resolver.resolveStringValue("${db.driver}"));
        dataSource.setUser(resolver.resolveStringValue("${db.user}"));
        dataSource.setPassword(resolver.resolveStringValue("${db.pwd}"));
        dataSource.setJdbcUrl(resolver.resolveStringValue("${db.jdbc}"));
        return dataSource;
    }

    @Bean
    public JdbcTemplate jdbcTemplate(DataSource dataSource) {
        // Spring 对配置文件进行了优化, 多次调用 dataSource() 这个方法也只能是一次创建多次查找
        this.jdbcTemplate = new JdbcTemplate(dataSource);
        return jdbcTemplate;
    }

    @Bean
    public PlatformTransactionManager transactionManager(DataSource dataSource) {
        return new DataSourceTransactionManager(dataSource);
    }

    @Override
    public void setEmbeddedValueResolver(StringValueResolver resolver) {
        this.resolver = resolver;
    }
}
@Service("userService")
public class UserService {

    @Autowired
    private UserDao userDao;

    @Transactional(rollbackFor = Exception.class)
    public void insert() {
        userDao.insert();
        // int a = 10 / 0;
    }

}
@Repository
public class UserDao {

    @Autowired
    private JdbcTemplate jdbcTemplate;

    public void insert() {
        String sql = "insert into tb_user(username, age) values(?, ?)";
        jdbcTemplate.update(sql, UUID.randomUUID().toString().substring(4, 8), 10);
    }
}
13. Aop的使用(@EnableAspectJAutoProxy, @Aspect)
    /**
     * AOP使用三步:
     * (1) 将业务逻辑和切面类加入到容器中, 告诉Spring哪个是切面类. (@Aspects)
     * (2) 在切面类中的方法上加上AOP注解(@Before, @After, AfterReturning, AfterThrowing ...)
     * (3) 在配置类上添加注解 @EnableAspectJAutoProxy
     * @param args
     */
public class AopTest {
  /**
     * AOP:【动态代理】
     *        指在程序运行期间动态的将某段代码切入到指定方法指定位置进行运行的编程方式;
     *
     * 1、导入aop模块;Spring AOP:(spring-aspects)
     * 2、定义一个业务逻辑类(MathCalculator);在业务逻辑运行的时候将日志进行打印(方法之前、方法运行结束、方法出现异常,xxx)
     * 3、定义一个日志切面类(LogAspects):切面类里面的方法需要动态感知MathCalculator.div运行到哪里然后执行;
     *        通知方法:
     *           前置通知(@Before):logStart:在目标方法(div)运行之前运行
     *           后置通知(@After):logEnd:在目标方法(div)运行结束之后运行(无论方法正常结束还是异常结束)
     *           返回通知(@AfterReturning):logReturn:在目标方法(div)正常返回之后运行
     *           异常通知(@AfterThrowing):logException:在目标方法(div)出现异常以后运行
     *           环绕通知(@Around):动态代理,手动推进目标方法运行(joinPoint.procced())
     * 4、给切面类的目标方法标注何时何地运行(通知注解);
     * 5、将切面类和业务逻辑类(目标方法所在类)都加入到容器中;
     * 6、必须告诉Spring哪个类是切面类(给切面类上加一个注解:@Aspect)
     * [7]、给配置类中加 @EnableAspectJAutoProxy 【开启基于注解的aop模式】
     *        在Spring中很多的 @EnableXXX;
     *
     * 三步:
     *     1)、将业务逻辑组件和切面类都加入到容器中;告诉Spring哪个是切面类(@Aspect)
     *     2)、在切面类上的每一个通知方法上标注通知注解,告诉Spring何时何地运行(切入点表达式)
     *  3)、开启基于注解的aop模式;@EnableAspectJAutoProxy
     *
     * AOP原理:【看给容器中注册了什么组件,这个组件什么时候工作,这个组件的功能是什么?】
     *        @EnableAspectJAutoProxy;
     * 1、@EnableAspectJAutoProxy是什么?
     *        @Import(AspectJAutoProxyRegistrar.class):给容器中导入AspectJAutoProxyRegistrar
     *           利用AspectJAutoProxyRegistrar自定义给容器中注册bean;BeanDefinetion
     *           internalAutoProxyCreator=AnnotationAwareAspectJAutoProxyCreator
     *
     *        给容器中注册一个AnnotationAwareAspectJAutoProxyCreator;
     *
     * 2、 AnnotationAwareAspectJAutoProxyCreator:
     *        AnnotationAwareAspectJAutoProxyCreator
     *           ->AspectJAwareAdvisorAutoProxyCreator
     *              ->AbstractAdvisorAutoProxyCreator
     *                 ->AbstractAutoProxyCreator
     *                       implements SmartInstantiationAwareBeanPostProcessor, BeanFactoryAware
     *                    关注后置处理器(在bean初始化完成前后做事情)、自动装配BeanFactory
     *
     * AbstractAutoProxyCreator.setBeanFactory()
     * AbstractAutoProxyCreator.有后置处理器的逻辑;
     *
     * AbstractAdvisorAutoProxyCreator.setBeanFactory()-》initBeanFactory()
     *
     * AnnotationAwareAspectJAutoProxyCreator.initBeanFactory()
     *
     *
     * 流程:
     *        1)、传入配置类,创建ioc容器
     *        2)、注册配置类,调用refresh()刷新容器;
     *        3)、registerBeanPostProcessors(beanFactory);注册bean的后置处理器来方便拦截bean的创建;
     *           1)、先获取ioc容器已经定义了的需要创建对象的所有BeanPostProcessor
     *           2)、给容器中加别的BeanPostProcessor
     *           3)、优先注册实现了PriorityOrdered接口的BeanPostProcessor;
     *           4)、再给容器中注册实现了Ordered接口的BeanPostProcessor;
     *           5)、注册没实现优先级接口的BeanPostProcessor;
     *           6)、注册BeanPostProcessor,实际上就是创建BeanPostProcessor对象,保存在容器中;
     *              创建internalAutoProxyCreator的BeanPostProcessor【AnnotationAwareAspectJAutoProxyCreator】
     *              1)、创建Bean的实例
     *              2)、populateBean;给bean的各种属性赋值
     *              3)、initializeBean:初始化bean;
     *                    1)、invokeAwareMethods():处理Aware接口的方法回调
     *                    2)、applyBeanPostProcessorsBeforeInitialization():应用后置处理器的postProcessBeforeInitialization()
     *                    3)、invokeInitMethods();执行自定义的初始化方法
     *                    4)、applyBeanPostProcessorsAfterInitialization();执行后置处理器的postProcessAfterInitialization();
     *              4)、BeanPostProcessor(AnnotationAwareAspectJAutoProxyCreator)创建成功;--》aspectJAdvisorsBuilder
     *           7)、把BeanPostProcessor注册到BeanFactory中;
     *              beanFactory.addBeanPostProcessor(postProcessor);
     * =======以上是创建和注册AnnotationAwareAspectJAutoProxyCreator的过程========
     *
     *           AnnotationAwareAspectJAutoProxyCreator => InstantiationAwareBeanPostProcessor
     *        4)、finishBeanFactoryInitialization(beanFactory);完成BeanFactory初始化工作;创建剩下的单实例bean
     *           1)、遍历获取容器中所有的Bean,依次创建对象getBean(beanName);
     *              getBean->doGetBean()->getSingleton()->
     *           2)、创建bean
     *              【AnnotationAwareAspectJAutoProxyCreator在所有bean创建之前会有一个拦截,InstantiationAwareBeanPostProcessor,会调用postProcessBeforeInstantiation()】
     *              1)、先从缓存中获取当前bean,如果能获取到,说明bean是之前被创建过的,直接使用,否则再创建;
     *                 只要创建好的Bean都会被缓存起来
     *              2)、createBean();创建bean;
     *                 AnnotationAwareAspectJAutoProxyCreator 会在任何bean创建之前先尝试返回bean的实例
     *                 【BeanPostProcessor是在Bean对象创建完成初始化前后调用的】
     *                 【InstantiationAwareBeanPostProcessor是在创建Bean实例之前先尝试用后置处理器返回对象的】
     *                 1)、resolveBeforeInstantiation(beanName, mbdToUse);解析BeforeInstantiation
     *                    希望后置处理器在此能返回一个代理对象;如果能返回代理对象就使用,如果不能就继续
     *                    1)、后置处理器先尝试返回对象;
     *                       bean = applyBeanPostProcessorsBeforeInstantiation():
     *                          拿到所有后置处理器,如果是InstantiationAwareBeanPostProcessor;
     *                          就执行postProcessBeforeInstantiation
     *                       if (bean != null) {
     *                              bean = applyBeanPostProcessorsAfterInitialization(bean, beanName);
     *                          }
     *
     *                 2)、doCreateBean(beanName, mbdToUse, args);真正的去创建一个bean实例;和3.6流程一样;
     *                 3)、
     *
     *
     * AnnotationAwareAspectJAutoProxyCreator【InstantiationAwareBeanPostProcessor】 的作用:
     * 1)、每一个bean创建之前,调用postProcessBeforeInstantiation();
     *        关心MathCalculator和LogAspect的创建
     *        1)、判断当前bean是否在advisedBeans中(保存了所有需要增强bean)
     *        2)、判断当前bean是否是基础类型的Advice、Pointcut、Advisor、AopInfrastructureBean,
     *           或者是否是切面(@Aspect)
     *        3)、是否需要跳过
     *           1)、获取候选的增强器(切面里面的通知方法)【List<Advisor> candidateAdvisors】
     *              每一个封装的通知方法的增强器是 InstantiationModelAwarePointcutAdvisor;
     *              判断每一个增强器是否是 AspectJPointcutAdvisor 类型的;返回true
     *           2)、永远返回false
     *
     * 2)、创建对象
     * postProcessAfterInitialization;
     *        return wrapIfNecessary(bean, beanName, cacheKey);//包装如果需要的情况下
     *        1)、获取当前bean的所有增强器(通知方法)  Object[]  specificInterceptors
     *           1、找到候选的所有的增强器(找哪些通知方法是需要切入当前bean方法的)
     *           2、获取到能在bean使用的增强器。
     *           3、给增强器排序
     *        2)、保存当前bean在advisedBeans中;
     *        3)、如果当前bean需要增强,创建当前bean的代理对象;
     *           1)、获取所有增强器(通知方法)
     *           2)、保存到proxyFactory
     *           3)、创建代理对象:Spring自动决定
     *              JdkDynamicAopProxy(config);jdk动态代理;
     *              ObjenesisCglibAopProxy(config);cglib的动态代理;
     *        4)、给容器中返回当前组件使用cglib增强了的代理对象;
     *        5)、以后容器中获取到的就是这个组件的代理对象,执行目标方法的时候,代理对象就会执行通知方法的流程;
     *
     *
     *     3)、目标方法执行  ;
     *        容器中保存了组件的代理对象(cglib增强后的对象),这个对象里面保存了详细信息(比如增强器,目标对象,xxx);
     *        1)、CglibAopProxy.intercept();拦截目标方法的执行
     *        2)、根据ProxyFactory对象获取将要执行的目标方法拦截器链;
     *           List<Object> chain = this.advised.getInterceptorsAndDynamicInterceptionAdvice(method, targetClass);
     *           1)、List<Object> interceptorList保存所有拦截器 5
     *              一个默认的ExposeInvocationInterceptor 和 4个增强器;
     *           2)、遍历所有的增强器,将其转为Interceptor;
     *              registry.getInterceptors(advisor);
     *           3)、将增强器转为List<MethodInterceptor>;
     *              如果是MethodInterceptor,直接加入到集合中
     *              如果不是,使用AdvisorAdapter将增强器转为MethodInterceptor;
     *              转换完成返回MethodInterceptor数组;
     *
     *        3)、如果没有拦截器链,直接执行目标方法;
     *           拦截器链(每一个通知方法又被包装为方法拦截器,利用MethodInterceptor机制)
     *        4)、如果有拦截器链,把需要执行的目标对象,目标方法,
     *           拦截器链等信息传入创建一个 CglibMethodInvocation 对象,
     *           并调用 Object retVal =  mi.proceed();
     *        5)、拦截器链的触发过程;
     *           1)、如果没有拦截器执行执行目标方法,或者拦截器的索引和拦截器数组-1大小一样(指定到了最后一个拦截器)执行目标方法;
     *           2)、链式获取每一个拦截器,拦截器执行invoke方法,每一个拦截器等待下一个拦截器执行完成返回以后再来执行;
     *              拦截器链的机制,保证通知方法与目标方法的执行顺序;
     *
     *     总结:
     *        1)、  @EnableAspectJAutoProxy 开启AOP功能
     *        2)、 @EnableAspectJAutoProxy 会给容器中注册一个组件 AnnotationAwareAspectJAutoProxyCreator
     *        3)、AnnotationAwareAspectJAutoProxyCreator是一个后置处理器;
     *        4)、容器的创建流程:
     *           1)、registerBeanPostProcessors()注册后置处理器;创建AnnotationAwareAspectJAutoProxyCreator对象
     *           2)、finishBeanFactoryInitialization()初始化剩下的单实例bean
     *              1)、创建业务逻辑组件和切面组件
     *              2)、AnnotationAwareAspectJAutoProxyCreator拦截组件的创建过程
     *              3)、组件创建完之后,判断组件是否需要增强
     *                 是:切面的通知方法,包装成增强器(Advisor);给业务逻辑组件创建一个代理对象(cglib);
     *        5)、执行目标方法:
     *           1)、代理对象执行目标方法
     *           2)、CglibAopProxy.intercept();
     *              1)、得到目标方法的拦截器链(增强器包装成拦截器MethodInterceptor)
     *              2)、利用拦截器的链式机制,依次进入每一个拦截器进行执行;
     *              3)、效果:
     *                 正常执行:前置通知-》目标方法-》后置通知-》返回通知
     *                 出现异常:前置通知-》目标方法-》后置通知-》异常通知
     *
     *
     *
     */
    public static void main(String[] args) {
        AnnotationConfigApplicationContext applicationContext = new AnnotationConfigApplicationContext(AOPConfig.class);
        MathCalculator calculator = applicationContext.getBean(MathCalculator.class);
        calculator.div(20, 10);
    }
}
@EnableAspectJAutoProxy
@Configuration
public class AOPConfig {

    @Bean
    public MathCalculator calculator() {
        return new MathCalculator();
    }

    @Bean
    public LogAspects aspects() {
        return new LogAspects();
    }

}
public class MathCalculator {
    public int div(int i, int j) {
        System.out.println("MathCalculator ... div... ");
        return i / j;
    }
}
切面类
@Aspect
public class LogAspects {

    @Pointcut("execution(public int com.zhazha.bean.MathCalculator.*(..))")
    public void pointCut() {
    }

    /**
     * 切入点表达式
     */
    @Before("pointCut()")
    public void logStart(JoinPoint joinPoint) {
        Object[] args = joinPoint.getArgs();

        System.out.println("" + joinPoint.getSignature().getName() + " @Before ... 参数列表{" + Arrays.asList(args) + "}是: ");
    }

    @After("pointCut()")
    public void logEnd(JoinPoint joinPoint) {
        System.out.println("" + joinPoint.getSignature().getName() + " @After: 参数列表{ " + Arrays.asList(joinPoint.getArgs()) + " } ... ");
    }

    /**
     * @param joinPoint 这个参数必须在参数列表的前面
     * @param res
     */
    @AfterReturning(value = "pointCut()", returning = "res")
    public void logReturn(JoinPoint joinPoint, Object res) {
        System.out.println("" + joinPoint.getSignature().getName() + " @AfterReturning 正常返回, 参数列表是: {" + Arrays.asList(joinPoint.getArgs()) + "} 运行结果: " + res.toString() + " ");
    }

    @AfterThrowing(value = "pointCut()", throwing = "exception")
    public void logException(JoinPoint joinPoint, Exception exception) {
        System.out.println("" + joinPoint.getSignature().getName() + "计算出现参数列表是: {" + Arrays.asList(joinPoint.getArgs()) + "} @AfterThrowing 异常 ... " + exception.getMessage() + "");
    }
}
14. Aware 接口方法的使用
public class AwareTest {

    /**
     * 继承了 Aware 接口的Bean将会在注入 Spring ioc 容器后Spring主动调用 Aware 接口的 set 方法完成相对应的类注入
     *
     * @param args
     */
    public static void main(String[] args) {
        AnnotationConfigApplicationContext applicationContext = new AnnotationConfigApplicationContext(AwareConfig.class);
        String[] beanDefinitionNames = applicationContext.getBeanDefinitionNames();
        for (String beanDefinitionName : beanDefinitionNames) {
            System.out.println(beanDefinitionName);
        }
        applicationContext.close();
    }
}
@Configuration
@Import(value = {Circle.class})
public class AwareConfig {
}
@Component
public class Circle implements ApplicationContextAware {

    private static ApplicationContext applicationContext;

    @Override
    public void setApplicationContext(ApplicationContext applicationContext) throws BeansException {
        this.applicationContext = applicationContext;
    }

    public ApplicationContext getApplicationContext() {
        return applicationContext;
    }
}
15. ioc Beanfactroy对象后置处理器
public class BeanPostProcessorTest {

    /**
     * 后置处理器, 在对象调用初始化接口的前后分别调用两个方法
     * @param args
     */
    public static void main(String[] args) {
        AnnotationConfigApplicationContext applicationContext = new AnnotationConfigApplicationContext(BeanPostProcessorConfig.class);
        applicationContext.close();
    }
}
@Configuration
@Import(value = {MyBeanPostProcessor.class, Cat.class})
public class BeanPostProcessorConfig {
}
public class MyBeanPostProcessor implements BeanPostProcessor {
    public Object postProcessBeforeInitialization(Object o, String s) throws BeansException {
        if (o instanceof Cat) {
            Cat cat = (Cat) o;
            cat.playBefore();
            System.out.println("cat init 前!");
        }
        return o;
    }

    public Object postProcessAfterInitialization(Object o, String s) throws BeansException {
        if (o instanceof Cat) {
            Cat cat = (Cat) o;
            cat.playAfter();
            System.out.println("cat init 后!");
        }
        return o;
    }
}
@Component
public class Cat implements InitializingBean, DisposableBean {

    public Cat() {
        System.out.println("cat constructor... ");
    }

    public void destroy() throws Exception {
        System.out.println("cat destroy ... ");
    }

    public void afterPropertiesSet() throws Exception {
        System.out.println(" cat init ... ");
    }

    public void playBefore() {
        System.out.println("喵之前");
    }

    public void playAfter() {
        System.out.println("喵之后");
    }

}
[心得体会]Spring注解基本使用方法的更多相关文章
- [心得体会]spring事务源码分析
spring事务源码分析 1. 事务的初始化注册(从 @EnableTransactionManagement 开始) @Import(TransactionManagementConfigurati ...
- [心得体会]Spring容器的初始化
1. Spring容器的初始化过程 public AnnotationConfigApplicationContext(Class<?>... annotatedClasses) { ...
- Spring 注解 hibernate 实体方法 <property name="packagesToScan" value="com.sise.domain"/>
<property name="annotatedClasses"> <list> <value>com.sise.domain.Admin&l ...
- 实验二 输出“Hello Word!”,测试主方法的输入参数和心得体会
实验二 一.输出“Hello World!” 1.首先打开eclipse,如下图所示. 2.选择一个工作空间,如下图所示. 3.接下来,点击[Java项目]创建一个Java项目,如下图所示. 4.然后 ...
- Spring注解开发-全面解析常用注解使用方法之生命周期
本文github位置:https://github.com/WillVi/Spring-Annotation/ 往期文章:Spring注解开发-全面解析常用注解使用方法之组件注册 bean生命周期 ...
- spring bean的介绍以及xml和注解的配置方法
5.Bean 下边我们来了解一下Bean的: Bean的作用域Bean的生命周期Bean的自动装配Resources和ResourceLoader 5.1Bean容器的初始化 Bean容器的初始化 两 ...
- 品Spring:对@PostConstruct和@PreDestroy注解的处理方法
在bean的实例化过程中,也会用到一系列的相关注解. 如@PostConstruct和@PreDestroy用来标记初始化和销毁方法. 平常更多的是侧重于应用,很少会有人去了解它背后发生的事情. 今天 ...
- 品Spring:对@Resource注解的处理方法
@Resource是Java的注解,表示一个资源,它具有双向的含义,一个是从外部获取一个资源,一个是向外部提供一个资源. 这其实就对应于Spring的注入和注册.当它用在字段和方法上时,表示前者.当它 ...
- 品Spring:对@Autowired和@Value注解的处理方法
在Spring中能够完成依赖注入的注解有JavaSE提供的@Resource注解,就是上一篇文章介绍的. 还有JavaEE提供的@javax.inject.Inject注解,这个用的很少,因为一般都不 ...
随机推荐
- linux进阶之网络技术管理
本节内容 1. 网络七层模型 物理层 数据链路层 网络层 传输层 会话层 表示层 应用层 2. TCP/UDP (1)TCP面向连接,可靠传输,消耗系统资源比较多,传输速度较慢,但是数据传 ...
- JQuery.Gantt开发指南(转)
说明 日前需要用到甘特图,以下转载内容源自网络. • 概述 1.JQuery.Gantt是一个开源的基于JQuery库的用于实现甘特图效果的可扩展功能的JS组件库. •前端页面 o 资源引用 首先我们 ...
- [算法] 数据结构 splay(伸展树)解析
前言 splay学了已经很久了,只不过一直没有总结,鸽了好久来写一篇总结. 先介绍 splay:亦称伸展树,为二叉搜索树的一种,部分操作能在 \(O( \log n)\) 内完成,如插入.查找.删除. ...
- 关于unity贴图压缩
unity官方 https://docs.unity3d.com/Manual/class-TextureImporterOverride.html //后续填充内容
- MyBatis执行器
Mybatis的执行器 下面先展示一张图,用来说明一下Mybatis执行器的整体架构 SimpleExecutor 首先SimpleExecutor是我们最常使用的一个执行器,无论我们执行什么方法默认 ...
- Navicat Premium 15 linux 安装与激活 ArchLinux 2021
查看了很多教程花了半小时才弄好可真不容易 参考https://github.com/orginly/navicat-keygen 下载地址 http://www.navicat.com.cn/down ...
- Splunk 8.2.0 发布 (macOS, Linux, Windows)
强烈鄙视 CSDN 用户 CIAS(账号:hanzheng260561728),盗用本站资源,删除原文链接,并且用于收费下载!!! 请访问原文链接:https://sysin.org/article/ ...
- SpringCloud Alibaba实战(2:电商系统业务分析)
选用了很常见的电商业务来进行SpringCloud Alibaba的实战. 当然,因为仅仅是为了学习SpringCloud Alibaba,所以对业务进行了大幅度简化,这里只取一个精简版的用户下单业务 ...
- 【补档STM32】STM32F103俄罗斯方块游戏实现
项目地址:https://gitee.com/daycen/stm32-tetris/tree/master 使用Keil uVision5打开即可 一.概述 本文介绍了一个基于STM32的俄罗斯 ...
- 使用 JavaScript 将 HTML 转换为 PDF
使用 JavaScript 将 HTML 转换为 PDF 更多相关学习资料参见http://www.pdfdownload.cn/b/ba_index.php 在本文中,我们将了解如何在浏览器(即完全 ...