ELK实战-elasticsearch安装
操作系统:
| centos版本 | 7.4 |
| 防火墙 | 关闭 |
| selinux | 关闭 |
| elasticsearch版本 | 6.3.2 |
| java版本 | 1.8 |
| server1 | 192.168.10.126 |
| server2 | 192.168.10.127 |
[root@server1 ~]# wget -c https://artifacts.elastic.co/downloads/elasticsearch/elasticsearch-6.3.2.tar.gz
[root@server1 ~]# tar zxf elasticsearch-6.3.2.tar.gz -C /usr/local/
[root@server1 ~]# yum -y install java
[root@server1 ~]# vim /etc/hosts
192.168.10.126 server1
192.168.10.127 server2
192.168.10.128 server3
[root@server1 ~]# vim /etc/profile
export ELASTICSEARCH_HOME=/usr/local/elasticsearch-6.3.2
export PATH=$ELASTICSEARCH_HOME/bin:$PATH
[root@server1 ~]# source /etc/profile
[root@server1 ~]# useradd elasticsearch
[root@server1 ~]# chown elasticsearch.elasticsearch /usr/local/elasticsearch-6.3.2/ -R
[root@server1 ~]# vim /etc/security/limits.conf
#最大用户进程数
* soft nproc 20480
* hard nproc 20480
#调整进程最大打开文件描述符
* soft nofile 65536
* hard nofile 65536
#最大锁定内存地址空间
* soft memlock unlimited
* hard memlock unlimited
[root@server1 ~]# vim /etc/sysctl.conf
#配置系统最大打开文件描述符
fs.file-max=655360
#限制一个Java线程数量,进程可以拥有的VMA(虚拟内存区域)的大小
vm.max_map_count = 262144
[root@server1 ~]# vim /etc/security/limits.d/20-nproc.conf
* soft nproc 4096
#root soft nproc unlimited
* soft nproc 20480
[root@server1 ~]# vim /usr/local/elasticsearch-6.3.2/config/jvm.options
#设置java内存资源使用为物理内存的一半
-Xms1g
-Xmx1g
[root@server1 ~]# vim /usr/local/elasticsearch-6.3.2/config/elasticsearch.yml
#集群名称
cluster.name: esbigdata
#节点名
node.name: server1
#指定该节点是否有资格被选举为主,默认为true
node.master: true
#指定该节点是否存储索引数据
node.data: true
#设置索引数据的存储路径
path.data: /data/elasticsearch
#设置日志文件存储路径
path.logs: /usr/local/elasticsearch-6.3.2/logs
#设置为true用来锁住物理内存
bootstrap.memory_lock: true
#设置提供服务的ip地址
network.host: 0.0.0.0
#设置提供服务的http端口
http.port: 9200
#设置集群中最少的主节点数,默认为1
discovery.zen.minimum_master_nodes: 1
#设置集群中master节点的初始列表,master节点初始列表中对应的端口时9300,即为集群交互通信端口
discovery.zen.ping.unicast.hosts: ["192.168.10.126:9300", "192.168.10.127:9300"]
[root@server1 ~]# sysctl -p
[root@server1 ~]# mkdir -p /data/elasticsearch
[root@server1 ~]# chmod 755 /data/elasticsearch
[root@server1 ~]# chmod 755 /data/elasticsearch -R
[root@server1 ~]# chown elasticsearch.elasticsearch -R /data/elasticsearch
[root@server1 ~]# su - elasticsearch
[elasticsearch@server1 ~]$ cd /usr/local/elasticsearch-6.3.2/bin/
#切换到elasticsearch用户启动服务,-d放到后台运行
[elasticsearch@server1 bin]$ elasticsearch -d
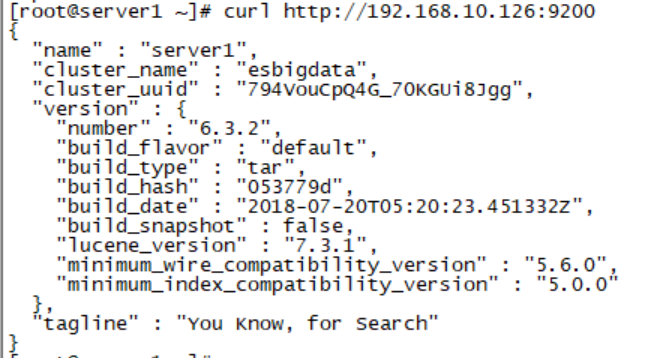
[root@server1 ~]# curl http://192.168.10.126:9200
#############################################################################
[root@server2 ~]# tar zxf elasticsearch-6.3.2.tar.gz -C /usr/local/
[root@server2 ~]# vim /etc/profile
export ELASTICSEARCH_HOME=/usr/local/elasticsearch-6.3.2
export PATH=$ELASTICSEARCH_HOME/bin:$PATH
[root@server2 ~]# source /etc/profile
[root@server2 ~]# vim /etc/hosts
192.168.10.126 server1
192.168.10.127 server2
192.168.10.128 server3
[root@server2 ~]# useradd elasticsearch
[root@server2 ~]# chown elasticsearch.elasticsearch /usr/local/elasticsearch-6.3.2/ -R
[root@server2 ~]# vim /etc/security/limits.conf
* soft nproc 20480
* hard nproc 20480
* soft nofile 65536
* hard nofile 65536
* soft memlock unlimited
* hard memlock unlimited
[root@server2 ~]# vim /etc/sysctl.conf
fs.file-max=655360
vm.max_map_count = 262144
[root@server2 ~]# vim /usr/local/elasticsearch-6.3.2/config/elasticsearch.yml
cluster.name: esbigdata
node.name: server1
node.master: true
node.data: true
path.data: /data/elasticsearch
path.logs: /usr/local/elasticsearch-6.3.2/logs
bootstrap.memory_lock: true
network.host: 0.0.0.0
http.port: 9200
discovery.zen.minimum_master_nodes: 1
discovery.zen.ping.unicast.hosts: ["192.168.10.126:9300", "192.168.10.127:9300"]
[root@server2 ~]# mkdir -p /data/elasticsearch
[root@server2 ~]# chmod 755 /data/elasticsearch
[root@server2 ~]# chmod 755 /data/elasticsearch -R
[root@server2 ~]# chown elasticsearch.elasticsearch -R /data/elasticsearch
[root@server2 ~]# chmod 755 -R /usr/local/elasticsearch-6.3.2
[root@server2 ~]# sysctl -p
[root@server1 ~]# curl http://192.168.10.126:9200
[root@server1 ~]# yum -y install nodejs npm git
[root@server1 ~]# git clone git://github.com/mobz/elasticsearch-head.git
#修改npm的源为淘宝国内镜像点
[root@server1 ~]# npm config set registry https://registry.npm.taobao.org/
[root@server1 local]# cd /usr/local/
[root@server1 local]# npm config set registry http://registry.npm.taobao.org/
[root@server1 local]# cd /usr/local/elasticsearch-head
[root@server1 elasticsearch-head]# npm install
[root@server1 _site]# cd /usr/local/elasticsearch-head/_site
[root@server1 _site]# vim app.js
4374 this.base_uri = this.config.base_uri || this.prefs.get("app-base_uri") || "http://192.168.10.126:9200";
[root@server1 _site]# vim /usr/local/elasticsearch-6.3.2/config/elasticsearch.yml
#表示开启跨域访问支持,默认为false
http.cors.enabled: true
#表示跨域访问允许的域名地址,可以使用正则表达式,这里的*表示允许所有域名访问
http.cors.allow-origin: "\*"
[root@server1 elasticsearch-head]# npm run start
浏览器里面输入:http://192.168.10.126:9100/

ELK实战-elasticsearch安装的更多相关文章
- elk之elasticsearch安装
环境: centos7 jdk8 参考: https://www.elastic.co/guide/en/elasticsearch/reference/current/rpm.htmlhttp:// ...
- ELK之elasticsearch安装&&kibana安装
1.ES和Kibana安装都是开箱即用的? 解压缩就可以用 elasticsearch解压缩之后,双击下图中的elasticsearch.bat,启动,kibana也是一样 双击之后, 我们看到上图有 ...
- ELK日志监控平台安装部署简介--Elasticsearch安装部署
最近由于工作需要,需要搭建一个ELK日志监控平台,本次采用Filebeat(采集数据)+Elasticsearch(建立索引)+Kibana(展示)架构,实现日志搜索展示功能. 一.安装环境描述: 1 ...
- elk实战分析nginx日志文档
elk实战分析nginx日志文档 架构: kibana <--- es-cluster <--- logstash <--- filebeat 环境准备:192.168.3.1 no ...
- ELK之elasticsearch6安装认证模块search guard
参考:https://www.cnblogs.com/marility/p/9392645.html 1,安装环境及软件版本 程序 版本 安装方式 elasticsearch 6.3.1 rpm ...
- Centos7中ELK集群安装流程
Centos7中ELK集群安装流程 说明:三个版本必须相同,这里安装5.1版. 一.安装Elasticsearch5.1 hostnamectl set-hostname elk vim /e ...
- Kibana安装(图文详解)(多节点的ELK集群安装在一个节点就好)
对于Kibana ,我们知道,是Elasticsearch/Logstash/Kibana的必不可少成员. 前提: Elasticsearch-2.4.3的下载(图文详解) Elasticsearch ...
- 全文搜索引擎 Elasticsearch 安装
全文搜索引擎 Elasticsearch 安装 学习了:http://www.ruanyifeng.com/blog/2017/08/elasticsearch.html 拼音:https://www ...
- Filebeat-1.3.1安装和设置(图文详解)(多节点的ELK集群安装在一个节点就好)(以Console Output为例)
前期博客 Filebeat的下载(图文讲解) 前提 Elasticsearch-2.4.3的下载(图文详解) Elasticsearch-2.4.3的单节点安装(多种方式图文详解) Elasticse ...
随机推荐
- HTML是什么?
HTML,即超文本标记语言,它不是一种编程语言,而是一种标记语言,是网页制作所必备的.“超文本”就是指页面内可以包含图片.链接,甚至音乐.程序等非文字元素.超文本标记语言的结构包括“头”部分.和“主体 ...
- 【19.05%】【codeforces 680D】Bear and Tower of Cubes
time limit per test2 seconds memory limit per test256 megabytes inputstandard input outputstandard o ...
- codeforces 220B . Little Elephant and Array 莫队+离散化
传送门:https://codeforces.com/problemset/problem/220/B 题意: 给你n个数,m次询问,每次询问问你在区间l,r内有多少个数满足其值为其出现的次数 题解: ...
- nginx负载均衡的几种模式
nginx 的 upstream目前支持 4 种方式的分配 ).轮询(默认) 每个请求按时间顺序逐一分配到不同的后端服务器,如果后端服务器down掉,能自动剔除. ).weight 指定轮询几率,we ...
- 【Linux】centos查看防火墙是否关闭
查看防火墙的状态的命令为: sudo systemctl status firewalld 打开防火墙的方式有两种,一种是打开后重启会恢复回原来的状态,命令为: sudo systemctl star ...
- 关于启动php-fpm失败的解决办法
当我执行 sudo lnmp php-fpm restart会出现如下错误 Starting php-fpm /usr/local/php/sbin/php-fpm: error while load ...
- 学习linux命令,看这篇2w多字的linux命令详解
用心分享,共同成长 没有什么比每天进步一点点更重要了 本文已收录到我的github:https://github.com/midou-tech/articles/tree/master/docs/li ...
- 【Spring Cloud 源码解读】之 【如何配置好OpenFeign的各种超时时间!】
关于Feign的超时详解: 在Spring Cloud微服务架构中,大部分公司都是利用Open Feign进行服务间的调用,而比较简单的业务使用默认配置是不会有多大问题的,但是如果是业务比较复杂,服务 ...
- HDFS的HA集群原理分析
1.简单hdfs集群中存在的问题 不能存在两个NameNode 单节点问题 单节点故障转移 2.解决单节点问题 找额外一个NameNode备份原有的数据 会出现脑裂 脑裂:一个集群中多个管理者数据 ...
- Windows下使用 npm 命令安装 Appium(详)
本文主要讲述如何在 Windows 系统上通过 npm 命令行安装 appium Windows 桌面版请在官网选择对应版本下载安装. 官网链接 TestHome 百度网盘下载链接 Tips:Appi ...