Android 底部按钮BottomNavigationView + Fragment 的使用(二)
这里来试验BottomNavigationView + Fragment
底部按钮通过点击底部选项,实现中间的Fragment进行页面的切换。
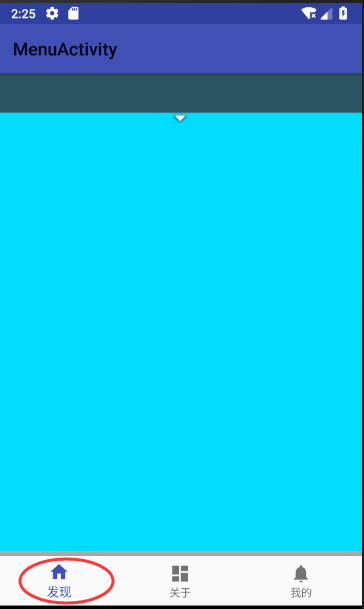
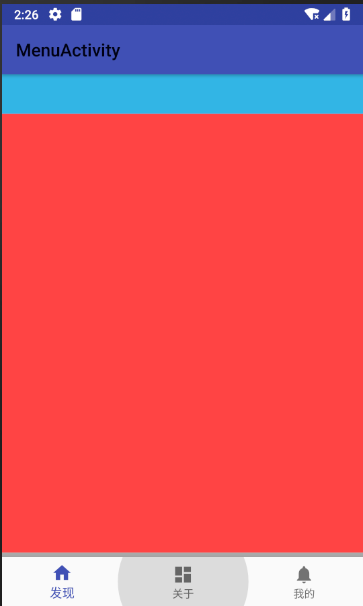

使用BottomNavigationView 控件,实现底部按钮的布局,然后给按钮加上监听,监听选择后,实现中间Fragment页面的切换
上代码:found_main.xml 其他两个文件为menu_main.xml 和 user_main.xml ,从found_main.xml copy 过去就行,修改下里面的样式,便于区分。
<?xml version="1.0" encoding="utf-8"?>

<android.support.constraint.ConstraintLayout

    xmlns:android="http://schemas.android.com/apk/res/android" android:layout_width="match_parent"

    xmlns:app="http://schemas.android.com/apk/res-auto"

    xmlns:tools="http://schemas.android.com/tools"

    android:layout_height="match_parent">

   <!--用来显示具体内容-->

    <LinearLayout

        android:id="@+id/linearLayout2"

        android:layout_width="match_parent"

        android:layout_height="match_parent"

        android:orientation="horizontal"

        app:layout_constraintBottom_toBottomOf="parent"

        app:layout_constraintEnd_toEndOf="parent"

        app:layout_constraintStart_toStartOf="parent">

        <TextView

            android:id="@+id/titlename"

            android:layout_width="match_parent"

            android:layout_height="45dp"

            android:layout_weight="1"

            android:background="#2b5361"

            android:drawablePadding="3dp"

            android:gravity="center"

            android:text="发现" />

    </LinearLayout>

    <LinearLayout

        android:layout_width="match_parent"

        android:layout_height="match_parent"

        android:layout_marginTop="45dp"

        android:background="@android:color/holo_blue_bright"

        android:orientation="vertical"

        app:layout_constraintBottom_toBottomOf="parent"

        app:layout_constraintTop_toBottomOf="@+id/linearLayout2">

        <ImageView

            android:id="@+id/imageView2"

            android:layout_width="match_parent"

            android:layout_height="wrap_content"

            app:srcCompat="@android:drawable/arrow_down_float" />

    </LinearLayout>

</android.support.constraint.ConstraintLayout>
创建主页面,activity_main.xml
<?xml version="1.0" encoding="utf-8"?>

<android.support.constraint.ConstraintLayout xmlns:android="http://schemas.android.com/apk/res/android"

    xmlns:app="http://schemas.android.com/apk/res-auto"

    xmlns:tools="http://schemas.android.com/tools"

    android:id="@+id/container"

    android:layout_width="match_parent"

    android:layout_height="match_parent"

    tools:context=".MenuActivity">

    <FrameLayout

        android:id="@+id/FramePage"

        android:layout_width="match_parent"

        android:layout_height="match_parent"

        android:background="@android:color/holo_purple"

        app:layout_constraintBottom_toTopOf="@+id/viewline">

    </FrameLayout>

    <View

        android:id="@+id/viewline"

        android:layout_width="match_parent"

        android:layout_height="5dp"

        android:layout_above="@id/navigation"

        android:background="@android:color/darker_gray"

        app:layout_constraintBottom_toTopOf="@+id/navigation" />

    <android.support.design.widget.BottomNavigationView

        android:id="@+id/navigation"

        android:layout_width="match_parent"

        android:layout_height="wrap_content"

        android:background="?android:attr/windowBackground"

        app:layout_constraintBottom_toBottomOf="parent"

        app:layout_constraintLeft_toLeftOf="parent"

        app:layout_constraintRight_toRightOf="parent"

        app:menu="@menu/navigation" />

</android.support.constraint.ConstraintLayout>
创建BottomNavigationView需要显示的item文件 nabigation.xml
<?xml version="1.0" encoding="utf-8"?>

<menu xmlns:android="http://schemas.android.com/apk/res/android">

    <item

        android:id="@+id/navigation_home"

        android:icon="@drawable/ic_home_black_24dp"

        android:title="@string/title_home" />

    <item

        android:id="@+id/navigation_dashboard"

        android:icon="@drawable/ic_dashboard_black_24dp"

        android:title="@string/title_dashboard" />

    <item

        android:id="@+id/navigation_notifications"

        android:icon="@drawable/ic_notifications_black_24dp"

        android:title="@string/title_notifications" />

</menu>
最后上主程序 MenuActivity.java
package action.sun.com.hello;

import android.app.FragmentManager;

import android.app.FragmentTransaction;

import android.os.Bundle;

import android.support.annotation.NonNull;

import android.support.design.widget.BottomNavigationView;

import android.support.v4.view.ViewPager;

import android.support.v7.app.AppCompatActivity;

import android.util.Log;

import android.view.MenuItem;

import android.widget.FrameLayout;

import android.widget.TextView;

import action.sun.com.hello.action.sun.com.hello.until.FirstFragment;

public class MenuActivity extends AppCompatActivity {

    private  String className= "MenuActivity";

  //  private ViewPager viewPager;

    String msg = "Android : ";

    //继承Activity 不会显示APP头上的标题

    private FirstFragment f1,f2,f3;

    @Override

    protected void onCreate(Bundle savedInstanceState) {

        super.onCreate(savedInstanceState);

        setContentView(R.layout.activity_menu);

        final BottomNavigationView bottomNavigationView = (BottomNavigationView) findViewById(R.id.navigation);

        //bottomNavigationView Item 选择监听

       bottomNavigationView.setOnNavigationItemSelectedListener(new BottomNavigationView.OnNavigationItemSelectedListener() {

            @Override

            public boolean onNavigationItemSelected(@NonNull MenuItem item) {

                Log.d("123", "onNavigationItemSelected is click: ");

                FragmentTransaction transaction = getFragmentManager().beginTransaction();

                hideAllFragment(transaction);

                switch (item.getItemId()){

                    case R.id.navigation_home:

                        Log.d(className, "R.id.navigation_home: ");

                        if(f1==null){

                            f1 = FirstFragment.newInstance("发现",R.layout.found_main);

                            transaction.add(R.id.FramePage,f1);

                        }else{

                            transaction.show(f1);

                        }

                        break;

                    case R.id.navigation_dashboard:

                        Log.d(className, "R.id.navigation_dashboard: ");

                        if(f2==null){

                            f2 =FirstFragment.newInstance("我的",R.layout.user_main);//"第二个Fragment"

                            transaction.add(R.id.FramePage,f2);

                        }else{

                            transaction.show(f2);

                        }

                        break;

                    case R.id.navigation_notifications:

                        Log.d(className, "R.string.title_notification: ");

                        if(f3==null){

                            f3 = FirstFragment.newInstance("关于",R.layout.menu_main);//"第三个Fragment"

                            transaction.add(R.id.FramePage,f3);

                        }else{

                            transaction.show(f3);

                        }

                        break;

                }

                transaction.commit();

                Log.d(msg, "xxxxx ");

                return false;

            }

        });

    }

    //隐藏所有Fragment

    public void hideAllFragment(FragmentTransaction transaction){

        if(f1!=null){

            transaction.hide(f1);

        }

        if(f2!=null){

            transaction.hide(f2);

        }

        if(f3!=null){

            transaction.hide(f3);

        }

    }

}
FirstFragment.java
package action.sun.com.hello.action.sun.com.hello.until;

import android.graphics.drawable.Drawable;

import android.support.annotation.Nullable;

import android.app.Fragment;

import android.view.LayoutInflater;

import android.view.View;

import android.view.ViewGroup;

import android.widget.TextView;

import android.os.Bundle;

import action.sun.com.hello.R;

public class FirstFragment extends Fragment{

    private String context="xxxxxxxxxxxxx";

    private TextView mTextView;

    //要显示的页面

    private int FragmentPage;

    public  static  FirstFragment newInstance(String context,int iFragmentPage){

        FirstFragment myFragment = new FirstFragment();

        myFragment.context = context;

        myFragment.FragmentPage = iFragmentPage;

        return  myFragment;

    }

    @Nullable

    @Override

    public View onCreateView(LayoutInflater inflater, ViewGroup container, Bundle savedInstanceState) {

        this.context = context;

        View view = inflater.inflate(FragmentPage,container,false);

        //mTextView = (TextView)view.findViewById(R.id.titlename);

        //mTextView = (TextView)getActivity().findViewById(R.id.txt_content);

        ///mTextView.setText(context);

        //mTextView.setBackgroundColor(20);

        return view;

    }

}
到此,代码结束,可实现上面的效果。

Android 底部按钮BottomNavigationView + Fragment 的使用(二)的更多相关文章
- Android 底部按钮BottomNavigationView + Fragment + viewPager 的使用(一)
实现的效果,左右滑动,底部栏跟着滑动,中间加的是分帧的页面 上代码:主页面activity_main.xml <?xml version="1.0" encod ...
- Android中FragmentPagerAdapter对Fragment的缓存(二)
上一篇我们谈到了,当应用程序恢复时,由于FragmentPagerAdapter对Fragment进行了缓存的读取,导致其并未使用在Activity中新创建的Fragment实例.今天我们来看如何解决 ...
- Android控件Gridview实现仿支付宝首页,Fragment底部按钮切换和登录圆形头像
此案例主要讲的是Android控件Gridview(九宫格)完美实现仿支付宝首页,包含添加和删除功能:Fragment底部按钮切换的效果,包含四个模块,登录页面圆形头像等,一个小项目的初始布局. 效果 ...
- Android studio 基本布局-底部按钮
在使用Android studio 的时候,准备弄的基本的布局出来,底部按钮,按了中间会显示. 来上代码: 页面menu_main.xml 这里弄控件的浮动耗费了点我的时间.原因是因为对其各种问题, ...
- Android BottomSheet:底部弹出Fragment面板(4)
Android BottomSheet:底部弹出Fragment面板(4) BottomSheet不仅可以弹出轻量级的定制好的面板(见附录文章5,6,7),还可以弹出"重"的 ...
- Android UI-实现底部切换标签(fragment)
Android UI-实现底部切换标签(fragment) 前言 本篇博客要分享的一个UI效果--实现底部切换标签,想必大家在一些应用上面遇到过这样的效果了,最典型的就是微信了,能够左右滑动切换页面. ...
- Android组件内核之Fragment管理与内核(二)
阿里P7Android高级架构进阶视频免费学习请点击:https://space.bilibili.com/474380680本篇文章将先从以下三个内容来介绍Fragment管理与内核: [Fragm ...
- Android Fragment详解(二):Fragment创建及其生命周期
Fragments的生命周期 每一个fragments 都有自己的一套生命周期回调方法和处理自己的用户输入事件. 对应生命周期可参考下图: 创建片元(Creating a Fragment) To c ...
- Android应用经典主界面框架之二:仿网易新闻client、CSDN client (Fragment ViewPager)
另外一种主界面风格则是以网易新闻.凤凰新闻以及新推出的新浪博客(阅读版)为代表.使用ViewPager+Fragment,即ViewPager里适配器里放的不是一般的View.而是Fragment.所 ...
随机推荐
- Sketch Measure
Sketch Measure 让创建规范成为开发者和团队协作的乐趣 http://sketch.im/plugins/1 安装 下载安装包 双击 Sketch Measure.sketchplugin ...
- logstash向elasticsearch写入数据,如何指定多个数据template
之前在配置从logstash写数据到elasticsearch时,指定单个数据模板没有问题,但是在配置多个数据模板时候,总是不成功,后来找了很多资料,终于找到解决办法,就是要多加一个配置项: temp ...
- Linux下实现脚本监测特定进程占用内存情况
Linux系统下,我们可以利用以下命令来获取特定进程的运行情况: cat /proc/$PID/status 其中PID是具体的进程号,这个命令打印出/proc/特定进程/status文件的内容,信息 ...
- 一步一步掌握java的线程机制(一)----创建线程
现在将1年前写的有关线程的文章再重新看了一遍,发现过去的自己还是照本宣科,毕竟是刚学java的人,就想将java的精髓之一---线程进制掌握到手,还是有点难度.等到自己已经是编程一年级生了,还是无法将 ...
- .NET Core 2.0 Cookie中间件 权限验证
:在ConfigureServices添加Cookie中间件,使用自定义Scheme services.AddAuthentication(options=> { options.Default ...
- Java之基于S2SH与手机数据交互(一)
在前两篇博客,介绍了在eclipse上搭建SSH,可是好多小伙伴反映.看了偶写滴博客.跟着搭建还是错误百出,唉! 事实上不经历错误怎么能不见红线啊!于是我在上篇博客补充了他们的错误,还在被错误困扰的童 ...
- 跟我学SharePoint 2013视频培训课程——排序、过滤在列表、库中的使用(10)
课程简介 第10天,SharePoint 2013排序.过滤在列表.库中的使用. 视频 SharePoint 2013 交流群 41032413
- SharePoint 2013 Step by Step—— How to Upload Multiple Documents in Document Library
How to Upload Multiple documents in SharePoint 2013,Options to add multiple files in a document libr ...
- IAR for stm8 memory窗口的功能
进入debug模式后点击菜单view-Memory 可以在线查看,RAM,FLASH,OPTION等
- django 自动化测试的故障排查
[问题背景] django使用mysql做为后台数据库.在使用django的自动化测试命令test时报如下错误 python3 manage.py test polls Creating test d ...