vue自定义插件封装示例

1、实现message插件封装(类似简易版的elementUi的message)

  message组件


<template>
    <transition name="msgbox-fade" @after-leave="handleAfterLeave">
        <div
            :class="[
                'message_wrapper',
                { success: type === 'success' },
                { warning: type === 'warning' },
                { error: type === 'error' },
                { info: type === 'info' },
            ]"
            v-show="visible"
            :style="{ top: styleTop + 'px' }"
        >
            {{ message }}
        </div>
    </transition>
</template> <script>
export default {
    name: 'message',
    data() {
        return {
            // 提示消息文本
            message: '',
            // 类型
            type: '',
            // 显示/隐藏
            visible: false,
            // 定位高度
            styleTop: 20,
        }
    },
    methods: {
        /**
         * @description: message显示
         */
        messageShow() {
            this.visible = true
        },         /**
         * @description: message隐藏
         */
        messageHide() {
            this.visible = false
        },         /**
         * @description: 销毁组件
         */
        handleAfterLeave() {
            this.$destroy(true)
            this.$el.parentNode.removeChild(this.$el)
        },
    },
}
</script> <style scoped lang="scss">
.message_wrapper {
    position: fixed;
    min-width: 380px;
    left: 50%;
    z-index: 99999;
    color: #fff;
    padding: 15px 15px 15px 20px;
    font-size: 14px;
    border-radius: 4px;
    top: 20px;
    transform: translateX(-50%);
    background: #fff;
    color: #909399;
    box-shadow: 0 0 20px rgba(0, 0, 0, 0.2);
    line-height: 1;
    &.success{
        background: mix(#ffffff, #67C23A, 90%);
        color: #67C23A;
    }
    &.warning{
        background: mix(#ffffff, #E6A23C, 90%);
        color: #E6A23C;
    }
    &.error{
        background: mix(#ffffff, #F56C6C, 90%);
        color: #F56C6C;
    }
    &.info{
        background: mix(#ffffff, #909399, 90%);
        color: #909399;
    }
    i {
        margin-right: 4px;
    }
}
.msgbox-fade-enter-active {
    -webkit-animation: msgbox-fade-in 0.3s;
    animation: msgbox-fade-in 0.3s;
}
.msgbox-fade-leave-active {
    -webkit-animation: msgbox-fade-out 0.3s;
    animation: msgbox-fade-out 0.3s;
}
@keyframes msgbox-fade-in {
    0% {
        transform: translate3d(-50%, -20px, 0);
        opacity: 0;
    }
    100% {
        transform: translate3d(-50%, 0, 0);
        opacity: 1;
    }
}
@keyframes msgbox-fade-out {
    0% {
        transform: translate3d(-50%, 0, 0);
        opacity: 1;
    }
    100% {
        transform: translate3d(-50%, -20px, 0);
        opacity: 0;
    }
}
</style>

然后书写对应的message.js


import Vue from 'vue'
import messageComponent from './index.vue' const messageConstructor = Vue.extend(messageComponent)
let instances = []
let seed = 1
function messageFun(obj) {
    let { message, type, duration } = obj
    const messageDom = new messageConstructor({
        el: document.createElement('div'),
        data() {
            return {
                message: message,
                type: type,
            }
        },
    })
    let id = 'my_message_' + seed++
    let styleTop = 20
    document.body.appendChild(messageDom.$el)
    messageDom.id = id
    instances.forEach(item => {
        styleTop += item.$el.offsetHeight + 16
    })
    messageDom.styleTop = styleTop
    messageDom.messageShow()
    instances.push(messageDom)
    // 过了 duration 时间后隐藏
    duration = duration ? duration : 3000
    setTimeout(() => {
        let len = instances.length
        messageDom.messageHide()
        let removedHeight = messageDom.$el.offsetHeight
        let index = instances.findIndex(e => e.id === messageDom.id)
        if (len > 1) {
            for (let i = index; i < len; i++) {
                let dom = instances[i].$el
                dom.style['top'] =
                    parseInt(dom.style['top'], 10) - removedHeight - 16 + 'px'
            }
        }
        instances.splice(index, 1)
    }, duration)
} function message() {
    window.$message = Vue.prototype.$message = messageFun
}
export default message

然后在main.ts中注册

// 自定义toast插件
import message from '@/components/notice/message/index.js'
vue.use(message)

然后就可以在全局地方使用

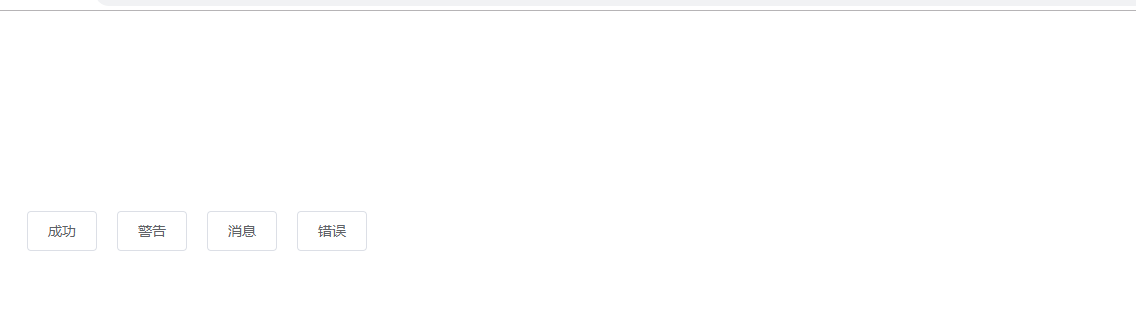
this.$message({message:"成功",type:'success'})

类似效果如下


2、实现$confirm插件封装(类似简易版的elementUi的messageBox)

  主要用于操作的二次确定

还是一样,首先书写confirm组件

这里按钮点击事件设置一个callback回调,用于方便后面的操作交互

<template>
    <transition name="confirmbox-fade">
        <div
            class="confirm_wrapper"
            v-show="visible"
            @click="otherClick"
        >
            <div class="confirm_box" ref="confirmBox">
                <p class="confirm_title">
                    <span class="sign"></span>
                    {{ title || "提示" }}
                </p>
                <p class="content_text">
                    {{ message }}
                </p>
                <div class="footer_button">
                    <div class="button" @click="cancel">取消</div>
                    <div class="button define" @click="define">确定</div>
                </div>
            </div>
        </div>
    </transition>
</template>
<script>
export default {
    name: 'Confirm',
    data() {
        return {
            // 标题(默认 提示)
            title: '',
            // 提示文本
            message: '',
            // 显示或隐藏
            visible: false,
        }
    },
    methods: {
        /**
         * @description: 其他地方点击隐藏弹框
         */
        otherClick(e) {
            let confirmBox = this.$refs.confirmBox
            if (e.target.contains(confirmBox)) {
                this.cancel()
            }
        },
        /**
         * @description: 移出
         */
        close() {
            this.visible = false
            setTimeout(() => {
                this.$el.parentNode.removeChild(this.$el)
            }, 300)
        },
        /**
         * @description: 确定
         */
        define() {
            this.close()
            this.callback('confirm')
        },
        /**
         * @description: 取消
         */
        cancel() {
            this.close()
            this.callback('cancel')
        },
    },
}
</script>
<style lang="scss" scoped>
.confirm_wrapper {
    position: fixed;
    top: 0;
    bottom: 0;
    right: 0;
    left: 0;
    background: rgba(0, 0, 0, 0.5);
    display: flex;
    justify-content: center;
    align-items: center;
    z-index: 99999;
    .confirm_box {
        width: 360px;
        padding-bottom: 10px;
        vertical-align: middle;
        background-color: #fff;
        border-radius: 4px;
        border: 1px solid #ebeef5;
        box-shadow: 0 2px 12px 0 rgba(0, 0, 0, 0.1);
        text-align: left;
        overflow: hidden;
        backface-visibility: hidden;
        .confirm_title {
            display: flex;
            align-items: center;
            height: 50px;
            line-height: 50px;
            padding-left: 8px;
            font-size: 18px;
            .sign {
                height: 15px;
                width: 4px;
                border-radius: 4px;
                margin-right: 8px;
            }
        }
        .content_text {
            padding: 15px 15px 10px 30px;
            color: #606266;
            font-size: 14px;
        }
        .footer_button {
            display: flex;
            justify-content: flex-end;
            padding-top: 24px;
            padding-right: 24px;
            .button{
                line-height: 1;
                cursor: pointer;
                background: #fff;
                border: 1px solid #dcdfe6;
                color: #606266;
                text-align: center;
                box-sizing: border-box;
                transition: .1s;
                padding: 12px 20px;
                font-size: 14px;
                border-radius: 4px;
                &.define{
                    margin-left: 20px;
                    color: #fff;
                    background-color: #409eff;
                    border-color: #409eff;
                }
            }
        }
    }
}
</style>
<style lang="scss" scoped>
.confirmbox-fade-enter-active {
    -webkit-animation: confirmbox-fade-in 0.3s;
    animation: confirmbox-fade-in 0.3s;
}
.confirmbox-fade-leave-active {
    -webkit-animation: confirmbox-fade-out 0.3s;
    animation: confirmbox-fade-out 0.3s;
}
@keyframes confirmbox-fade-in {
    0% {
        transform: translate3d(0, -20px, 0);
        opacity: 0;
    }
    100% {
        transform: translate3d(0, 0, 0);
        opacity: 1;
    }
}
@keyframes confirmbox-fade-out {
    0% {
        transform: translate3d(0, 0, 0);
        opacity: 1;
    }
    100% {
        transform: translate3d(0, -20px, 0);
        opacity: 0;
    }
}
</style>

对应的书写index.js

这里使用Promise来为用户点击确定或者取消做对应的交互触发

import Vue from 'vue'
import ConfirmBox from './index.vue'
const ConfirmBoxConstructor = Vue.extend(ConfirmBox)
let instance
const initInstance = (message, title) => {
    instance = new ConfirmBoxConstructor({
        el: document.createElement('div'),
        data() {
            return {
                title,
                message,
            }
        },
    })
}
const showConfirm = obj => {
    let { message, title } = obj
    return new Promise((reslove, reject) => {
        initInstance(message, title)
        instance.callback = action => {
            if (action === 'confirm') {
                reslove()
            } else if (action === 'cancel') {
                reject()
            }
        }
        document.body.appendChild(instance.$el)
        Vue.nextTick(() => {
            instance.visible = true
        })
    })
}
function registryConfirm() {
    Vue.prototype.$confirm = showConfirm
}
export default registryConfirm

接下来在main.js中

// 自定义confirm插件
import messageBox from '@/components/notice/messageBox/index.js'
vue.use(messageBox)

然后就可以在全局使用

 this.$confirm({
    message: '弹窗测试'
 })
   .then(() => {})
   .catch(() => {});

类似效果如下

这时,点击确定按钮就会触发 .then里的事件,点击取消则触发 .catch里的事件

typescript对应的声明文件

如果插件是用typescript书写的,则以下是对应的声明文件,仅供参考

import Vue from "vue";
declare module "vue/types/vue" {
interface Vue {
$message: any,
$confirm: any
}
}

vue自定义插件封装,实现简易的elementUi的Message和MessageBox的更多相关文章

  1. Vue自定义插件方法大全

    新年第一天首先祝大家新年快乐,心想事成! 1.利用根实例构造函数的原型 //在构造函数的原型链上添加自定义属性 Vue.prototype.test = 'pomelo' //在其他组件中调用 con ...

  2. vue自定义插件

    1.新建js文件 utils.js,自定义方法 let local = { say() { console.log('我是插件里面自定义的方法') } } export default { insta ...

  3. vue自定义插件-弹框

    <template> <transition name="msgbox"> <div v-if="show" class=&quo ...

  4. 浅析vue封装自定义插件

    在使用vue的过程中,经常会用到Vue.use,但是大部分对它一知半解,不了解在调用的时候具体做了什么,因此,本文简要概述下在vue中,如何封装自定义插件. 在开始之前,先补充一句,其实利用vue封装 ...

  5. vue2.0 如何自定义组件(vue组件的封装)

    一.前言 之前的博客聊过 vue2.0和react的技术选型:聊过vue的axios封装和vuex使用.今天简单聊聊 vue 组件的封装. vue 的ui框架现在是很多的,但是鉴于移动设备的复杂性,兼 ...

  6. webpack + vue 项目 自定义 插件 解决 前端 JS 版本 更新 问题

    Webpack 是一个前端资源加载/打包工具.它将根据模块的依赖关系进行静态分析,然后将这些模块按照指定的规则生成对应的静态资源. 它的异步加载原理是,事先将编译好后的静态文件,通过js对象映射,硬编 ...

  7. vue各种插件汇总

    https://blog.csdn.net/wh8_2011/article/details/80497620(copy) Vue是什么? Vue.js(读音 /vjuː/, 类似于 view) 是一 ...

  8. vue 常用插件,保存

    UI组件 element- 饿了么出品的Vue2的web UI工具套件 Vux- 基于Vue和WeUI的组件库 mint-ui- Vue 2的移动UI元素 iview- 基于 Vuejs 的开源 UI ...

  9. vue_简介_渐进式 js 框架_内置指令_自定义指令_自定义插件

    vue 尤雨溪 华裔 Google 工程师 遵循 MVVM 模式 编码简洁,体积小,运行效率高,适合 移动 / PC 端 开发 动态构建用户界面: 异步获取后台数据,展现到页面 渐进式 js 框架 渐 ...

随机推荐

  1. how to convert Map to Object in js

    how to convert Map to Object in js Map to Object just using the ES6 ways Object.fromEntries const lo ...

  2. Union international INC:VR线下娱乐市场巨大

    联合国际公司认为众多企业追着VR的风口不断加码,导致VR在经历了一个爆炸式的发展,如今部分VR公司开始觉得日子不好过了,一个重要表现就是现金流紧张.VR如何能够普及,何时能够及早变现,成为业内关注的焦 ...

  3. Mybatis【20】-- Mybatis延迟加载怎么处理?

    注:代码已托管在GitHub上,地址是:https://github.com/Damaer/Mybatis-Learning ,项目是mybatis-16-lazyload,需要自取,需要配置mave ...

  4. SpringBoot读取配置文件的内容

    1.@Value读取 在springboot项目中,如果要读取配置文件application.properties或application.yml文件的内容,可以使用自带的注解@Value.以prop ...

  5. 翻译:《实用的Python编程》02_05_Collections

    目录 | 上一节 (2.4 序列) | 下一节 (2.6 列表推导式) 2.5 collections 模块 collections 模块为数据处理提供了许多有用的对象.本部分简要介绍其中的一些特性. ...

  6. oracle ora-01114 IO error writing block to file 207 (block # )

    oracle ORA-01114 IO error writing block to file 207 (block # ) Reference: https://stackoverflow.com/ ...

  7. Go的数组

    目录 数组 一.数组的定义 1.声明数组 2.初始化设值 3.指定位置设值 4.不指定长度初始化(了解) 二.数组的使用 三.数组的类型 四.数组的长度 五.迭代数组 1.初始化迭代 2.使用rang ...

  8. python使用requests模块下载文件并获取进度提示

    一.概述 使用python3写了一个获取某网站文件的小脚本,使用了requests模块的get方法得到内容,然后通过文件读写的方式保存到硬盘同时需要实现下载进度的显示 二.代码实现 安装模块 pip3 ...

  9. Centos7 升级 sqlite3

    下载地址:https://www.sqlite.org/download.html [root@djangoServer ~]# wget https://www.sqlite.org/2019/sq ...

  10. k8s v1.18.2 centos7 下环境搭建

    准备 服务器:3台机器--1台主.2台工作节点,可以使用virtualbox 搭建虚拟机 主机名 centos version ip docker version flannel version 主机 ...