第04章—整合Mybatis
spring boot 系列学习记录:http://www.cnblogs.com/jinxiaohang/p/8111057.html
码云源码地址:https://gitee.com/jinxiaohang/springboot
SSM框架中接触过Spring整合Mybatis。
一、引入依赖
如果是新建项目的,可以在这页添加依赖;
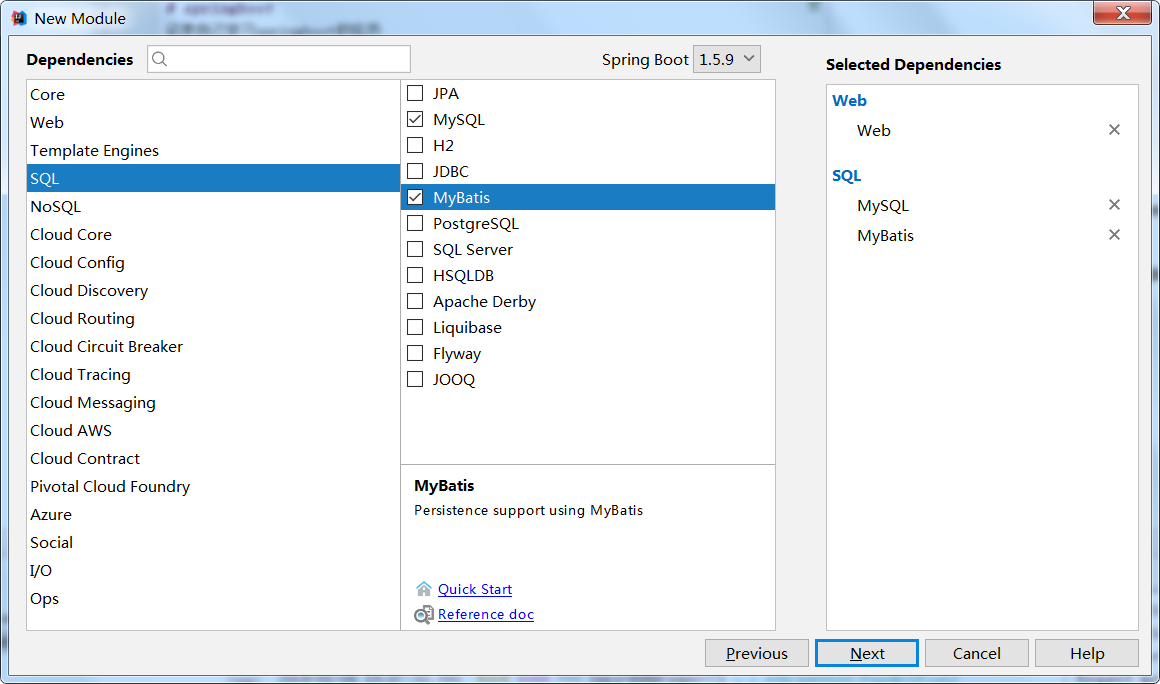
如果是原有项目,还可以在pom.xml 引入ORM框架(Mybaits-Starter)和数据库驱动(MySQL-Conn)的依赖。
<?xml version="1.0" encoding="UTF-8"?>

<project xmlns="http://maven.apache.org/POM/4.0.0" xmlns:xsi="http://www.w3.org/2001/XMLSchema-instance"

    xsi:schemaLocation="http://maven.apache.org/POM/4.0.0 http://maven.apache.org/xsd/maven-4.0.0.xsd">

    <modelVersion>4.0.0</modelVersion>

    <groupId>com.xiaohang</groupId>

    <artifactId>springboot-mybatis</artifactId>

    <version>0.0.1-SNAPSHOT</version>

    <packaging>jar</packaging>

    <name>springboot-mybatis</name>

    <description>Demo project for Spring Boot</description>

    <parent>

        <groupId>org.springframework.boot</groupId>

        <artifactId>spring-boot-starter-parent</artifactId>

        <version>1.5.9.RELEASE</version>

        <relativePath/> <!-- lookup parent from repository -->

    </parent>

    <properties>

        <project.build.sourceEncoding>UTF-8</project.build.sourceEncoding>

        <project.reporting.outputEncoding>UTF-8</project.reporting.outputEncoding>

        <java.version>1.8</java.version>

    </properties>

    <dependencies>

        <!--添加Web依赖 -->

        <dependency>

            <groupId>org.springframework.boot</groupId>

            <artifactId>spring-boot-starter-web</artifactId>

        </dependency>

        <!--添加Test依赖 -->

        <dependency>

            <groupId>org.springframework.boot</groupId>

            <artifactId>spring-boot-starter-test</artifactId>

            <scope>test</scope>

        </dependency>

        <!--添加MySQL驱动依赖 -->

        <dependency>

            <groupId>mysql</groupId>

            <artifactId>mysql-connector-java</artifactId>

            <scope>runtime</scope>

        </dependency>

        <!--添加Mybatis依赖 -->

        <dependency>

            <groupId>org.mybatis.spring.boot</groupId>

            <artifactId>mybatis-spring-boot-starter</artifactId>

            <version>1.3.1</version>

        </dependency>

    </dependencies>

    <build>

        <plugins>

            <plugin>

                <groupId>org.springframework.boot</groupId>

                <artifactId>spring-boot-maven-plugin</artifactId>

            </plugin>

        </plugins>

    </build>

</project>
二、添加数据源
application.properties也可以配置,但语法上有些不同而已。
在application.yml 添加数据源,以及开启Mybaits的驼峰映射功能。
spring:

  datasource:

    url: jdbc:mysql://localhost:3306/test?useSSL=false

    username: root

    password: root

    driver-class-name: com.mysql.jdbc.Driver

mybatis:

  configuration:

   map-underscore-to-camel-case: true #开启驼峰映射
三、编写各层代码
// entity类如下:

public class User {

    private String userId;

    private String username;

    private String password;

    // Getters & Setters ..

}

// dao层代码如下:

@Component

public interface UserMapper {

    @Select("select * from user")

    List<User> list();

    @Select("select * from user where userId = #{userId}")

    User getOne(String userId);

    @Insert("insert into user(userId,username,password) values(#{userId},#{username},#{password})")

    boolean save(User user);

    @Update("update user set username=#{username},password=#{password} where userId=#{userId}")

    boolean update(User user);

    @Delete("delete from user where userId = #{userId}")

    boolean delete(String userId);

}

//service层
//serviceImpl层
//controller层
这些都和之前接触的类似,所以不在罗列,具体可以参照上面上传的代码
四、添加数据库记录
mysql> DROP TABLE IF EXISTS `user`;

CREATE TABLE `user` (

  `userId` varchar(50) ,

  `username` varchar(50) ,

  `password` varchar(50)

) ;

INSERT INTO `user` VALUES ('', 'admin', 'admin');

INSERT INTO `user` VALUES ('', 'yizhiwazi', '');
五、启动项目
@SpringBootApplication

@MapperScan("com.xiaohang.springbootmybatis.dao")//新添加的注解

public class SpringbootMybatisApplication {

    public static void main(String[] args) {

        SpringApplication.run(SpringbootMybatisApplication.class, args);

    }

}
六、测试
运用火狐浏览器或者postman进行测试。
本篇重点关键在于依赖的添加、文件配置、和一些注解的使用,其他都和接触过的ssm、ssh差不多。
因为测试是件很麻烦的事,而且对于这样的接口进行测试,还要与前端的需求统一,所以下一章将学习swagger。
第04章—整合Mybatis的更多相关文章
- 第九章 整合Mybatis(待续)
··········
- 【springboot】整合 MyBatis
转自:https://blog.csdn.net/cp026la/article/details/86493503 1. 简介: 目前,国内大部分公司都使用 MyBatis作为持久层框架.本章整合My ...
- springmvc 项目完整示例04 整合mybatis mybatis所需要的jar包 mybatis配置文件 sql语句 mybatis应用
百度百科: MyBatis 本是apache的一个开源项目iBatis, 2010年这个项目由apache software foundation 迁移到了google code,并且改名为MyBat ...
- Spring学习笔记 - 第二章 - 注解开发、配置管理第三方Bean、注解管理第三方Bean、Spring 整合 MyBatis 和 Junit 案例
Spring 学习笔记全系列传送门: Spring学习笔记 - 第一章 - IoC(控制反转).IoC容器.Bean的实例化与生命周期.DI(依赖注入) [本章]Spring学习笔记 - 第二章 - ...
- spring boot(二)整合mybatis plus+ 分页插件 + 代码生成
先创建spring boot项目,不知道怎么创建项目的 可以看我上一篇文章 用到的环境 JDK8 .maven.lombok.mysql 5.7 swagger 是为了方便接口测试 一.Spring ...
- eclipse 创建maven 项目 动态web工程完整示例 maven 整合springmvc整合mybatis
接上一篇: eclipse 创建maven 项目 动态web工程完整示例 eclipse maven工程自动添加依赖设置 maven工程可以在线搜索依赖的jar包,还是非常方便的 但是有的时候可能还需 ...
- springboot学习随笔(四):Springboot整合mybatis(含generator自动生成代码)
这章我们将通过springboot整合mybatis来操作数据库 以下内容分为两部分,一部分主要介绍generator自动生成代码,生成model.dao层接口.dao接口对应的sql配置文件 第一部 ...
- SpringBoot整合Mybatis完整详细版二:注册、登录、拦截器配置
接着上个章节来,上章节搭建好框架,并且测试也在页面取到数据.接下来实现web端,实现前后端交互,在前台进行注册登录以及后端拦截器配置.实现简单的未登录拦截跳转到登录页面 上一节传送门:SpringBo ...
- SpringBoot整合Mybatis完整详细版
记得刚接触SpringBoot时,大吃一惊,世界上居然还有这么省事的框架,立马感叹:SpringBoot是世界上最好的框架.哈哈! 当初跟着教程练习搭建了一个框架,传送门:spring boot + ...
随机推荐
- Atitit.php nginx页面空白 并返回500的解决
Atitit.php nginx页面空白 并返回500的解决 1.1. 空白问题起源1 1.2. Php.ini 开启display_err1 1.3. 修改www.conf ,并重启动.重启php ...
- linux常用命令系列
自己开始接触linux系统已经两年了,刚到现场进行系统维护的时候,只知道ls和cd命令,所以我被迫开始学习linux,虽然现在每天都在linux系统上进行一些操作,但是感觉自己半路出家一样:可能知道某 ...
- jQuery 实战读书笔记之第五章:使用 jQuery 操作页面
html 如下: <!DOCTYPE html> <html> <head> <meta charset="utf-8" /> &l ...
- Angular js ie 7,8 兼容性
Angularjs 官网有云: 1)在html 里面 ,有ng-app 的标签里需要定义个id ,id='ng-app'; 2)ie 7及以下版本需要json2.js或json3.js,主要用来解析 ...
- eclipse中根据方法找到其实现类
面向接口编程中,程序全是面向接口变成调用,在维护别人写的系统的时候怎么样快速定位当前根据接口调用的方法是哪个实体类实现的: Ctrl + T/f4(光标放在需要查看的方法上,然后按Ctrl+T或者F4 ...
- shell课后总结
shell课后总结 作者:高波 归档:学习笔记 2017年12月4日13:31:08 快捷键: Ctrl + 1 标题1 Ctrl + 2 标题2 Ctrl + 3 标题3 Ctrl + 4 ...
- CSS之webkit-scrollbar例子
基于webkit的浏览器现在也可以自定义其样式: ::-webkit-scrollbar { /* 1 */ } ::-webkit-scrollbar-button ...
- Hbase存储详解
转自:http://my.oschina.net/mkh/blog/349866 Hbase存储详解 started by chad walters and jim 2006.11 G release ...
- 当您尝试再次安装 SQL Server 时,SQL Server 2008年安装将会失败
症状 当您尝试在一台服务器上安装 Microsoft SQL Server 2008年时,则安装将失败.当您尝试在同一台服务器上重新安装 SQL Server 2008年的相同副本时,此安装也将失败. ...
- 更改MVC注册Areas的顺序,掌控Areas的运作
[转自:http://www.cnblogs.com/dozer/archive/2010/04/14/change-order-of-MVC-Areas.html] 一.前言 首先,有人要问,为什么 ...