Linux 搭建Nginx并添加配置 SSL 证书
[root@nginx ~]# yum -y install gcc-c++
[root@nginx ~]# yum -y install pcre pcre-devel
[root@nginx ~]# yum -y install zlib zlib-devel
[root@nginx ~]# yum -y install openssl openssl-devel
[root@nginx ~]# wget -c https://nginx.org/download/nginx-1.10.3.tar.gz
[root@nginx ~]# yum -y install wget
[root@nginx ~]# tar -zxvf nginx-1.10.3.tar.gz
[root@nginx include]# groupadd nginx

[root@nginx include]# useradd -g nginx -d /home/nginx nginx

[root@nginx include]# passwd nginx
Sticky是nginx的一个模块,它是基于cookie的一种nginx的负载均衡解决方案,通过分发和识别cookie,来使同一个客户端的请求落在同一台服务器上,默认标识名为route

.客户端首次发起访问请求,nginx接收后,发现请求头没有cookie,则以轮询方式将请求分发给后端服务器。

.后端服务器处理完请求,将响应数据返回给nginx。

.此时nginx生成带route的cookie,返回给客户端。route的值与后端服务器对应,可能是明文,也可能是md5、sha1等Hash值

.客户端接收请求,并保存带route的cookie。

.当客户端下一次发送请求时,会带上route,nginx根据接收到的cookie中的route值,转发给对应的后端服务器。

http {
  #OK include vhost/xxx.conf;
  upstream shop_server{
  sticky;
  #Sticky是nginx的一个模块,它是基于cookie的一种nginx的负载均衡解决方案,通过分发和识别cookie,来使同一个客户端的请求落在同一台服务器上
  #	server 192.168.1.23;
  server 192.168.1.24;
  #	server 192.168.1.25;
  keepalive 32;
}
[root@nginx ~]# tar -zxvf nginx-goodies-nginx-sticky-module-ng-08a395c66e42..gz

[root@nginx ~]# mv nginx-goodies-nginx-sticky-module-ng-08a395c66e42 nginx-sticky-1.2.
查找并删除mysql有关的文件
find / -name nginx
rm -rf 上边查找到的路径,多个路径用空格隔开,或者下边一条命令即可
find / -name nginx|xargs rm -rf
[root@nginx ~]# cd nginx-1.10.

[root@nginx nginx-1.10.]# ./configure --user=nginx --group=nginx --prefix=/usr/local/nginx --add-module=/usr/local/nginx-sticky-1.2.
./configure \

--user=nginx --group=nginx \ #安装的用户组

--prefix=/usr/local/nginx \ #指定安装路径

--with-http_stub_status_module \ #监控nginx状态,需在nginx.conf配置

--with-http_ssl_module \ #支持HTTPS

--with-http_sub_module \ #支持URL重定向

--with-http_gzip_static_module #静态压缩

--add-module=/usr/local/nginx-sticky-1.2. #安装sticky模块
[root@nginx nginx-1.10.]# make && make install
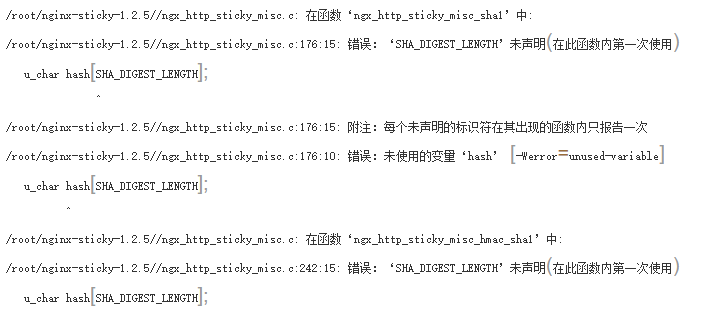
[root@nginx nginx-1.10.3]# sed -i '12a #include <openssl/sha.h>' /usr/local/nginx-sticky-1.2.5/ngx_http_sticky_misc.c

[root@nginx nginx-1.10.3]# sed -i '12a #include <openssl/md5.h>' /usr/local/nginx-sticky-1.2.5/ngx_http_sticky_misc.c
[root@nginx nginx-1.10.3]# make && make install
[root@nginx bin]# cd /usr/local/nginx/sbin/

[root@nginx sbin]# ln -s /usr/local/nginx/sbin/nginx /usr/local/bin/nginx
[root@nginx ~]# nginx -v
nginx version: nginx/1.10.3
[root@nginx ~]# nginx -V
nginx version: nginx/1.10.3
built by gcc 4.8.5 20150623 (Red Hat 4.8.5-28) (GCC)
configure arguments: --add-module=/root/nginx-sticky-1.2.5/
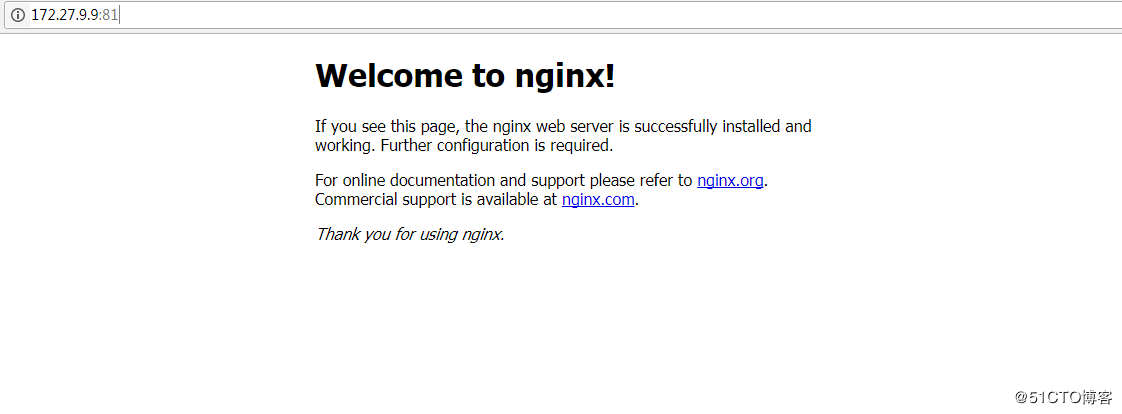
[root@nginx nginx-1.10.3]# /usr/local/nginx/sbin/nginx -c /usr/local/nginx/conf/nginx.conf
[root@nginx nginx-1.12.2]# nginx -s stop
[root@nginx nginx-1.12.2]# nginx -s quit
[root@nginx nginx-1.12.2]# nginx -s reload
nginx: the configuration file /usr/local/nginx/conf/nginx.conf syntax is ok
 [root@nginx rc.d]# cd /etc/rc.d

 [root@nginx rc.d]# sed -i '13a /usr/local/nginx/sbin/nginx' /etc/rc.d/rc.local

 [root@nginx rc.d]# chmod u+x rc.local
[root@nginx ~]# view /usr/local/nginx/conf/nginx.conf

[root@nginx ~]# nginx -s reload
[root@nginx ~]# firewall-cmd --state
running

[root@nginx ~]# systemctl stop firewalld.service

[root@nginx ~]# firewall-cmd --state
 not running
7.开始配置SSL证书(证书需另行获取,获取的途径很多,如阿里云的服务或第三方服务购买)
 server {

     listen 80;

     server_name 需要访问的域名;

     rewrite ^(.*) https://$server_name$1 permanent; #这句是代表 把    http的域名请求转成https

     #charset koi8-r;

     #access_log logs/host.access.log main;

     location / {

         root html;

         index index.html index.htm;

        proxy_pass http://需要访问的域名; #因为这里还是80端口,所以保持http就可以了

     }

 }
 # HTTPS server

 #

 server {

     listen 443 ssl;

     server_name 需要访问的域名,这里也不用加https;

     ssl on;

     ssl_certificate /usr/local/nginx/ssl/ssl.pem; #这里是ssl key文件存放的绝对路径,根据自己的文件名称和路径来写

     ssl_certificate_key /usr/local/nginx/ssl/ssl.key; #这里是ssl key文件存放的绝对路径,根据自己的文件名称和路径来写

     ssl_session_cache shared:SSL:1m;

     ssl_session_timeout 5m;

     ssl_ciphers HIGH:!aNULL:!MD5;

     ssl_prefer_server_ciphers on;

     location / {

         proxy_pass http://需要访问的域名:8080/;

     }

 }
[root@localhost sbin]# nginx -t

 #user  nobody;

 worker_processes  1;

 #error_log  logs/error.log;

 #error_log  logs/error.log  notice;

 #error_log  logs/error.log  info;

 #pid        logs/nginx.pid;

 events {

     worker_connections  1024;

 }

 http {

     include       mime.types;

     default_type  application/octet-stream;

     #log_format  main  '$remote_addr - $remote_user [$time_local] "$request" '

     #                  '$status $body_bytes_sent "$http_referer" '

     #                  '"$http_user_agent" "$http_x_forwarded_for"';

     #access_log  logs/access.log  main;

     sendfile        on;

     #tcp_nopush     on;

     #keepalive_timeout  0;

     keepalive_timeout  65;

     #gzip  on;

     server {

         listen       80;

         server_name  test.feihe.com;

         #rewrite ^(.*) https://$server_name$1 permanent; #这句是代表 把http的域名请求转成https

         #charset koi8-r;

         #access_log  logs/host.access.log  main;

         location / {

             root   html/;

             index  index.html index.htm;

         }

         location /coa/ {

             proxy_pass http://localhost:8080;

         }

         location /front/ {

             proxy_pass http://localhost:8080;

         }

         #error_page  404              /404.html;

         # redirect server error pages to the static page /50x.html

         #

         error_page   500 502 503 504  /50x.html;

         location = /50x.html {

             root   html;

         }

         # proxy the PHP scripts to Apache listening on 127.0.0.1:80

         #

         #location ~ \.php$ {

         #    proxy_pass   http://127.0.0.1;

         #}

         # pass the PHP scripts to FastCGI server listening on 127.0.0.1:9000

         #

         #location ~ \.php$ {

         #    root           html;

         #    fastcgi_pass   127.0.0.1:9000;

         #    fastcgi_index  index.php;

         #    fastcgi_param  SCRIPT_FILENAME  /scripts$fastcgi_script_name;

         #    include        fastcgi_params;

         #}

         # deny access to .htaccess files, if Apache's document root

         # concurs with nginx's one

         #

         #location ~ /\.ht {

         #    deny  all;

         #}

     }

     # another virtual host using mix of IP-, name-, and port-based configuration

     #

     #server {

     #    listen       8000;

     #    listen       somename:8080;

     #    server_name  somename  alias  another.alias;

     #    location / {

     #        root   html;

     #        index  index.html index.htm;

     #    }

     #}

     # HTTPS server         ssl_protocols  SSLv2 SSLv3 TLSv1;

     server {

         listen       443 ssl;

         server_name  test.feihe.com;

         ssl                  on;

         ssl_certificate      /usr/local/nginx/ssl/_.xx.com_bundle.crt;  #这里是ssl pem文件存放的绝对路径

         ssl_certificate_key  /usr/local/nginx/ssl/_.xx.com.key;  #这里是ssl key文件存放的绝对路径

         ssl_session_cache    shared:SSL:1m;

         ssl_session_timeout  5m;

         ssl_ciphers  HIGH:!aNULL:!MD5;

         ssl_prefer_server_ciphers   on;

         location / {

             root   html/;

             index  index.html index.htm;

         }

         location /coa/ {

             proxy_pass http://localhost:8080;

         }

         location /front/ {

             proxy_pass http://localhost:8080;

         }

     }

 }
Linux 搭建Nginx并添加配置 SSL 证书的更多相关文章
- nginx下如何配置 ssl证书?腾讯云ssl证书为例!
nginx下如何配置 ssl证书?腾讯云ssl证书为例! 目前为止,https已经成为一种趋势,想要开启https就需要ssl证书. 首先,为域名注册ssl证书. 腾讯云注册地址:https://cl ...
- 网站是HTTP?10分钟变成HTTPS!域名免费添加配置SSL证书,变成https//环境
对于小程序request请求需要https域名.navigator.geolocation定位也需要在https环境下才可以生效等问题: 前端开发越来越需要https环境来来测试一下API接口和各类问 ...
- nginx安全:配置ssl证书(https证书)
一,配置https证书的意义 https协议是由SSL+http协议构建的安全协议,支持加密传输和身份认证, 安全性比http要更好,因为数据的加密传输,更能保证数据的安全性和完整性 例如:不使用ht ...
- Linux中Nginx中添加自签证书TLS
创建自签证书TLS openssl req \ -newkey rsa: \ -x509 \ -nodes \ -keyout test.com.key \ -new \ -out test.com. ...
- 阿里云配置ssl证书
一.申请证书和下载证书(阿里云申请) 二.在nginx服务器上配置ssl证书 1.检查服务器是否安装openssl 2.在nginx conf 文件夹创建 cret 文件,放置证书 [root@web ...
- linux nginx 配置ssl证书访问
http://www.linuxidc.com/Linux/2013-08/88271.htm 一.什么是 SSL 证书,什么是 HTTPSSSL 证书是一种数字证书,它使用 Secure Socke ...
- linux下nginx配置ssl证书(https)
nginx配置ssl很简单,首先需要两个文件,一个是crt文件,另一个是key文件,如下所示: xxx.crt; #(证书公钥)xxx.key; #(证书私钥) 把这两个文件放到nginx的conf ...
- nginx配置ssl证书实现https访问
一,环境说明 服务器系统:ubuntu16.04LTS 服务器IP地址:47.89.12.99 域名:bjubi.com 二,域名解析到服务器 在阿里云控制台-产品与服务-云解析DNS-找到需要解析的 ...
- 阿里云 nginx配置ssl证书实现https访问
一,环境说明 服务器系统:ubuntu16.04LTS 服务器IP地址:47.89.12.99 域名:bjubi.com 二,域名解析到服务器 在阿里云控制台-产品与服务-云解析DNS-找到需要解析的 ...
随机推荐
- Linux 设置 LD_LIBRARY_PATH
在Linux下,如果自己写好一个动态链接库,需要在其他程序里调用,则需要让这些程序能找到这个动态链接库,如果设置的不对,就会出现类似的错误: error : cannot open shared ob ...
- TensorFlow基础笔记(14) 网络模型的保存与恢复_mnist数据实例
http://blog.csdn.net/huachao1001/article/details/78502910 http://blog.csdn.net/u014432647/article/de ...
- wex5中集成的mysql数据库 打开时一闪而过 报错
在进程中kill mysql.exe 重新启动即可
- pyqt的setObjectName()/findChild()
根据设置的Name标示查找组件的对象,关键函数:setObjectName()/findChild() findChild()/2:需要两个参数, 参数一:组件的类型,如QLineEdit.QPush ...
- CentOS和Ubuntu安装软件命令对比(区别)
此表内容来自<Ubuntu Server最佳方案>,CentOS和Ubuntu(Debian)是VPS最常见的系统,这份表很实用,分享下
- PL/SQL中decode函数简介
今天看别人的SQL时看这里面还有decode()函数,以前从来没接触到,上网查了一下,还挺好用的一个函数,写下来希望对朋友们有帮助哈! decode()函数简介: 主要作用:将查询结果翻译成其他值(即 ...
- Linux jstack分析cpu占用100%
背景: 运行测试程序后,top命令发现某个进程(pid)占用cpu达到100%. 查看哪个线程占用最多资源: ps mp pid -o THREAD,tid,命令查看这个进程下面的所有线程占用情况 ...
- UGUI 的多分辨率适配
1.Canvas的属性配置 2.Canvas Scaler的属性配置 3.根据不同的屏幕的比例动态修改缩放基准 void Start () { float standard_width = 960f; ...
- Unity5.4新版AssetBundle资源打包
(1)新版本 唯一打包API Buildpipeline.BuildAssetBundle (2)在资源的Inpector界面最下方可设置该资源的assetbundleName, 每个assetbun ...
- 高级选项更改MathType数学公式样式
MathType中系统的样式有很多种,我们将通过示例来演示如何更改样式定义达到修改等式的目的.使用样式将允许你迅速且方便的获得一种格式,这种格式将使你创建的等式具有统一的风格. 以下步骤中,我们将创建 ...