Postman-Tests模块测试方法记录
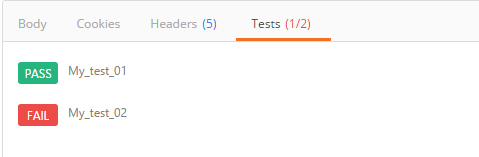
用Postman的时候大多数测试结果是可以用Tests模块的测试方法来代替人工检查的,测试方法本质上是JavaScript代码,我们可以通过运行测试用例(测试脚本是在发送请求之后并且从服务器接收到响应时执行),观察结果是“PASS”还是“FAIL”就能判断测试结果:
在此记录一些常用方法备忘(当遇到需要判断返回值为A或B的时候,使用“||”符号):
1.设置环境变量
pm.environment.set("variable_key", "variable_value");
2.将一个嵌套的对象设置为一个环境变量
var array = [1, 2, 3, 4];
pm.environment.set("array", JSON.stringify(array, null, 2));
var obj = { a: [1, 2, 3, 4], b: { c: 'val' } };
pm.environment.set("obj", JSON.stringify(obj))
3.获得一个环境变量
pm.environment.get("variable_key");
4.获得一个环境变量(其值是一个字符串化的对象)
// These statements should be wrapped in a try-catch block if the data is coming from an unknown source.
var array = JSON.parse(pm.environment.get("array"));
var obj = JSON.parse(pm.environment.get("obj"));
5.清除一个环境变量
pm.environment.unset("variable_key");
6.设置一个全局变量
pm.globals.set("variable_key", "variable_value");
7.获取一个全局变量
pm.globals.get("variable_key");
8.清除一个全局变量
pm.globals.unset("variable_key");
9.获取一个变量(该函数在全局变量和活动环境中搜索变量)
pm.variables.get("variable_key");
10.检查响应主体是否包含字符串
pm.test("Body matches string", function () {
pm.expect(pm.response.text()).to.include("string_you_want_to_search");
});
11.检查响应体是否等于字符串
pm.test("Body is correct", function () {
pm.response.to.have.body("response_body_string");
});
12.检查JSON值
pm.test("Your test name", function () {
var jsonData = pm.response.json();
pm.expect(jsonData.value).to.eql(100);
});
13.Content-Type 存在
pm.test("Content-Type is present", function () {
pm.response.to.have.header("Content-Type");
});
14.返回时间少于200ms
pm.test("Response time is less than 200ms", function () {
pm.expect(pm.response.responseTime).to.be.below(200);
});
15.状态码是200
pm.test("Status code is 200", function () {
pm.response.to.have.status(200);
});
16.代码名包含一个字符串
pm.test("Status code name has string", function () {
pm.response.to.have.status("Created");
});
17.成功的POST请求状态码
pm.test("Successful POST request", function () {
pm.expect(pm.response.code).to.be.oneOf([201,202]);
});
18.为JSON数据使用TinyValidator
var schema = {
"items": {
"type": "boolean"
}
};
var data1 = [true, false];
var data2 = [true, 123];
pm.test('Schema is valid', function() {
pm.expect(tv4.validate(data1, schema)).to.be.true;
pm.expect(tv4.validate(data2, schema)).to.be.true;
});
19.解码base64编码数据
var intermediate,
base64Content, // assume this has a base64 encoded value
rawContent = base64Content.slice('data:application/octet-stream;base64,'.length);
intermediate = CryptoJS.enc.Base64.parse(base64content); // CryptoJS is an inbuilt object, documented here: https://www.npmjs.com/package/crypto-js
pm.test('Contents are valid', function() {
pm.expect(CryptoJS.enc.Utf8.stringify(intermediate)).to.be.true; // a check for non-emptiness
});
20.发送异步请求
此函数可作为预请求和测试脚本使用
pm.sendRequest("https://postman-echo.com/get", function (err, response) {
console.log(response.json());
});
21.将XML主体转换为JSON对象
var jsonObject = xml2Json(responseBody);
-----------------------------------------------------------------------------------------------------------------------------
1. 清除一个全局变量
Clear a global variable
对应脚本:
postman.clearGlobalVariable("variable_key");
参数:需要清除的变量的key
2.清除一个环境变量
Clear an environment variable
对应脚本:
postman.clearEnvironmentVariable("variable_key");
参数:需要清除的环境变量的key
3.response包含内容
Response body:Contains string
对应脚本:
tests["Body matches string"] =responseBody.has("string_you_want_to_search");
参数:预期内容
4.将xml格式的response转换成son格式
Response body:Convert XML body to a JSON Object
对应脚本:
var jsonObject = xml2Json(responseBody);
参数:(默认不需要设置参数,为接口的response)需要转换的xml
5.response等于预期内容
Response body:Is equal to a string
对应脚本:
tests["Body is correct"] = responseBody === "response_body_string";
参数:预期response
6.json解析key的值进行校验
Response body:JSON value check
对应脚本:
tests["Args key contains argument passed as url parameter"] = 'test' in responseJSON.args
参数:test替换被测的值,args替换被测的key
7.检查response的header信息是否有被测字段
Response headers:Content-Type header check
对应脚本:
tests["Content-Type is present"] = postman.getResponseHeader("Content-Type");
参数:预期header
8.响应时间判断
Response time is less than 200ms
对应脚本:
tests["Response time is less than 200ms"] = responseTime < 200;
参数:响应时间
9.设置全局变量
Set an global variable
对应脚本:
postman.setGlobalVariable("variable_key", "variable_value");
参数:全局变量的键值
10.设置环境变量
Set an environment variable
对应脚本:
postman.setEnvironmentVariable("variable_key", "variable_value");
参数:环境变量的键值
11.判断状态码
Status code:Code is 200
对应脚本:
tests["Status code is 200"] = responseCode.code != 400;
参数:状态码
12.检查code name 是否包含内容
Status code:Code name has string
对应脚本:
tests["Status code name has string"] = responseCode.name.has("Created");
参数:预期code name包含字符串
13.成功的post请求
Status code:Successful POST request
对应脚本:
tests["Successful POST request"] = responseCode.code === 201 || responseCode.code === 202;
14.微小验证器
Use Tiny Validator for JSON data
对应脚本:
var schema = {
"items": {
"type": "boolean"
}
};
var data1 = [true, false];
var data2 = [true, 123];
console.log(tv4.error);
tests["Valid Data1"] = tv4.validate(data1, schema);
tests["Valid Data2"] = tv4.validate(data2, schema);
参数:可以修改items里面的键值对来对应验证json的参数
Postman-Tests模块测试方法记录的更多相关文章
- postman简单教程,使用tests模块来验证接口时是否通过
接口测试醉重要的就是返回数据的检查,一个简单的接口,我们可以肉眼检查返回数据,但接口一旦多起来且复杂,每次的检查都会很费劲,此时我们就需要postman 的tests模块来代替 概念: Postman ...
- postman tests实例记录(还没看,一些常用的)
这段时间准备测试api接口,postman这个工具很是方便,特别是里面的tests的javascript脚本. 记录一下测试接口常用的tests验证的实例. 1.设置环境变量 postman.setE ...
- Python DDT(data driven tests)模块心得
关于ddt模块的一些心得,主要是看官网的例子,加上一点自己的理解,官网地址:http://ddt.readthedocs.io/en/latest/example.html ddt(data driv ...
- Python有关模块学习记录
1 pandas numpy模块 首先安装搭建好jupyter notebook,运行成功后的截图如下: 安装使用步骤(PS:确定Python安装路径和安装路径里面Scripts文件夹路径已经配置到环 ...
- python 之 处理excel表的xlwt模块学习记录
python 操作excel表的常用模块主要有2个: 1:xlrd:读取excel表 2:xlwt:创建并写入excel表 安装方法: 可以直接下载安装:https://pypi.python.org ...
- postman tests常用方法
postman常用方法集合: 1.设置环境变量 postman.setEnvironmentVariable("key", "value"); pm.envir ...
- postman Tests断言
摘要:关于postman的断言方法很多,在网上随便搜寻下,能搜出一大推,什么牛鬼蛇神都有,让人眼花缭乱..甚至在应用时出现错误.Test断言都是根据js规则来写的,对于我这种不懂js语言的来说确实不友 ...
- 【学习】Python os模块常用方法 记录
记录一些工作中常用到的用法 os.walk() 模块os中的walk()函数可以遍历文件夹下所有的文件. os.walk(top, topdown=Ture, onerror=None, follow ...
- Python3-logging模块-日志记录
Python3中的logging模块提供了较为灵活的事件日志系统 日志级别 DEBUG < INFO < WARING(Python默认) < ERROR < FATAL(CR ...
随机推荐
- 《条目二十九:对于逐个字符的输入请考虑istreambuf_iterator》
<条目二十九:对于逐个字符的输入请考虑istreambuf_iterator> 1.使用: ifstream inputfile("xxxx"); string fil ...
- CF1083(Round #526 Div. 1) 简要题解
题目链接 https://codeforces.com/contest/1083 简要题目翻译 题解 A. The Fair Nut and the Best Path 可以忽略掉"任意时刻 ...
- Apache Maven的入门使用之项目的基本构建(1)
前言 最近在研究java框架struts2的相关漏洞,然后就去看了官方给出的文档.在看文档的过程中发现使用到了Apache Maven这个项目管理工具,我在网上搜索了一下,大多数文章都写得不是很系统, ...
- 第2章—装配Bean—通过java代码装配bean
通过java代码装配bean 在进行显式装配的时候,有两种选型方案:java和XML配置,这里先介绍java的配置方式. 2.3.1创建配置类 先复习下上一章的配置内容: @Configurati ...
- html转图片,java库cssbox
引入依赖包 <dependency> <groupId>net.sf.cssbox</groupId> <artifactId>cssbox</a ...
- 关联容器:unordered_map详细介绍(附可运行代码)
介绍 1 特性 2 Hashtable和bucket 模版 1 迭代器 功能函数 1 构造函数 12示例代码 2 容量操作 21 size 22 empty 3 元素操作 31 find 32 ins ...
- Mac 安装tensorflow
一. 安装 TensorFlow谷歌的官网和开源项目都有介绍各个系统的安装和使用(官网:https://www.tensorflow.org/install git: https://github.c ...
- InnoDB存储引擎的表空间文件,重做日志文件
存储引擎文件:因为MySQL表存储引擎的关系,每个存储引擎都会有自己的文件来保存各种数据.这些存储引擎真正存储了数据和索引等数据. 表空间文件 InnoDB存储引擎在存储设计上模仿了Oracle,将存 ...
- Mysql查询今天、昨天、7天、近30天、本月、上一月数据
今天 SELECT * FROM 表名 WHERE TO_DAYS(时间字段名) = TO_DAYS(now()); 昨天 SELECT * FROM 表名 WHERE TO_DAYS( NOW( ) ...
- 一个简单好用的强制删除软件geek
给大家推荐geek软件工具,一个可以用来强制卸载那些常规手段无法卸载的软件,到官网(https://geekuninstaller.com/download)下载免费版,运行软件后,选择需要强制删除软 ...