
PCB genesis 大孔扩孔(不用G84命令)实现方法
PCB钻孔时,当钻刀>6.3mm时,超出钻孔范围,钻孔工序是没有这么大的钻刀,当这种情况,工程CAM会都采用G84命令用小孔扩孔的方式制作, 在这里介绍一种如果不用G84命令,用程序实现将大孔生成小孔钻孔达到扩孔的目的。
一.我们先了解一下G84命令扩孔
孔尺寸大小

孔密度

连一篇文章有关于孔数计算方式: https://www.cnblogs.com/pcbren/p/9379178.html
二.求解思路
1.通过孔密度,求出孔与孔中心距离
2.求出单次增量方位角
3.以大孔中心为,长度为(大孔半径-小孔半径), 任选择一个方位角作为起始方位角,并增加一个起始孔,并围绕这个起始方位角不断递增方位角,直到360度递增完成后即结束。
三.C#简易代码实现:
1.扩孔钻孔代码
            string drilllayer = "drl";

            gLayer layer = g.getFEATURES($"{drilllayer}", g.STEP, g.JOB, "mm", true);

            List<gPP> pList = new List<gPP>();

            double HoleSize = ;  //扩孔所用钻刀大小

            foreach (var pad in layer.Plist)

            {

                if (pad.width > )  //钻孔>6300需扩孔

                {

                    gA arc = calc2.p_2A(new gP(pad.p, pad.width - HoleSize));

                    arc.width = HoleSize;

                    var HoleCenterDi = calc2.p_Convex(arc.width * 0.0005)*;

                    pList.AddRange(calc2.a_2Plist(arc, HoleCenterDi, , true));

                }

            }

            addCOM.pad(pList);
2.计算函数
/// <summary>

        /// 通过孔半径与凸高位求  孔中心距

        /// </summary>

        /// <param name="Rradius">孔半径</param>

        /// <param name="tol_">凸位高度值</param>

        /// <returns></returns>

        public double p_Convex(double Rradius, double tol_ = 0.0127)

        {

            return Math.Sqrt(Math.Pow(Rradius, ) - Math.Pow(Rradius - tol_, )) * ;

        }

        /// <summary>

        /// 求方位角

        /// </summary>

        /// <param name="ps"></param>

        /// <param name="pe"></param>

        /// <returns></returns>

        public double p_ang(gPoint ps, gPoint pe)

        {

            double a_ang = Math.Atan((pe.y - ps.y) / (pe.x - ps.x)) / Math.PI * ;

            //象限角  转方位角   计算所属象限   并求得方位角

            if (pe.x >= ps.x && pe.y >= ps.y)  //↗    第一象限

            {

                return a_ang;

            }

            else if (!(pe.x >= ps.x) && pe.y >= ps.y)  // ↖   第二象限

            {

                return a_ang + ;

            }

            else if (!(pe.x >= ps.x) && !(pe.y >= ps.y))  //↙   第三象限

            {

                return a_ang + ;

            }

            else if (pe.x >= ps.x && !(pe.y >= ps.y))  // ↘   第四象限

            {

                return a_ang + ;

            }

            else

            {

                return a_ang;

            }

        }//求方位角

        /// <summary>

        /// 求增量坐标

        /// </summary>

        /// <param name="ps">起点</param>

        /// <param name="val">增量值</param>

        /// <param name="ang_direction">角度</param>

        /// <returns></returns>

        public gPP p_val_ang(gPP ps, double val, double ang_direction)

        {

            gPP pe = ps;

            pe.p.x = ps.p.x + val * Math.Cos(ang_direction * Math.PI / );

            pe.p.y = ps.p.y + val * Math.Sin(ang_direction * Math.PI / );

            return pe;

        }

        /// <summary>

        /// 弧Arc 转点P组集

        /// </summary>

        /// <param name="a"></param>

        /// <param name="val_">此数值表示:分段数值</param>

        /// <param name="type_">代表值数值类型 【0】弧长 【1】角度  【2】弦长 </param>

        /// <param name="is_avg">是否平均分布 </param>

        /// <returns></returns>

        public List<gPP> a_2Plist(gA a, double val_ = 0.1d, int type_ = , bool is_avg = false)

        {

            List<gPP> list_point = new List<gPP>();

            gPP tempP;

            tempP.p = a.ps;

            tempP.symbols = a.symbols;

            tempP.width = a.width;

            list_point.Add(tempP);

            double avg_count;

            double angle_val = ;

            double rad_ = p2p_di(a.pc, a.pe);

            double sum_alge = a_Angle(a);

            if (type_ == )  //    【1】角度

            {

                angle_val = val_;

                avg_count = (int)(Math.Ceiling(sum_alge / angle_val)) - ;  //  总角度/单角度

            }

            else if (type_ == )  //【2】弦长

            {

                angle_val = Math.Asin(val_ / (rad_ * )) *  / pi;

                avg_count = (int)(Math.Ceiling(sum_alge / angle_val)) - ;  //  总角度/单角度

            }

            else  //                【0】弧长

            {

                angle_val = val_ *  / (pi * rad_);

                avg_count = (int)(Math.Ceiling(sum_alge / angle_val)) - ;  //  总角度/单角度

                //avg_count = (int)(Math.Ceiling(a_Lenght(a) / val_)) - 1;  //  或  总弧长/单弧长

            }

            if (is_avg)

                angle_val = sum_alge / avg_count;

            if (avg_count > )

            {

                gPP centerP = tempP;

                centerP.p = a.pc;

                double angle_s = p_ang(a.pc, a.ps);

                if (a.ccw) { angle_val =  - angle_val; }

                for (int i = ; i < avg_count; i++)

                {

                    tempP = p_val_ang(centerP, rad_, angle_s - angle_val * i);

                    list_point.Add(tempP);

                }

            }

            if (!(zero(a.ps.x - a.pe.x) && zero(a.ps.y - a.pe.y)))

            {

                tempP.p = a.pe;

                list_point.Add(tempP);

            }

            return list_point;

        }

        /// <summary>

        /// 返回两点之间欧氏距离

        /// </summary>

        /// <param name="p1"></param>

        /// <param name="p2"></param>

        /// <returns></returns>

        public double p2p_di(gPoint p1, gPoint p2)

        {

            return Math.Sqrt((p1.x - p2.x) * (p1.x - p2.x) + (p1.y - p2.y) * (p1.y - p2.y));

        }

        /// <summary>

        /// 求弧Arc圆心角       //后续改进  用叉积 与3P求角度求解  验证哪个效率高

        /// </summary>

        /// <param name="a"></param>

        /// <returns></returns>

        public double a_Angle(gA a)

        {

            double angle_s, angle_e, angle_sum;

            if (a.ccw)

            {

                angle_s = p_ang(a.pc, a.pe);

                angle_e = p_ang(a.pc, a.ps);

            }

            else

            {

                angle_s = p_ang(a.pc, a.ps);

                angle_e = p_ang(a.pc, a.pe);

            }

            if (angle_s == ) { angle_s = ; }

            if (angle_e >= angle_s)

                angle_sum =  - Math.Abs(angle_s - angle_e);

            else

                angle_sum = Math.Abs(angle_s - angle_e);

            return angle_sum;

        }

        /// <summary>

        ///  检查值决对值 小于 (eps = 0.001)    浮点误差处理

        /// </summary>

        /// <param name="x"></param>

        /// <returns></returns>

        public bool zero(double x)

        {

            return (((x) >  ? (x) : (-x)) < eps);

        }
3.Point,PAD,Arc数据结构
/// <summary>

    /// 精简 PAD  数据类型

    /// </summary>

    public struct gPP

    {

        public gPP(double x_val, double y_val, double width_)

        {

            this.p = new gPoint(x_val, y_val);

            this.symbols = "r";

            this.width = width_;

        }

        public gPP(gPoint p_, double width_)

        {

            this.p = p_;

            this.symbols = "r";

            this.width = width_;

        }

        public gPP(gPoint p_, string symbols_, double width_)

        {

            this.p = p_;

            this.symbols = symbols_;

            this.width = width_;

        }

        public gPoint p;

        public string symbols;

        public double width;

        public static gPP operator +(gPP p1, gPP p2)

        {

            p1.p += p2.p;

            return p1;

        }

        public static gPP operator +(gPP p1, gPoint p2)

        {

            p1.p += p2;

            return p1;

        }

        public static gPP operator -(gPP p1, gPP p2)

        {

            p1.p -= p2.p;

            return p1;

        }

        public static gPP operator -(gPP p1, gPoint p2)

        {

            p1.p -= p2;

            return p1;

        }

    }

    /// <summary>

    /// 点  数据类型 (XY)

    /// </summary>

    public struct gPoint

    {

        public gPoint(gPoint p_)

        {

            this.x = p_.x;

            this.y = p_.y;

        }

        public gPoint(double x_val, double y_val)

        {

            this.x = x_val;

            this.y = y_val;

        }

        public double x;

        public double y;

        public static gPoint operator +(gPoint p1, gPoint p2)

        {

            p1.x += p2.x;

            p1.y += p2.y;

            return p1;

        }

        public static gPoint operator -(gPoint p1, gPoint p2)

        {

            p1.x -= p2.x;

            p1.y -= p2.y;

            return p1;

        }

    }

    /// <summary>

    /// ARC 数据类型

    /// </summary>

    public struct gA

    {

        public gA(double ps_x, double ps_y, double pc_x, double pc_y, double pe_x, double pe_y, double width_, bool ccw_)

        {

            this.ps = new gPoint(ps_x, ps_y);

            this.pc = new gPoint(pc_x, pc_y);

            this.pe = new gPoint(pe_x, pe_y);

            this.negative = false;

            this.ccw = ccw_;

            this.symbols = "r";

            this.attribut = string.Empty;

            this.width = width_;

        }

        public gA(gPoint ps_, gPoint pc_, gPoint pe_, double width_, bool ccw_ = false)

        {

            this.ps = ps_;

            this.pc = pc_;

            this.pe = pe_;

            this.negative = false;

            this.ccw = ccw_;

            this.symbols = "r";

            this.attribut = string.Empty;

            this.width = width_;

        }

        public gPoint ps;

        public gPoint pe;

        public gPoint pc;

        public bool negative;//polarity-- positive  negative

        public bool ccw; //direction-- cw ccw

        public string symbols;

        public string attribut;

        public double width;

        public static gA operator +(gA arc1, gPoint move_p)

        {

            arc1.ps += move_p;

            arc1.pe += move_p;

            arc1.pc += move_p;

            return arc1;

        }

        public static gA operator +(gA arc1, gP move_p)

        {

            arc1.ps += move_p.p;

            arc1.pe += move_p.p;

            arc1.pc += move_p.p;

            return arc1;

        }

        public static gA operator -(gA arc1, gPoint move_p)

        {

            arc1.ps -= move_p;

            arc1.pe -= move_p;

            arc1.pc -= move_p;

            return arc1;

        }

        public static gA operator -(gA arc1, gP move_p)

        {

            arc1.ps -= move_p.p;

            arc1.pe -= move_p.p;

            arc1.pc -= move_p.p;

            return arc1;

        }

    }
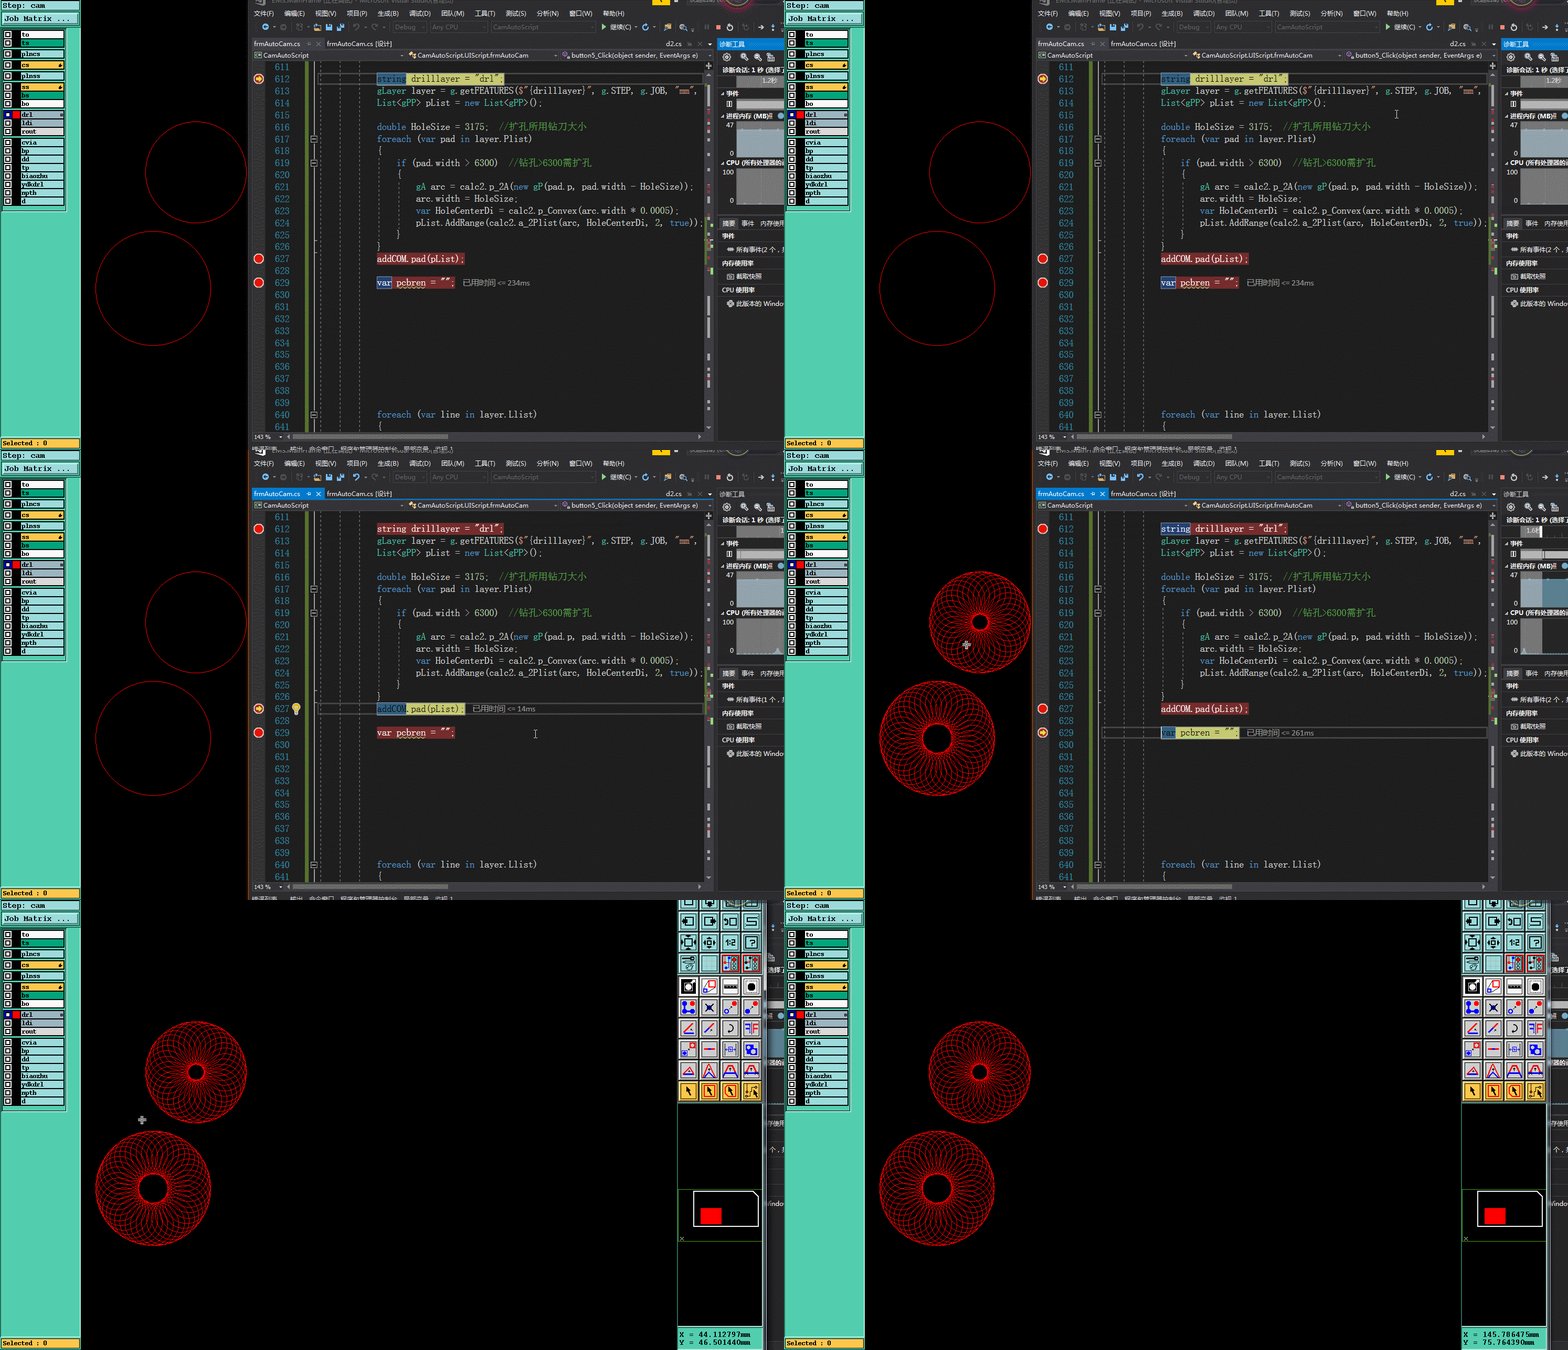
四.实现效果
PCB genesis 大孔扩孔(不用G84命令)实现方法的更多相关文章
- PCB genesis大孔加小孔(即卸力孔)实现方法
一.为什么 大孔中要加小孔(即卸力孔) 这其实跟钻刀的排屑有关了,当钻刀越大孔,排屑量也越大(当然这也得跟转速,下刀速的参数有关系),通常当钻刀越大,转速越慢,下刀速也越慢(因为要保证它的排屑通畅). ...
- PCB genesis Slot槽转钻孔(不用G85命令)实现方法
PCB钻Slot槽一般都采用G85命令钻槽孔,而采用G85命令工程CAM无法准确的知道Slot槽钻多少个孔,并不能决定钻槽孔的顺序,因为采用G85命令钻孔密度与钻槽顺序由钻机本身决定的.在这里介绍一种 ...
- PCB genesis自制孔点 Font字体实现方法
一.先看genesis原有Font字体 在PCB工程CAM加孔点字体要求时,通常我们直接用Geneis软件给我们提供了2种孔点字体canned_57与canned_67,但此字体可能不能满足各个工厂个 ...
- PCB genesis连孔加除毛刺孔(槽孔与槽孔)实现方法(三)
一.为什么 连孔加除毛刺孔 原因是 PCB板材中含有玻璃纤维, 毛刺产生位置在于2个孔相交位置,由于此处钻刀受力不均导致纤维切削不断形成毛刺 ,为了解决这个问题:在钻完2个连孔后,在相交处再钻一个孔, ...
- PCB genesis连孔加除毛刺孔(圆孔与槽孔)实现方法(二)
一.为什么 连孔加除毛刺孔 原因是 PCB板材中含有玻璃纤维, 毛刺产生位置在于2个孔相交位置,由于此处钻刀受力不均导致纤维切削不断形成毛刺 ,为了解决这个问题:在钻完2个连孔后,在相交处再钻一个孔, ...
- PCB genesis连孔加除毛刺孔(圆孔与圆孔)实现方法(一)
一.为什么 连孔加除毛刺孔 原因是 PCB板材中含有玻璃纤维, 毛刺产生位置在于2个孔相交位置,由于此处钻刀受力不均导致纤维切削不断形成毛刺 ,为了解决这个问题:在钻完2个连孔后,在相交处再钻一个孔, ...
- PCB genesis孔符制作实现方法
一.先看genesis原始孔符 孔符的作用:用于表示孔径的大小的一种代号, 当孔径检测时,可以按分孔图中的孔符对应的孔径尺寸对孔径检测. 在实际PCB行业通常不使用原始(图形)孔符,而使用字母孔符(如 ...
- PCB Genesis 外形加内角孔实现方法
在PCB工程制作CAM时,经常会遇到外形拐角处直角的,而客户对内角是要求,比如最大内角要求R0.5mm或者不接受内角, 但成型方式为铣方式,又不是啤板成型,那怎么处理才可以达到要求效果呢,在这里介绍2 ...
- Linux 服务器配置、运行、不用敲命令(新手必备!) - 宝塔全攻略建站一条龙
Linux 服务器配置.运行.不用敲命令 WordPress 建站攻略 本文提供全流程,中文翻译. Chinar 坚持将简单的生活方式,带给世人!(拥有更好的阅读体验 -- 高分辨率用户请根据需求调整 ...
随机推荐
- sql之inner join
这个嘛...经常写sql写的我怀疑自己:算了还是记下来了再强调一遍!再强调一遍!再强调一遍!:虽然很傻逼... inner join(等值连接) 只返回两个表中联结字段相等的行
- 实战:tcp链接rst场景tcpdump分析
RST为重置报文段,它会导致TCP连接的快速拆迁,且不需要ack进行确认. 1.针对不存在的端口的连请求 客户端: #include <unistd.h> #include <sys ...
- NOIP2000方格取数(洛谷,动态规划递推)
先上题目: P1004 方格取数 下面上ac代码: ///如果先走第一个再走第二个不可控因素太多 #include<bits/stdc++.h> #define ll long long ...
- Centos6文本安装教程
Centos6.4文本方式安装 虚拟机中文本安装(内存512),内存大于512默认为图形安装 1.选择安装媒体,在vbox中选skip跳过 2.选择安装语言(chinese(simplifired)简 ...
- 10 Python中的代码缓存机制
目录: 1) 什么是代码块 2) 基本原理 3) 机制适用范围 4) 适用对象 5) 优势 更详细说明,参考太白老师博客 https://www.cnblogs.com/jin-xin/article ...
- 49. spring boot日志升级篇—理论【从零开始学Spring Boot】
我们之前在其中的一篇文章介绍过如何在spring boot中使用日志记录SLF4J. Spring Boot在所有内部日志中使用Commons Logging,但是默认配置也提供了对常用日志的支持,如 ...
- Linux & Filesystem Hierarchy Standard
Linux & Filesystem Hierarchy Standard The Filesystem Hierarchy Standard of Linux https://zhuanla ...
- M - 小希的迷宫 并查集
上次Gardon的迷宫城堡小希玩了很久(见Problem B),现在她也想设计一个迷宫让Gardon来走.但是她设计迷宫的思路不一样,首先她认为所有的通道都应该是双向连通的,就是说如果有一个通道连通了 ...
- Screenshot: available via screen
在使用selenium+PhantomJS进行爬虫时候报错 selenium.common.exceptions.TimeoutException: Message: Screenshot: avai ...
- ZooKeeper实现配置中心的实例(原生API实现)(转)
说明:要实现配置中心的例子,可以选择的SDK有很多,原生自带的SDK也是不错的选择.比如使用I0Itec,Spring Boot集成等. 大型应用通常会按业务拆分成一个个业务子系统,这些大大小小的子应 ...