springboot整合actuator,进行运维监控
首先引入依赖:
<?xml version="1.0" encoding="UTF-8"?>

<project xmlns="http://maven.apache.org/POM/4.0.0" xmlns:xsi="http://www.w3.org/2001/XMLSchema-instance"

         xsi:schemaLocation="http://maven.apache.org/POM/4.0.0 http://maven.apache.org/xsd/maven-4.0.0.xsd">

    <modelVersion>4.0.</modelVersion>

    <parent>

        <groupId>org.springframework.boot</groupId>

        <artifactId>spring-boot-starter-parent</artifactId>

        <version>2.1..RELEASE</version>

        <relativePath/> <!-- lookup parent from repository -->

    </parent>

    <groupId>com.cxy</groupId>

    <artifactId>activtiboot</artifactId>

    <version>0.0.-SNAPSHOT</version>

    <name>activtiboot</name>

    <description>Demo project for Spring Boot</description>

    <properties>

        <java.version>1.8</java.version>

    </properties>

    <dependencies>

        <dependency>

            <groupId>org.springframework.boot</groupId>

            <artifactId>spring-boot-starter-web</artifactId>

        </dependency>

        <dependency>

            <groupId>org.springframework.boot</groupId>

            <artifactId>spring-boot-starter-actuator</artifactId>

        </dependency>

        <dependency>

            <groupId>org.springframework.boot</groupId>

            <artifactId>spring-boot-starter-hateoas</artifactId>

        </dependency>

        <dependency>

            <groupId>org.springframework.boot</groupId>

            <artifactId>spring-boot-starter-test</artifactId>

            <scope>test</scope>

        </dependency>

    </dependencies>

    <build>

        <plugins>

            <plugin>

                <groupId>org.springframework.boot</groupId>

                <artifactId>spring-boot-maven-plugin</artifactId>

            </plugin>

        </plugins>

    </build>

</project>
二 控制类:
package com.cxy.activtiboot.controller;

import org.springframework.web.bind.annotation.RequestMapping;

import org.springframework.web.bind.annotation.RestController;

/***

 * @ClassName: HomeController

 * @Description:

 * @Auther: cxy

 * @Date: 2019/2/15:16:11

 * @version : V1.0

 */

@RestController

public class HomeController {

    @RequestMapping("/get")

    public  String get(){

        return "hellowolrd";

    }

}
三:peizhi;
management.endpoints.web.exposure.include=*
四 启动
package com.cxy.activtiboot;

import org.springframework.boot.SpringApplication;

import org.springframework.boot.autoconfigure.SpringBootApplication;

@SpringBootApplication

public class ActivtibootApplication {

    public static void main(String[] args) {

        SpringApplication.run(ActivtibootApplication.class, args);

    }

}
运行结果:
http://localhost:8080/actuator
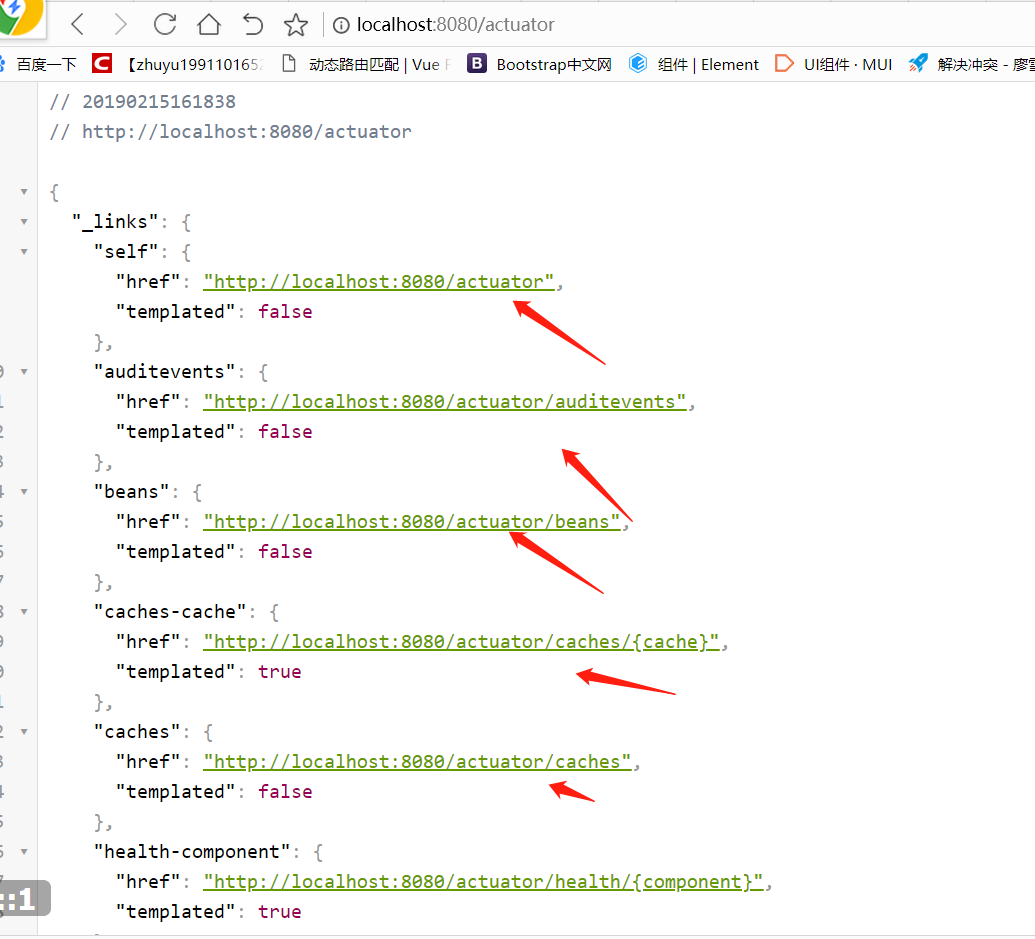
这些路径是可以点击的,

springboot整合actuator,进行运维监控的更多相关文章
- SpringBoot整合Actuator进行健康监控
一.Actuator介绍 SpringBoot自带监控功能Actuator,通过 restful api 请求来监管.审计.收集应用的运行情况,可以帮助实现对程序内部运行情况监控,比如监控状况.Bea ...
- springboot整合druid和配置资源监控
1.添加依赖,在maven repository中搜索 <dependency> <groupId>com.alibaba</groupId> <artifa ...
- SpringBoot整合SpringAdmin搭建监控平台
在SpringBoot整合Actuator进行健康监控中,胜金讲述了通过Actuator进行健康监控,但是学习API并根据API开发前端需要花费相当大的精力,本次胜金就写一下通过SpringAdmin ...
- SpringBoot整合Swagger和Actuator
前言 本篇文章主要介绍的是SpringBoot整合Swagger(API文档生成框架)和SpringBoot整合Actuator(项目监控)使用教程. SpringBoot整合Swagger 说明:如 ...
- 十五:SpringBoot-配置Actuator组件,实现系统监控
SpringBoot-配置Actuator组件,实现系统监控 1.Actuator简介 1.1 监控组件作用 1.2 监控分类 2.SpringBoot整合Actuator 2.1 核心依赖Jar包 ...
- SpringBoot系列: Actuator监控
Sprng Boot 2 actuator变动加大, 网上很多资料都都已经过期. ============================配置项============================ ...
- SpringBoot系列七:SpringBoot 整合 MyBatis(配置 druid 数据源、配置 MyBatis、事务控制、druid 监控)
1.概念:SpringBoot 整合 MyBatis 2.背景 SpringBoot 得到最终效果是一个简化到极致的 WEB 开发,但是只要牵扯到 WEB 开发,就绝对不可能缺少数据层操作,所有的开发 ...
- SpringBoot集成Actuator监控管理
1.说明 本文详细介绍Spring Boot集成Actuator监控管理的方法, 基于已经创建好的Spring Boot工程, 然后引入Actuator依赖, 介绍监控管理相关功能的使用. Sprin ...
- SpringBoot整合Mybatis之进门篇
已经有好些日子没有总结了,不是变懒了,而是我一直在奋力学习springboot的路上,现在也算是完成了第一阶段的学习,今天给各位总结总结. 之前在网上找过不少关于springboot的教程,都是一些比 ...
随机推荐
- 修改Windows帐户密码,导致Sql Server 2000无法启动
修改Windows帐户密码,导致Sql Server 2000无法启动. --现象以管理员或同等权限用户登录 Windows XP,建立 Sql Server 2000 数据库.之后,在修改此 Win ...
- ORA-00600:内部错误代码,参数:[kpnxdcbk-2],[],[],[],[],[],[],[],[],[],[],[]
由于最近工作中常出现ORA-00600:内部错误代码,参数:[kpnxdcbk-2],[],[],[],[],[],[],[],[],[],[],[]这种异常!所以在这里讲一下我的处理方法. 笔者所遇 ...
- H264中的SPS、PPS提取与作用<转>
牛逼的视频会议网站:http://wmnmtm.blog.163.com/blog/#m=0 ++++++++++++++++++++++++++++++++++++++++++++++++++++ ...
- C#WinForm如何调整控件的Tab按键顺序
在日常生活中,很多用户都会有使用Tab键的习惯.而在C#的WinForm开发中,Tab按键的顺序默认是你拖拽进窗体的顺序.那么我们如何修改这个顺序呢?答案如下(以VS2010为例). 只需要点击[视图 ...
- [Python Study Notes]pandas.DataFrame.plot()函数绘图
''''''''''''''''''''''''''''''''''''''''''''''''''''''''''''''''''''''''''''''''''''''''''''''''''' ...
- 基于C++求两个数的最大公约数最小公倍数
求x,y最大公约数的函数如下: int gys(int x,int y) { int temp; while(x) {temp=x; x=y%x; y=temp;} return y; } x=y的时 ...
- 关于android中出现failed to read row 0,column -1错误
该错误出现的原因是Cursor.getColumnIndex()的参数列名不存在或者错误,这时返回值为-1.出现该错误
- 解决列表中增加字典覆盖之前相同key的字典
dic = {} lst = [] # 先声明一个字典和一个列表 dic['name'] = "chenrun" lst.append(dic) print(lst) dic[&q ...
- 【总结整理】高德LBS开放平台学习
高德LBS开放平台地址 http://lbs.amap.com/api/javascript-api/guide/create-map/mapstye 概述->示例中心Demo体验-> ...
- css知多少(10)——display(转)
css知多少(10)——display 1. 引言 网页的所有元素,除了“块”就是“流”,而且“流”都是包含在“块”里面的(最外层的body就是一个“块”).在本系列一开始讲<浏览器默认样式 ...