Vue.js使用-组件(下篇)
上一节,我们定义了组件的基本使用,下面我们看看组件其他的一些特性。
1.组件作用域
同时在Vue对象和组件中定义一个属性,显示结果是怎样的呢?
<!DOCTYPE html>

<html lang="en">

<head>

    <meta charset="UTF-8">

    <title>Title</title>

</head>

<body>

    <div id="app">

        {{ msg }}

        <my-component></my-component>

    </div>

</body>

<script src="js/vue.js"></script>

<script>

    new Vue({

        el: '#app',

        data: {

            msg: 'hello world'

        },

        components: {

            'my-component':{

                template: '<div>{{ msg }}</div>',

                data: function () {

                    return {

                        msg: 'hello shijingjing'

                    }

                }

            }

        }

    })

</script>

</html>
运行结果:

可见,都在各自的作用域内有效,且组件不影响Vue定义的属性。
如何让组件使用Vue定义的属性呢,上节已经提到过,使用props属性。如下:
<!DOCTYPE html>

<html lang="en">

<head>

    <meta charset="UTF-8">

    <title>Title</title>

</head>

<body>

    <div id="app">

        <my-component v-bind:my-msg="msg"></my-component>

    </div>

</body>

<script src="js/vue.js"></script>

<script>

    new Vue({

        el: '#app',

        data: {

            msg: 'hello world'

        },

        components: {

            'my-component':{

                template: '<div>{{ myMsg }}</div>',

                props: ['myMsg']

            }

        }

    })

</script>

</html>
运行结果:

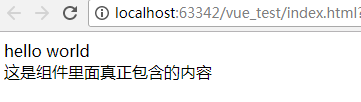
2.slot占位符
slot的意思是卡槽,也就是一个占位符,内容由组件包含的内容而定。
<!DOCTYPE html>

<html lang="en">

<head>

    <meta charset="UTF-8">

    <title>Title</title>

</head>

<body>

    <div id="app">

        <my-component>

            <div>这是组件里面真正包含的内容</div>

        </my-component>

    </div>

</body>

<script src="js/vue.js"></script>

<script>

    new Vue({

        el: '#app',

        components: {

            'my-component':{

                template: '<div>hello world</div><slot>这只是一个占位符,具体内容由component包含的内容来定</slot>'

            }

        }

    })

</script>

</html>
运行结果:
如果组件里面没有包含内容呢?
<!DOCTYPE html>

<html lang="en">

<head>

    <meta charset="UTF-8">

    <title>Title</title>

</head>

<body>

    <div id="app">

        <my-component>

        </my-component>

    </div>

</body>

<script src="js/vue.js"></script>

<script>

    new Vue({

        el: '#app',

        components: {

            'my-component':{

                template: '<div>hello world</div><slot>这只是一个占位符,具体内容由component包含的内容来定</slot>'

            }

        }

    })

</script>

</html>
运行结果:

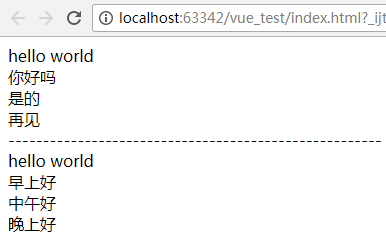
可以再组件中包含占位符,来定义更为通用的组件。如一个对话框组件,不同时候弹出的标题不同,那么标题可以使用slot定义,真正内容放到组件内部。
<!DOCTYPE html>

<html lang="en">

<head>

    <meta charset="UTF-8">

    <title>Title</title>

</head>

<body>

    <div id="app">

        <my-component>

            <header slot="header">

                你好吗

            </header>

            <div slot="body">

                是的

            </div>

            <footer slot="footer">

                再见

            </footer>

        </my-component>

        ------------------------------------------------------

        <my-component>

            <header slot="header">

                早上好

            </header>

            <div slot="body">

                中午好

            </div>

            <footer slot="footer">

                晚上好

            </footer>

        </my-component>

    </div>

</body>

<script src="js/vue.js"></script>

<script>

    new Vue({

        el: '#app',

        components: {

            'my-component':{

                template: '<div>hello world</div><slot name="header"></slot><slot name="body"></slot><slot name="footer"></slot>'

            }

        }

    })

</script>

</html>
运行结果:
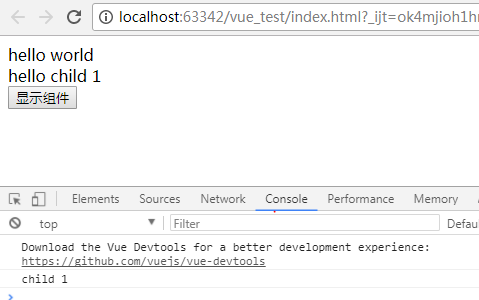
3.组件之间数据访问
1)父组件访问子组件属性 $children
<!DOCTYPE html>

<html lang="en">

<head>

    <meta charset="UTF-8">

    <title>Title</title>

</head>

<body>

    <div id="app">

        <my-component></my-component>

    </div>

</body>

<script src="js/vue.js"></script>

<script>

    new Vue({

        el: '#app',

        components: {

            'my-component':{

                template: '<div>hello world</div><child-component1></child-component1><button v-on:click="showChildData">显示组件</button>',

                components:{

                    'child-component1':{

                        template: '<div>hello child 1</div>',

                        data: function () {

                            return {

                                msg: 'child 1'

                            }

                        }

                    }

                },

                methods:{

                    showChildData: function () {

                        console.log(this.$children[0].msg);

                    }

                }

            }

        }

    })

</script>

</html>
运行结果:

除了$children,还可以使用v-ref:c1来给组件指定一个索引名称c1,查询子组件时,使用$refs.c1找到这个子组件。
<!DOCTYPE html>

<html lang="en">

<head>

    <meta charset="UTF-8">

    <title>Title</title>

</head>

<body>

    <div id="app">

        <my-component></my-component>

    </div>

</body>

<script src="js/vue.js"></script>

<script>

    new Vue({

        el: '#app',

        components: {

            'my-component':{

                template: '<div>hello world</div><child-component1 v-ref:c1></child-component1><button v-on:click="showChildData">显示子组件</button>',

                components:{

                    'child-component1':{

                        template: '<div>hello child 1</div>',

                        data: function () {

                            return {

                                msg: 'child 1'

                            }

                        }

                    }

                },

                methods:{

                    showChildData: function () {

                        console.log(this.$refs.c1.msg);

                    }

                }

            }

        }

    })

</script>

</html>
运行结果:
2)子组件访问父组件属性 $parent
<!DOCTYPE html>

<html lang="en">

<head>

    <meta charset="UTF-8">

    <title>Title</title>

</head>

<body>

    <div id="app">

        <my-component></my-component>

    </div>

</body>

<script src="js/vue.js"></script>

<script>

    new Vue({

        el: '#app',

        components: {

            'my-component':{

                template: '<div>hello world</div><child-component1></child-component1>',

                components:{

                    'child-component1':{

                        template: '<div>hello child 1</div><button v-on:click="showParentData">显示父组件</button>',

                        methods:{

                            showParentData: function () {

                                console.log(this.$parent.msg);

                            }

                        }

                    }

                },

                data: function () {

                    return {

                        msg: 'parent'

                    }

                }

            }

        }

    })

</script>

</html>
运行结果:

3)子组件访问根组件属性 $root
<!DOCTYPE html>

<html lang="en">

<head>

    <meta charset="UTF-8">

    <title>Title</title>

</head>

<body>

    <div id="app">

        <my-component></my-component>

    </div>

</body>

<script src="js/vue.js"></script>

<script>

    new Vue({

        el: '#app',

        data: {

            msg: 'root'

        },

        components: {

            'my-component':{

                template: '<div>hello world</div><child-component1></child-component1>',

                components:{

                    'child-component1':{

                        template: '<div>hello child 1</div><button v-on:click="showRootData">显示根组件</button>',

                        methods:{

                            showRootData: function () {

                                console.log(this.$root.msg);

                            }

                        }

                    }

                }

            }

        }

    })

</script>

</html>
运行结果:

可见,根元素指的是Vue对象
由$children,$parent,$root可以实现父子组件,以及Vue对象间的数据交互,但是还是尽量使用props属性来传递数据,
可以避免父子组件的过度耦合,以及子组件修改了父组件中的数据。
4.组件之间事件传递
1)派发事件$dispatch,事件沿着父链冒泡
<!DOCTYPE html>

<html lang="en">

<head>

    <meta charset="UTF-8">

    <title>Title</title>

</head>

<body>

    <div id="app">

        {{ message }}

        <my-component></my-component>

    </div>

</body>

<script src="js/vue.js"></script>

<script>

    new Vue({

        el: '#app',

        data: {

            message: ''

        },

        components: {

            'my-component':{

                template: ' <input v-model="msg" /><button v-on:click="notify">dispatch</button>',

                data: function () {

                    return {

                        msg: ''

                    }

                },

                methods:{

                    notify: function () {

                        this.$dispatch('child-msg', this.msg);

                    }

                }

            }

        },

        events:{

            'child-msg': function (msg) {

                this.message = msg;

            }

        }

    })

</script>

</html>
运行结果:

$.dispatch会将事件派发到父组件的events事件,父组件接收到子组件的派发后,调用child-msg事件。
2)broadcast广播事件,事件向下传导给所有的子组件
<!DOCTYPE html>

<html lang="en">

<head>

    <meta charset="UTF-8">

    <title>Title</title>

</head>

<body>

    <div id="app">

        <input type="text" v-model="message"/>

        <button v-on:click="notify">broadcast</button>

        <my-component></my-component>

    </div>

</body>

<script src="js/vue.js"></script>

<script>

    new Vue({

        el: '#app',

        data: {

            message: ''

        },

        components: {

            'my-component':{

                template: '{{msg}}',

                data: function () {

                    return {

                        msg: ''

                    }

                },

                events:{

                    'parent-msg': function (msg) {

                        this.msg = msg;

                    }

                }

            }

        },

        methods:{

            notify: function () {

                this.$broadcast('parent-msg', this.message);

            }

        }

    })

</script>

</html>
运行结果:

$.broadcast会将事件广播到子组件的events事件,子组件接收到父组件的广播后,调用parent-msg事件。
Vue.js使用-组件(下篇)的更多相关文章
- Vue.js多重组件嵌套
Vue.js多重组件嵌套 Vue.js中提供了非常棒的组件化思想,组件提高了代码的复用性.今天我们来实现一个形如 <app> <app-header></app-head ...
- 【Vue课堂】Vue.js 父子组件之间通信的十种方式
这篇文章介绍了Vue.js 父子组件之间通信的十种方式,不管是初学者还是已经在用 Vue 的开发者都会有所收获.无可否认,现在无论大厂还是小厂都已经用上了 Vue.js 框架,简单易上手不说,教程详尽 ...
- 【Vue.js实战案例】- Vue.js递归组件实现组织架构树和选人功能
大家好!先上图看看本次案例的整体效果. 浪奔,浪流,万里涛涛江水永不休.如果在jq时代来实这个功能简直有些噩梦了,但是自从前端思想发展到现在的以MVVM为主流的大背景下,来实现一个这样繁杂的功能简直不 ...
- Vue.js之组件传值
Vue.js之组件传值 属性传值可以从父组件到子组件,也可以从子组件到父组件. 这里讲一下从父组件到子组件的传值 还以上次的demo为例,demo里有APP.vue是父组件,Header.vue,Us ...
- Vue.js之组件嵌套小demo
Vue.js之组件嵌套的小demo项目 第一步:初始化一个wabpack项目,这里不在复述.第二步:在components文件夹下新建Header.vue Footer.vue和Users.vue三个 ...
- Vue.js之组件嵌套
Vue.js中组件嵌套有两种方式 第一种:注册全局组件 例如在components文件夹下新建一个User.vue组件,然后在main.js文件中注册全局组件 //注册全局组件 Vue.compone ...
- vue.js 同级组件之间的值传递方法(uni-app通用)
vue.js 兄弟组件之间的值传递方法 https://blog.csdn.net/jingtian678/article/details/81634149
- Vue.js说说组件
什么是组件:组件是Vue.js最强大的功能之一.组件可以扩展HTML元素,封装可重用的代码.在较高层面上,组件是自定义的元素,Vue.js的编译器为它添加特殊功能.在有些情况下,组件也可以是原生HTM ...
- Vue.js 递归组件实现树形菜单
最近看了 Vue.js 的递归组件,实现了一个最基本的树形菜单. 项目结构: main.js 作为入口,很简单: import Vue from 'vue' Vue.config.debug = tr ...
随机推荐
- gnu screen的用法
在使用ssh或者telnet登录远程主机后执行一些耗时的命令, 如果此时ssh或者telnet中断, 那么远程主机上正在执行的程序或者说命令也会被迫终止. screen能够很好地解决这个问题, scr ...
- 解决inline-block上下不对齐
一开始都是行内元素,但是左边按钮和右边标题就是对不齐,于是,设置左边按钮float:left就可以了. <header class="right-header"> &l ...
- 使用Thrift让Python为Java提供服务
Thrift是基于TCP的,谷歌的GRPC是基于HTTP的.Thrift和GRPC都是比直接写个web接口进行调用更完美的方式,最明显的一点就是:我们可以定义结构体,避免了手动解析的过程. 但是,在将 ...
- grib文件
一.grib文件简介 WMO是世界气象组织,world meteorology organization. GRIB是WMO开发的一种用于交换和存储规则分布数据的二进制文件格式.最初GRIB表示&qu ...
- Using PHP as a Spring MVC View via Quercus(转)
原贴: http://blog.caucho.com/2009/04/14/using-php-as-a-spring-mvc-view-via-quercus/ This week, I’ve be ...
- NSObject协议中方法:description 和 debugDescription
description基本概念 1.NSLog(@"%@", objectA);这会自动调用objectA的description方法来输出ObjectA的描述信息. 2.desc ...
- scp的两种方式
如果host A 与 host B建立了信任连接(B有A的public key),那么从A向B传送文件,或者从B上传回文件都可以省略密码.但是前提是命令是在A上执行的. 从A向B拷贝文件 on hos ...
- iCheck的全选和获取value
一.全选 在使用jQuery iCheck 插件的时候遇到了一个问题,就是当我们使用普通的js全选功能无效了. $("#checkall").click( function(){ ...
- Snip for Mac(桌面截图工具)安装
1.软件简介 Snip 一款用于桌面截图的工具. 2.资源列表 链接 提取密码 系统要求 软件语言 Snip for Mac v2.0 (5771) fgab macOS 10.6.8 及以上 ...
- mysql 1449 : The user specified as a definer ('root'@'%') does not exist
1)创建试图时抛出此错误信息,如下图所示: 2)从网上搜索了一下,是SQL权限问题,通过如下的方式便可以解决: 3)再次执行创建视图的语句,验证一下问题是否已经解决,可以了,如下所示: 4)参考如下所 ...