Spring学习总结六——SpringMVC一
一:什么是springMVC
MVC,顾名思义,m就是model模型,包括处理业务、访问数据库以及封装数据实体类等,view视图层
负责和用户进行交互,就是展示给用户的部分,包括jsp页面,html等,c就是控制器,是controller层。
大致的访问流程是:
1:浏览器发送请求到服务器,然后服务器将请求分配给dispatcher分发器(在web.xml中配置)
2:然后dispatcher分发器调用handlerMapping将前台请求地址与controller控制器进行匹配,这里就要
用到handlerMapping组件
3:controller控制层调用handlerRequest方法处理请求,当然包括业务以及与数据库交互的部分,然后将
处理结果以及页面封装到ModelAndView对象中返回给核心分发器
4:然后分发器调用viewResolver组件将modelandview中返回的视图名称按照viewResolver进行拼接,得到
访问的视图,然后将数据填充到视图中
5:将jsp处理结果返回到浏览器展示
二:示例演示
下面通过示例来演示:
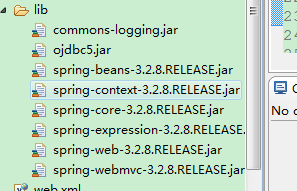
1:第一步配置环境,在lib中导入如下jar包
2:配置spring容器spring-mvc.xml
 <?xml version="1.0" encoding="UTF-8"?>

 <beans xmlns="http://www.springframework.org/schema/beans"

     xmlns:xsi="http://www.w3.org/2001/XMLSchema-instance" xmlns:context="http://www.springframework.org/schema/context"

     xmlns:jdbc="http://www.springframework.org/schema/jdbc" xmlns:jee="http://www.springframework.org/schema/jee"

     xmlns:tx="http://www.springframework.org/schema/tx" xmlns:jpa="http://www.springframework.org/schema/data/jpa"

     xmlns:util="http://www.springframework.org/schema/util" xmlns:mvc="http://www.springframework.org/schema/mvc"

     xsi:schemaLocation="

         http://www.springframework.org/schema/beans http://www.springframework.org/schema/beans/spring-beans-3.2.xsd

         http://www.springframework.org/schema/context http://www.springframework.org/schema/context/spring-context-3.2.xsd

         http://www.springframework.org/schema/jdbc http://www.springframework.org/schema/jdbc/spring-jdbc-3.2.xsd

         http://www.springframework.org/schema/jee http://www.springframework.org/schema/jee/spring-jee-3.2.xsd

         http://www.springframework.org/schema/tx http://www.springframework.org/schema/tx/spring-tx-3.2.xsd

         http://www.springframework.org/schema/data/jpa http://www.springframework.org/schema/data/jpa/spring-jpa-1.3.xsd

         http://www.springframework.org/schema/util http://www.springframework.org/schema/util/spring-util-3.2.xsd

         http://www.springframework.org/schema/mvc http://www.springframework.org/schema/mvc/spring-mvc-3.2.xsd">

     <!-- 定义请求处理映射 -->

     <bean id="handlerMapping" class="org.springframework.web.servlet.handler.SimpleUrlHandlerMapping">

         <!-- 指定请求与controller对应关系 -->

         <property name="mappings" ref="urlMappings"/>

     </bean>

     <!--定义映射关系 -->

     <util:properties id="urlMappings">

         <prop key="/hello.form">helloController</prop>

     </util:properties>

     <bean id="helloController" class="com.hlcui.controller.HelloController"></bean>

     <!-- 定义viewResolver解析器-->

     <bean id="viewResolver" class="org.springframework.web.servlet.view.InternalResourceViewResolver">

         <property name="prefix" value="/WEB-INF/jsp/"/>

         <property name="suffix" value=".jsp"/>

     </bean>

     </beans>
3:配置web.xml,dispatcher控制器在这里配置
 <?xml version="1.0" encoding="UTF-8"?>

 <web-app version="2.5"

     xmlns="http://java.sun.com/xml/ns/javaee"

     xmlns:xsi="http://www.w3.org/2001/XMLSchema-instance"

     xsi:schemaLocation="http://java.sun.com/xml/ns/javaee

     http://java.sun.com/xml/ns/javaee/web-app_2_5.xsd">

     <servlet>

         <servlet-name>springmvc</servlet-name>

         <servlet-class>org.springframework.web.servlet.DispatcherServlet</servlet-class>

         <!-- 指定配置文件的位置 -->

         <init-param>

             <param-name>contextConfigLocation</param-name>

             <param-value>classpath:spring-mvc.xml</param-value>

         </init-param>

         <load-on-startup>1</load-on-startup>

     </servlet>

     <servlet-mapping>

         <servlet-name>springmvc</servlet-name>

         <url-pattern>*.form</url-pattern>

     </servlet-mapping>

   <welcome-file-list>

     <welcome-file>index.jsp</welcome-file>

   </welcome-file-list>

 </web-app>
4:HelloController类
 /**

  *

  */

 package com.hlcui.controller;

 import javax.servlet.http.HttpServletRequest;

 import javax.servlet.http.HttpServletResponse;

 import org.springframework.web.servlet.ModelAndView;

 import org.springframework.web.servlet.mvc.Controller;

 /**

  * @author Administrator

  *

  */

 public class HelloController implements Controller {

     public ModelAndView handleRequest(HttpServletRequest request,

             HttpServletResponse response) throws Exception {

         System.out.println("处理业务逻辑!");

         ModelAndView model = new ModelAndView("hello");

         return model;

     }

 }
5:hello.jsp页面
 <%@ page language="java" import="java.util.*" pageEncoding="ISO-8859-1"%>

 <%

 String path = request.getContextPath();

 String basePath = request.getScheme()+"://"+request.getServerName()+":"+request.getServerPort()+path+"/";

 %>

 <!DOCTYPE HTML PUBLIC "-//W3C//DTD HTML 4.01 Transitional//EN">

 <html>

   <head>

     <base href="<%=basePath%>">

     <title>My JSP 'hello.jsp' starting page</title>

     <meta http-equiv="pragma" content="no-cache">

     <meta http-equiv="cache-control" content="no-cache">

     <meta http-equiv="expires" content="0">

     <meta http-equiv="keywords" content="keyword1,keyword2,keyword3">

     <meta http-equiv="description" content="This is my page">

     <!--

     <link rel="stylesheet" type="text/css" href="styles.css">

     -->

   </head>

   <body>

     This is my JSP page. <br>

   </body>

 </html>
6:启动服务器,然后通过浏览器访问
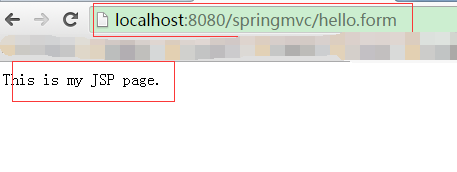
访问成功!
三:使用注解的方式对案例进行重构
1:在HelloController类中,可以使用@Controller注解在类上,替代实现Controller接口,需要在
spring容器中配置组件扫描:
 <!-- 组件扫描 -->

     <context:component-scan base-package="com.hlcui.controller"/>
2:在类上或者方法上使用@RequestMapping注解替换在spring容器中配置urlMapping映射bean
需要在spring容器中配置注解扫描:
 <!-- RequestMapping映射配置 -->

     <mvc:annotation-driven/>
3:修改后的类以及配置文件如下
     <!-- 组件扫描 -->

     <context:component-scan base-package="com.hlcui.controller"/>

     <!-- RequestMapping映射配置 -->

     <mvc:annotation-driven/>
 @Controller

 @RequestMapping("/web")

 public class HelloController {

     @RequestMapping("/hello.form")

     public String execute(HttpServletRequest request,

             HttpServletResponse response) throws Exception {

         System.out.println("处理业务逻辑!");

         return "hello";

     }

 }
4:启动服务器,使用浏览器进行访问
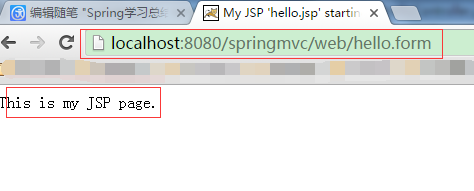
访问成功!
Spring学习总结六——SpringMVC一的更多相关文章
- MyEclipse Spring 学习总结三 SpringMVC
MyEclipse Spring 学习总结三 SpringMVC 一.SpringMVC原理 1.Springmvc 框架介绍 1)Spring 框架停工了构建Web应用程序的全功能MVC模块.Spr ...
- spring学习四:springMVC
ref:http://www.cnblogs.com/ysocean/tag/SpringMVC%E5%85%A5%E9%97%A8%E7%B3%BB%E5%88%97/ Spring MVC的处理流 ...
- MyEclipse Spring 学习总结三 SpringMVC 表单处理
SpringMVC 表单处理的项目结构如下图所示: Student.java 文件 public class Student { private Integer age; private String ...
- SpringMVC学习总结(六)——SpringMVC文件上传例子(2)
基本的SpringMVC的搭建在我的上一篇文章里已经写过了,这篇文章主要说明一下使用SpringMVC进行表单上的文件上传以及多个文件同时上传的不同方法 一.配置文件: SpringMVC 用的是 的 ...
- spring学习 十六 spring加载属性文件
第一步:创建一个properties文件,以数据库链接作为实例db.properties jdbc.url=jdbc:mysql://192.168.153.128:3306/mybaties?cha ...
- Spring学习笔记六:Spring整合Hibernate
转载请注明原文地址:http://www.cnblogs.com/ygj0930/p/6785323.html 前言:整合概述 Spring整合Hibernate主要是把Hibernate中常用的S ...
- Spring学习(十六)----- Spring AOP实例(Pointcut(切点),Advisor)
在上一个Spring AOP通知的例子,一个类的整个方法被自动拦截.但在大多数情况下,可能只需要一种方式来拦截一个或两个方法,这就是为什么引入'切入点'的原因.它允许你通过它的方法名来拦截方法.另外, ...
- Spring学习(六)——集成memcached客户端
memcached是高性能的分布式内存缓存服务器.许多Web应用都将数据保存到RDBMS中,应用服务器从中读取数据并在浏览器中显示. 但随着数据量的增大.访问的集中,就会出现RDBMS的负担加重.数据 ...
- Spring学习(六)—— Spring注解(二)
核心原理 1. 用户发送请求给服务器.url:user.do 2. 服务器收到请求.发现Dispatchservlet可以处理.于是调用DispatchServlet. 3. ...
随机推荐
- 【WPF/WAF】使用System.Windows.Interactivity交互事件
下载System.Windows.Interactivity.dll文件,并引入项目中(在VS项目的引用列表中可以看到).可在Nuget搜索System.Windows.Interactivity下载 ...
- Docker常用命令<转>
创建redis服务端docker run -p 6379:6379 -d --name redis-server docker.io/redis:3.0.7 redis-server -- port ...
- go编译
1. Go编译器 两种官方编译器,gc和gccgo,其中gccgo基于gcc后端. go编译器支持8种指令集,不同建构编译质量不同: amd64 (also known ) (x86 or x86-) ...
- WmS具体解释(二)之怎样理解Window和窗体的关系?基于Android7.0源代码
上篇博客(WmS具体解释(一)之token究竟是什么?基于Android7.0源代码)中我们简要介绍了token的作用,这里涉及到的概念非常多,当中出现频率最高的要数Window和窗体这一对搭档了,那 ...
- java对mongoDB的基本操作 ,游标使用
package com.mongodb.text; import java.net.UnknownHostException; import java.util.List; import org.bs ...
- print、print_r、echo到底有什么区别?
echo和print都可以做输出,不同的是,echo不是函数,没有返回值,而print是一个函数有返回值,所以相对而言如果只是输出 echo 会更快,而print_r通常用于打印变量的相关信息,通常在 ...
- 关于HttpWebRequest上传文件
我们web 操作离不开 http请求响应 HttpWebRequest上传文件也是一样的道理 下面码一些代码: private void UploadFile(string strRequestUri ...
- 关于Unity中3D声音的使用
3D声音 3D立体声和2D声不同的地方是它是会随着距离衰减的,距离越近声音越大,距离越远声音越小. 1: 声音: 背景音乐和音效; 2: 声音文件支持的格式: ogg, mp3, wave, AIFF ...
- 【转】JS对Cookie的读写删除
JavaScript是运行在客户端的脚本,因此一般是不能够设置Session的,因为Session是运行在服务器端的.而cookie是运行在客户端的,所以可以用JS来设置cookie. 假设有这样一种 ...
- (笔记)Mysql实例:建库建表并插入数据1
drop database if exists school; // 如果存在school则删除create database school; // 建立库schooluse school; / ...