在ubuntu 上创建 ssl 证书
soap webservice 调试工具: soap UI, 可以下载下来玩一玩。
Introduction
TLS, or transport layer security, and its predecessor SSL, which stands for secure sockets layer, are web protocols used to wrap normal traffic in a protected, encrypted wrapper.
Using this technology, servers can send traffic safely between the server and the client without the concern that the messages will be intercepted and read by an outside party. The certificate system also assists users in verifying the identity of the sites that they are connecting with.
In this guide, we will show you how to set up a self-signed SSL certificate for use with an Nginx web server on an Ubuntu 14.04 server. A self-signed certificate will not validate the identity of your server for your users since it is not signed by one of their web browser's trusted certificate authorities, but it will allow you to encrypt communications with your web clients.
Prerequisites
To get started on this guide, you will need to set up some basic things on your server.
You should have a non-root user available who has sudo privileges. You can learn how to set up such a user account by following steps 1-4 in our initial server setup for Ubuntu 14.04.
After that, you'll also need to have the Nginx web server installed. If you would like to install an entire LEMP (Linux, Nginx, MySQL, PHP) stack on your server, you can follow our guide on setting up LEMP on Ubuntu 14.04.
If you just want the Nginx web server, you can instead just type:
sudo apt-get update

sudo apt-get install nginx
Step One — Create the SSL Certificate
We can start off by creating a directory that will be used to hold all of our SSL information. We should create this under the Nginx configuration directory:
sudo mkdir /etc/nginx/ssl
Now that we have a location to place our files, we can create the SSL key and certificate files in one motion by typing:
sudo openssl req -x509 -nodes -days 365 -newkey rsa:2048 -keyout /etc/nginx/ssl/nginx.key -out /etc/nginx/ssl/nginx.crt
You will be asked a series of questions. Before we go over that, let's take a look at what is happening in the command we are issuing:
- openssl: This is the basic command line tool for creating and managing OpenSSL certificates, keys, and other files.
- req: This subcommand specifies that we want to use X.509 certificate signing request (CSR) management. The "X.509" is a public key infrastructure standard that SSL and TLS adheres to for its key and certificate management. We want to create a new X.509 cert, so we are using this subcommand.
- -x509: This further modifies the previous subcommand by telling the utility that we want to make a self-signed certificate instead of generating a certificate signing request, as would normally happen.
- -nodes: This tells OpenSSL to skip the option to secure our certificate with a passphrase. We need Nginx to be able to read the file, without user intervention, when the server starts up. A passphrase would prevent this from happening because we would have to enter it after every restart.
- -days 365: This option sets the length of time that the certificate will be considered valid. We set it for one year here.
- -newkey rsa:2048: This specifies that we want to generate a new certificate and a new key at the same time. We did not create the key that is required to sign the certificate in a previous step, so we need to create it along with the certificate. The
rsa:2048portion tells it to make an RSA key that is 2048 bits long. - -keyout: This line tells OpenSSL where to place the generated private key file that we are creating.
- -out: This tells OpenSSL where to place the certificate that we are creating.
As we stated above, these options will create both a key file and a certificate. We will be asked a few questions about our server in order to embed the information correctly in the certificate.
Fill out the prompts appropriately. The most important line is the one that requests the Common Name (e.g. server FQDN or YOUR name). You need to enter the domain name that you want to be associated with your server. You can enter the public IP address instead if you do not have a domain name.
The entirety of the prompts will look something like this:
Country Name (2 letter code) [AU]:US

State or Province Name (full name) [Some-State]:New York

Locality Name (eg, city) []:New York City

Organization Name (eg, company) [Internet Widgits Pty Ltd]:Bouncy Castles, Inc.

Organizational Unit Name (eg, section) []:Ministry of Water Slides

Common Name (e.g. server FQDN or YOUR name) []:your_domain.com

Email Address []:admin@your_domain.com
Both of the files you created will be placed in the /etc/nginx/ssl directory.
Step Two — Configure Nginx to Use SSL
We have created our key and certificate files under the Nginx configuration directory. Now we just need to modify our Nginx configuration to take advantage of these by adjusting our server block files. You can learn more about Nginx server blocks in this article.
Nginx versions 0.7.14 and above (Ubuntu 14.04 ships with version 1.4.6) can enable SSL within the same server block as regular HTTP traffic. This allows us to configure access to the same site in a much more succinct manner.
Your server block may look something like this:
server {

        listen 80 default_server;

        listen [::]:80 default_server ipv6only=on;

        root /usr/share/nginx/html;

        index index.html index.htm;

        server_name your_domain.com;

        location / {

                try_files $uri $uri/ =404;

        }

}
The only thing we would need to do to get SSL working on this same server block, while still allowing regular HTTP connections, is add a these lines:
server {

        listen 80 default_server;

        listen [::]:80 default_server ipv6only=on;

        listen 443 ssl;

        root /usr/share/nginx/html;

        index index.html index.htm;

        server_name your_domain.com;

        ssl_certificate /etc/nginx/ssl/nginx.crt;

        ssl_certificate_key /etc/nginx/ssl/nginx.key;

        location / {

                try_files $uri $uri/ =404;

        }

}
When you are finished, save and close the file.
Now, all you have to do is restart Nginx to use your new settings:
sudo service nginx restart
This should reload your site configuration, now allowing it to respond to both HTTP and HTTPS (SSL) requests.
Step Three — Test your Setup
Your site should now have SSL functionality, but we should test it to make sure.
First, let's test to make sure we can still access the site with using normal HTTP. In your web browser, go to your server's domain name or IP address:
http://server_domain_or_IP
You should see your normal website. In my example, I'm just serving the default Nginx page:
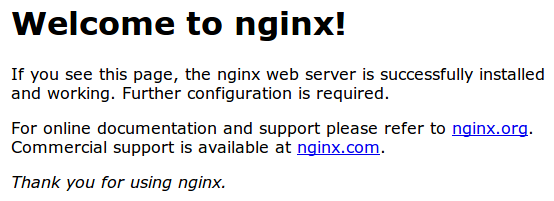
If you get this page, then your server is still handling HTTP requests correctly.
Now, we can check whether our server can use SSL to communicate. Do this by specifying the httpsprotocol instead of the http protocol.
https://server_domain_or_IP
You will likely get a warning in your web browser that looks something like this:
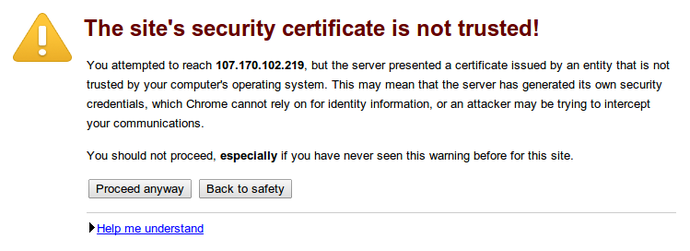
This is expected. It is telling you that it cannot verify the identity of the server you are trying to connect to because it isn't signed by a certificate authority that the browser has been configured to trust. Since we created a self-signed certificate, this makes perfect sense.
Click on "Proceed anyway", "Continue", or whatever similar option is available. You should see your site again:
Your browser may show the "https" crossed out in the address bar or a broken or crossed out "lock" icon. If you click on the lock icon, you can see some more information about the connection:
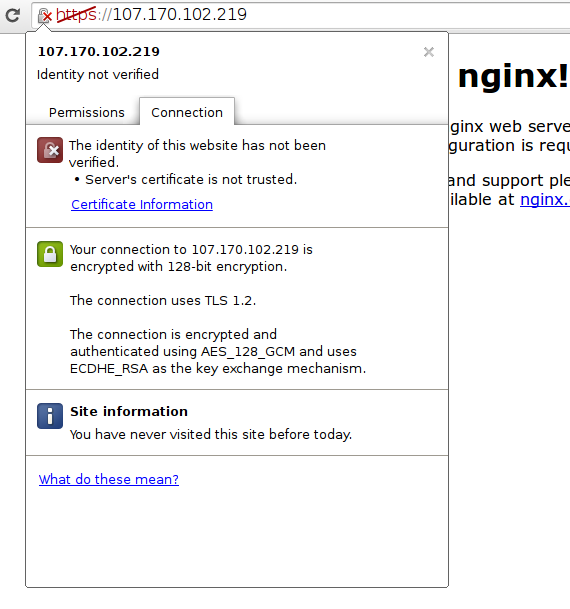
As you can see, the issue is only that the browser cannot verify the identity of the server because it isn't signed by a certificate authority that it is configured to trust. The middle section shows that the connection is encrypted, however, so we have achieved that goal.
Conclusion
You have configured your Nginx server to handle both HTTP and SSL requests. This will help you communicate with clients securely and avoid outside parties from being able to read your traffic.
If you are planning on using SSL for a public website, you should probably purchase an SSL certificate from a trusted certificate authority to prevent the scary warnings from being shown to each of your visitors.
在ubuntu 上创建 ssl 证书的更多相关文章
- 菜鸟玩云计算之十五:在Ubuntu上创建和管理Redhat虚拟机
菜鸟玩云计算之十五:在Ubuntu上创建和管理Redhat虚拟机 chedou@hgdb.net 虚拟机给工作带来巨大的便利,不仅仅体现在资源的按需使用,而且配置的迁移特别方便.本文将使用Ubuntu ...
- nginx上通过ssl证书将http转发为https
环境:阿里云linux,ngnix 1.16.0 ,ssl证书,XXXX.jar 0.自行在阿里云上下载免费的ssl证书.里面有2个文件.key和pem后面要用到. 1.首先将项目在linux上跑起来 ...
- 如何在 CentOS 7 上生成 SSL 证书为 Nginx 加密
本文首发:开发指南:如何在 CentOS 7 上安装 Nginx Let’s Encrypt 是由 Internet Security Research Group (ISRG) 开发的一个自由.自动 ...
- 在Apache服务器上安装SSL证书
参考:链接 前提条件 1.您的Apache服务器上已经开启了443端口(HTTPS服务的默认端口) // 开通443端口 firewall-cmd --zone=public --add-port=4 ...
- Nginx上安装SSL证书
准备 参考 :链接 下载的Nginx证书压缩文件解压后包含: .pem:证书文件.PEM文件的扩展名为CRT格式. .key:证书密钥文件.申请证书时如果未选择自动创建CRS,则下载的证书文件压缩包中 ...
- Ubuntu 上创建常用磁盘阵列
RAID(Redundant Array of Independent Disk 独立冗余磁盘阵列)技术是加州大学伯克利分校1987年提出,最初是为了组合小的廉价磁盘来代替大的昂贵磁盘,同时希望磁盘失 ...
- 如何在Ubuntu上创建及管理LXC容器?
将LXC安装到Ubuntu上 $ sudo apt-get install lxc 安装完毕之后,运行lxc-checkconifg工具,检查当前Linux内核支持LXC的情况.要是一切都已被启用,内 ...
- IIS 7上导入SSL证书
1.将SSL证书文件上传至服务器 2.导入证书 1)在IIS设置项中,打开‘服务器证书’ 2)选择导入 3)将网站绑定SSL证书
- WDCP上传SSL证书
1.在线申请SSL证书 2.网站管理>SSL证书上传 3.将key文件直接上传,cert文件内容复制到crt文件中,再上传 4.开启https 注意:同一个域名下解析的若干域名,只能走主域名的证 ...
随机推荐
- JavaScript(6)——事件1.0
---恢复内容开始--- 事件 好不容易回到正轨,好好学习,天天向上.今天写的是事件,感觉内容蛮多的,所以分了两篇写,主要写了事件流.事件处理程序.事件对象.恩,明天还会再有一篇,哈哈哈.我努力的!我 ...
- Python Cookbook - 1 - 数据结构和算法
1 序列解压:通过*来通配 *a, b = somelist, first, *mid, last = somelist, a, *b = somelist 2 使用双向队列: from col ...
- Ubuntu 12.04 中自定义DNS服务器设置
首先我们需要创建一个文件/etc/resolvconf/resolv.conf.d/tail: #vim /etc/resolvconf/resolv.conf.d/tail 然后我们在这个文件里写入 ...
- ZUFE OJ 2288 God Wang I
Description God Wang 是ZUFE的神犇,有一天他想到一种神奇的变换,并且将它命名为GodW变换 对于一个数字n,该变换后的值GodW(n)为,先令X=n 第一步,如果X为个位数,G ...
- selenium C#下的zencart自动化测试(WFloginUrlPayment)环境4.0
using System;using System.Collections.Generic;using System.ComponentModel;using System.Data;using Sy ...
- R语言笔记5--读数据
1.读文本文件数据 (1)先设置工作目录,把文本文件放于该目录下 备注:在记事本里写完数据后,按一下回车,负责在R语言中出现错误 (2)读剪贴板 文本或EXCEL的数据均可通过剪贴板操作 (3)读ex ...
- AIR使用文件对象操作文件和目录
文件对象是啥?文件对象(File对象)是在文件系统中指向文件或目录的指针.由于安全原因,只在AIR中可用. 文件对象能做啥? 获取特定目录,包括用户目录.用户文档目录.该应用程序启动的目录和程序目录 ...
- caffe卷积输入通道如何到输出通道
今天一个同学问 卷积过程好像是对 一个通道的图像进行卷积, 比如10个卷积核,得到10个feature map, 那么输入图像为RGB三个通道呢,输出就为 30个feature map 吗, 答案肯定 ...
- anyremote源码分析
XTest 鼠标移动事件. XTestFakeMotionEvent 关于XTest的编程. http://lilydjwg.is-programmer.com/2011/9/21/using-x ...
- Java学习笔记之接口和抽象类
接口(interface)1.interface创建一个接口,implements实现接口 interface jiekou{} class lie implements jiekou{}2.接口可以 ...