Binding笔记
Binding基础
绑定某个对象的属性值到控制上,写法如下:
public class Order : INotifyPropertyChanged//只要实现此接口

    {

        public event PropertyChangedEventHandler PropertyChanged;

        private string orderNo;

        public string OrderNo

        {

            get

            {

                return orderNo;

            }

            set

            {

                orderNo = value;

                if (PropertyChanged != null)

                {

                    //通知变化,OrderNo变化后控件就会自动更新值了

                   //OrderNo为对应的属性名

                    PropertyChanged.Invoke(this, new PropertyChangedEventArgs("OrderNo"));称

                }

            }

        }

}
绑定方法: textBox.SetBinding(TextBox.TextProperty, new Binding("OrderNo") { Source = new Order() });
以其他控制作为源的写法:
<TextBox x:Name="textBox" Text="{Binding Path =Value,ElementName =slider}" V Width="120"/>
<Slider x:Name="slider" Width="179" Minimum="1" Maximum="100"/>
Binding的path,source灵活使用:
->path没有指定值代表是数据源的本身,如数据源本身为string int decimal类型时
->path一般是数据源对象的属性值, 如属性是集合多次层,如一国多省,省又多市,可这样写path=”/ProvinceList/CityList”
->source不写则会往控制的外层找DataContext的值作为它的Source
集合对象作为列表控制的ItemSource
只需要显示集合单个属性的写法
<ListBox x:Name="listBox" />
<TextBox x:Name="textBox" />
listBox.ItemsSource = students;
listBox.DisplayMemberPath = "Name";
textBox.SetBinding(TextBox.TextProperty, new Binding("SelectedItem.Id") { Source=listBox });
显示多个字段方法
<ListBox x:Name="listBox" >
<ListBox.ItemTemplate>
<DataTemplate> <!--固定写法-->
<StackPanel Orientation="Horizontal">
<TextBlock Text="{Binding Id}"></TextBlock>
<TextBlock Text="{Binding Name}"></TextBlock>
</StackPanel>
</DataTemplate>
</ListBox.ItemTemplate>
</ListBox>
listBox.ItemsSource = students;
使用集合类作为列表控制的ItemSource时一般考虑使用ObservableCollection<T>代表List<T>,因为ObservableCollection<T>实现了INotifyCollectionChanged接口,集合变化能立刻通知列表控制
ADO.NET对象作为数据源
如像DataTable DataSet对象直接用来绑定
用于显示数据源单个字段
DataTable dt = new DataTable();
listView.DisplayMemberPath = "Name";//要显示的字段
listView.ItemsSource = dt.DefaultView;//必须使用DefaultView,因为其实现了IEnumberable
用于显示数据源多个字段
<ListView x:Name="listView" >
<ListView.View>
<GridView>
<GridViewColumn Header="序号" DisplayMemberBinding="{Binding Id}" Width="120"/>
<GridViewColumn Header="姓名" DisplayMemberBinding="{Binding Name}" />
</GridView>
</ListView.View>
</ListView>
listView.ItemsSource = dt.DefaultView;
如果不想使用DefaultView则可以把对象赋给ListView的DataContext属性
DataTable dt = new DataTable();
listView.DataContext = dt;
//使用是个空的Binding,没有指定Source则会往外找DataContext
listView.SetBinding(ListView.ItemsSourceProperty, new Binding());
XML数据源
以xml格式的资源或xml文件作数据源
<ListView x:Name="listView" >
<ListView.View>
<GridView>
<GridViewColumn Header="序号" DisplayMemberBinding="{Binding XPath =@Id}" />
<GridViewColumn Header="姓名" DisplayMemberBinding="{Binding XPath =@Name}" />
</GridView>
</ListView.View>
</ListView>
上面使用的是XPath,且@代表是xml的元素的属性值,不加则是其子元素
var xdoc = new XmlDocument();
xdoc.Load(AppDomain.CurrentDomain.BaseDirectory+"student2.xml");
XmlDataProvider xpd = new XmlDataProvider();
xpd.Document = xdoc;
xpd.XPath = @"/StudentList/Student";//指定要暴漏出去的数据
//使用DataContext而非ItemsSource
listView.DataContext = xpd;
//这是一个没path,没source的binding则会直接使用DataContext
listView.SetBinding(ListView.ItemsSourceProperty, new Binding());
以下为窗体resource方式绑定,但没有通过测试
<Window.Resources>
<XmlDataProvider x:Key="xmlsource" XPath="/StudentList/Student">
<x:XData>
<StudentList>
<Student Id="1" Name="奥巴马2"></Student>
<Student Id="2" Name="库里"></Student>
</StudentList>
</x:XData>
</XmlDataProvider>
</Window.Resources>
<Grid>
<ListView x:Name="listView" DataContext="{StaticResource xmlsource}" >
<ListView.View>
<GridView>
<GridViewColumn Header="序号" DisplayMemberBinding="{Binding XPath=@Id}" Width="120"/>
<GridViewColumn Header="姓名" DisplayMemberBinding="{Binding XPath=@Name}" />
</GridView>
</ListView.View>
</ListView>
</Grid>
Linq数据源
通过linq方式提供数据源
<ListView x:Name="listView" >
<ListView.View>
<GridView>
<GridViewColumn Header="序号" DisplayMemberBinding="{Binding Path=Id}" Width="120"/>
<GridViewColumn Header="姓名" DisplayMemberBinding="{Binding Path=Name}" />
</GridView>
</ListView.View>
</ListView>
常见的集合方式
var students = new List<Student>()
{
new Student() { Id=1,Name="奥巴马"},
new Student() { Id=1,Name="库里"},
};
//这里只要指定ItemsSource,xaml的bing即可以获取数据
listView.ItemsSource = from t in students select t;
通过DataTable方式
DataTable dt = new DataTable();
listView.ItemsSource = from row in dt.Rows.Cast<DataRow>())//转成实现了IEnumerable的DataRow
select new Student
{
Id=int.Parse(row["id"].ToString()),
Name=row["name"].ToString()
};
通过XML文件方式
<?xml version="1.0" encoding="utf-8" ?>
<StudentList>
<Class>
<Student Id="1" Name="奥巴马"></Student>
<Student Id="2" Name="库里"></Student>
</Class>
</StudentList>
//注意不是使用XmlDocument
XDocument xd = XDocument.Load(AppDomain.CurrentDomain.BaseDirectory + "student.xml");
listView.ItemsSource = from ele in xd.Descendants("Student")//Descendants可直接获取其下所有层次的student节点
select new Student
{
Id = int.Parse(ele.Attribute("Id").Value),
Name = ele.Attribute("Name").Value
};
ObjectDataProvider数据源
通常source都是来自对象的属性,但有时需要用到方法体返回值则用ObjectDataProvider
public class test
{
public int Add(int a, int b)
{
return a + b;
}
}
xaml
<TextBox x:Name="textBox1" />
<TextBox x:Name="textBox2" />
<TextBox x:Name="textBox3" />
cs代码
var odp = new ObjectDataProvider();
odp.ObjectInstance = new test();
odp.MethodName = "Add";
odp.MethodParameters.Add(1);
odp.MethodParameters.Add(2);
var bing1 = new Binding("MethodParameters[0]")//路径就是属性MethodParameters
{
Source =odp,
BindsDirectlyToSource =true,//UI收集的值直接写到source
UpdateSourceTrigger =UpdateSourceTrigger.PropertyChanged//一有更新立即回传到source
};
var bing2 = new Binding("MethodParameters[1]")
{
Source = odp,
BindsDirectlyToSource = true,
UpdateSourceTrigger = UpdateSourceTrigger.PropertyChanged
};
var bing3 = new Binding(".") { Source = odp };//.数据源的本身
textBox1.SetBinding(TextBox.TextProperty, bing1);
textBox2.SetBinding(TextBox.TextProperty, bing2);
textBox3.SetBinding(TextBox.TextProperty, bing3);
RelativeSource数据源
用于指定窗体其他UI元素或自身的属性等作为数据源。
<DockPanel Name="KKK">
<DockPanel Name="HHH">
<Canvas Name="GGGG">
<TextBox x:Name="textBox22" />
</Canvas>
</DockPanel>
通过自身偏移量查找元素并作为数据源
var rela = new RelativeSource(RelativeSourceMode.FindAncestor);//查找方式:目标元素上级的方式
rela.AncestorLevel = 2;//以目标元素向外查找,符合指定类型的第2个元素作为数据源
rela.AncestorType = typeof(DockPanel);//元素类型
textBox22.SetBinding(TextBox.TextProperty, new Binding("Name") { RelativeSource = rela });//得到值"KKK"
XAML写法
<TextBox x:Name="textBox22" Text="{Binding RelativeSource={RelativeSource Mode=FindAncestor,AncestorLevel=2,AncestorType={x:Type DockPanel}},Path=Name}" />
自身属性作为数据源
var rela = new RelativeSource(RelativeSourceMode.Self);//查找方式:自身
textBox22.SetBinding(TextBox.TextProperty, new Binding("Name") { RelativeSource = rela });//得到值"textBox22"
XAML写法
<TextBox x:Name="textBox22" Text="{Binding RelativeSource={RelativeSource Mode=Self},Path=Name}" >
Binding数据验证
<TextBox x:Name="textBox" />
<Slider x:Name="slider" Minimum="1" Maximum="100"/>
<Label x:Name="label" Content="Label" />
public va()
{
InitializeComponent();
var binding = new Binding("Value");
binding.Source = slider;//数据源为silder元素
//文本框输入值会更新slider
binding.UpdateSourceTrigger = UpdateSourceTrigger.PropertyChanged;
var vr = new TxtValidation();//此规则限制值为5才更新到slider
vr.ValidatesOnTargetUpdated = true;//值属性为true则双像都要验证,不加则只验证目标变化
binding.ValidationRules.Add(vr); //使用Add可以加N多规则
binding.NotifyOnValidationError = true;//true则由本元素向外传递验证错误信息,直到有接收错误的元素
textBox.SetBinding(TextBox.TextProperty, binding);
//用于接收验证错误信息
textBox.AddHandler(Validation.ErrorEvent, new RoutedEventHandler(ValidaError));
}
private void ValidaError(object sender, RoutedEventArgs e)
{
var errors = Validation.GetErrors(textBox);
if (errors.Any())
{
//显示错误信息
label.Content = textBox.ToolTip = Validation.GetErrors(textBox)[0].ErrorContent.ToString();
}
}
//验证规则类
public class TxtValidation: ValidationRule
{
//主要是继承ValidationRule,并重写ValidationResult
public override ValidationResult Validate(object value, CultureInfo cultureInfo)
{
int i = 0;
if (int.TryParse(value.ToString(), out i))
{
if(i!=5)
return new ValidationResult(false, "不是预期值");
}
else
{
return new ValidationResult(false, "格式不正确");
}
return new ValidationResult(true,"验证通过");
}
}
Binding数据转换
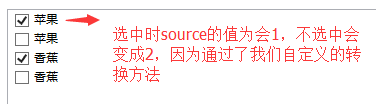
转换主要是写对应的转换类,通常需要用到转换的地方多为控制与绑定的字段类型不一致才需要转,可以双向转。主要是需在我们定义转换器,并实现 IValueConverter接口.如示例通过ListBox显示水果集合
//水果类
public class Fruits
{
/// <summary>
/// 分类
/// </summary>
public Category Category { get; set; }
/// <summary>
/// 选中状态 1=选中 2=不选中
/// </summary>
public int SelectState { get; set; }
}
public enum Category
{
Apple,
Banana
}
//水果种类转换器
public class CategoryConverter : IValueConverter
{
// 数据源转向目标时使用
public object Convert(object value, Type targetType, object parameter, CultureInfo culture)
{
var category = (Category)value;
if (category == Category.Apple)
return "苹果";
else if (category == Category.Banana)
return "香蕉";
return "未知";
}
//目标转向数据源使用,当前转正不需要
public object ConvertBack(object value, Type targetType, object parameter, CultureInfo culture)
{
throw new NotImplementedException();
}
}
//是否选中转换器
public class SelectStateConverter : IValueConverter
{
// 数据源转向目标时使用
public object Convert(object value, Type targetType, object parameter, CultureInfo culture)
{
var selectState = (int)value;
if (selectState ==1)
return true;
return false;
}
//目标转向数据源使用
public object ConvertBack(object value, Type targetType, object parameter, CultureInfo culture)
{
var selectState = (bool)value;
if (selectState)
return 1;
return 2;
}
}
XAML代码
<Window.Resources>
<!--通过资源的方式定义转换-->
<local:CategoryConverter x:Key="cc" />
<local:SelectStateConverter x:Key="sc" />
</Window.Resources>
<Grid>
<ListBox.ItemTemplate>
<DataTemplate>
<StackPanel x:Name="sp" Orientation="Horizontal">
<CheckBox x:Name="checkBox" Content="{Binding Path=Category,Converter={StaticResource cc}}" IsChecked="{Binding Path=SelectState,Converter={StaticResource sc},UpdateSourceTrigger=PropertyChanged}" />
</StackPanel>
</DataTemplate>
</ListBox.ItemTemplate>
</ListBox>
<Label x:Name="label1" Content="Label" />
<Button x:Name="button" Content="保存" H Click="button_Click"/>
</Grid>
C#代码:
var list = new List<Fruits>();
list.Add(new Fruits() { Category = Category.Apple, SelectState = 1 });
list.Add(new Fruits() { Category = Category.Apple, SelectState = 2 });
list.Add(new Fruits() { Category = Category.Banana, SelectState = 1 });
list.Add(new Fruits() { Category = Category.Banana, SelectState = 2 });
lb.ItemsSource = list;
多路Binding
即多个数据源或多个属性值组合起来满足自定义组合条件绑定到一个目标上。如两个文本框的值相等按钮才可用:
<TextBox x:Name="textBox" />
<TextBox x:Name="textBox1" />
<Button x:Name="button" IsEnabled="False"/>
public partial class MultiBinding2 : Window
{
public MultiBinding2()
{
InitializeComponent();
var binding1 = new Binding("Text") { Source = textBox };
var binding2 = new Binding("Text") { Source = textBox1 };
var mb = new MultiBinding() { Mode=BindingMode.OneWay};
//添加顺序是敏感的
mb.Bindings.Add(binding1);
mb.Bindings.Add(binding2);
mb.Converter = new EnableBtnConverter();
button.SetBinding(Button.IsEnabledProperty, mb);
}
}
public class EnableBtnConverter : IMultiValueConverter
{
public object Convert(object[] values, Type targetType, object parameter, CultureInfo culture)
{
return values[0].ToString() == values[1].ToString();//不加ToString()居然不相等,为毛???
}
public object[] ConvertBack(object value, Type[] targetTypes, object parameter, CultureInfo culture)
{
throw new NotImplementedException();
}
}
Binding笔记的更多相关文章
- WPF的Binding学习笔记(二)
原文: http://www.cnblogs.com/pasoraku/archive/2012/10/25/2738428.htmlWPF的Binding学习笔记(二) 上次学了点点Binding的 ...
- WPF笔记 ( xmlns引用,Resource、Binding 前/后台加载,重新绑定) 2013.6.7更新
原文:WPF笔记 ( xmlns引用,Resource.Binding 前/后台加载,重新绑定) 2013.6.7更新 1.xmlns Mapping URI的格式是 clr-namespace:&l ...
- WPF的Binding学习笔记(一)
原文: http://www.cnblogs.com/pasoraku/archive/2012/10/20/2732427.html 一.binding的一般步骤 1,准备数据源 数据源需要 ...
- 【ASP.NET MVC 学习笔记】- 16 Model Binding(模型绑定)
本文参考:http://www.cnblogs.com/willick/p/3424188.html. 1.Model Binding是Http请求和Action方法之间的桥梁,是MVC框架根据Htt ...
- MyBatis笔记----报错Exception in thread "main" org.apache.ibatis.binding.BindingException: Invalid bound statement (not found): com.ij34.model.UserMapper.selectUser
信息: Refreshing org.springframework.context.support.ClassPathXmlApplicationContext@41cf53f9: startup ...
- MyBatis笔记----报错:Exception in thread "main" org.apache.ibatis.binding.BindingException: Invalid bound statement (not found)解决方法
报错 Exception in thread "main" org.apache.ibatis.binding.BindingException: Invalid bound st ...
- RabbitMQ笔记四:Binding,Queue,Message概念
Binding详解 黄线部分就是binding Exchange与Exchange,Queue之间的虚拟连接,Binding中可以包含Routing key或者参数 创建binding 注意: ...
- WPF基础学习笔记整理 (七) Binding绑定
基础知识: 数据绑定是一种关系,该关系告诉WPF从源对象提取一些信息,并用这些信息设置目标对象的属性:目标对象始终是依赖属性,而源对象则可以是任何内容. BindingOperations类,提供静态 ...
- Mybatis笔记二:org.apache.ibatis.binding.BindingException: Invalid bound statement (not found)
错误异常:org.apache.ibatis.binding.BindingException: Invalid bound statement (not found): com.test.dao.N ...
随机推荐
- 执行插入语句,object val = cmd.ExecuteScalar() val = null
在写接口的过程中遇到错误:空对象不能转换为值类型 因为我们使用的是petapoco,经过调试后发现是 object val = cmd.ExecuteScalar() 这一句造成的报错, val = ...
- Spring中常见的bean创建异常
Spring中常见的bean创建异常 1. 概述 本次我们将讨论在spring中BeanFactory创建bean实例时经常遇到的异常 org.springframework.beans.fa ...
- 如何在SpringBoot中使用JSP ?但强烈不推荐,果断改Themeleaf吧
做WEB项目,一定都用过JSP这个大牌.Spring MVC里面也可以很方便的将JSP与一个View关联起来,使用还是非常方便的.当你从一个传统的Spring MVC项目转入一个Spring Boot ...
- pandas.DataFrame对行和列求和及添加新行和列
导入模块: from pandas import DataFrame import pandas as pd import numpy as np 生成DataFrame数据 df = DataFra ...
- 记录一次bug解决过程:git深入学习和JDK8新特性
一 总结 熟悉廖雪峰git基础; 由于git跟踪的是修改,而不是版本号:因此对于修改撤销的操作,文件在eclipse中依旧有>修改标记,这点不同于svn. 二 BUG描述:熟悉Git基础 在Gi ...
- Java - I/O
File类 java.io 操作文件和目录,与平台无关.具体的常用实例方法: File file = new File("."); // 以当前路径创建名为 ".&quo ...
- MySQL动态游标
通过(准备语句+视图+静态游标)实现 -- 建立测试表和数据 create table webuser (username varchar(10)); insert into webuser valu ...
- 《C#开发常用免费WebServices集合》
天气预报 Web服务,数据来源于中国气象局 公用事业 http://www.webxml.com.cn/WebServices/WeatherWebService.asmx 中国股票行情 分时走势预览 ...
- sed的应用
h3 { color: rgb(255, 255, 255); background-color: rgb(30,144,255); padding: 3px; margin: 10px 0px } ...
- Angularjs-项目搭建
开发工具采用WebStorm,没破解,使用了过期策略:安装之后不着急打开程序,先设置系统日期为未来的某个日期,比如2020年.然后再打开程序,试用.然后再改回来系统日期.虽然每次打开WebStorm都 ...