
NodeMCU入门(4):搭建Web服务器,配置网络连接
准备工作
1.NodeMCU模块
2.ESPlorer v0.2.0-rc6
3.NodeMCU-HTTP-Server
搭建web服务器
下载https://github.com/wangzexi/NodeMCU-HTTP-Server文件,并上传到NodeMCU中
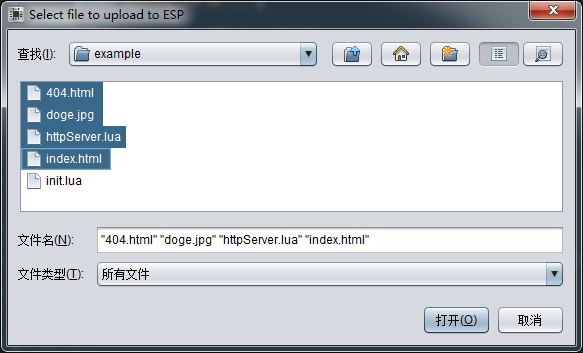
修改init.lua文件,可参看NodeMCU-HTTP-Server Example
-- init.lua

---------------------

-- wifi

---------------------

print('Setting up WIFI...')

wifi.setmode(wifi.STATION)

wifi.sta.config('WX401901', 'smyh1234')

wifi.sta.autoconnect()

tmr.alarm(, , tmr.ALARM_AUTO, function()

    if wifi.sta.getip() == nil then

        print('Waiting for IP ...')

    else

        print('IP is ' .. wifi.sta.getip())

    tmr.stop()

    end

end)

-- Serving static files

dofile('httpServer.lua')

httpServer:listen()

-- Custom API

-- Get text/html

httpServer:use('/welcome', function(req, res)

    res:send('Hello ' .. req.query.name) -- /welcome?name=doge

end)

-- Get file

httpServer:use('/doge', function(req, res)

    res:sendFile('doge.jpg')

end)

-- Get json

httpServer:use('/json', function(req, res)

    res:type('application/json')

    res:send('{"doge": "smile"}')

end)

-- Redirect

httpServer:use('/redirect', function(req, res)

    res:redirect('doge.jpg')

end)
现在是工作在STATION模式下,保存后可以看到获取的IP地址,在浏览器中输入http://192.168.100.100就可以看到一个简单的页面了。
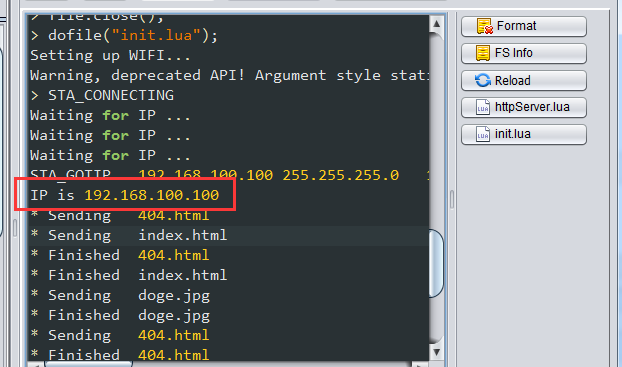
修改成 wifi.setmode(wifi.STATIONAP) 模式,出现了内存不足的错误,无视它。
E:M 248
not enough memory
stack traceback:
[C]: in function 'dofile'
init.lua:22: in main chunk
[C]: in function 'dofile'
stdin:1: in main chunk
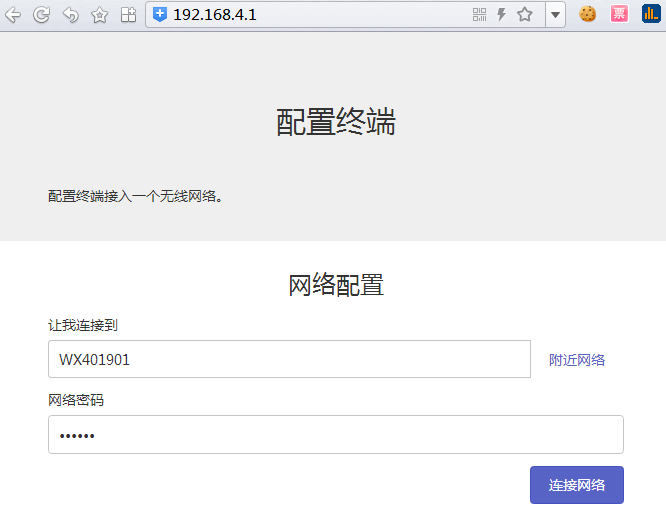
现在NodeMCU有两个IP,一个是作为STATION的192.168.100.100,另外一个是作为AP的192.168.4.1,这时在无线列表中会多出一个AI-THINKER_AC72F4,用手机或电脑连上后浏览器中输入http://192.168.4.1 也可以看到页面。
实现Web配置无线连接账号和密码
这里借用NodeMCU之旅(四):实现Web配置页面的配置页面。
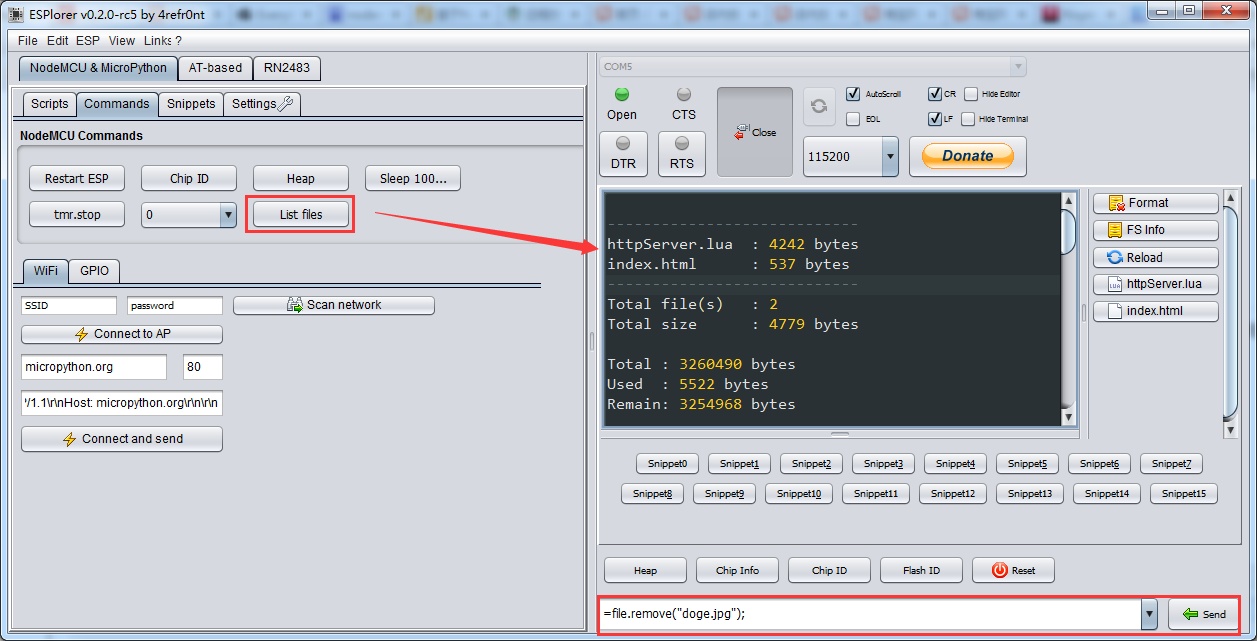
首先,删除上一步中上传的测试文件 404.html和doge.jpg
然后,上传新的配置页面
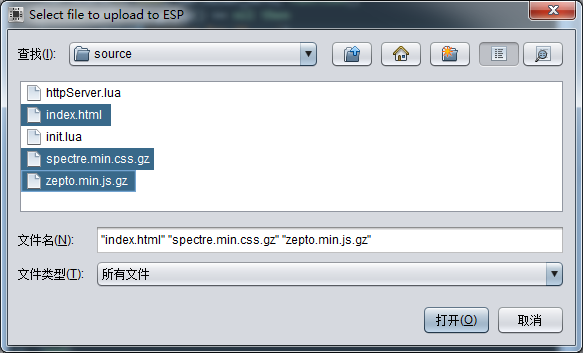
最后,修改init.lua文件去掉演示web相关的路由配置添加两个新的路由:
httpServer:use('/config', function(req, res)

    if req.query.ssid ~= nil and req.query.pwd ~= nil then

        wifi.sta.config(req.query.ssid, req.query.pwd)

        status = 'STA_CONNECTING'

        status_sleep=

        tmr.alarm(TMR_WIFI, , tmr.ALARM_AUTO, function()

            status_sleep=status_sleep+

       --当设置的账号密码错误时,定时器不会停止,所以这里添加了超时检查

            if(status_sleep==10) then

                   res:type('application/json')

                res:send('{"status":"timeout"}')

                tmr.stop(TMR_WIFI)

             end

            if status ~= 'STA_CONNECTING'  then

                res:type('application/json')

                res:send('{"status":"' .. status .. '"}')

                tmr.stop(TMR_WIFI)

            end

        end)

    end

end)

-- Get json

httpServer:use('/scanap', function(req, res)

  wifi.sta.getap(function(table)

        local aptable = {}

        for ssid,v in pairs(table) do

            local authmode, rssi, bssid, channel = string.match(v, "([^,]+),([^,]+),([^,]+),([^,]+)")

            aptable[ssid] = {

                authmode = authmode,

                rssi = rssi,

                bssid = bssid,

                channel = channel

            }

        end

        res:type('application/json')
--原来是cjson.encode(aptable),因为构建固件时没有找到cjson用了sjson,所以这里改成sjson

        res:send(sjson.encode(aptable)) end)

end)
当请求的方法里出现异常时前端看到的是404错误,这个坑让我一直怀疑是httpServer.lua的问题
保存后,访问http://192.168.100.100,修改成一个错误的密码,点击连接网络,Led灯开始闪烁然后模块重启常亮,表示修改失败。
* Sending index.html
* Finished index.html
PANIC: unprotected error in call to Lua API (httpServer.lua:77: not connected)
还得切换Wifi到AI-THINKER_AC72F4,通过http://192.168.4.1修改账号密码。
-- init.lua

----------------------

--define

---------------------

IO_BLINK =

TMR_WIFI =

TMR_BLINK =

TMR_BTN =

gpio.mode(IO_BLINK, gpio.OUTPUT)

---------------------

-- blink

---------------------

blink = nil

tmr.register(TMR_BLINK, , tmr.ALARM_AUTO, function()

    gpio.write(IO_BLINK, blink.i % )

    tmr.interval(TMR_BLINK, blink[blink.i + ])

    blink.i = (blink.i + ) % #blink

end)

function blinking(param)

    if type(param) == 'table' then

        blink = param

        blink.i =

        tmr.interval(TMR_BLINK, )

        running, _ = tmr.state(TMR_BLINK)

        if running ~= true then

            tmr.start(TMR_BLINK)

        end

    else

        tmr.stop(TMR_BLINK)

        gpio.write(IO_BLINK, param or gpio.LOW)

    end

end

---------------------

-- wifi

---------------------

print('Setting up WIFI...')

wifi.setmode(wifi.STATIONAP )

wifi.sta.config('WX401901', 'smyh1234')

wifi.sta.autoconnect()

tmr.alarm(, , tmr.ALARM_AUTO, function()

    if wifi.sta.getip() == nil then

        print('Waiting for IP ...')

    else

        print('IP is ' .. wifi.sta.getip())

    tmr.stop()

    end

end)

status=nil

wifi.sta.eventMonReg(wifi.STA_WRONGPWD, function()

    blinking({,  , , })

    status = 'STA_WRONGPWD'

    print(status)

end)

wifi.sta.eventMonReg(wifi.STA_APNOTFOUND, function()

    blinking({, })

    status = 'STA_APNOTFOUND'

    print(status)

end)

wifi.sta.eventMonReg(wifi.STA_CONNECTING, function(previous_State)

    blinking({, })

    status = 'STA_CONNECTING'

    print(status)

end)

wifi.sta.eventMonReg(wifi.STA_GOTIP, function()

    blinking()

    status = 'STA_GOTIP'

    print(status, wifi.sta.getip())

end)

wifi.sta.eventMonStart()

---------------------

-- http

---------------------

dofile('httpServer.lua')

httpServer:listen()

httpServer:use('/config', function(req, res)

    if req.query.ssid ~= nil and req.query.pwd ~= nil then

        wifi.sta.config(req.query.ssid, req.query.pwd)

        status = 'STA_CONNECTING'

        status_sleep=

        tmr.alarm(TMR_WIFI, , tmr.ALARM_AUTO, function()

            status_sleep=status_sleep+

            if(status_sleep==) then

                   res:type('application/json')

                res:send('{"status":"timeout"}')

                tmr.stop(TMR_WIFI)

             end

            if status ~= 'STA_CONNECTING'  then

                res:type('application/json')

                res:send('{"status":"' .. status .. '"}')

                tmr.stop(TMR_WIFI)

            end

        end)

    end

end)

-- Get json

httpServer:use('/scanap', function(req, res)

  wifi.sta.getap(function(table)

        local aptable = {}

        for ssid,v in pairs(table) do

            local authmode, rssi, bssid, channel = string.match(v, "([^,]+),([^,]+),([^,]+),([^,]+)")

            aptable[ssid] = {

                authmode = authmode,

                rssi = rssi,

                bssid = bssid,

                channel = channel

            }

        end

        res:type('application/json')

        res:send(sjson.encode(aptable))

    end)

end)
init.lua
相关资源
本文是在NodeMCU之旅(三):响应配置按钮、NodeMCU之旅(四):实现Web配置页面 基础之上的学习过程,感谢原作者。
NodeMCU入门(4):搭建Web服务器,配置网络连接的更多相关文章
- 轻松使用Nginx搭建web服务器
如果读者以前做过web开发的话,就应该知道如何去搭建一个web服务器来跑你的web站点,在windows下你可能会选择去用IIS,十分的快捷,在linux下,你可能首先会想到apache,“一哥”( ...
- 记录一些服务端术语和搭建web服务器
菜单快捷导航 服务端常用术语 搭建web服务器和配置虚拟主机 记录一些服务端方面的常用术语 1.CS架构和BS架构 1.1 CS架构 CS(Client/Server),基于安装包类型的桌面或手机软件 ...
- CentOS 6.2下搭建Web服务器
1Centos 6.2下搭建web服务器 如今,Linux在Web应用越来越广,许多企业都采用Linux来搭建Web服务器,这样即节省了购买正版软件的费用,而且还能够提高服务器的安全性. 之前我们介绍 ...
- 使用 Node.js 搭建 Web 服务器
使用Node.js搭建Web服务器是学习Node.js比较全面的入门教程,因为实现Web服务器需要用到几个比较重要的模块:http模块.文件系统.url解析模块.路径解析模块.以及301重定向技术等, ...
- Mac上一条命令搭建web服务器
实际测试工作中偶尔会需要搭建Web服务器环境,由于Mac OS X自带了Apache和PHP环境,只需要简单的启动就可以. 开启Apache 开启Web服务器的方法有两种(默认启动端口号是80): 打 ...
- Android手机用KSWEB搭建Web服务器成功安装WordPress
之前部落分享的几个免费Web服务器软件都是用来安装在本地电脑上,搭建Apache.PhpMyAdmin.MySQL等网站运行环境,然后我们就可以在电脑上测试运行Wordpress.Discuz! 论坛 ...
- centos7 搭建WEB服务器
centos7 搭建WEB服务器 2017年09月17日 09:44:50 逝然1994 阅读数:18321 标签: centosapacheweb服务器 更多 个人分类: centos服务器简单配置 ...
- CentOS 6.3下搭建Web服务器
准备前的工作: 1.修改selinux配置文件(/etc/sysconfig/selinux) 关闭防火墙 (1)把SELINUX=enforcing注释掉 (2)并添加SELINUX=disable ...
- Ubuntu 搭建Web服务器(MySQL+PHP+Apache)详细教程
Ubuntu 搭建Web服务器(MySQL+PHP+Apache)详细教程 看了好多人的博客,有的不全 or 有问题,整理了一下,适合小白 新手先整理几个小问题 1.为啥使用 Linux 搭建服务器? ...
随机推荐
- Linux基础网络搭建实验
一.实验目标 利用3台虚拟机,搭建vmnet2和vmnet3两个host-only网络,实现两个网络的互联 二.实验环境 内网 外网 网关 IP 192.168.0.10/24 202.3.4.1 ...
- bootstrap快速入门笔记(三)响应式,行,列,偏移量,排序
一,响应式列重置 .clearfix <div class="row"> <div class="col-xs-6 col-sm-3"> ...
- Javascript中变量作用域
<script type="text/javascript"> var a = 10; var Bar = (function () { console.log(a); ...
- JQuery 中关于插入新元素的方法
关于JQuery插入新内容的方法: append() - 在被选元素的结尾插入内容 prepend() - 在被选元素的开头插入内容 after() - 在被选元素之后插入内容 before() - ...
- shapeless官方指南翻译总结
今天抽空把之前翻译的<The Type Astronaut's Guide to Shapeless>一书放到了Gitbook上,将其开源供所有人阅读并希望大家能够提出宝贵意见,地址为sh ...
- Azure Event Bus 技术研究系列1-Event Hub入门篇
前两个系列研究了Azure IoT Hub和Azure Messaging.最近准备继续研究Azure Event Bus,即Azure的事件中心.首先, Azure Event Hub的官方介绍: ...
- Ubuntu server搭建Java web服务器
1. 在Ubuntu server中安装ssh,如果是购买服务器的话,这已经是安装的了,包括vim 获取超级权限 先更新安装包 开始安装ssh ssh已经启动了 2. 安装Xshell并创建连接安装X ...
- 配置网络yum源
有的时候服务器需要下载一些软件,是本地yum源没有的,这时候需要配置网络yum源 #cd /etc/yum.repos.d/ 把这个目录下的配置文件备份,改名:或者是把文件里边的enabled=1的 ...
- 华为ensp模拟某公司网络架构及配置详解
1.先晒下架构图,二层设备省略..... 2.下面开始具体配置详解 2.1.从路由器开始配置,先用远程工具远程AR1220F-S路由,secureCRT ,putty,xshell任选其中一个均可,功 ...
- python 列表、元组、字符串、字典、集合、return等梳理
有必要对这些数据类型及操作做下梳理: 1.列表:增删改查 a.查找: >>> names=["zhang","wang","li&q ...