Spring详解(七)------AOP 注解
上一篇博客我们讲解了 AspectJ 框架如何实现 AOP,然后具体的实现方式我们是通过 xml 来进行配置的。xml 方式思路清晰,便于理解,但是书写过于麻烦。这篇博客我们将用 注解 的方式来进行 AOP 配置。
为了便于大家理解,讲解方式是这样的,我们先给出 xml 的配置,然后介绍如何通过 注解 来进行替代。
PS:本篇博客源码下载链接:http://pan.baidu.com/s/1dFdBHZF 密码:3v4k
1、xml 的方式实现 AOP
①、接口 UserService
package com.ys.aop;

public interface UserService {

	//添加 user

	public void addUser();

	//删除 user

	public void deleteUser();

}
②、实现类 UserServiceImpl
package com.ys.aop;

public class UserServiceImpl implements UserService{

	@Override

	public void addUser() {

		System.out.println("增加 User");

	}

	@Override

	public void deleteUser() {

		System.out.println("删除 User");

	}

}
③、切面类,也就是通知类 MyAspect
package com.ys.aop;

import org.aspectj.lang.JoinPoint;

public class MyAspect {

	/**

	 * JoinPoint 能获取目标方法的一些基本信息

	 * @param joinPoint

	 */

	public void myBefore(JoinPoint joinPoint){

		System.out.println("前置通知 : " + joinPoint.getSignature().getName());

	}

	public void myAfterReturning(JoinPoint joinPoint,Object ret){

		System.out.println("后置通知 : " + joinPoint.getSignature().getName() + " , -->" + ret);

	}

	public void myAfterThrowing(JoinPoint joinPoint,Throwable e){

		System.out.println("抛出异常通知 : " + e.getMessage());

	}

	public void myAfter(){

		System.out.println("最终通知");

	}

}
④、AOP配置文件 applicationContext.xml
<?xml version="1.0" encoding="UTF-8"?>

<beans xmlns="http://www.springframework.org/schema/beans"

       xmlns:xsi="http://www.w3.org/2001/XMLSchema-instance"

       xmlns:context="http://www.springframework.org/schema/context"

       xmlns:aop="http://www.springframework.org/schema/aop"

       xsi:schemaLocation="http://www.springframework.org/schema/beans

       					   http://www.springframework.org/schema/beans/spring-beans.xsd

       					   http://www.springframework.org/schema/aop

       					   http://www.springframework.org/schema/aop/spring-aop.xsd

       					   http://www.springframework.org/schema/context

       					   http://www.springframework.org/schema/context/spring-context.xsd">

	<!--1、创建目标类 -->

	<bean id="userService" class="com.ys.aop.UserServiceImpl"></bean>

	<!--2、创建切面类(通知)  -->

	<bean id="myAspect" class="com.ys.aop.MyAspect"></bean>

	<!--3、aop编程

		3.1 导入命名空间

		3.2 使用 <aop:config>进行配置

				proxy-target-class="true" 声明时使用cglib代理

				如果不声明,Spring 会自动选择cglib代理还是JDK动态代理

			<aop:pointcut> 切入点 ,从目标对象获得具体方法

			<aop:advisor> 特殊的切面,只有一个通知 和 一个切入点

				advice-ref 通知引用

				pointcut-ref 切入点引用

		3.3 切入点表达式

			execution(* com.ys.aop.*.*(..))

			选择方法         返回值任意   包             类名任意   方法名任意   参数任意

	-->

	<aop:config>

		<aop:aspect ref="myAspect">

		<!-- 切入点表达式 -->

		<aop:pointcut expression="execution(* com.ys.aop.*.*(..))" id="myPointCut"/>

		<!-- 3.1 前置通知

				<aop:before method="" pointcut="" pointcut-ref=""/>

					method : 通知,及方法名

					pointcut :切入点表达式,此表达式只能当前通知使用。

					pointcut-ref : 切入点引用,可以与其他通知共享切入点。

				通知方法格式:public void myBefore(JoinPoint joinPoint){

					参数1:org.aspectj.lang.JoinPoint  用于描述连接点(目标方法),获得目标方法名等

		-->

		<aop:before method="myBefore" pointcut-ref="myPointCut"/>

		<!-- 3.2后置通知  ,目标方法后执行,获得返回值

				<aop:after-returning method="" pointcut-ref="" returning=""/>

					returning 通知方法第二个参数的名称

				通知方法格式:public void myAfterReturning(JoinPoint joinPoint,Object ret){

					参数1:连接点描述

					参数2:类型Object,参数名 returning="ret" 配置的

		-->

		<aop:after-returning method="myAfterReturning" pointcut-ref="myPointCut" returning="ret" />

		<!-- 3.3 最终通知 -->

		<aop:after method="myAfter" pointcut-ref="myPointCut"/>

		</aop:aspect>

	</aop:config>

</beans>
⑤、测试
@Test

public void testAop(){

	ApplicationContext context = new ClassPathXmlApplicationContext("applicationContext.xml");

	UserService useService = (UserService) context.getBean("userService");

	useService.addUser();

	useService.deleteUser();

}
⑥、控制台打印结果
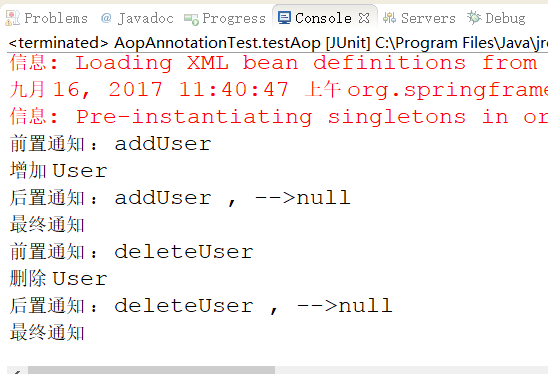
上面的例子很简单,就是在 UserService 的 addUser()方法和 deleteUser()方法增加前置通知和后置通知,这在实际操作中很好理解。比如这是和数据库打交道的话,那么我们在 addUser() 或者 deleteUser() 时,必须要在前面开始事务,操作完毕后提交事务。下面我们就用注解的方式来配置。
2、注解实现 AOP
①、导入相应的 jar 包,以及在 applicationContext.xml 文件中导入相应的命名空间。这个在上面的源码下载链接中都有

<?xml version="1.0" encoding="UTF-8"?>

<beans xmlns="http://www.springframework.org/schema/beans"

       xmlns:xsi="http://www.w3.org/2001/XMLSchema-instance"

       xmlns:context="http://www.springframework.org/schema/context"

       xmlns:aop="http://www.springframework.org/schema/aop"

       xsi:schemaLocation="http://www.springframework.org/schema/beans

       					   http://www.springframework.org/schema/beans/spring-beans.xsd

       					   http://www.springframework.org/schema/aop

       					   http://www.springframework.org/schema/aop/spring-aop.xsd

       					   http://www.springframework.org/schema/context

       					   http://www.springframework.org/schema/context/spring-context.xsd">

</beans>
②、注解配置 bean
xml配置:
	<!--1、创建目标类 -->

	<bean id="userService" class="com.ys.aop.UserServiceImpl"></bean>

	<!--2、创建切面类(通知)  -->

	<bean id="myAspect" class="com.ys.aop.MyAspect"></bean>
注解配置:
目标类:

切面类:

③、配置扫描注解识别
这个我们在前面也讲过,上面配置的注解,Spring 如何才能识别这些类上添加了注解呢?我们必须告诉他。
在 applicationContext.xml 文件中添加如下配置:
<!-- 配置扫描注解类

		base-package:表示含有注解类的包名。

		如果扫描多个包,则下面的代码书写多行,改变 base-package 里面的内容即可!

	-->

	<context:component-scan base-package="com.ys.aop"></context:component-scan>
④、注解配置 AOP
一、我们用xml配置过如下:

这是告诉 Spring 哪个是切面类。下面我们用注解配置
我们在切面类上添加 @Aspect 注解,如下:

二、如何让 Spring 认识我们所配置的 AOP 注解呢?光有前面的类注解扫描是不够的,这里我们要额外配置 AOP 注解识别。
我们在 applicationContext.xml 文件中增加如下配置:
	<!--2、确定 aop 注解生效  -->

	<aop:aspectj-autoproxy></aop:aspectj-autoproxy>
三、注解配置前置通知
我们先看 xml 配置前置通知如下:
<!-- 切入点表达式 -->

		<aop:pointcut expression="execution(* com.ys.aop.*.*(..))" id="myPointCut"/>

		<!-- 3.1 前置通知

				<aop:before method="" pointcut="" pointcut-ref=""/>

					method : 通知,及方法名

					pointcut :切入点表达式,此表达式只能当前通知使用。

					pointcut-ref : 切入点引用,可以与其他通知共享切入点。

				通知方法格式:public void myBefore(JoinPoint joinPoint){

					参数1:org.aspectj.lang.JoinPoint  用于描述连接点(目标方法),获得目标方法名等

		-->

		<aop:before method="myBefore" pointcut-ref="myPointCut"/>
那么注解的方式如下:

四、注解配置后置通知
xml 配置后置通知:
<!-- 3.2后置通知  ,目标方法后执行,获得返回值

				<aop:after-returning method="" pointcut-ref="" returning=""/>

					returning 通知方法第二个参数的名称

				通知方法格式:public void myAfterReturning(JoinPoint joinPoint,Object ret){

					参数1:连接点描述

					参数2:类型Object,参数名 returning="ret" 配置的

		-->

		<aop:after-returning method="myAfterReturning" pointcut-ref="myPointCut" returning="ret" />
注意看,后置通知有个 returning="ret" 配置,这是用来获得目标方法的返回值的。
注解配置如下:

五、测试
@Test

	public void testAopAnnotation(){

		ApplicationContext context = new ClassPathXmlApplicationContext("applicationContext_Annotation.xml");

		UserService useService = (UserService) context.getBean("userService");

		useService.addUser();

		useService.deleteUser();

	}
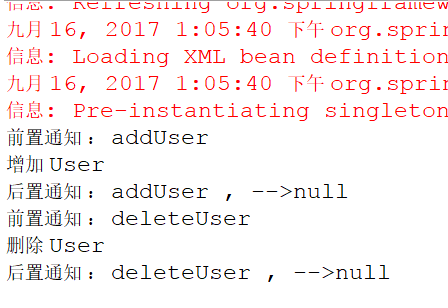
六、控制台打印结果
3、注解改进
我们可以看前置通知和后置通知的注解配置:
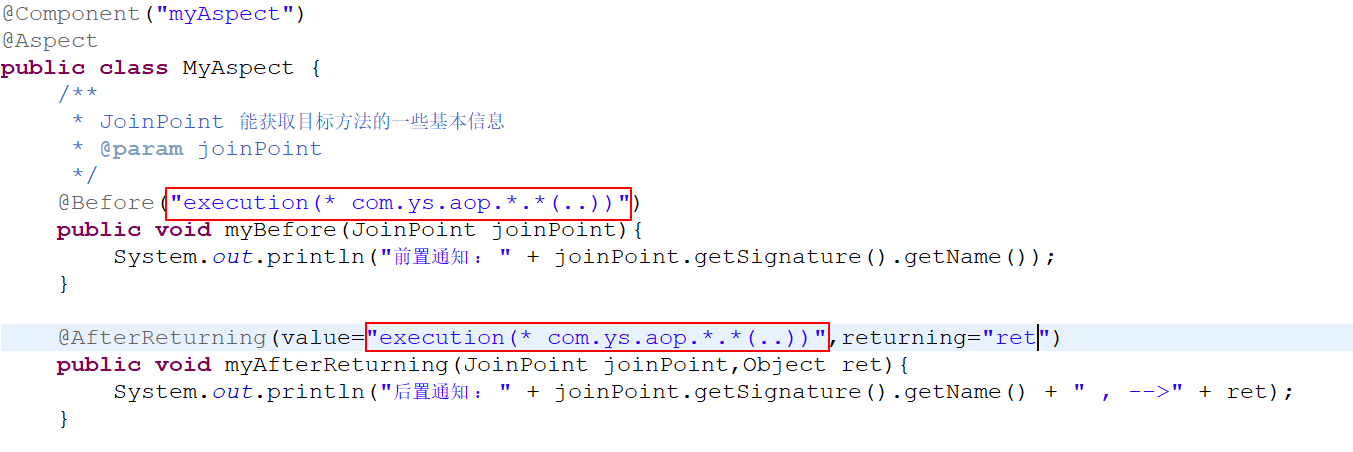
注意看红色框住的部分,很显然这里是重复的,而且如果我们有多个通知方法,那就得在每个方法名都写上该注解,而且如果包名够复杂,也很容易写错。那么怎么办呢?
解决办法就是声明公共切入点:
①、在 切面类 MyAspect.java 中新增一个切入点方法 myPointCut(),然后在这个方法上添加 @Pointcut 注解

②、那么前置通知和后置通知,我们可以进行如下改写配置:

4、总结
上面我们只进行了前置通知和后置通知的讲解,还有比如最终通知、环绕通知、抛出异常通知等,配置方式都差不多,这里就不进行一一讲解了。然后我们看一下这些通知的注解:
@Aspect 声明切面,修饰切面类,从而获得 通知。
通知
@Before 前置
@AfterReturning 后置
@Around 环绕
@AfterThrowing 抛出异常
@After 最终
切入点
@PointCut ,修饰方法 private void xxx(){} 之后通过“方法名”获得切入点引用
Spring详解(七)------AOP 注解的更多相关文章
- Spring框架系列(9) - Spring AOP实现原理详解之AOP切面的实现
前文,我们分析了Spring IOC的初始化过程和Bean的生命周期等,而Spring AOP也是基于IOC的Bean加载来实现的.本文主要介绍Spring AOP原理解析的切面实现过程(将切面类的所 ...
- Spring框架系列(10) - Spring AOP实现原理详解之AOP代理的创建
上文我们介绍了Spring AOP原理解析的切面实现过程(将切面类的所有切面方法根据使用的注解生成对应Advice,并将Advice连同切入点匹配器和切面类等信息一并封装到Advisor).本文在此基 ...
- Iptables详解七层过滤
<Iptables详解七层过滤> 一.防火墙简介 防火墙其实就是一个加固主机或网络安全的一个设备或者软件而已,通过防火墙可以隔离风险区域与安全区域的连接,同时不会妨碍风险区域的访问.当然需 ...
- Spring详解(六)------AOP 注解
上一篇博客我们讲解了 AspectJ 框架如何实现 AOP,然后具体的实现方式我们是通过 xml 来进行配置的.xml 方式思路清晰,便于理解,但是书写过于麻烦.这篇博客我们将用 注解 的方式来进行 ...
- spring定时任务详解(@Scheduled注解)( 转 李秀才的博客 )
在springMVC里使用spring的定时任务非常的简单,如下: (一)在xml里加入task的命名空间 xmlns:task="http://www.springframework.or ...
- Spring详解(五)------AOP
这章我们接着讲 Spring 的核心概念---AOP,这也是 Spring 框架中最为核心的一个概念. PS:本篇博客源码下载链接:http://pan.baidu.com/s/1skZjg7r 密码 ...
- [Spring学习笔记 3 ] spring 注解详解,完全注解,常用注解
.xml使用注解 xml 用来定义bean的信息,注解用来配置依赖信息 ) 在配置文件中配置bean )在javaBean中用注解来指定依赖注入 )在配置文件中开启注解扫描 @Resource标签 j ...
- Spring详解篇之 AOP面向切面编程
一.概述 Aop(aspect oriented programming面向切面编程),是spring框架的另一个特征.AOP包括切面.连接点.通知(advice).切入点(pointCut) . 1 ...
- Spring详解(一)------概述
本系列教程我们将对 Spring 进行详解的介绍,相信你在看完后一定能够有所收获. 1.什么是 Spring ? Spring是一个开源框架,Spring是于2003 年兴起的一个轻量级的Java 开 ...
随机推荐
- RDMA RC UC UD
RC:面向连接的可靠服务 UC:面向连接的不可靠服务 UD:面向数据报的不可靠服务 RD:面向非连接(类似UDP)的可靠服务 面向连接 vs 面向数据报 相同点:两者的通信均包括双方QP对的参与 不同 ...
- Ubuntu 18.04 下如何配置mysql 及 配置远程连接
首先是大家都知道的老三套,啥也不说上来就放三个大招: sudo apt-get install mysql-server sudo apt isntall mysql-client sudo apt ...
- VB 性能优化点
1.将Single,Double和Currency类型的变量替换为Integer或Long类型的变量:10倍 2.避免使用变体: 慢:Dim FSO as object Set FSO = N ...
- Atom使用
cmd-r 通过方法名查找 ctrl-option-g 跳转至光标所在方法或结构 安装 last-cursor-position 后 alt-- 返回至光标上一次所在位置
- Springboot & Mybatis 构建restful 服务二
Springboot & Mybatis 构建restful 服务二 1 前置条件 成功执行完Springboot & Mybatis 构建restful 服务一 2 restful ...
- ApocalypseSomeday
ApocalypseSomeday CountDownLatch和CyclicBarrier分别都是在什么时候使用的? Charles使用(apphttp抓包,request拦截,response拦截 ...
- PageHelper分页+前台BootStrap_pagination样式/BootStrap_table样式
一.PagerHelper分页+前台BootStrap_pagination样式: 效果: 1.引入pageHelper插件:2种方式 pageHelper所需jar包:pagehelper-5 ...
- ajax动态刷新的元素,导致绑定事件失效
jquery事件绑定有2种方式: 1,普通事件绑定: $('元素').click(function(){}); 2, 事件代理或者叫事件委托 $('#chatPanelList').on('click ...
- Windows平台最方便最易用的法语输入法
原文:http://wenwen.sogou.com/z/q1700007921.htm 对于XP,在“控制面板”中选择“输入法区域设置”,单击“更改”,出现一个“设置”框:选择“添加”,然后选择“法 ...
- Settings 参数记录
DOWNLOAD_FAIL_ON_DATALOSS : 参数:TRUE.FALSE 如果设置为 True : scrapy.Request 有一个 errback 参数, 当 Request 请求出错 ...