关于xib文件和storyboard文件的那些事儿
在ios中,一般建议使用代码布局,因为使用代码布局,后期维护容易,拓展容易,并且可以实现动态加载很多数据,但是代码布局比较繁琐,不适合初学者。Xib布局或者Storyboard布局比较方便。下面介绍一下xib和storyboard的知识及创建使用方法。
有关nib、xib和storyboard的往事
nib和xib的那些事儿
开发 iOS 或 Mac 程序,搭建界面是避免不了的。Xcode 包含了一个工具 Interface Builder,可以用图形化的方式,使用鼠标拖拉来创建界面。
Xcode 3.0 之前 Interface Builder 创建的文件是二进制格式 nib,nib 代表 NeXT Interface Builder。乔布斯从苹果公司出走之后,创建了下一个公司 NeXT, 之后 NeXT 又被苹果公司收购。现在 iOS 或 Mac 开发的整套系统、工具、类库最开始都源自 NeXT。
二进制格式不好管理,也不方便版本控制,Xcode 3.0之后,Interface Builder 使用了一种新的文件格式xib。xib 的意思可能是 XML Interface Builder,也有可能是 OS X Interface Builder。xib 使用了 XML,在工程编译的时候再转换成 nib。Xib就是一个描述文档,这里面包含了用户界面和用户界面相关元素。这样做的主要原因是,方便程序员,因为其是“所见即所得”的,程序员不需要像原来一样写一堆代码,然后运行出来才能看到界面元素的执行结果,这样是很低效的。
在 Xcode 4.0 之前,Interface Builder 是一个独立的软件。而Xcode 4.0 是个大版本,界面被重新设计,Interface Builder 被直接集成到 Xcode 当中。
其实 Interface Builder 可以配置创建任何 NSObject 对象,但我们绝大多数情况下只用它来创建界面。
xib设计的一大目的其实是为了良好的MVC:一般来说,单个的xib文件对应一个ViewController,而对于一些自定义的view,往往也会使用单个xib并从main bundle进行加载的方式来载入。IB帮助完成view的创建,布局和与file owner的关系映射等一些列工作。
storyboard的那些事儿
storyboard的能做的事儿
storyboard可以使程序的逻辑结构更加清楚,减少程序的代码量,使view和controller耦合度降低。
storyboard提供的功能有自动布局(Auto Layout)、Size Classes、Scene跳转、代码可视化。

1、点击test.xib -> File's Owner -> 身份检查器 -> Class -> UIViewController;
2、点击File's Owner -> 按住"Ctrl"按键不放 -> 鼠标左键按住不放,拖动到"View" -> 选中view。

<?xml version="1.0" encoding="UTF-8" standalone="no"?>

<document type="com.apple.InterfaceBuilder3.CocoaTouch.XIB" version="3.0" toolsVersion="10117" systemVersion="15F34" targetRuntime="iOS.CocoaTouch" propertyAccessControl="none" useAutolayout="YES" useTraitCollections="YES">

    <dependencies>

        <deployment identifier="iOS"/>

        <plugIn identifier="com.apple.InterfaceBuilder.IBCocoaTouchPlugin" version="10085"/>

    </dependencies>

    <objects>

        <placeholder placeholderIdentifier="IBFilesOwner" id="-1" userLabel="File's Owner" customClass="UIViewController">

            <connections>

                <outlet property="view" destination="nyC-sf-CLM" id="2kO-17-hRO"/>

            </connections>

        </placeholder>

        <placeholder placeholderIdentifier="IBFirstResponder" id="-2" customClass="UIResponder"/>

        <view contentMode="scaleToFill" id="nyC-sf-CLM">

            <rect key="frame" x="0.0" y="0.0" width="600" height="600"/>

            <autoresizingMask key="autoresizingMask" flexibleMaxX="YES" flexibleMaxY="YES"/>

            <subviews>

                <label opaque="NO" userInteractionEnabled="NO" contentMode="left" horizontalHuggingPriority="251" verticalHuggingPriority="251" fixedFrame="YES" text="HelloWorld" textAlignment="natural" lineBreakMode="tailTruncation" baselineAdjustment="alignBaselines" adjustsFontSizeToFit="NO" translatesAutoresizingMaskIntoConstraints="NO" id="7kL-hD-HEb">

                    <rect key="frame" x="269" y="112" width="84" height="21"/>

                    <fontDescription key="fontDescription" type="system" pointSize="17"/>

                    <color key="textColor" cocoaTouchSystemColor="darkTextColor"/>

                    <nil key="highlightedColor"/>

                </label>

            </subviews>

            <color key="backgroundColor" white="1" alpha="1" colorSpace="calibratedWhite"/>

        </view>

    </objects>

</document>
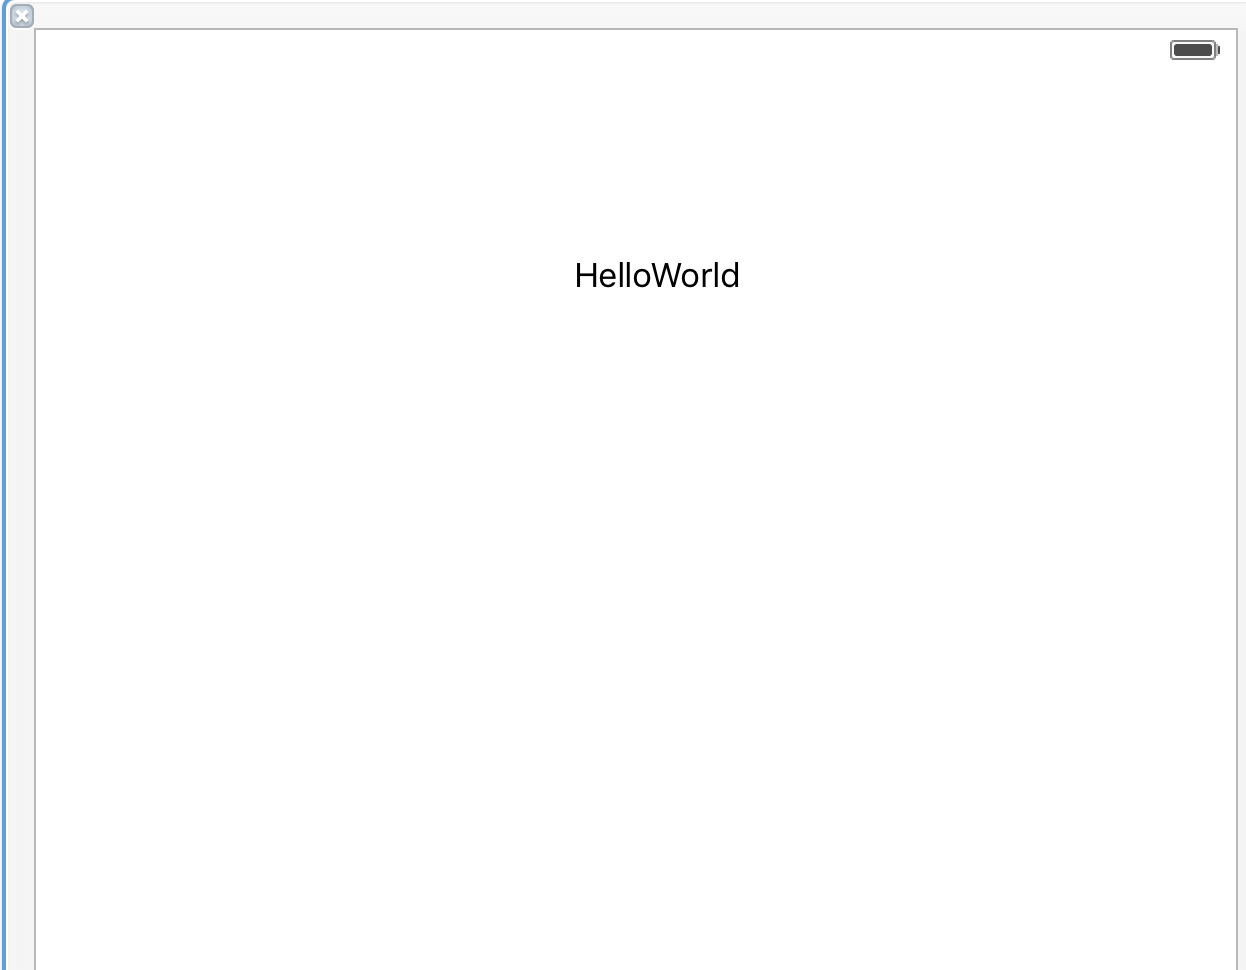
在上面我将部分代码加粗突出显示出来,可以看出<view><label></label>...</view>对应着添加的view和label控件。
使用xib文件
- (IBAction)btnClick:(id)sender {

   _viewOfStoryboard = [[TestViewController alloc]initWithNibName:@"test" bundle:nil];

    _viewOfStoryboard.view.backgroundColor = [UIColor whiteColor];

    [self dismissViewControllerAnimated:YES completion:nil];

    [self presentViewController:_viewOfStoryboard animated:YES completion:nil];

}
由于没有进行约束,所以label的位置发生了变化,显示效果:
点击Button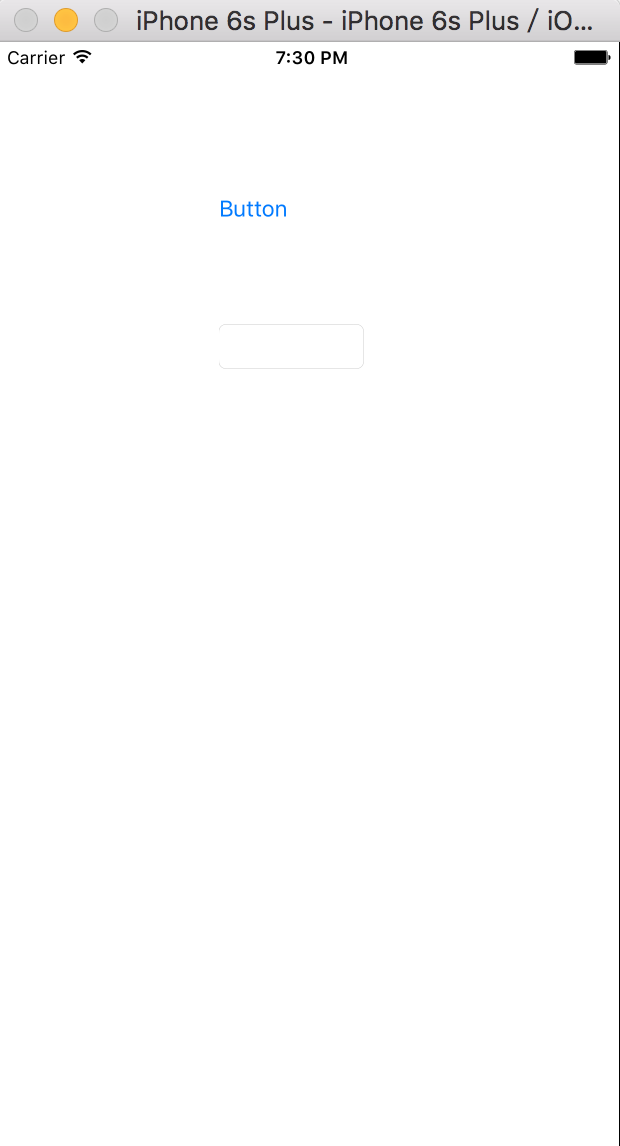 ----------------->显示
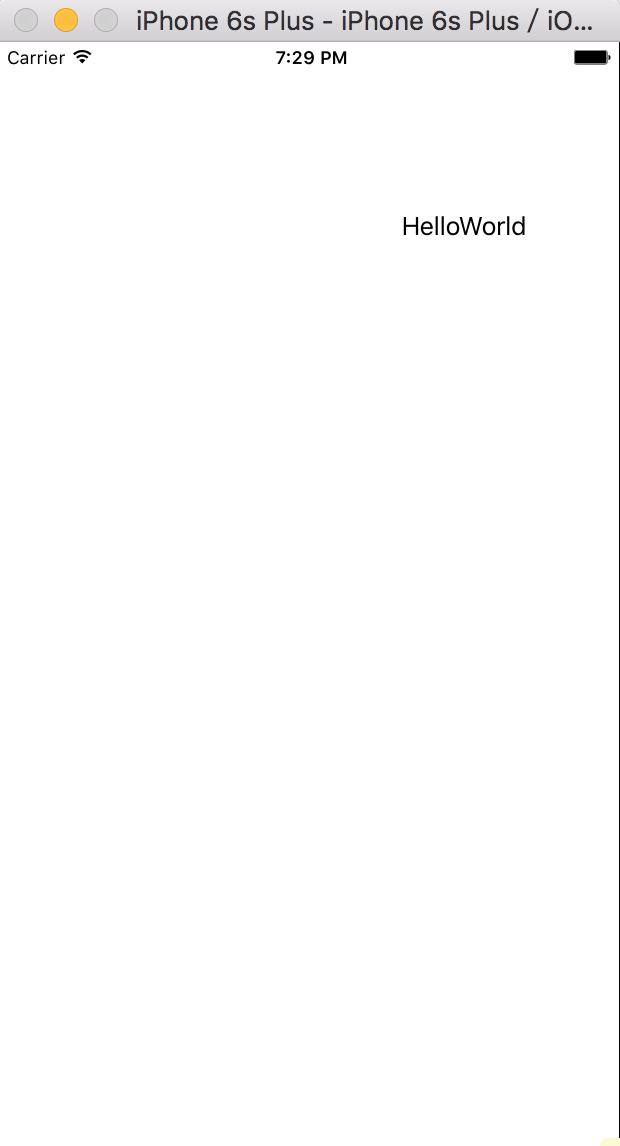
Storyboard加载
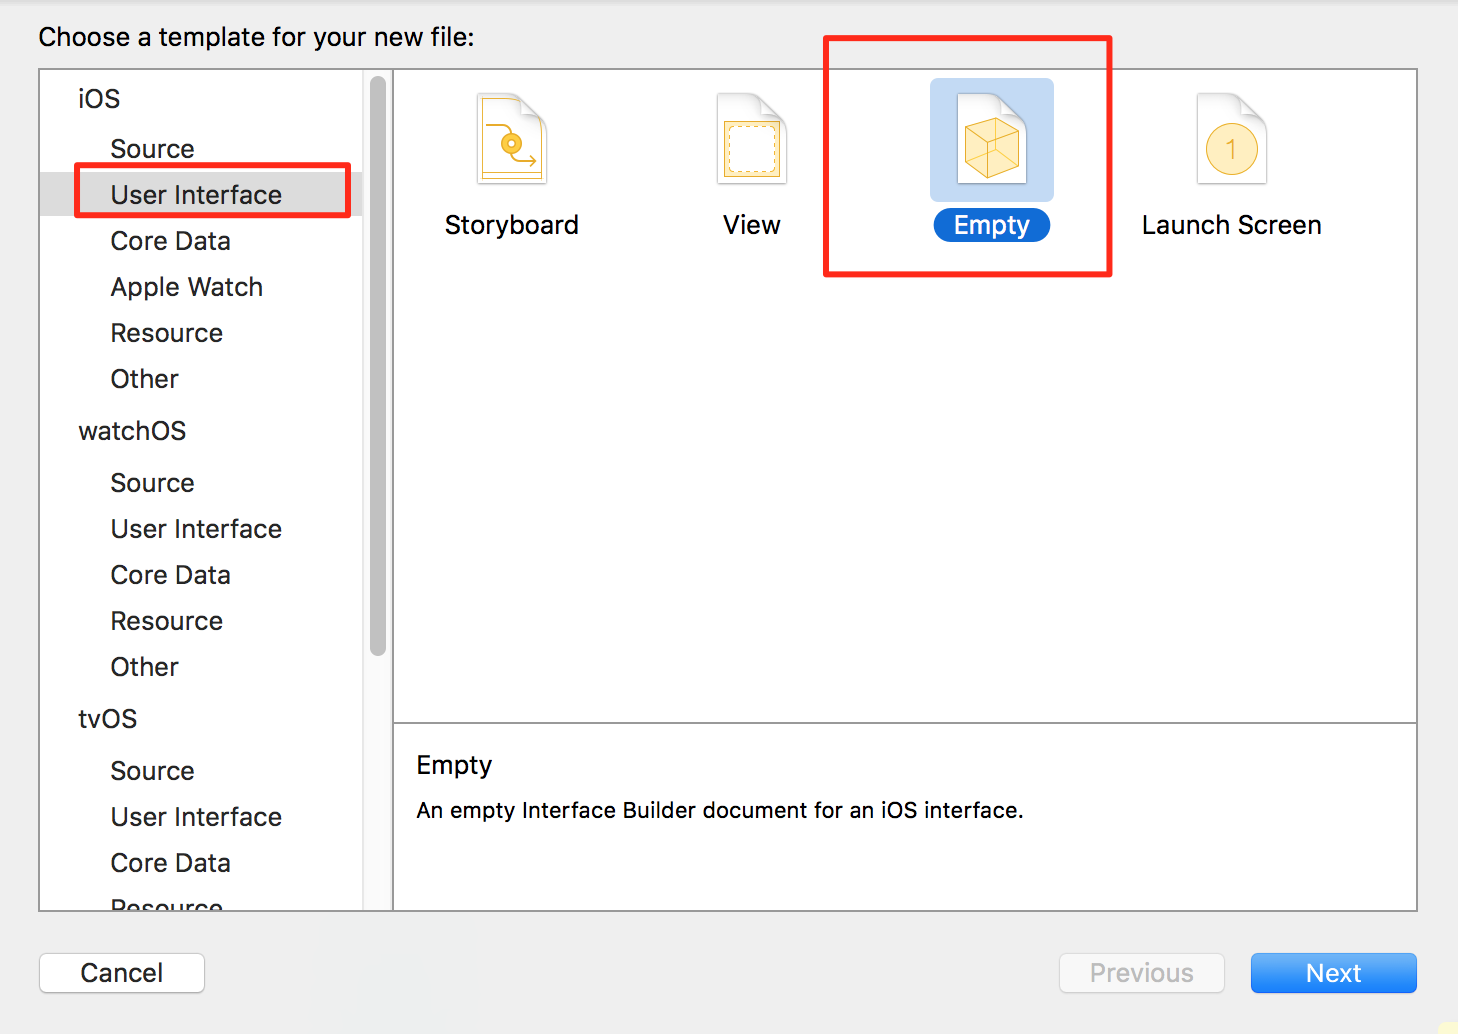
新建Storyboard文件,快速创建(使用cmd+N):


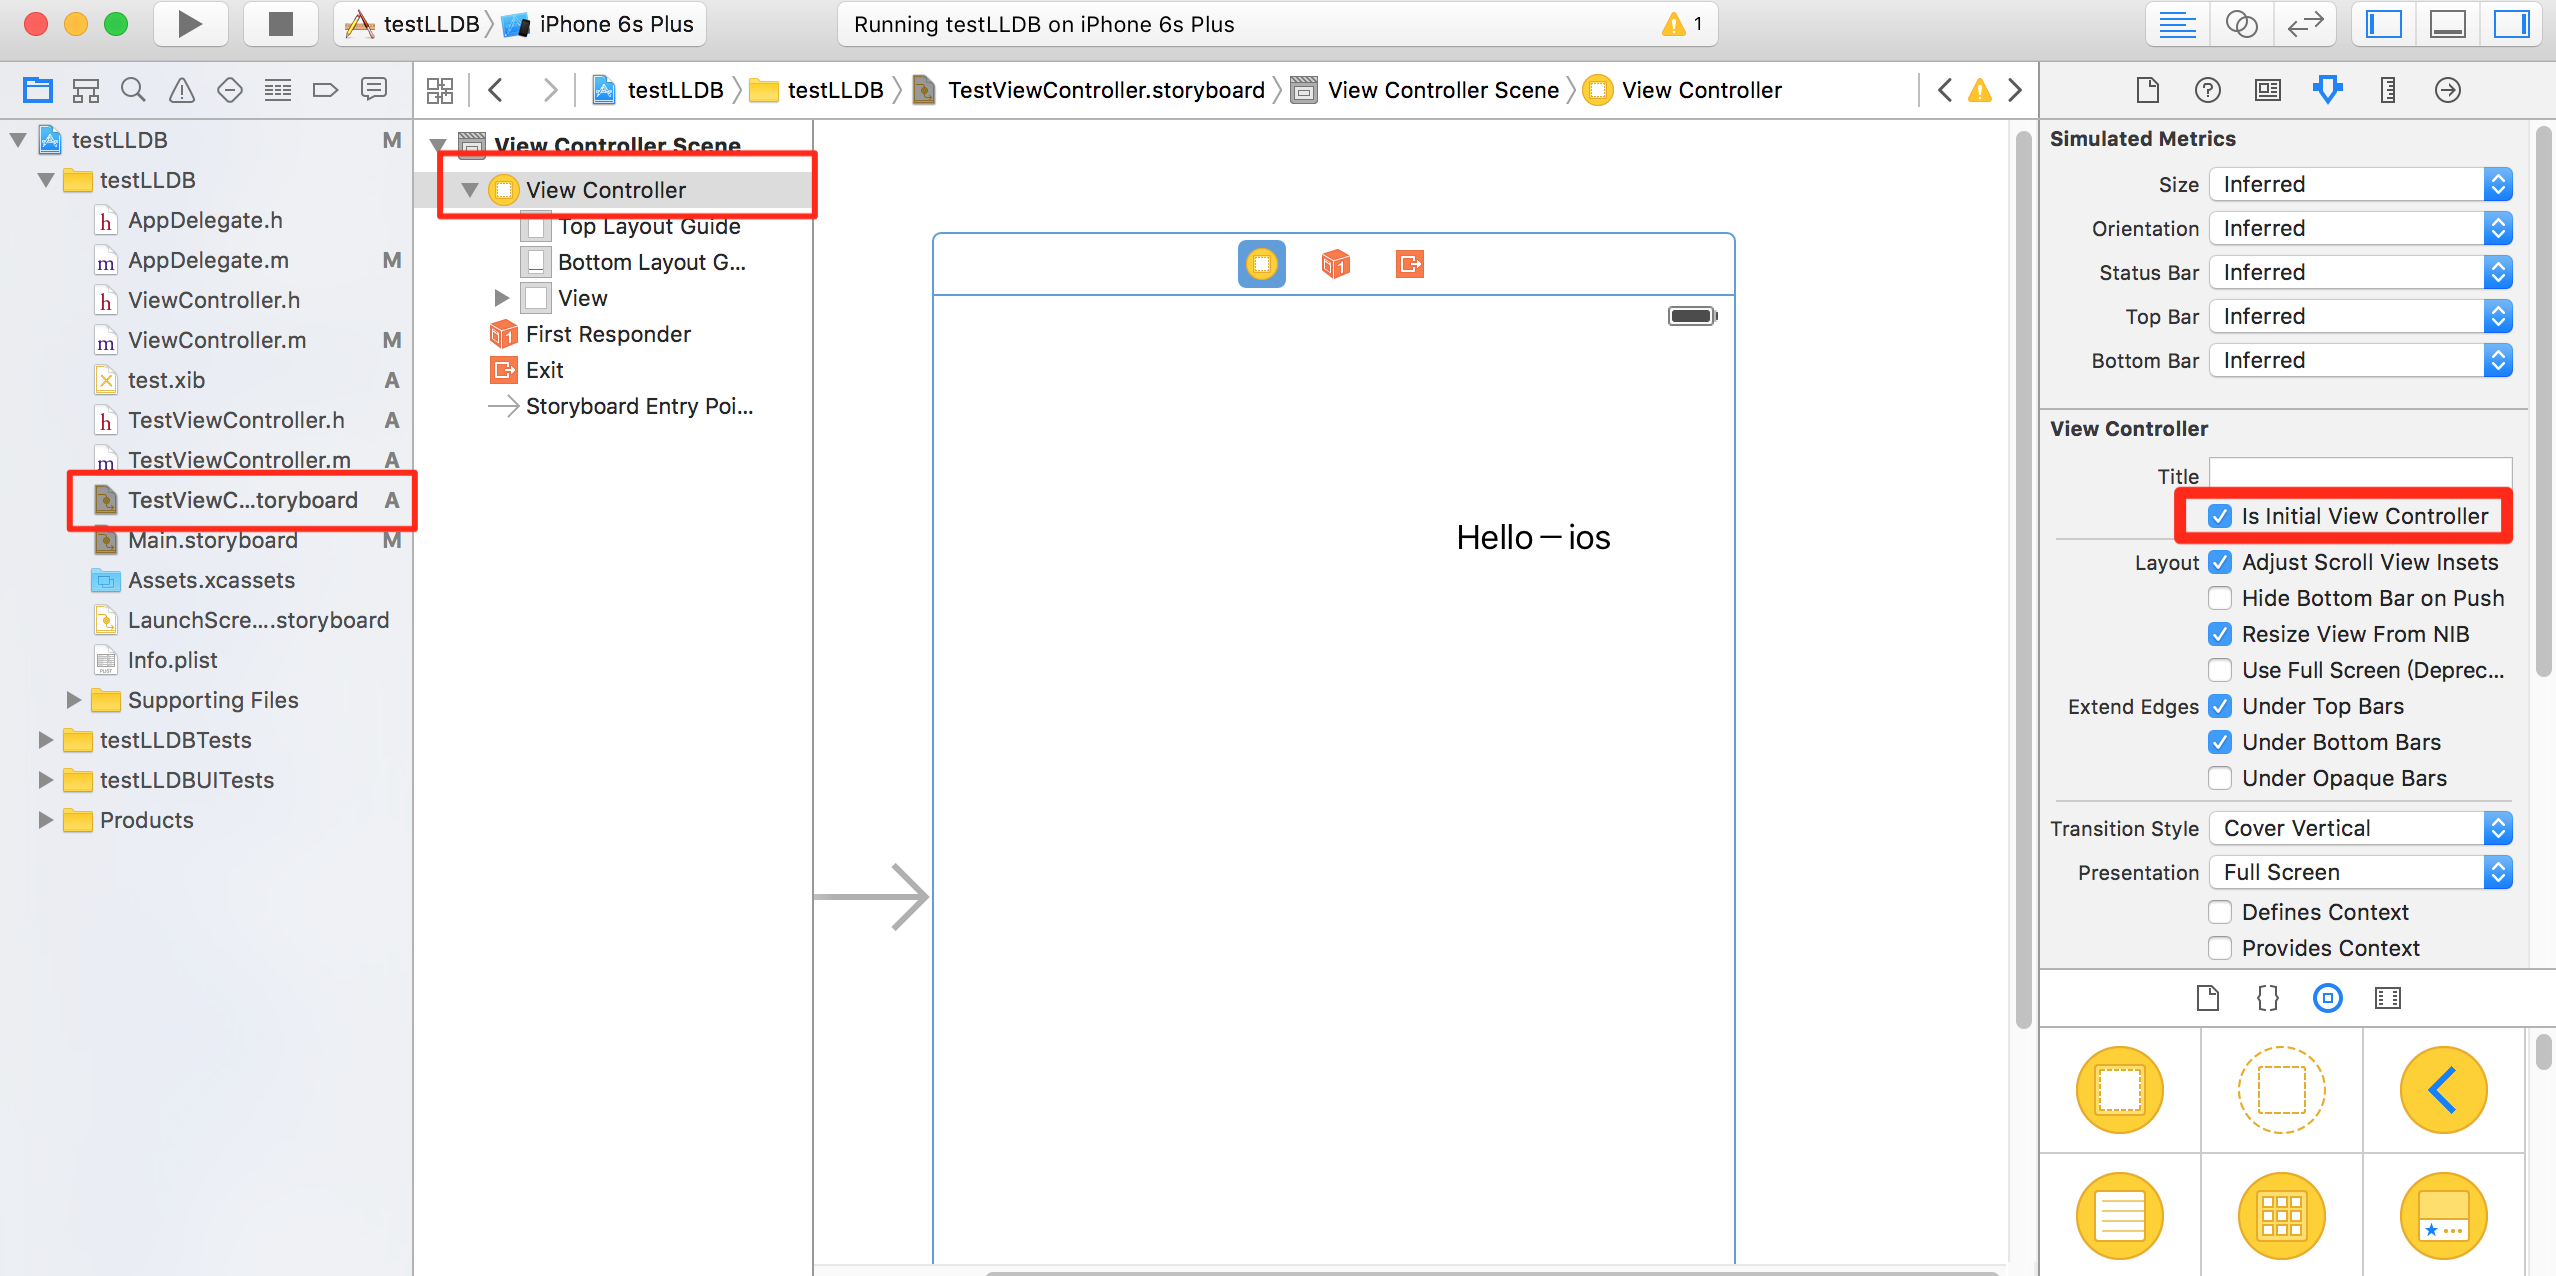
Storyboard文件创建好后,点击该Storyboard文件,设置如下:
1、点击TestViewController.storyboard -> View Controller -> 身份检查器 -> Class -> UIViewController
2、Identity -> Storyboard ID -> 填入该控制器的唯一标识
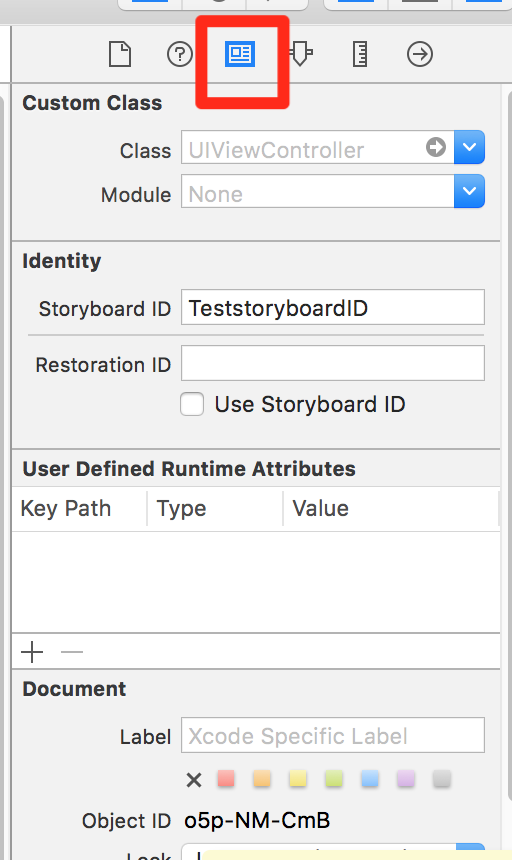
属性面板中的Is Initial View Controller选项一定要选中,否则程序运行时会出现crash。详情请阅读Application tried to present a nil modal view controller on target “Current View Controller”解决方案。
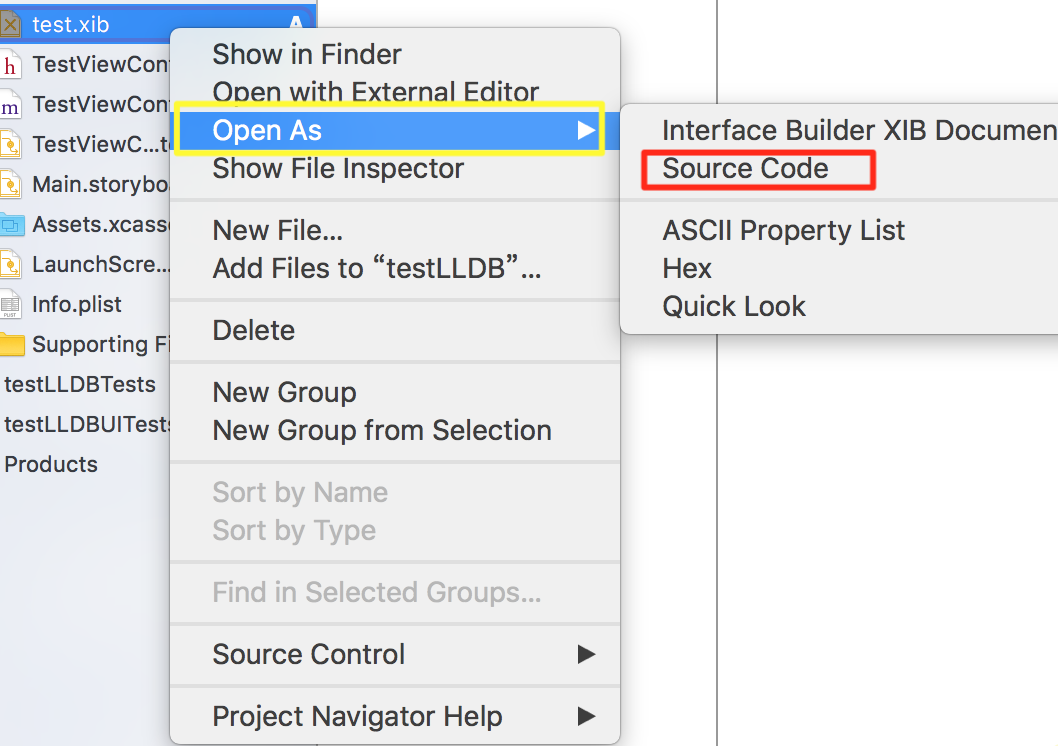
TestViewController.storyboard文件用Source Code打开:
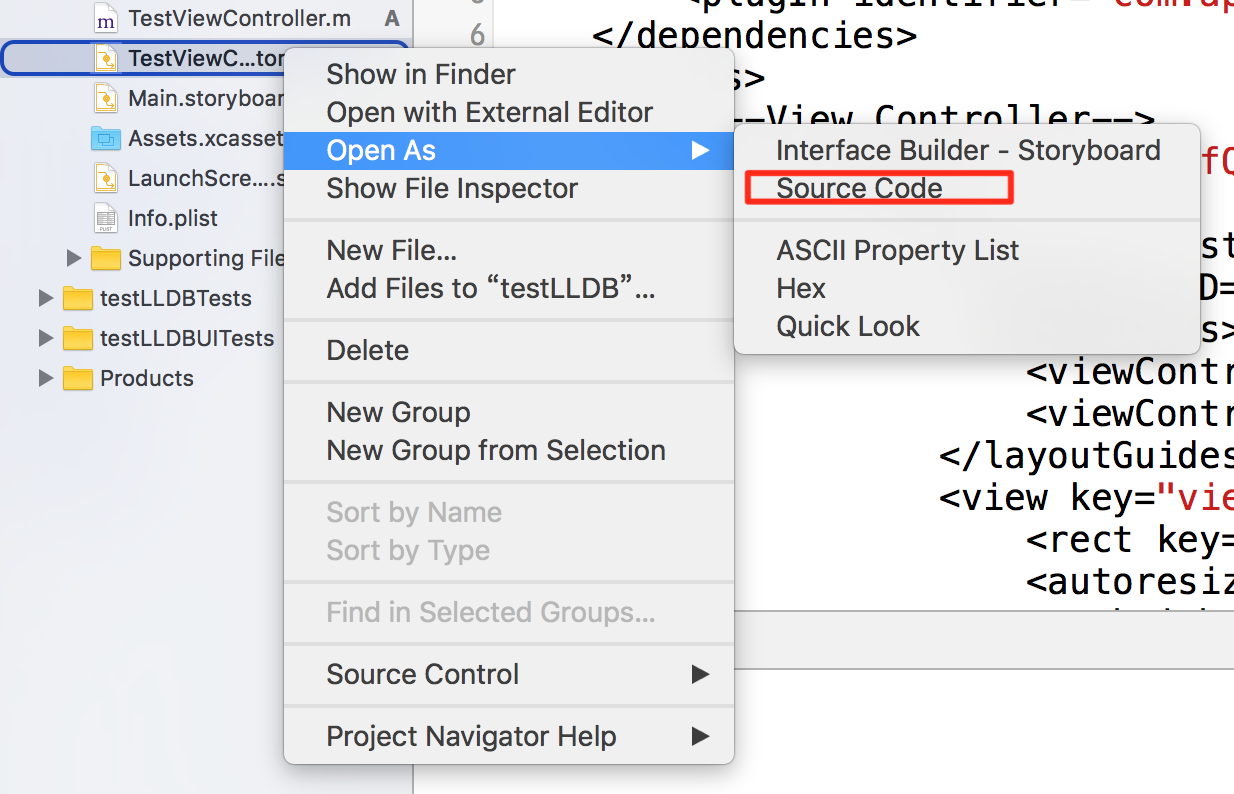
对应xml详情:
<?xml version="1.0" encoding="UTF-8" standalone="no"?>

<document type="com.apple.InterfaceBuilder3.CocoaTouch.Storyboard.XIB" version="3.0" toolsVersion="10117" systemVersion="15F34" targetRuntime="iOS.CocoaTouch" propertyAccessControl="none" useAutolayout="YES" useTraitCollections="YES" initialViewController="o5p-NM-CmB">

    <dependencies>

        <deployment identifier="iOS"/>

        <plugIn identifier="com.apple.InterfaceBuilder.IBCocoaTouchPlugin" version="10085"/>

    </dependencies>

    <scenes>

        <!--View Controller-->

        <scene sceneID="KVb-4h-YfQ">

            <objects>

                <viewController storyboardIdentifier="TeststoryboardID" id="o5p-NM-CmB" sceneMemberID="viewController">

                    <layoutGuides>

                        <viewControllerLayoutGuide type="top" id="rlj-D4-qTs"/>

                        <viewControllerLayoutGuide type="bottom" id="efH-L5-gfL"/>

                    </layoutGuides>

                    <view key="view" contentMode="scaleToFill" id="efL-Bt-VVl">

                        <rect key="frame" x="0.0" y="0.0" width="600" height="600"/>

                        <autoresizingMask key="autoresizingMask" widthSizable="YES" heightSizable="YES"/>

                        <subviews>

                            <label opaque="NO" userInteractionEnabled="NO" contentMode="left" horizontalHuggingPriority="251" verticalHuggingPriority="251" fixedFrame="YES" restorationIdentifier="MyStoryboard" text="Hello-ios" textAlignment="center" lineBreakMode="tailTruncation" baselineAdjustment="alignBaselines" adjustsFontSizeToFit="NO" translatesAutoresizingMaskIntoConstraints="NO" id="lk9-fl-mjE">

                                <rect key="frame" x="199" y="100" width="202" height="41"/>

                                <fontDescription key="fontDescription" type="system" pointSize="17"/>

                                <color key="textColor" cocoaTouchSystemColor="darkTextColor"/>

                                <nil key="highlightedColor"/>

                            </label>

                        </subviews>

                        <color key="backgroundColor" white="1" alpha="1" colorSpace="calibratedWhite"/>

                    </view>

                </viewController>

                <placeholder placeholderIdentifier="IBFirstResponder" id="C30-mU-UYt" userLabel="First Responder" sceneMemberID="firstResponder"/>

            </objects>

            <point key="canvasLocation" x="910" y="142"/>

        </scene>

    </scenes>

</document>
在xml文件中我将storyboard和Label对应的部分加粗进行了突出显示。
使用storyboard文件
- (IBAction)btnClick:(id)sender {

    UIStoryboard *storyboard = [UIStoryboard storyboardWithName:@"TestViewController" bundle:nil];

     _viewOfStoryboard = [storyboard instantiateInitialViewController];

    //使用storyboardID创建

//    _viewOfStoryboard = [storyboard instantiateViewControllerWithIdentifier:@"TeststoryboardID"];

    _viewOfStoryboard.view.backgroundColor = [UIColor whiteColor];

    [self dismissViewControllerAnimated:YES completion:nil];

    [self presentViewController:_viewOfStoryboard animated:YES completion:nil];

}
运行显示:
点击Button ----------------->显示
关于xib文件和storyboard文件的那些事儿的更多相关文章
- [转]iOS学习笔记(2)--Xcode6.1创建仅xib文件无storyboard的hello world应用
转载地址:http://www.mamicode.com/info-detail-514151.html 由于Xcode6之后,默认创建storyboard而非xib文件,而作为初学,了解xib的加载 ...
- iOS学习笔记(2)--Xcode6.1创建仅xib文件无storyboard的hello world应用
http://www.mamicode.com/info-detail-514151.html 由于Xcode6之后,默认创建storyboard而非xib文件,而作为初学,了解xib的加载原理很重要 ...
- iOS 11开发教程(六)iOS11Main.storyboard文件编辑界面
iOS 11开发教程(六)iOS11Main.storyboard文件编辑界面 在1.2.2小节中提到过编辑界面(Interface builder),编辑界面是用来设计用户界面的,单击打开Main. ...
- storyboard文件的认识
- 作用:描述软件界面 - 程序启动的简单过程 - 程序一启动,就会加载`Main.storyboard`文件 - 会创建箭头所指的控制器,并且显示控制器所管理的软件界面 - 配置程序 ...
- Swift下自定义xib添加到Storyboard
猴子原创,欢迎转载.转载请注明: 转载自Cocos2Der-CSDN,谢谢! 原文地址: http://blog.csdn.net/cocos2der/article/details/51657154 ...
- 制作静态库文件(.a文件)
制作静态库文件(.a文件) 1.创建静态库工程: 在Xcode中new一个新的project,选择IOS下面的Framework&Library,下面有一个Cocoa Touch Static ...
- iOS开发之info.pist文件和.pch文件
iOS开发之info.pist文件和.pch文件 如果你是iOS开发初学者,不用过多的关注项目中各个文件的作用.因为iOS开发的学习路线起点不在这里,这些文件只会给你学习带来困扰. 打开一个项目,我们 ...
- 保护你的代码,生成.a文件以及.framework文件需要注意的地方
一个好的设计,一个方便使用的控件封装,一个酷炫的动画... 是不是迫不及待要分享给大家你的每一个突然蹦出来的好的idea,那就下手吧! 可是,你想要的只是让大家使用它,而不是把所有技术点都公开给每个人 ...
- UWP开发之Template10实践:本地文件与照相机文件操作的MVVM实例(图文付原代码)
前面[UWP开发之Mvvmlight实践五:SuspensionManager中断挂起以及复原处理]章节已经提到过Template10,为了认识MvvmLight的区别特做了此实例. 原代码地址:ht ...
随机推荐
- springmvc 向页面传值
- 2016 - 1 - 23 json转模型 常用的第三方框架
一: 三个常用的框架 1. Mantle - 所有模型必须继承MTModel 2. JSONModel - 所有模型必须继承JSONModel 3.MJExtension - 不需要继承任何东西. - ...
- js:setTimeout 与 setInterval 比较
在javascript中有两个非常有用的函数:setTimeout 和setInterval ,都是定时器:但是两者存在着一些区别: 1. setTimeout函数 用法:setTimeout(fn, ...
- (基础篇)echo、print、print_r、printf、sprintf、var_dump的区别比较
一.echo echo() 实际上不是一个函数,是php语句,因此您无需对其使用括号.不过,如果您希望向 echo() 传递一个以上的参数,那么使用括号会发生解析错误.而且echo是返回void的,并 ...
- Node.js高级编程读书笔记 - 5 数据库 - Never
Outline 6 连接数据库 6.1 使用node-mysql连接MySQL数据库 6.2 使用Nano连接CouchDB数据库 6.3 使用Mongoose连接MongoDB数据库 6 连接数据库 ...
- 构建一个简单的WCF应用——WCF学习笔记(1)
通过<WCF全面解析>来知识分享....感谢蒋金楠老师@Artech 一.VS中构建解决方案 Client一个控制台程序模拟的客户端,引用Service.ServiceModel.dl ...
- Objective-c——UI进阶开发第一天(UIPickerView和UIDatePicker)
一.知识点 1.介绍数据选择控件UIPickerView和日期选择控件UIDatePicker控件 * UIPickerView的案例 * 点餐系统 * 城市选择 * 国旗选择 * UIDatePic ...
- Sprint第一个冲刺(第九天)
一.Sprint介绍 建立云端数据库,把注册的内容保存到云端,不易丢失. 实验截图: 任务进度: 二.Sprint周期 看板: 燃尽图:
- 论文笔记之:Conditional Generative Adversarial Nets
Conditional Generative Adversarial Nets arXiv 2014 本文是 GANs 的拓展,在产生 和 判别时,考虑到额外的条件 y,以进行更加"激烈 ...
- MQTT服务器搭建-mosquitto1.4.4安装指南
Mosquitto mosquitto是一款实现了 MQTT v3.1 协议的开源的消息代理服务软件. 其提供了非常轻量级的消息数据传输协议,采用发布/订阅模式进行工作,可用于物联设备.中间件.APP ...