
Taro自定义Modal对话框组件|taro仿微信、android弹窗
基于Taro多端实践TaroPop:自定义模态框|dialog对话框|msg消息框|Toast提示
taro自定义弹出框支持编译到多端H5/小程序/ReactNative,还可以自定义弹窗类型/弹窗样式、多按钮事件/样式、自动关闭、遮罩层、弹窗显示位置及自定义内容模板
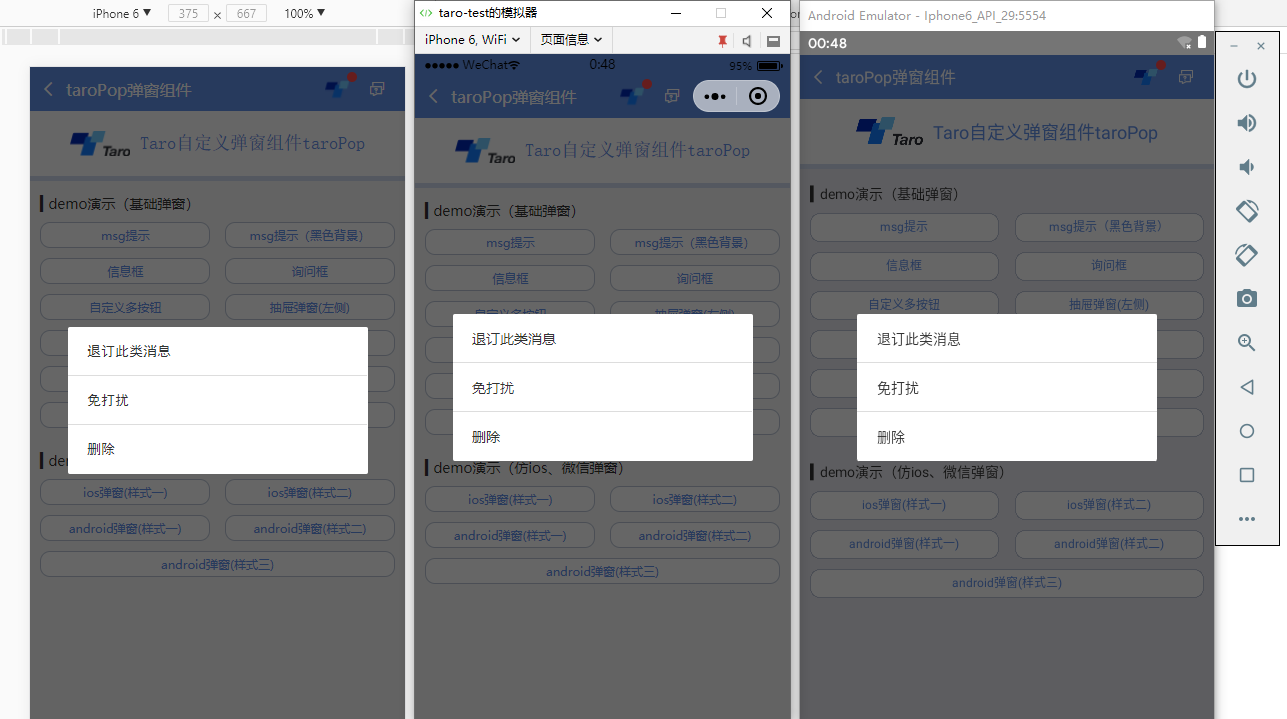
用法
▍在相应页面引入组件
import TaroPop from '@components/taroPop'
import Taro from '@tarojs/taro'

import { View, Text } from '@tarojs/components'

// 引入自定义弹窗组件

import TaroPop from '@components/taroPop'

export default class TaroPopDemo extends Taro.Component {

    ...

    render() {

        return (

            <View className="taro-container">

                ...

                {/* 引入弹窗模板 */}

                <TaroPop ref="taroPop" />

            </View>

        );

    }

}
通过ref方式调用组件内show、close方法
this.refs.taroPop.show({...options})
this.refs.taroPop.close()
▍自定义弹窗模板内容(如下图)
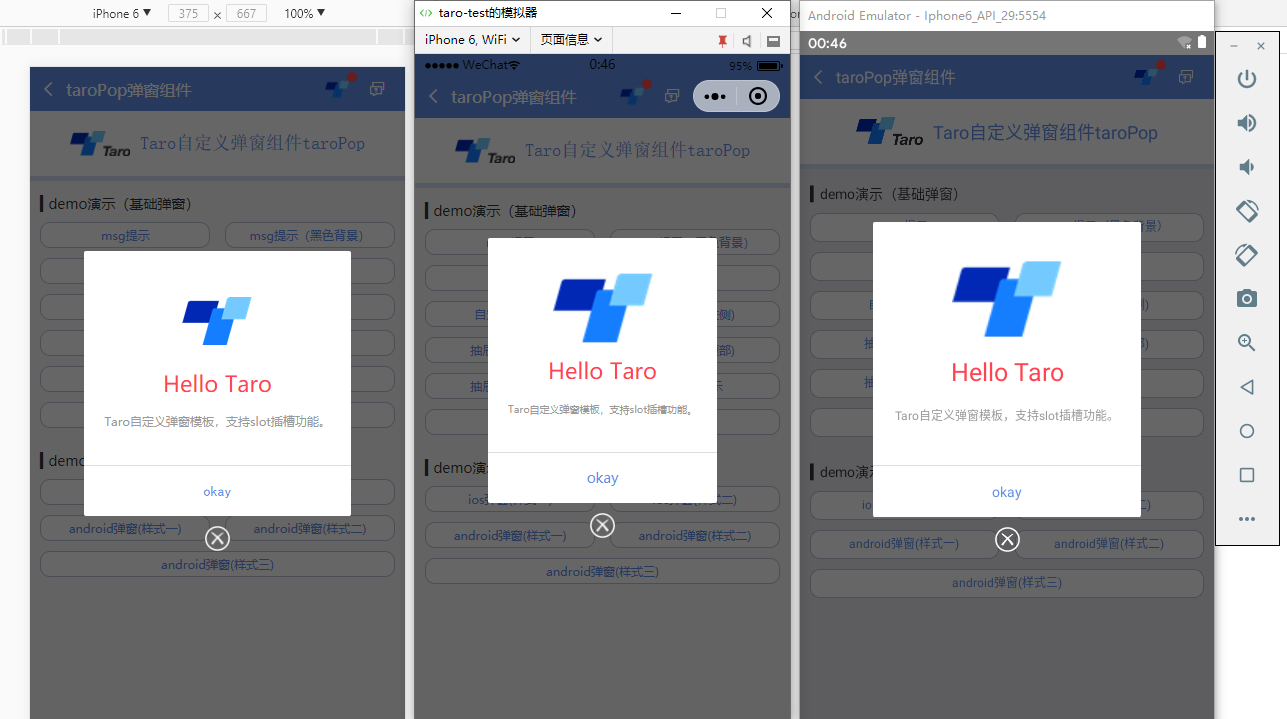
只需把页面上的模板写成如下即可,调用方式还和上面一样
<TaroPop ref="taroPopTpl">

    ...

</TaroPop>
支持多种参数配置:
/**

 * @ 弹窗默认配置

 */

static defaultProps = {

    isVisible: false,       //弹窗显示

    title: '',              //标题

    content: '',            //内容

    contentStyle: null,     //内容样式

    style: null,            //自定义弹窗样式

    skin: '',               //弹窗风格

    icon: '',               //弹窗图标

    xclose: false,          //自定义关闭按钮

    shade: true,            //遮罩层

    shadeClose: true,       //点击遮罩关闭

    opacity: '',            //遮罩透明度

    time: 0,                //自动关闭时间

    end: null,              //销毁弹窗回调函数

    position: '',           //弹窗位置显示

    btns: null,             //弹窗按钮 [{...args}, {...args}]

}
/**

 * 显示弹窗事件

 */

show = (options) => {

    this.setState({

        ...this.props, ...options, isVisible: true

    })

}

/**

 * 关闭弹窗事件

 */

close = () => {

    this.setState({...this.props})

    this.timer && clearTimeout(this.timer)

    delete this.timer

    typeof this.state.end === 'function' && this.state.end.call(this)

}

/**

 * 点击遮罩关闭

 */

shadeClick = () => {

    if(!this.state.shadeClose) return

    this.close()

}
◆ msg消息框提示
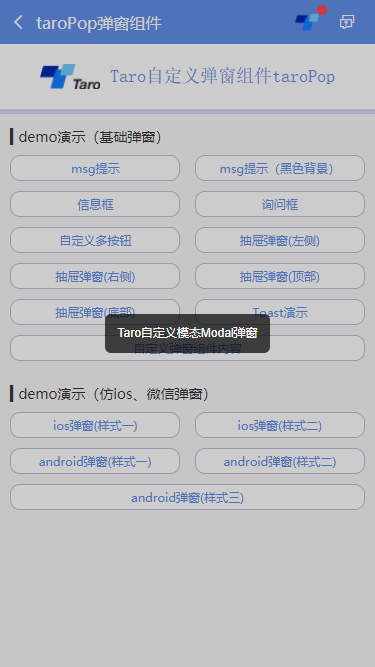
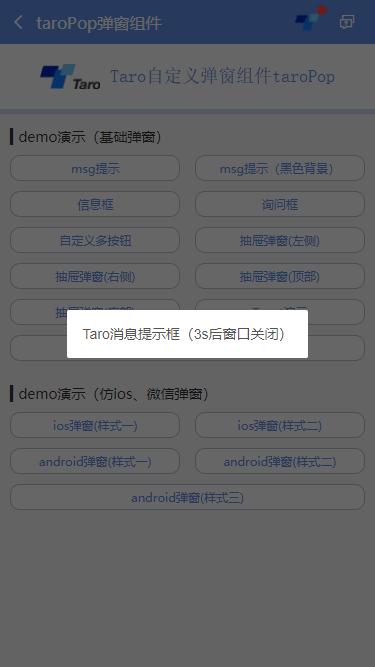
this.refs.taroPop.show({

    content: 'Taro自定义模态Modal弹窗',

    shadeClose: false,

    style: {backgroundColor: 'rgba(0,0,0,.7)', borderRadius: 6},

    contentStyle: {color: '#fff', fontSize: 12, padding: 12},

    time: 3,

    opacity: .2,

})
◆ Toast轻提示效果(success | error | info | loading四种图标)
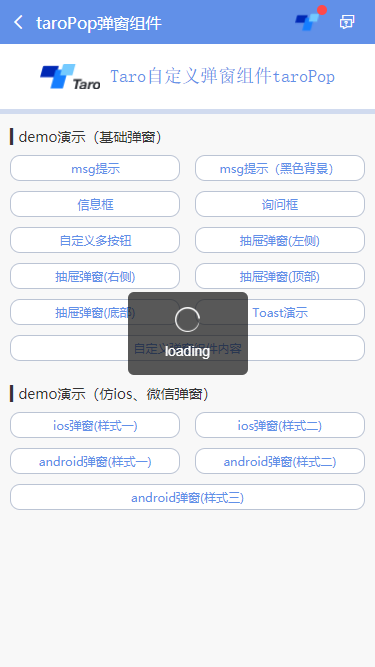
let taroPop = this.refs.taroPop

taroPop.show({

    skin: 'toast',

    content: 'loading',

    icon: 'loading', //success | info | error | loading

    shade: false,

    time: 3

})
◆ android弹窗效果
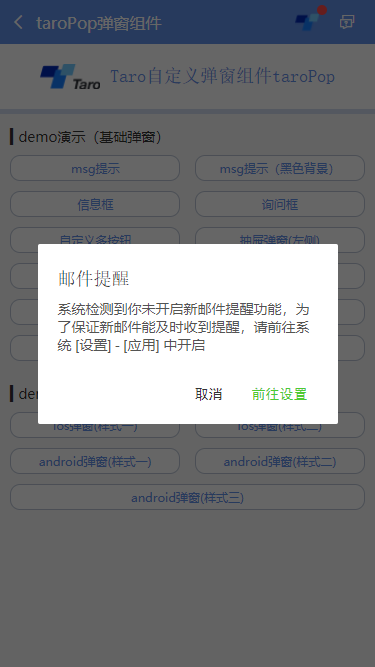
let taroPop = this.refs.taroPop

taroPop.show({

    skin: 'android',

    title: '邮件提醒',

    content: '系统检测到你未开启新邮件提醒功能,为了保证新邮件能及时收到提醒,请前往系统 [设置] - [应用] 中开启',

    shadeClose: false,

    btns: [

        {

            text: '取消',

            onClick() {

                taroPop.close()

            }

        },

        {

            text: '前往设置',

            style: {color: '#4eca33'},

            onClick() {

                console.log('您点击了前往设置!')

            }

        }

    ]

})
emmmm,看了如上展示及调用方式,是否觉得还不错哟!哈哈哈,这可是花了无数个日夜采坑的结果。
尤其是编译到reactNative端,各种千奇百怪的问题,有些抓狂~~
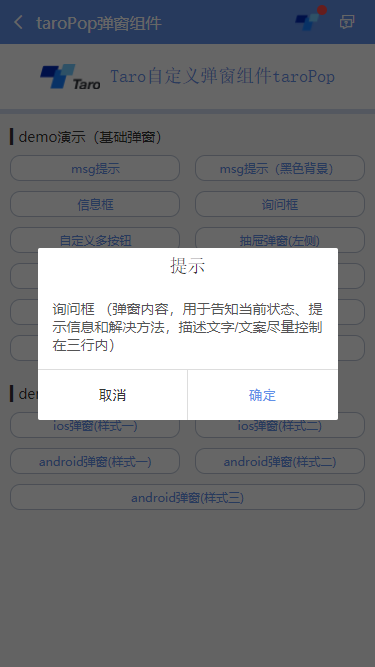
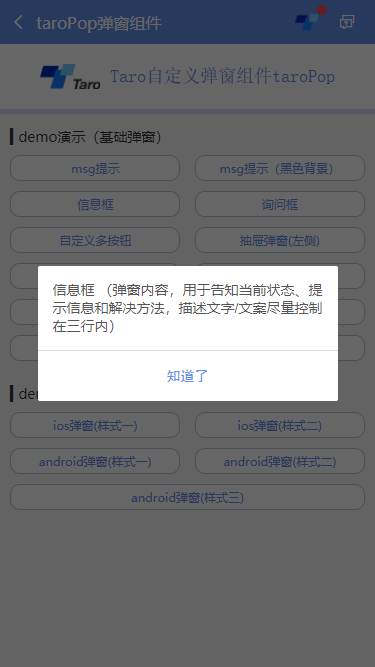
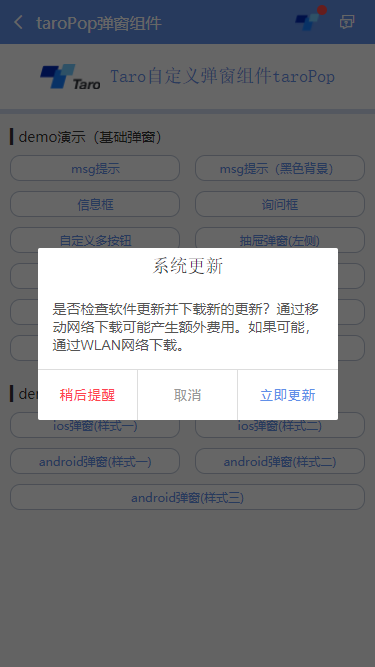
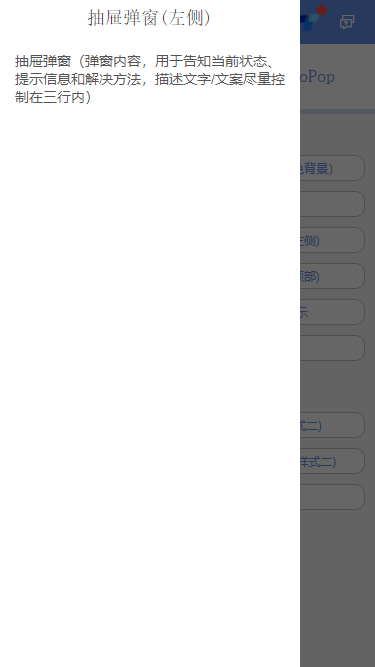

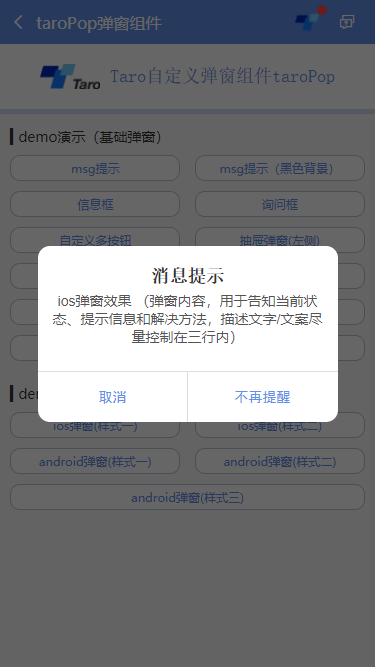
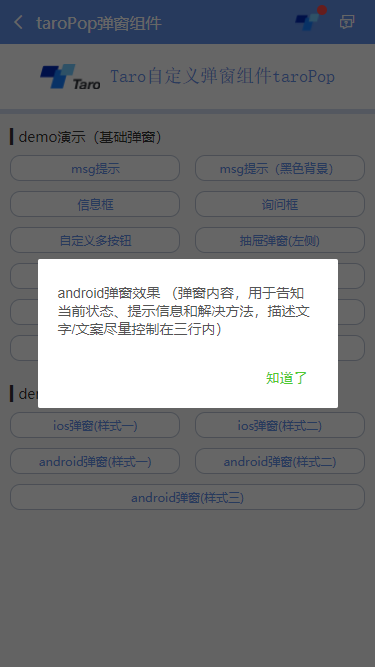
另外对于不同端的一些兼容性处理,需要判断各端环境并渲染相应模板,对于RN,则使用Modal
let taroEnv = process.env.TARO_ENV

// 渲染窗体

if (taroEnv === 'rn') {

    return (

        <Modal transparent={true} visible={isVisible} onRequestClose={this.close}>

            {renderTpl}

        </Modal>

    )

}else if (taroEnv === 'h5' || taroEnv === 'weapp'){

    return isVisible && renderTpl

}
另外在样式处理上也需注意RN端兼容性。
/**

 * @Title     Taro自定义弹窗组件 - taroPop.js

 * @Time     andy by 2019-11-28

 * @About     Q:282310962  wx:xy190310

 */

import Taro from '@tarojs/taro'

import { View, Text, Image } from '@tarojs/components'

import { Modal, ActivityIndicator, TouchableHighlight } from 'react-native'

import classNames from 'classnames'

import './index.scss'

export default class TaroPop extends Taro.Component {

    /**

     * @ 弹窗默认配置

     */

    static defaultProps = {

        isVisible: false,       //弹窗显示

        title: '',              //标题

        content: '',            //内容

        contentStyle: null,     //内容样式

        style: null,            //自定义弹窗样式

        skin: '',               //弹窗风格

        icon: '',               //弹窗图标

        xclose: false,          //自定义关闭按钮

        shade: true,            //遮罩层

        shadeClose: true,       //点击遮罩关闭

        opacity: '',            //遮罩透明度

        time: 0,                //自动关闭时间

        end: null,              //销毁弹窗回调函数

        anim: 'scaleIn',        //弹窗动画

        position: '',           //弹窗位置显示

        btns: null,             //弹窗按钮 [{...args}, {...args}]

    }

    constructor(props) {

        super(props)

        this.state = {

            ...this.props,

        }

        this.timer = null

    }

    /**

     * @ 显示弹窗事件

     */

    show = (options) => {

        this.setState({

            ...this.props, ...options, isVisible: true

        })

    }

    /**

     * @ 关闭弹窗事件

     */

    close = () => {

        this.setState({...this.props})

        this.timer && clearTimeout(this.timer)

        delete this.timer

        typeof this.state.end === 'function' && this.state.end.call(this)

    }

    /**

     * @ 点击遮罩关闭

     */

    shadeClick = () => {

        if(!this.state.shadeClose) return

        this.close()

    }

    render() {

        let { isVisible, title, content, contentStyle, style, skin, icon, xclose, shade, shadeClose, opacity, time, end, anim, position, btns } = this.state

        let toastIcon = {

            loading: require('./skin/loading.png'),

            success: require('./skin/success.png'),

            error: require('./skin/error.png'),

            info: require('./skin/info.png'),

        }

        let taroEnv = process.env.TARO_ENV

        ...

        // 渲染H5、RN模板

        const renderTpl = (

            <View className="taroPop">

                {/* 遮罩 */}

                {shade ? <View className="atpop__ui_mask" style={{opacity: opacity == '' ? .6 : opacity}} onClick={this.shadeClick} /> : null}

                {/* 窗体 */}

                <View className="atpop__ui_main">

                    <View className={classNames('atpop__ui_child', skin && 'atpop__' + skin, position && 'atpop__ui_child-' + position)} style={style}>

                        {/* 标题 */}

                        {title ? <Text className={classNames('atpop__ui_tit', skin && 'atpop__ui_tit-' + skin)}>{title}</Text> : null}

                        {/* 内容 */}

                        {content ? <View className="atpop__ui_cnt">

                            {/* toast内容 */}

                            {icon && skin === 'toast' ?

                                <View className="atpop__ui_toast">

                                    {icon === 'loading' && taroEnv === 'rn' ?

                                    <ActivityIndicator color="rgba(255,255,255,.5)" size={24} /> : <Image className={classNames('atpop__ui_toast-img', icon=='loading' && 'atpop__ui_toast-img-loading')} src={toastIcon[icon]} mode="aspectFit" />

                                    }

                                </View>

                                :

                                null

                            }

                            {/* 文本内容 */}

                            <Text className={classNames('atpop__ui_cntxt', skin && 'atpop__ui_cntxt-' + skin)} style={contentStyle}>{content}</Text>

                        </View>

                        :

                        this.props.children

                        }

                        {/* 按钮 */}

                        {btns ? <View className={classNames('atpop__ui_btns', skin && 'atpop__ui_btns-' + skin)}>

                            {btns.map((item, i) => {

                                return taroEnv === 'rn' ?

                                <TouchableHighlight className={classNames('atpop__ui_btn', skin && 'atpop__ui_btn-' + skin)} activeOpacity={1} underlayColor='rgba(200,200,200,.3)' key={i} onPress={item.onClick}>

                                    <Text className={classNames('atpop__ui_btntxt', skin && 'atpop__ui_btntxt-' + skin)} style={item.style}>{item.text}</Text>

                                </TouchableHighlight>

                                :

                                <View className={classNames('atpop__ui_btn', skin && 'atpop__ui_btn-' + skin)} key={i} onClick={item.onClick}>

                                    <Text className={classNames('atpop__ui_btntxt', skin && 'atpop__ui_btntxt-' + skin)} style={item.style}>{item.text}</Text>

                                </View>

                            })}

                        </View>

                        :

                        null

                        }

                    </View>

                    {/* xclose */}

                    {xclose ? <View className="atpop__ui_xclose" onClick={this.close}><Image className="atpop__ui_xclose-img" src={require('./skin/error.png')} mode="aspectFit" /></View> : null}

                </View>

            </View>

        )

        // 渲染窗体

        if (taroEnv === 'rn') {

            return (

                <Modal transparent={true} visible={isVisible} onRequestClose={this.close}>

                    {renderTpl}

                </Modal>

            )

        }else if (taroEnv === 'h5' || taroEnv === 'weapp'){

            return isVisible && renderTpl

        }

    }

}
好了,以上就是taro自定义弹窗组件实现方式,希望能有帮助✊✊~~
Taro自定义Modal对话框组件|taro仿微信、android弹窗的更多相关文章
- 安卓开发笔记——Fragment+ViewPager组件(高仿微信界面)
什么是ViewPager? 关于ViewPager的介绍和使用,在之前我写过一篇相关的文章<安卓开发复习笔记——ViewPager组件(仿微信引导界面)>,不清楚的朋友可以看看,这里就不再 ...
- 转-Fragment+ViewPager组件(高仿微信界面)
http://www.cnblogs.com/lichenwei/p/3982302.html 什么是ViewPager? 关于ViewPager的介绍和使用,在之前我写过一篇相关的文章<安卓开 ...
- 凡信(超仿微信Android版)开源了,内有源码下载 -
韩梦飞沙 韩亚飞 313134555@qq.com yue31313 han_meng_fei_sha 凡信(超仿微信Android版)开源了,内有源码下载 - IM Geek开发者社区-移动 ...
- 转-ViewPager组件(仿微信引导界面)
http://www.cnblogs.com/lichenwei/p/3970053.html 这2天事情比较多,都没时间更新博客,趁周末,继续继续~ 今天来讲个比较新潮的组件——ViewPager ...
- 安卓开发笔记——ViewPager组件(仿微信引导界面)
这2天事情比较多,都没时间更新博客,趁周末,继续继续~ 今天来讲个比较新潮的组件——ViewPager 什么是ViewPager? ViewPager是安卓3.0之后提供的新特性,继承自ViewGro ...
- uni-app自定义导航栏按钮|uniapp仿微信顶部导航条
最近一直在学习uni-app开发,由于uniapp是基于vue.js技术开发的,只要你熟悉vue,基本上很快就能上手了. 在开发中发现uni-app原生导航栏也能实现一些顶部自定义按钮+搜索框,只需在 ...
- C/C++ Qt 自定义Dialog对话框组件应用
在上一篇博文 <C/C++ Qt 标准Dialog对话框组件应用> 中我给大家演示了如何使用Qt中内置的标准对话框组件实现基本的数据输入功能. 但有时候我们需要一次性修改多个数据,使用默认 ...
- h5聊天室web端(仿微博、微信)|h5仿微信网页端|仿微信界面弹窗
这段时间一直在着手h5开发手机端聊天系统——html5仿微信聊天室,最近又在原先基础上开发了一个仿微信.微博网页web版聊天系统,使用到了HTML5+css3+jQuery+wcpop等技术开发,弹窗 ...
- Taro聊天室|react+taro仿微信聊天App界面|taro聊天实例
一.项目简述 taro-chatroom是基于Taro多端实例聊天项目,运用Taro+react+react-redux+taroPop+react-native等技术开发的仿微信App界面聊天室,实 ...
随机推荐
- js反爬学习(一)谷歌镜像
1. url:https://ac.scmor.com/ 2. target:如下链接 3. 过程分析: 3.1 打开chrome调试,进行元素分析.随便定位一个“现在访问” 3.2 链接不是直接挂在 ...
- ArcGIS JS 4加载第三方矢量切片
现在矢量切片越来越普及,对于地图渲染能更轻更快.ArcGIS JS 4.13可以实现加载第三方矢量切片,以下为代码示例,最下方是我之前切的建筑物数据. 当切片大小在1M左右,加载效果还 ...
- SMTP email from C#
/// <summary> /// 一人一附件发送邮件 /// 2017-05-17 涂聚文 GeovinDu /// </summary> /// <param nam ...
- 基于H7的中移动物联例子以及简易操作说明,方便电脑端和手机端远程查看数据
说明: 1.操作前,务必优先看此贴里面的基础例子,先将WIFI连接到路由器上,这样才可以访问外网: https://www.cnblogs.com/armfly/p/11307803.html 2.有 ...
- C# Replace字符替换函数
它可以将字串内的字符替换为别的字符,可以嵌套使用,如下: 需要注意的是,它可以把字符替换为空,但不可以替换空字符,当不确定字符串是否为空时,可以进行以下判断,再替换: 示例的完整代码: string ...
- Linux(一)
1.简单命令 1.1 ls指令 语法1:#ls [路径] 表示列出指定路径下的文件夹和文件的名字,如果路径没有指定则列出当前路径下的(lis ...
- Java生鲜电商平台-服务化后的互联网架构实战(针对生鲜电商小程序或者APP)
Java生鲜电商平台-服务化后的互联网架构实战(针对生鲜电商小程序或者APP) “微服务架构”的话题非常之火,很多朋友都在小窗我,说怎么做服务化?解答“怎么做”之前,先得了解“为什么做”. 画外音:做 ...
- JS---体验DOM操作
体验DOM操作 1. <!--html代码--> <input type="button" value="弹框" onclick=" ...
- (草稿)如何判断一名UiPath开发人员是否合格?
一名合格的UiPath开发人员究竟需要具备什么核心技能?业务梳理?沟通技巧?VB.net吗?VBA吗?Python?还是SQL?出于多种原因,关于这一点总是众说纷纭,莫衷一是.尽管这些技术都算沾边,但 ...
- Android8.1 MTK平台 SystemUI源码分析之 网络信号栏显示刷新
SystemUI系列文章 Android8.1 MTK平台 SystemUI源码分析之 Notification流程 Android8.1 MTK平台 SystemUI源码分析之 电池时钟刷新 And ...