SpringBoot重点详解--使用Junit进行单元测试
目录
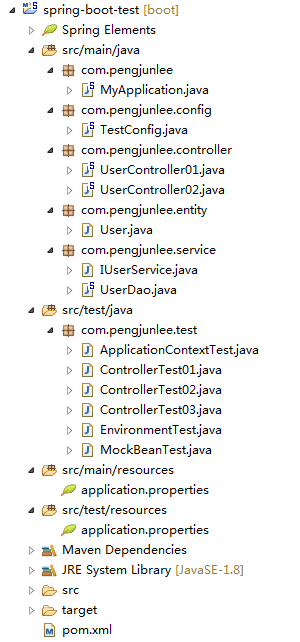
本文将对在Springboot中如何使用Junit进行单元测试进行简单示例和介绍,项目的完整目录层次如下图所示。
添加依赖与配置
为了保证测试的完整性,本工程POM文件中除引入Junit单元测试依赖外,还额外引入了用来测试JDBC和Controller的JPA和WEB依赖。
-
<parent>
-
<groupId>org.springframework.boot</groupId>
-
<artifactId>spring-boot-starter-parent</artifactId>
-
<version>1.5.6.RELEASE</version>
-
</parent>
-
-
<dependencies>
-
<!-- 添加MySQL依赖 -->
-
<dependency>
-
<groupId>mysql</groupId>
-
<artifactId>mysql-connector-java</artifactId>
-
</dependency>
-
<!-- 添加JDBC依赖 -->
-
<dependency>
-
<groupId>org.springframework.boot</groupId>
-
<artifactId>spring-boot-starter-data-jpa</artifactId>
-
</dependency>
-
<dependency>
-
<groupId>org.springframework.boot</groupId>
-
<artifactId>spring-boot-starter-web</artifactId>
-
</dependency>
-
<!-- 引入单元测试依赖 -->
-
<dependency>
-
<groupId>org.springframework.boot</groupId>
-
<artifactId>spring-boot-starter-test</artifactId>
-
<scope>test</scope>
-
</dependency>
-
</dependencies>
同时,在src/main/resources目录下添加核心配置文件application.properties,内容如下。
-
#########################################################
-
### Spring DataSource -- DataSource configuration ###
-
#########################################################
-
spring.datasource.url=jdbc:mysql://localhost:3306/dev1?useUnicode=true&characterEncoding=utf8
-
spring.datasource.driverClassName=com.mysql.jdbc.Driver
-
spring.datasource.username=root
-
spring.datasource.password=123456
-
-
#########################################################
-
### Java Persistence Api -- Spring jpa configuration ###
-
#########################################################
-
# Specify the DBMS
-
spring.jpa.database = MYSQL
-
# Show or not log for each sql query
-
spring.jpa.show-sql = true
-
# Hibernate ddl auto (create, create-drop, update)
-
spring.jpa.hibernate.ddl-auto = update
-
# Naming strategy
-
#[org.hibernate.cfg.ImprovedNamingStrategy #org.hibernate.cfg.DefaultNamingStrategy]
-
spring.jpa.hibernate.naming-strategy = org.hibernate.cfg.ImprovedNamingStrategy
-
# stripped before adding them to the entity manager)
-
spring.jpa.properties.hibernate.dialect = org.hibernate.dialect.MySQL5Dialect
ApplicationContext测试
在Springboot中使用Junit进行单元测试的方法很简单,只需要在编写的单元测试类上添加两个注解:@RunWith(SpringRunner.class)和@SpringBootTest。
-
@RunWith(SpringRunner.class) // 等价于使用 @RunWith(SpringJUnit4ClassRunner.class)
-
@SpringBootTest(classes = { MyApplication.class, TestConfig.class })
-
public class ApplicationContextTest {
-
-
@Autowired
-
private ApplicationContext context;
-
-
@Autowired
-
private UserDao userDao;
-
-
@Test
-
public void testUserDao() {
-
userDao.addUser(18, "pengjunlee");
-
}
-
-
@Test
-
public void testConfiguration() {
-
Runnable bean = context.getBean(Runnable.class);
-
Assert.assertNotNull(bean);
-
bean.run();
-
}
-
-
}
UserDao定义如下。
-
@Repository
-
public class UserDao {
-
-
@Autowired
-
private JdbcTemplate jdbcTemplate;
-
-
@Transactional
-
public void addUser(Integer userAge, String userName) {
-
String sql = "insert into tbl_user (age,name) values ('" + userAge + "','" + userName + "');";
-
jdbcTemplate.execute(sql);
-
}
-
}
TestConfig定义如下。
-
/**
-
* @TestConfiguration注解的配置内的Bean仅在测试时装配
-
*/
-
@TestConfiguration
-
public class TestConfig {
-
-
@Bean
-
public Runnable createRunnable(){
-
return ()->{
-
System.out.println("This is a test Runnable bean...");
-
};
-
}
-
}
提示:@SpringBootTest注解的classes可以指定用来加载Spring容器所使用的配置类,@TestConfiguration注解修饰的配置类内的Bean仅在测试的时候才会装配。
Environment测试
我们可以通过@SpringBootTest注解的properties属性向Environment中设置新的属性,也可以通过使用EnvironmentTestUtils工具类来向ConfigurableEnvironment中添加新的属性。
-
@RunWith(SpringRunner.class)
-
@SpringBootTest(properties = { "app.token=pengjunlee" })
-
public class EnvironmentTest {
-
-
@Autowired
-
private Environment env;
-
-
@Autowired
-
private ConfigurableEnvironment cenv;
-
-
@Before
-
public void init() {
-
EnvironmentTestUtils.addEnvironment(cenv, "app.secret=55a4b77eda");
-
}
-
-
@Test
-
public void testEnvironment() {
-
System.out.println(env.getProperty("spring.datasource.url"));
-
Assert.assertEquals("pengjunlee", env.getProperty("app.token"));
-
Assert.assertEquals("55a4b77eda", cenv.getProperty("app.secret"));
-
}
-
-
@Test
-
@Ignore // 忽略测试方法
-
public void testIgnore() {
-
-
System.out.println("你看不见我...");
-
}
-
-
}
扩展:Junit测试用例执行顺序:@BeforeClass ==> @Before ==> @Test ==> @After ==> @AfterClass 。
注意:在使用Junit对Spring容器进行单元测试时,若在src/test/resources 目录下存在核心配置文件,Spring容器将会只加载src/test/resources 目录下的核心配置文件,而不再加载src/main/resources 目录下的核心配置文件。
MockBean测试
我们可以通过@MockBean注解来对那些未添加实现的接口进行模拟测试,预先设定好调用方法期待的返回值,然后再进行测试。
例如,有如下的IUserService接口,定义了一个getUserAge()方法用来根据用户的ID来查询用户的年龄。
-
public interface IUserService {
-
-
Integer getUserAge(Long userId);
-
-
}
使用@MockBean来对IUserService接口进行模拟测试,测试代码如下。
-
@RunWith(SpringRunner.class)
-
public class MockBeanTest {
-
-
@MockBean
-
private IUserService userService;
-
-
@SuppressWarnings("unchecked")
-
@Test(expected = NullPointerException.class)
-
public void testMockBean() {
-
-
BDDMockito.given(userService.getUserAge(2L)).willReturn(Integer.valueOf(18));
-
BDDMockito.given(userService.getUserAge(0L)).willReturn(Integer.valueOf(0));
-
BDDMockito.given(userService.getUserAge(null)).willThrow(NullPointerException.class);
-
-
Assert.assertEquals(Integer.valueOf(18), userService.getUserAge(2L));
-
Assert.assertEquals(Integer.valueOf(0), userService.getUserAge(0L));
-
Assert.assertEquals(Integer.valueOf(0), userService.getUserAge(null));
-
-
}
-
}
Controller测试
在Springboot中可以通过TestRestTemplate和MockMvc来对Controller进行测试,有以下两种情况。
情况一
Controller中未装配任何其他Spring容器中的Bean,例如下面这个控制器。
-
@RestController
-
@RequestMapping("/user")
-
public class UserController01 {
-
-
@GetMapping("/home")
-
public String homeUser(@RequestParam(name = "name", required = true) String userName) {
-
if (null == userName || userName.trim() == "") {
-
return "you are nobody...";
-
}
-
return "This is " + userName + "'s home...";
-
}
-
}
此时无需启动Spring容器,可直接使用MockMvc来对Controller进行模拟测试,测试代码如下。
-
@RunWith(SpringRunner.class)
-
@WebMvcTest(controllers = { UserController01.class })
-
public class ControllerTest01 {
-
-
@Autowired
-
private MockMvc mvc;
-
-
@Test
-
public void testAddUser() throws Exception {
-
mvc.perform(MockMvcRequestBuilders.get("/user/home").param("name", ""))
-
.andExpect(MockMvcResultMatchers.status().isOk())
-
.andExpect(MockMvcResultMatchers.content().string("you are nobody..."));
-
mvc.perform(MockMvcRequestBuilders.get("/user/home").param("name", "pengjunlee"))
-
.andExpect(MockMvcResultMatchers.status().isOk())
-
.andExpect(MockMvcResultMatchers.content().string("This is pengjunlee's home..."));
-
}
-
-
}
情况二
Controller中需装配其他Spring容器中的Bean,例如下面这个控制器。
-
@RestController
-
@RequestMapping("/user")
-
public class UserController02 {
-
-
@Autowired
-
private UserDao userDao;
-
-
@GetMapping("/add")
-
public String addUser(@RequestParam(name = "age", required = false, defaultValue = "0") Integer userAge,
-
@RequestParam(name = "name", required = true) String userName) {
-
if (userAge <= 0 || null == userName || userName.trim() == "") {
-
return "0";
-
}
-
userDao.addUser(userAge, userName);
-
return "1";
-
}
-
-
}
此时除了要启动Spring容器,还需要启动内嵌的WEB环境,有以下两种方法。
方法一
利用TestRestTemplate进行测试。
-
@RunWith(SpringRunner.class)
-
@SpringBootTest(webEnvironment = WebEnvironment.RANDOM_PORT)
-
public class ControllerTest02 {
-
-
@Autowired
-
private TestRestTemplate template;
-
-
@Test
-
public void testAddUser() {
-
String result1 = template.getForObject("/user/add?name=pengjunlee", String.class);
-
Assert.assertEquals("0", result1);
-
String result2 = template.getForObject("/user/add?age=20&name=Tracy", String.class);
-
Assert.assertEquals("1", result2);
-
}
-
-
}
方法二
利用MockMvc进行测试。
-
@RunWith(SpringRunner.class)
-
@SpringBootTest(webEnvironment = WebEnvironment.RANDOM_PORT)
-
@AutoConfigureMockMvc
-
public class ControllerTest03 {
-
-
@Autowired
-
private MockMvc mvc;
-
-
@Test
-
public void testAddUser() throws Exception {
-
mvc.perform(MockMvcRequestBuilders.get("/user/add").param("name", ""))
-
.andExpect(MockMvcResultMatchers.status().isOk())
-
.andExpect(MockMvcResultMatchers.content().string("0"));
-
mvc.perform(MockMvcRequestBuilders.get("/user/add").param("age", "22").param("name", "pengjunlee"))
-
.andExpect(MockMvcResultMatchers.status().isOk())
-
.andExpect(MockMvcResultMatchers.content().string("1"));
-
}
-
-
}
本文项目源码已上传至CSDN,资源地址:https://download.csdn.net/download/pengjunlee/10394302
原文地址:https://blog.csdn.net/pengjunlee/article/details/80206615
SpringBoot重点详解--使用Junit进行单元测试的更多相关文章
- springboot配置详解
springboot配置详解 Author:SimpleWu properteis文件属性参考大全 springboot默认加载配置 SpringBoot使用两种全局的配置文件,全局配置文件可以对一些 ...
- springboot项目--传入参数校验-----SpringBoot开发详解(五)--Controller接收参数以及参数校验----https://blog.csdn.net/qq_31001665/article/details/71075743
https://blog.csdn.net/qq_31001665/article/details/71075743 springboot项目--传入参数校验-----SpringBoot开发详解(五 ...
- SpringBoot @ConfigurationProperties详解
文章目录 简介 添加依赖关系 一个简单的例子 属性嵌套 @ConfigurationProperties和@Bean 属性验证 属性转换 自定义Converter SpringBoot @Config ...
- Spring Boot2 系列教程 (二) | 第一个 SpringBoot 工程详解
微信公众号:一个优秀的废人 如有问题或建议,请后台留言,我会尽力解决你的问题. 前言 哎呦喂,按照以往的惯例今天周六我的安排应该是待在家学学猫叫啥的.但是今年这种日子就可能一去不复返了,没法办法啊.前 ...
- SpringBoot——配置文件详解【五】
前言 SpringBoot的配置文件 配置文件 SpringBoot使用一个全局的配置文件,配置文件名是固定的. application.properties application.yml 配置文件 ...
- Go语言学习之8 goroutine详解、定时器与单元测试
主要内容: 1.Goroutine2. Chanel3. 单元测试 1. Goroutine Go 协程(Goroutine)(轻量级的线程,开线程没有数量限制). (1)进程和线程 A. 进程是 ...
- matlab考试重点详解
此帖是根据期末考试复习重点补充完成, 由于使用word编辑引用图片和链接略有不便, 所以开此贴供复习及学习使用.侵删 复习要点 第一章 Matlab的基本概念,名称的来源,基本功能,帮助的使用方法 1 ...
- Springboot 启动详解
1.前言 最近一直在看Springboot和springcloud代码,看了将近20多天,对这两个系统的认知总算是入了门.后续应该会有一个系列的文章,本文就先从Springboot的启动入手. 2.容 ...
- 2.SpringBoot HelloWorld详解
1.POM文件 父项目 <parent> <groupId>org.springframework.boot</groupId> <artifactId> ...
随机推荐
- CMDB API验证
CMDB API验证 为什么做API验证 API验证是防止数据在传输的过程中,保证数据不被篡改 如何设计的API验证 灵感来源于Torando中加密Cookie的源码,主要是生成加密的随机字符串. M ...
- mybatis association嵌套association的两级嵌套问题
今天遇到了一个双表连接查询以及自关联的问题,由于第一次遇到,所以在这记下,日后好查阅 针对一个表的关联属性本身也有自关联的情况下,可以用association嵌套association的方法来处理. ...
- ubuntu k8s 命令补全
apt install bash-completion // locate bash_completion source /usr/share/bash-completion/bash_complet ...
- java基础—java读取properties文件
一.java读取properties文件总结 在java项目中,操作properties文件是经常要做的,因为很多的配置信息都会写在properties文件中,这里主要是总结使用getResource ...
- java基础—equals方法
一.equals方法介绍 1.1.通过下面的例子掌握equals的用法 1 package cn.galc.test; 2 3 public class TestEquals { 4 public s ...
- webpack开始一个项目的步骤
这几天在学习Vue 用到了webpack打包工具 开始一个项目的时候 需要配置很多项 刚开始写的时候 配置文件总是缺什么再去配置什么 创建项目就用了半个小时 后来觉得应该有个步骤 这样 ...
- 用decimal模块增加python的浮点数精度
浮点数python默认是17位精度,也就是小数点后16位(16位以后的全部四舍五入了),虽然有16位,但是这个精度越往后越不准. 如果有特殊需求,需要更多的精度,可以用decimal模块,通过更改其里 ...
- city Engine 建模
基本操作介绍 界面布局,文件组织 五个常见图层 常见规则,替换思想
- kettle-单表增量同步
目标:利于kettle实现单表增量同步,以时间为判断条件 背景:源表:db1.q1 (2w条数据) 目标表:db2.q2(0条数据) 表结构: CREATE TABLE `q1` ( `ID` bi ...
- 【Linux】tcpdump命令详解
tcpdump可以将网络中传送的数据包的“头”完全截获下来提供分析. 它支持针对网络层.协议.主机.网络或端口的过滤,并提供and.or.not等逻辑语句帮你过滤到无用的信息. 实用命令实例 1.普通 ...