c#实现识别图片上的验证码数字
|
1
2
3
4
5
6
7
8
9
10
11
12
13
14
15
16
17
18
19
20
21
22
23
24
25
26
27
28
29
30
31
32
33
34
35
36
37
38
39
40
41
42
43
44
45
46
47
48
49
50
51
52
53
54
55
56
57
58
59
60
61
62
63
64
65
66
67
68
69
70
71
72
73
74
75
76
77
78
79
80
81
82
83
84
85
86
87
88
89
90
91
92
93
94
95
96
97
98
99
100
101
102
103
104
105
106
107
108
109
110
111
112
113
114
115
116
117
118
119
120
121
122
|
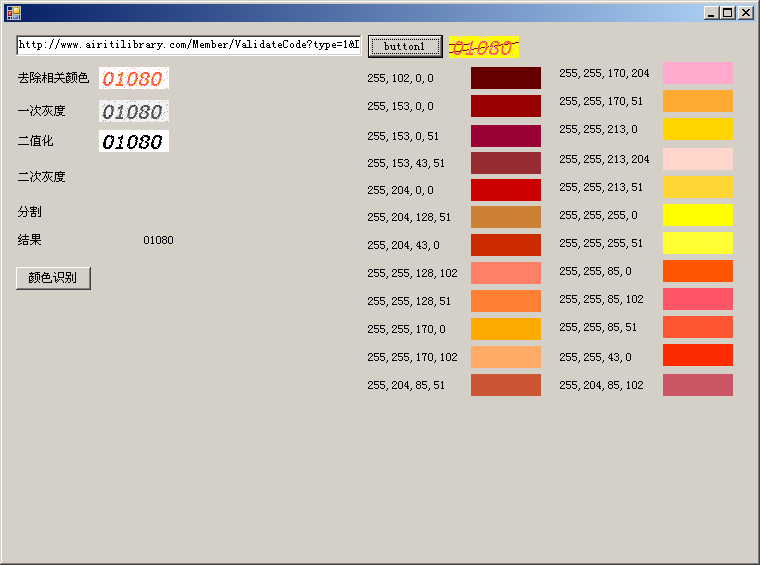
public void imgdo(Bitmap img) { //去色 Bitmap btp = img; Color c = new Color(); int rr, gg, bb; for (int i = 0; i < btp.Width; i++) { for (int j = 0; j < btp.Height; j++) { //取图片当前的像素点 c = btp.GetPixel(i, j); rr = c.R; gg = c.G; bb = c.B; //改变颜色 if (rr == 102 && gg == 0 && bb == 0) { //重新设置当前的像素点 btp.SetPixel(i, j, Color.FromArgb(255, 255, 255, 255)); } if (rr == 153 && gg == 0 && bb == 0) { //重新设置当前的像素点 btp.SetPixel(i, j, Color.FromArgb(255, 255, 255, 255)); } if (rr == 153 && gg == 0 && bb == 51) { //重新设置当前的像素点 btp.SetPixel(i, j, Color.FromArgb(255, 255, 255, 255)); } if (rr == 153 && gg == 43 && bb == 51) { //重新设置当前的像素点 btp.SetPixel(i, j, Color.FromArgb(255, 255, 255, 255)); } if (rr == 255 && gg == 255 && bb == 0) { //重新设置当前的像素点 btp.SetPixel(i, j, Color.FromArgb(255, 255, 255, 255)); } if (rr == 255 && gg == 255 && bb == 51) { //重新设置当前的像素点 btp.SetPixel(i, j, Color.FromArgb(255, 255, 255, 255)); } } } btp.Save("d:\\去除相关颜色.png"); pictureBox2.Image = Image.FromFile("d:\\去除相关颜色.png"); //灰度 Bitmap bmphd = btp; for (int i = 0; i < bmphd.Width; i++) { for (int j = 0; j < bmphd.Height; j++) { //取图片当前的像素点 var color = bmphd.GetPixel(i, j); var gray = (int)(color.R * 0.001 + color.G * 0.700 + color.B * 0.250); //重新设置当前的像素点 bmphd.SetPixel(i, j, Color.FromArgb(gray, gray, gray)); } } bmphd.Save("d:\\灰度.png"); pictureBox27.Image = Image.FromFile("d:\\灰度.png"); //二值化 Bitmap erzhi = bmphd; Bitmap orcbmp; int nn = 3; int w = erzhi.Width; int h = erzhi.Height; BitmapData data = erzhi.LockBits(new Rectangle(0, 0, w, h), ImageLockMode.ReadOnly, PixelFormat.Format24bppRgb); unsafe { byte* p = (byte*)data.Scan0; byte[,] vSource = new byte[w, h]; int offset = data.Stride - w * nn; for (int y = 0; y < h; y++) { for (int x = 0; x < w; x++) { vSource[x, y] = (byte)(((int)p[0] + (int)p[1] + (int)p[2]) / 3); p += nn; } p += offset; } erzhi.UnlockBits(data); Bitmap bmpDest = new Bitmap(w, h, PixelFormat.Format24bppRgb); BitmapData dataDest = bmpDest.LockBits(new Rectangle(0, 0, w, h), ImageLockMode.WriteOnly, PixelFormat.Format24bppRgb); p = (byte*)dataDest.Scan0; offset = dataDest.Stride - w * nn; for (int y = 0; y < h; y++) { for (int x = 0; x < w; x++) { p[0] = p[1] = p[2] = (int)vSource[x, y] > 161 ? (byte)255 : (byte)0; //p[0] = p[1] = p[2] = (int)GetAverageColor(vSource, x, y, w, h) > 50 ? (byte)255 : (byte)0; p += nn; } p += offset; } bmpDest.UnlockBits(dataDest); orcbmp = bmpDest; orcbmp.Save("d:\\二值化.png"); pictureBox29.Image = Image.FromFile("d:\\二值化.png"); } //OCR的值 if (orcbmp != null) { string result = Ocr(orcbmp); label32.Text = result.Replace("\n", "\r\n").Replace(" ", ""); } } |
C#识别验证码图片通用类
|
1
2
3
4
5
6
7
8
9
10
11
12
13
14
15
16
17
18
19
20
21
22
23
24
25
26
27
28
29
30
31
32
33
34
35
36
37
38
39
40
41
42
43
44
45
46
47
48
49
50
51
52
53
54
55
56
57
58
59
60
61
62
63
64
65
66
67
68
69
70
71
72
73
74
75
76
77
78
79
80
81
82
83
84
85
86
87
88
89
90
91
92
93
94
95
96
97
98
99
100
101
102
103
104
105
106
107
108
109
110
111
112
113
114
115
116
117
118
119
120
121
122
123
124
125
126
127
128
129
130
131
132
133
134
135
136
137
138
139
140
141
142
143
144
145
146
147
148
149
150
151
152
153
154
155
156
157
158
159
160
161
162
163
164
165
166
167
168
169
170
171
172
173
174
175
176
177
178
179
180
181
182
183
184
185
186
187
188
189
190
191
192
193
194
195
196
197
198
199
200
201
202
203
204
205
206
207
208
209
210
211
212
213
214
215
216
217
218
219
220
221
222
223
224
225
226
227
228
229
230
231
232
|
using System; using System.Collections.Generic; using System.Text; using System.Collections; using System.Drawing; using System.Drawing.Imaging; using System.Runtime.InteropServices; namespace BallotAiying2 { class UnCodebase { public Bitmap bmpobj; public UnCodebase(Bitmap pic) { bmpobj = new Bitmap(pic); //转换为Format32bppRgb } /// <summary> /// 根据RGB,计算灰度值 /// </summary> /// <param name="posClr">Color值</param> /// <returns>灰度值,整型</returns> private int GetGrayNumColor(System.Drawing.Color posClr) { return (posClr.R * 19595 + posClr.G * 38469 + posClr.B * 7472) >> 16; } /// <summary> /// 灰度转换,逐点方式 /// </summary> public void GrayByPixels() { for (int i = 0; i < bmpobj.Height; i++) { for (int j = 0; j < bmpobj.Width; j++) { int tmpValue = GetGrayNumColor(bmpobj.GetPixel(j, i)); bmpobj.SetPixel(j, i, Color.FromArgb(tmpValue, tmpValue, tmpValue)); } } } /// <summary> /// 去图形边框 /// </summary> /// <param name="borderWidth"></param> public void ClearPicBorder(int borderWidth) { for (int i = 0; i < bmpobj.Height; i++) { for (int j = 0; j < bmpobj.Width; j++) { if (i < borderWidth || j < borderWidth || j > bmpobj.Width - 1 - borderWidth || i > bmpobj.Height - 1 - borderWidth) bmpobj.SetPixel(j, i, Color.FromArgb(255, 255, 255)); } } } /// <summary> /// 灰度转换,逐行方式 /// </summary> public void GrayByLine() { Rectangle rec = new Rectangle(0, 0, bmpobj.Width, bmpobj.Height); BitmapData bmpData = bmpobj.LockBits(rec, ImageLockMode.ReadWrite, bmpobj.PixelFormat);// PixelFormat.Format32bppPArgb); // bmpData.PixelFormat = PixelFormat.Format24bppRgb; IntPtr scan0 = bmpData.Scan0; int len = bmpobj.Width * bmpobj.Height; int[] pixels = new int[len]; Marshal.Copy(scan0, pixels, 0, len); //对图片进行处理 int GrayValue = 0; for (int i = 0; i < len; i++) { GrayValue = GetGrayNumColor(Color.FromArgb(pixels)); pixels = (byte)(Color.FromArgb(GrayValue, GrayValue, GrayValue)).ToArgb(); //Color转byte } bmpobj.UnlockBits(bmpData); } /// <summary> /// 得到有效图形并调整为可平均分割的大小 /// </summary> /// <param name="dgGrayValue">灰度背景分界值</param> /// <param name="CharsCount">有效字符数</param> /// <returns></returns> public void GetPicValidByValue(int dgGrayValue, int CharsCount) { int posx1 = bmpobj.Width; int posy1 = bmpobj.Height; int posx2 = 0; int posy2 = 0; for (int i = 0; i < bmpobj.Height; i++) //找有效区 { for (int j = 0; j < bmpobj.Width; j++) { int pixelValue = bmpobj.GetPixel(j, i).R; if (pixelValue < dgGrayValue) //根据灰度值 { if (posx1 > j) posx1 = j; if (posy1 > i) posy1 = i; if (posx2 < j) posx2 = j; if (posy2 < i) posy2 = i; }; }; }; // 确保能整除 int Span = CharsCount - (posx2 - posx1 + 1) % CharsCount; //可整除的差额数 if (Span < CharsCount) { int leftSpan = Span / 2; //分配到左边的空列 ,如span为单数,则右边比左边大1 if (posx1 > leftSpan) posx1 = posx1 - leftSpan; if (posx2 + Span - leftSpan < bmpobj.Width) posx2 = posx2 + Span - leftSpan; } //复制新图 Rectangle cloneRect = new Rectangle(posx1, posy1, posx2 - posx1 + 1, posy2 - posy1 + 1); bmpobj = bmpobj.Clone(cloneRect, bmpobj.PixelFormat); } /// <summary> /// 得到有效图形,图形为类变量 /// </summary> /// <param name="dgGrayValue">灰度背景分界值</param> /// <param name="CharsCount">有效字符数</param> /// <returns></returns> public void GetPicValidByValue(int dgGrayValue) { int posx1 = bmpobj.Width; int posy1 = bmpobj.Height; int posx2 = 0; int posy2 = 0; for (int i = 0; i < bmpobj.Height; i++) //找有效区 { for (int j = 0; j < bmpobj.Width; j++) { int pixelValue = bmpobj.GetPixel(j, i).R; if (pixelValue < dgGrayValue) //根据灰度值 { if (posx1 > j) posx1 = j; if (posy1 > i) posy1 = i; if (posx2 < j) posx2 = j; if (posy2 < i) posy2 = i; }; }; }; //复制新图 Rectangle cloneRect = new Rectangle(posx1, posy1, posx2 - posx1 + 1, posy2 - posy1 + 1); bmpobj = bmpobj.Clone(cloneRect, bmpobj.PixelFormat); } /// <summary> /// 得到有效图形,图形由外面传入 /// </summary> /// <param name="dgGrayValue">灰度背景分界值</param> /// <param name="CharsCount">有效字符数</param> /// <returns></returns> public Bitmap GetPicValidByValue(Bitmap singlepic, int dgGrayValue) { int posx1 = singlepic.Width; int posy1 = singlepic.Height; int posx2 = 0; int posy2 = 0; for (int i = 0; i < singlepic.Height; i++) //找有效区 { for (int j = 0; j < singlepic.Width; j++) { int pixelValue = singlepic.GetPixel(j, i).R; if (pixelValue < dgGrayValue) //根据灰度值 { if (posx1 > j) posx1 = j; if (posy1 > i) posy1 = i; if (posx2 < j) posx2 = j; if (posy2 < i) posy2 = i; }; }; }; //复制新图 Rectangle cloneRect = new Rectangle(posx1, posy1, posx2 - posx1 + 1, posy2 - posy1 + 1); return singlepic.Clone(cloneRect, singlepic.PixelFormat); } /// <summary> /// 平均分割图片 /// </summary> /// <param name="RowNum">水平上分割数</param> /// <param name="ColNum">垂直上分割数</param> /// <returns>分割好的图片数组</returns> public Bitmap [] GetSplitPics(int RowNum,int ColNum) { if (RowNum == 0 || ColNum == 0) return null; int singW = bmpobj.Width / RowNum; int singH = bmpobj.Height / ColNum; Bitmap [] PicArray=new Bitmap[RowNum*ColNum]; Rectangle cloneRect; for (int i = 0; i < ColNum; i++) //找有效区 { for (int j = 0; j < RowNum; j++) { cloneRect = new Rectangle(j*singW, i*singH, singW , singH); PicArray[i*RowNum+j]=bmpobj.Clone(cloneRect, bmpobj.PixelFormat);//复制小块图 } } return PicArray; } /// <summary> /// 返回灰度图片的点阵描述字串,1表示灰点,0表示背景 /// </summary> /// <param name="singlepic">灰度图</param> /// <param name="dgGrayValue">背前景灰色界限</param> /// <returns></returns> public string GetSingleBmpCode(Bitmap singlepic, int dgGrayValue) { Color piexl; string code = ""; for (int posy = 0; posy < singlepic.Height; posy++) for (int posx = 0; posx < singlepic.Width; posx++) { piexl = singlepic.GetPixel(posx, posy); if (piexl.R < dgGrayValue) // Color.Black ) code = code + "1"; else code = code + "0"; } return code; } } } |
c#实现识别图片上的验证码数字的更多相关文章
- Python3.x:如何识别图片上的文字
Python3.x:如何识别图片上的文字 安装pytesseract库,必须先安装其依赖的PIL及tesseract-ocr,其中PIL为图像处理库,而后面的tesseract-ocr则为google ...
- python 识别图片上的数字
https://blog.csdn.net/qq_31446377/article/details/81708006 ython 3.6 版本 Pytesseract 图像验证码识别 环境: (1) ...
- C#识别图片上的数字
通过Emgu实现对图片上的数字进行识别. 前期步骤: 1.下载Emgu安装文件,我的版本是2.4.2.1777.3.0版本则实现对中文的支持. 2.安装后需填写环境变量,环境变量Path值后加入Emg ...
- 分享C#识别图片上的数字
通过Emgu实现对图片上的数字进行识别.前期步骤:1.下载Emgu安装文件,我的版本是2.4.2.1777.3.0版本则实现对中文的支持.2.安装后需填写环境变量,环境变量Path值后加入Emgu安装 ...
- 如何大批量的识别图片上的文字,批量图片文字识别OCR软件系统
软件不需要安装,直接双击打开就可以用,废话不多说直接上图好了,方便说明问题 批量图片OCR(批量名片识别.批量照片识别等)识别,然后就下来研究了一下,下面是成果 使用步骤:打开单个图片识别,导入文件夹 ...
- 机器学习进阶-项目实战-信用卡数字识别 1.cv2.findContour(找出轮廓) 2.cv2.boudingRect(轮廓外接矩阵位置) 3.cv2.threshold(图片二值化操作) 4.cv2.MORPH_TOPHAT(礼帽运算突出线条) 5.cv2.MORPH_CLOSE(闭运算图片内部膨胀) 6. cv2.resize(改变图像大小) 7.cv2.putText(在图片上放上文本)
7. cv2.putText(img, text, loc, text_font, font_scale, color, linestick) # 参数说明:img表示输入图片,text表示需要填写的 ...
- PHP识别简单的图片上面的数字(可扩展)
1.场景 最近在学习图片处理,就是特意把数字生成一个图片,然后再用程序去识别图片的数字.这就有了一下的学习过程. 2.原理分析 2.1 首先是将图片像素化,二值化,然后和字模去对比(需要相对于配置字模 ...
- KNN识别图像上的数字及python实现
领导让我每天手工录入BI系统中的数据并判断数据是否存在异常,若有异常点,则检测是系统问题还是业务问题.为了解放双手,我决定写个程序完成每天录入管理驾驶舱数据的任务.首先用按键精灵录了一套脚本把系统中的 ...
- python爬虫20 | 小帅b教你如何使用python识别图片验证码
当你在爬取某些网站的时候 对于你的一些频繁请求 对方会阻碍你 常见的方式就是使用验证码 验证码的主要功能 就是区分你是人还是鬼(机器人) 人 想法设法的搞一些手段来对付技术 而 技术又能对付人们的想法 ...
随机推荐
- SQL-59 按照salary的累计和running_total,其中running_total为前两个员工的salary累计和,其他以此类推。
题目描述 按照salary的累计和running_total,其中running_total为前两个员工的salary累计和,其他以此类推. 具体结果如下Demo展示..CREATE TABLE `s ...
- Python之file方法
def fileno(self): # 文件描述符 def flush(self): # 刷新文件内部缓冲区 def isatty(se ...
- SharePoint Framework 在web部件中使用已存在的JavaScript库 - 捆绑打包和外部引用
博客地址:http://blog.csdn.net/FoxDave 在构建SPFx客户端web部件时,你可以使用公网已有的JavaScript库来构建强大的解决方案.但是在使用的时候你需要考虑你引用的 ...
- 前端开发【第四篇: Dom操作】
文档对象模型(Document Object Model,DOM)是一种用于HTML和XML文档的编程接口.它给文档提供了一种结构化的表示方法,可以改变文档的内容和呈现方式.我们最为关心的是,DOM把 ...
- vim安装
vim的下载与安装 在线安装 sudo yum install vim 源码编译安装 1) 下载源码 git clone https://github.com/vim/vim.git 2) 编 ...
- 简单网络管理协议(SNMP)
SNMP是TCP/IP网络中应用最为广泛的网络管理协议,工作在TCP/IP参考模型的应用层,是一种面向无连接的协议 功能:SNMP的功能是使网络设备之间能方便的交换管理信息,从而使网络管理员了解网络运 ...
- mysql 性能监控
1.监控thread_cache命中率admin@localhost : (none) 07:51:20> show variables like '%thread%';+----------- ...
- 写入一个html文件时的编码要求
with open("ip.html",'w',encoding='utf-8') as fp: fp.write(response)
- commons-dbcp2 新版本2.6使用连接池在关闭服务器的时候会有内存溢出的BUG....
这是异常信息.本人使用的mysql8.0数据库驱动版本mysql-connector-java Version 8.0.11,发生这种情况的原因主要是Dbcp2的XBasicDataSource在关闭 ...
- 王者荣耀交流协会互评Beta版本--爱阅app
测评人:任思佳 爱阅APP软件说明书地址:http://www.cnblogs.com/szjzsd/p/7881686.html 1.根据NABCD评论作品的选题: N(Need):相比α发布来 ...