动手实现 React-redux(二):结合 context 和 store
既然要把 store 和 context 结合起来,我们就先构建 store。在 src/index.js 加入之前创建的 createStore 函数,并且构建一个 themeReducer 来生成一个 store:
import React, { Component } from 'react'

import PropTypes from 'prop-types'

import ReactDOM from 'react-dom'

import Header from './Header'

import Content from './Content'

import './index.css'

function createStore (reducer) {

  let state = null

  const listeners = []

  const subscribe = (listener) => listeners.push(listener)

  const getState = () => state

  const dispatch = (action) => {

    state = reducer(state, action)

    listeners.forEach((listener) => listener())

  }

  dispatch({}) // 初始化 state

  return { getState, dispatch, subscribe }

}

const themeReducer = (state, action) => {

  if (!state) return {

    themeColor: 'red'

  }

  switch (action.type) {

    case 'CHANGE_COLOR':

      return { ...state, themeColor: action.themeColor }

    default:

      return state

  }

}

const store = createStore(themeReducer)

...
themeReducer 定义了一个表示主题色的状态 themeColor,并且规定了一种操作 CHNAGE_COLOR,只能通过这种操作修改颜色。现在我们把 store 放到 Index 的 context 里面,这样每个子组件都可以获取到 store 了,修改 src/index.js 里面的 Index:
class Index extends Component {

  static childContextTypes = {

    store: PropTypes.object

  }

  getChildContext () {

    return { store }

  }

  render () {

    return (

      <div>

        <Header />

        <Content />

      </div>

    )

  }

}
如果有些同学已经忘记了 context 的用法,可以参考之前的章节: React.js 的 context 。
然后修改 src/Header.js,让它从 Index 的 context 里面获取 store,并且获取里面的 themeColor 状态来设置自己的颜色:
class Header extends Component {

  static contextTypes = {

    store: PropTypes.object

  }

  constructor () {

    super()

    this.state = { themeColor: '' }

  }

  componentWillMount () {

    this._updateThemeColor()

  }

  _updateThemeColor () {

    const { store } = this.context

    const state = store.getState()

    this.setState({ themeColor: state.themeColor })

  }

  render () {

    return (

      <h1 style={{ color: this.state.themeColor }}>React.js 小书</h1>

    )

  }

}
其实也很简单,我们在 constructor 里面初始化了组件自己的 themeColor 状态。然后在生命周期中 componentWillMount 调用 _updateThemeColor,_updateThemeColor会从 context 里面把 store 取出来,然后通过 store.getState() 获取状态对象,并且用里面的 themeColor 字段设置组件的 state.themeColor。
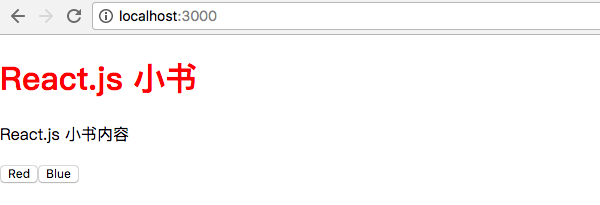
然后在 render 函数里面获取了 state.themeColor 来设置标题的样式,页面上就会显示:
如法炮制 Content.js:
class Content extends Component {

  static contextTypes = {

    store: PropTypes.object

  }

  constructor () {

    super()

    this.state = { themeColor: '' }

  }

  componentWillMount () {

    this._updateThemeColor()

  }

  _updateThemeColor () {

    const { store } = this.context

    const state = store.getState()

    this.setState({ themeColor: state.themeColor })

  }

  render () {

    return (

      <div>

        <p style={{ color: this.state.themeColor }}>React.js 小书内容</p>

        <ThemeSwitch />

      </div>

    )

  }

}
还有 src/ThemeSwitch.js:
class ThemeSwitch extends Component {

  static contextTypes = {

    store: PropTypes.object

  }

  constructor () {

    super()

    this.state = { themeColor: '' }

  }

  componentWillMount () {

    this._updateThemeColor()

  }

  _updateThemeColor () {

    const { store } = this.context

    const state = store.getState()

    this.setState({ themeColor: state.themeColor })

  }

  render () {

    return (

      <div>

        <button style={{ color: this.state.themeColor }}>Red</button>

        <button style={{ color: this.state.themeColor }}>Blue</button>

      </div>

    )

  }

}
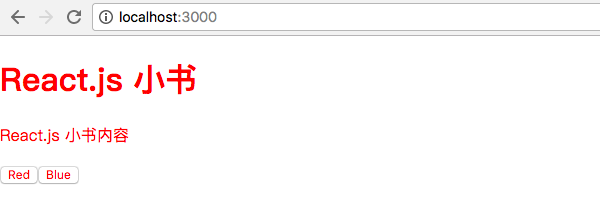
这时候,主题已经完全生效了,整个页面都是红色的:
当然现在点按钮还是没什么效果,我们接下来给按钮添加事件。其实也很简单,监听 onClick 事件然后 store.dispatch 一个 action 就好了,修改 src/ThemeSwitch.js:
class ThemeSwitch extends Component {

  static contextTypes = {

    store: PropTypes.object

  }

  constructor () {

    super()

    this.state = { themeColor: '' }

  }

  componentWillMount () {

    this._updateThemeColor()

  }

  _updateThemeColor () {

    const { store } = this.context

    const state = store.getState()

    this.setState({ themeColor: state.themeColor })

  }

  // dispatch action 去改变颜色

  handleSwitchColor (color) {

    const { store } = this.context

    store.dispatch({

      type: 'CHANGE_COLOR',

      themeColor: color

    })

  }

  render () {

    return (

      <div>

        <button

          style={{ color: this.state.themeColor }}

          onClick={this.handleSwitchColor.bind(this, 'red')}>Red</button>

        <button

          style={{ color: this.state.themeColor }}

          onClick={this.handleSwitchColor.bind(this, 'blue')}>Blue</button>

      </div>

    )

  }

}
我们给两个按钮都加上了 onClick 事件监听,并绑定到了 handleSwitchColor 方法上,两个按钮分别给这个方法传入不同的颜色 red 和 blue,handleSwitchColor 会根据传入的颜色 store.dispatch 一个 action 去修改颜色。
当然你现在点击按钮还是没有反应的。因为点击按钮的时候,只是更新 store 里面的 state,而并没有在 store.state 更新以后去重新渲染数据,我们其实就是忘了 store.subscribe 了。
给 Header.js、Content.js、ThemeSwitch.js 的 componentWillMount 生命周期都加上监听数据变化重新渲染的代码:
...

  componentWillMount () {

    const { store } = this.context

    this._updateThemeColor()

    store.subscribe(() => this._updateThemeColor())

  }

...
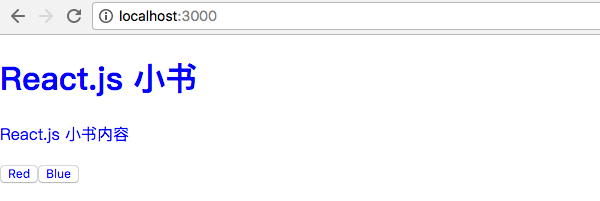
通过 store.subscribe,在数据变化的时候重新调用 _updateThemeColor,而 _updateThemeColor 会去 store 里面取最新的 themeColor 然后通过 setState 重新渲染组件,这时候组件就更新了。现在可以自由切换主题色了:
我们顺利地把 store 和 context 结合起来,这是 Redux 和 React.js 的第一次胜利会师,当然还有很多需要优化的地方。
下一节:动手实现 React-redux(三):connect 和 mapStateToProps
动手实现 React-redux(二):结合 context 和 store的更多相关文章
- react redux 二次开发流程
在一个大项目中如何引入redux及其相关技术栈(react-redux redux-thunk redux-immutable ),已经成为react前端工程师不可或缺的技能,下面通过实现一个简单的t ...
- React文档(二十二)context
React中,通过React组件可以很容易地追踪数据流.当你关注一个组件,你可以发现哪一个props被传递了,这样使得你的应用很容被推断. 在一些情况下,你想要传递数据通过组件树而不需要去手动在每一层 ...
- react+redux教程(二)redux的单一状态树完全替代了react的状态机?
上篇react+redux教程,我们讲解了官方计数器的代码实现,react+redux教程(一).我们发现我们没有用到react组件本身的state,而是通过props来导入数据和操作的. 我们知道r ...
- webpack+react+redux+es6开发模式
一.预备知识 node, npm, react, redux, es6, webpack 二.学习资源 ECMAScript 6入门 React和Redux的连接react-redux Redux 入 ...
- webpack+react+redux+es6
一.预备知识 node, npm, react, redux, es6, webpack 二.学习资源 ECMAScript 6入门 React和Redux的连接react-redux Redux 入 ...
- webpack+react+redux+es6开发模式---续
一.前言 之前介绍了webpack+react+redux+es6开发模式 ,这个项目对于一个独立的功能节点来说是没有问题的.假如伴随着源源不断的需求,前段项目会涌现出更多的功能节点,需要独立部署运行 ...
- react + redux 完整的项目,同时写一下个人感悟
先附上项目源码地址和原文章地址:https://github.com/bailicangd... 做React需要会什么? react的功能其实很单一,主要负责渲染的功能,现有的框架,比如angula ...
- Immutable.js 以及在 react+redux 项目中的实践
来自一位美团大牛的分享,相信可以帮助到你. 原文链接:https://juejin.im/post/5948985ea0bb9f006bed7472?utm_source=tuicool&ut ...
- react+redux+react-redux练习项目
一,项目目录 二.1.新建pages包,在pages中新建TodoList.js: 2.新建store包,在store包中新建store.js,reducer.js,actionCreater.js, ...
- React Redux Sever Rendering实战
# React Redux Sever Rendering(Isomorphic JavaScript) ,右键单击包名,Refactor -> Rename,只能修改包名最外层的字段 分离模式下(点击设置,将Hide Empty Middle Pack ...
- LOJ#139. 树链剖分
LOJ#139. 树链剖分 题目描述 这是一道模板题. 给定一棵$n$个节点的树,初始时该树的根为 1 号节点,每个节点有一个给定的权值.下面依次进行 m 个操作,操作分为如下五种类型: 换根:将一个 ...
- SDUT OJ 2054 双向链表的实现 (结构体node指针+遍历 *【模板】)
双向链表 Time Limit: 1000ms Memory limit: 65536K 有疑问?点这里^_^ 题目描述 学会了单向链表,我们又多了一种解决问题的能力,单链表利用一个指针就能在内 ...
- linux初级学习笔记七:linux用户管理,密码和组命令详解!(视频序号:04_1)
本节学习的命令: 用户管理命令:useradd,userdel,id,finger,usermod,chsh,chfn,passwd,pwck, 组管理命令:groupadd,groupmod,gro ...
- UIButton常见属性和方法
一.创建,两种方法: 1. 常规的 initWithFrame UIButton *btn1 = [[UIButton alloc]initWithFrame:CGRectMake(10, 10, 8 ...
- 【TJOI2013】 单词
[题目链接] 点击打开链接 [算法] AC自动机+递推 [代码] #include<bits/stdc++.h> using namespace std; #define MAXN 200 ...
- Watir 能够为你做什么?
为了提高自己的工作效率,我曾经对Watir进行了系统性的学习,比起学习C++, Java等始终不得门,Watir还是学进去了,能够完整搭建出一个自己很容易理解的自动化架构. 之后我想继续在自动化测试方 ...
- http基础知识摘录
HTTP是一个基于请求/响应模式的,无状态的协议 (只有客户端发送请求服务器才会响应,否则服务器不会主动发送信息的,无状态指客户端发过来一个请求服务端给你发回一个响应,接着你再去发送一个请求,服务器根 ...
- 笔记本电脑处理器(CPU)性能排行榜
笔记本电脑处理器(CPU)性能排行榜 本排行榜随新款处理器(CPU)的发布而随时更新.更新日期:2012年7月15日 排名 型号 二级+三级缓存 前端总线(MHz) 功率(瓦) 主频(MHz) 核 ...
- nable to load bean: type:com.opensymphony.xwork2.util.ValueStackFactory
严重: Exception starting filter struts2 Unable to load bean: type:com.opensymphony.xwork2.util.ValueSt ...