文件上传(Servlet/Struts2/SpringMVC)
文件下载(Servlet/Struts2)的链接:http://www.cnblogs.com/ghq120/p/8328093.html
文件上传
Servlet实现
要实现文件上传的功能,必须在form的表单中的添加 enctype="multipart/form-data" 表示以二进制流的方式将文件传给控制器。
需要导入的jar包有:commons-fileupload-1.2.1.jar、commons-io-1.4.jar
文件上传的步骤:
(1)创建DiskFileItemFactory的对象。
(2)创建ServletFileUpload的对象,需传入DiskFileItemFactory的对象。可以获得封装普通表单域和文件域的集合。
(3)创建存放新文件的名字;获取文件存放在服务器上的目录。
(4)对请求对象进行解析,获得一个封装的FileItem的集合,FileItem带表普通表单域或者文件域
(5)判断FileItem是普通表单域还是文本域;
若是普通表单域,则将普通表单域中的name和value封装到Map集合中。
若是文本域,获取被上传文件的名字并拼接上新的名字。创建文件上传的输入流。
(6)根据提供的目录和文件,创建一个File对象,表示的是目标文件。创建目标文件的输出流,表示将文件输出到服务器上。
(7)开始上传文件;读入被上传的文件,写入到目标文件。
(8)关闭输入和输出流。
项目的目录结构

index.jsp
<form action="<%=path %>/UserServlet" method="post" enctype="multipart/form-data">
用户名:<input type="text" name="username"><br>
密 码:<input type="password" name="userpass"><br>
确认密码:<input type="password" name="conpass"><br>
上传照片:<input type="file" name="file"><br>
<input type="submit" value="确定"> <input type="reset" value="重置">
</form>

UserServlet.java
package com.ghq.controller;

import java.io.File;

import java.io.FileOutputStream;

import java.io.IOException;

import java.io.InputStream;

import java.io.OutputStream;

import java.text.DateFormat;

import java.text.SimpleDateFormat;

import java.util.Date;

import java.util.HashMap;

import java.util.List;

import java.util.Map;

import java.util.Random;

import javax.servlet.ServletException;

import javax.servlet.http.HttpServlet;

import javax.servlet.http.HttpServletRequest;

import javax.servlet.http.HttpServletResponse;

import org.apache.commons.fileupload.FileItem;

import org.apache.commons.fileupload.FileUploadException;

import org.apache.commons.fileupload.disk.DiskFileItemFactory;

import org.apache.commons.fileupload.servlet.ServletFileUpload;

public class UserServlet extends HttpServlet {

    public void doGet(HttpServletRequest request, HttpServletResponse response)

            throws ServletException, IOException {

        this.doPost(request, response);

    }

    public void doPost(HttpServletRequest request, HttpServletResponse response)

            throws ServletException, IOException {

        //创建DiskFileItemFactory的对象

        DiskFileItemFactory fileItemFactory = new DiskFileItemFactory();

        //创建ServletFileUpload的对象,可以获得封装普通表单域和文件域的集合

        ServletFileUpload fileUpload = new ServletFileUpload(fileItemFactory);

        //用于封装普通表单域的名字和表单域的内容

        Map<String, String> fieldMap = new HashMap<String, String>();

        //定义一个指定的时间格式器,

        DateFormat dateFormat = new SimpleDateFormat("yyyyMMddHHmmssSSS");

        //获取当前上传的时间

        String currenTime = dateFormat.format(new Date());

        //随机数生成器

        Random ran = new Random();

        //获取3位随机数

        int randomNum = ran.nextInt(900)+100;

        //用于存放新文件的名字,即当前时间字符串形式+3位的随机数

        String newFileName = currenTime + randomNum;

        //用于存放被上传文件对应的输入流

        InputStream fin = null;

        //用于存放目标文件的输出流,该文件将被产生在服务器上

        OutputStream fout = null;

        //用于获取images目录在服务器上的目录

        String imageRealPath = this.getServletContext().getRealPath("/images");

        byte[] source = new byte[1024];

        //用于存放实际读取的字节个数

        int count = 0;

        try {

            //对请求进行解析,获得一个封装的FileItem的集合,FileItem带表普通表单域或者文件域

            List<FileItem> fileItems = fileUpload.parseRequest(request);

            for(FileItem fi : fileItems){

                //isFormField方法为true,FileItem对象代表普通表单域,否则是文件域

                if (fi.isFormField()) {

                    //普通表单域的内容

                    String fieldValue = fi.getString();

                    //获取表单域的名字

                    String fieldName = fi.getFieldName();

                    //将指定的普通表单域的名字和内容封装到Map集合中

                    fieldMap.put(fieldName, fieldValue);

                    System.out.println(fieldName+"  "+fieldValue);

                }else {

                    //代表文件域,获取被上传文件的名字

                    String oldFileName = fi.getName();

                    //设置上传文件名的编码格式

                    oldFileName = new String(oldFileName.getBytes(),"utf-8");

                    newFileName += oldFileName;

                    fin = fi.getInputStream();

                }

            }

            //根据提供的目录和文件,创建一个File对象,是目标文件

            File targetFile = new File(imageRealPath,newFileName);

            //服务器上不存在的文件对应的输出流,该文件就代表上传到服务器上的文件

            fout = new FileOutputStream(targetFile);

            //如果没有读到流的末尾则count不是-1

            while ((count = fin.read(source)) != -1) {

                //将读到的数据写到输出流中,不建议使用write(source)避免在最后的时候写入无效的数据

                fout.write(source, 0, count);

            }

        } catch (FileUploadException e) {

            e.printStackTrace();

        } finally{

            //关闭输出输入流

            if (fout != null) {

                fout.close();

            }

            if (fin != null) {

                fin.close();

            }

        }

    }

}
web.xml中的配置
<?xml version="1.0" encoding="UTF-8"?>

<web-app xmlns:xsi="http://www.w3.org/2001/XMLSchema-instance" xmlns="http://java.sun.com/xml/ns/javaee" xmlns:web="http://java.sun.com/xml/ns/javaee/web-app_2_5.xsd" xsi:schemaLocation="http://java.sun.com/xml/ns/javaee http://java.sun.com/xml/ns/javaee/web-app_3_0.xsd" id="WebApp_ID" version="3.0">

  <servlet>

    <servlet-name>UserServlet</servlet-name>

    <servlet-class>com.ghq.controller.UserServlet</servlet-class>

  </servlet>

  <servlet-mapping>

    <servlet-name>UserServlet</servlet-name>

    <url-pattern>/UserServlet</url-pattern>

  </servlet-mapping>

</web-app>
上传文件后,在服务器的地址下的效果如下:

Struts2 文件上传
项目目录结构

UserAction.java
package com.ghq.action;

import java.io.File;

import java.io.FileInputStream;

import java.io.FileOutputStream;

import java.util.UUID;

import org.apache.struts2.ServletActionContext;

import com.opensymphony.xwork2.ActionSupport;

public class UserAction extends ActionSupport {

    private String username;

    private String userpass;

    //用于封装上传的对象,userphoto必须和文件域的名字相同  ,不管上传的文件类型是什么,userphoto扩展名都是tmp

    private File userphoto;

    //封装被上传的文件的名字,userphoto必须和文件域的名字相同,FileName区分大小写

    private String userphotoFileName;

    public String getUsername() {

        return username;

    }

    public void setUsername(String username) {

        this.username = username;

    }

    public String getUserpass() {

        return userpass;

    }

    public void setUserpass(String userpass) {

        this.userpass = userpass;

    }

    public File getUserphoto() {

        return userphoto;

    }

    public void setUserphoto(File userphoto) {

        this.userphoto = userphoto;

    }

    public String getUserphotoFileName() {

        return userphotoFileName;

    }

    public void setUserphotoFileName(String userphotoFileName) {

        this.userphotoFileName = userphotoFileName;

    }

    public String regUI() throws Exception{

        return "regUI";

    }

    public String reg() throws Exception {

        //获取目标文件所在目录的绝对路径

        String filePath = ServletActionContext.getServletContext().getRealPath("/images");

        //目标文件的名字 UUID和扩展名组成

        String fileName = UUID.randomUUID().toString()+

                          userphotoFileName.substring(userphotoFileName.lastIndexOf("."));

        //定义目标文件的对象,即要在服务器上出现的文件,要考虑到目标文件不能重复。

        File targetFile = new File(filePath,fileName);

        //获取上传文件的输入流

        FileInputStream fin = new FileInputStream(userphoto);

        //获取目标文件的输出流

        FileOutputStream fout = new FileOutputStream(targetFile);

        byte[] bs = new byte[1024];

        int count = 0;

        //上传文件

        while ((count = fin.read(bs))!= -1) {

            fout.write(bs,0,count);

        }

        if (fout != null) {

            fout.close();

        }

        if (fin != null) {

            fin.close();

        }

        return "regSuc";

    }

}
注:使用common-io.jar包中的FileUtils类可以简化文件上传。
public String reg() throws Exception {

        String filePath = ServletActionContext.getServletContext().getRealPath("/images");

        String fileName = UUID.randomUUID().toString() + userphotoFileName.substring(userphotoFileName.lastIndexOf("."));

        File targetFile = new File(filePath,fileName);

        FileUtils.copyFile(userphoto,targetFile);

        return "regSuc";

}
User.java
package com.ghq.model.eneity;

public class User {

    private int id;

    private String username;

    private String userpass;

    private String userphoto;

    public User(int id, String username, String userpass, String userphoto) {

        super();

        this.id = id;

        this.username = username;

        this.userpass = userpass;

        this.userphoto = userphoto;

    }

    //省略setter和getter方法

}
struts.xml配置
<?xml version="1.0" encoding="UTF-8" ?>

<!DOCTYPE struts PUBLIC

    "-//Apache Software Foundation//DTD Struts Configuration 2.3//EN"

    "http://struts.apache.org/dtds/struts-2.3.dtd">

<struts>

    <!-- 禁止动态方法调用, url中不能这样写UserAction!reg.action -->

    <constant name="struts.enable.DynamicMethodInvocation" value="false"/>

    <!-- 定义开发模式,开发阶段定义为开发模式       当项目上线以后,定义为非开发模式 -->

    <constant name="struts.devMode" value="true"/>

    <!-- 强制对Action类的访问的扩展名必须是action -->

    <constant name="struts.action.extension" value="action"/>

    <!-- 让核心控制器加载upload.properties文件 -->

    <constant name="struts.custom.i18n.resources" value="upload"/>

    <package name="user" extends="struts-default">

        <global-results>

            <!-- 文件上传失败转发到reg页面 -->

            <result name="input">/reg.jsp</result>

        </global-results>

        <action name="UserAction_*" class="com.ghq.action.UserAction" method="{1}">

            <result name="regSuc">/regSuc.jsp</result>

            <result name="regUI">/reg.jsp</result>

            <interceptor-ref name="fileUpload">

                <param name="allowedExtensions">jpg,gif,jpeg,bmp,png</param>

                <param name="maximumSize">5210</param>

            </interceptor-ref>

            <interceptor-ref name="defaultStack"></interceptor-ref>

        </action>

    </package>

</struts>
reg.jsp
<body>

      <s:fielderror/>

    <form action="<%=path %>/UserAction_reg.action" method="post" enctype="multipart/form-data">

        用户名:<input type="text" name="username"><br>

        密码:   <input type="password" name="userpass"><br>

        选择照片:<input type="file" name="userphoto"><br>

        <input type="submit" value="注册">

    </form>

</body>
拦截器实现文件过滤
Struts2提供了一个文件上传的拦截器,通过配置拦截器可以轻松地实现文件过滤。在<action>元素中添加如下代码
<interceptor-ref name="fileUpload">

    <param name="allowedExtensions">jpg,gif,jpeg,bmp,png</param>

    <param name="maximumSize">5210</param>

</interceptor-ref>

<!— 配置系统默认的拦截器 -->

<interceptor-ref name="defaultStack"></interceptor-ref>
参数含义:
allowedExtensions:指定允许上传的文件类型,多个类型之前逗号隔开
maximumSize:指定允许上传的文件大小,单位是字节
可以在jsp页面中添加Struts2标签来输出错误信息,但是直接调用含有Struts2标签的jsp文件时,会发生如下异常
<s:fielderror/>
The Struts dispatcher cannot be found. This is usually caused by using Struts tags without the associated filter. Struts tags are only usable when the request has passed through its servlet filter, which initializes the Struts dispatcher needed for this tag.
解决办法:
利用逻辑视图和物理视图之间的对应关系,使用逻辑视图来调用物理视图。
例如上面的UserAction中的regUI方法就是实现了此功能,地址栏输入http://127.0.0.1:8080/struts2_FileUpLoad/UserAction_regUI.action,调用regUI方法,返回"regUI",在struts.xml文件中找到对应的物理视图映射reg.jsp来加载页面。
错误信息正常显示的是英文提示,用户体检不佳
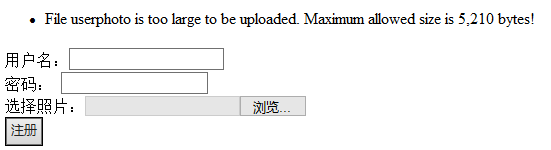
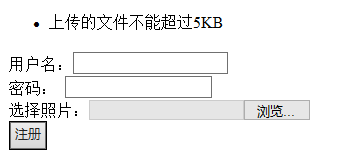
可以使用国际化信息替换。编写upload.properties文件

在struts.xml文件中配置以加载此文件
<constant name="struts.custom.i18n.resources" value="upload"/>
配置后显示样式为
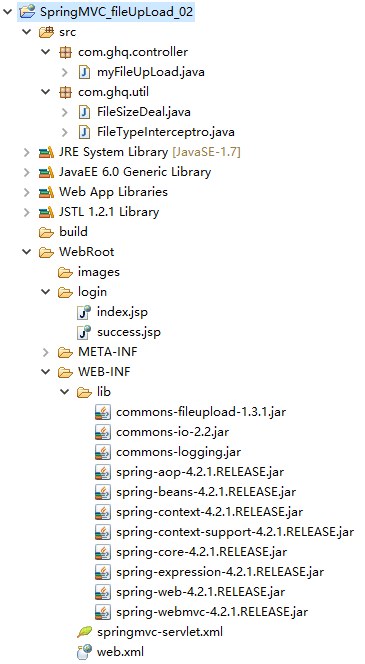
SpringMVC 多文件上传
同样文件上传需要导入的包是:commons-fileupload-1.2.1.jar、commons-io-1.4.jar
SpringMVC的文件上传使用了注解
类
@Controller 指定当前类是处理器 Spring注解
@RequestMapping 指定处理器url前缀 SpringMVC注解
方法
@RequestMapping 处理url后缀
参数
@RequestParam 方法的参数,接收请求参数值
项目目录结构
web.xml配置
<?xml version="1.0" encoding="UTF-8"?>

<web-app xmlns:xsi="http://www.w3.org/2001/XMLSchema-instance" xmlns="http://java.sun.com/xml/ns/javaee" xmlns:web="http://java.sun.com/xml/ns/javaee/web-app_2_5.xsd" xsi:schemaLocation="http://java.sun.com/xml/ns/javaee http://java.sun.com/xml/ns/javaee/web-app_3_0.xsd" id="WebApp_ID" version="3.0">

  <!-- 配置SpringMVC中的分发控制器DispatcherServlet -->

  <servlet>

      <servlet-name>springmvc</servlet-name>

      <servlet-class>org.springframework.web.servlet.DispatcherServlet</servlet-class>

        <!-- 服务器启动时创建DispatcherServlet对象 -->

        <load-on-startup>1</load-on-startup>

  </servlet>

  <servlet-mapping>

      <servlet-name>springmvc</servlet-name>

      <!-- DispatcherServlet只接收以.do结尾的请求 -->

      <url-pattern>*.do</url-pattern>

  </servlet-mapping>

  <!-- 该拦截器用于解决post请求中请求参数值可能出现乱码的情况 -->

  <filter>

      <filter-name>characterEncoding</filter-name>

      <filter-class>org.springframework.web.filter.CharacterEncodingFilter</filter-class>

      <init-param>

          <param-name>encoding</param-name>

          <param-value>utf-8</param-value>

      </init-param>

  </filter>

  <filter-mapping>

      <filter-name>characterEncoding</filter-name>

      <url-pattern>/*</url-pattern>

  </filter-mapping>

  <welcome-file-list>

    <welcome-file>login/index.jsp</welcome-file>

  </welcome-file-list>

</web-app>
myFileUpload.java
package com.ghq.controller;

import java.io.File;

import java.util.UUID;

import javax.servlet.http.HttpServletRequest;

import org.springframework.stereotype.Controller;

import org.springframework.web.bind.annotation.RequestMapping;

import org.springframework.web.bind.annotation.RequestParam;

import org.springframework.web.multipart.MultipartFile;

@Controller

@RequestMapping("/user")

public class myFileUpLoad{

    @RequestMapping("/fileupload")

    public String fileupload(HttpServletRequest request,@RequestParam MultipartFile[] files) throws Exception {

        if (files != null && files.length > 0) {

            for (int i = 0; i < files.length; i++) {

                //获取原始文件名

                String orifName = files[i].getOriginalFilename();

                //获取扩展名

                String extName = orifName.substring(orifName.lastIndexOf("."));

                //获得服务器上的虚拟路径

                String filePath = request.getServletContext().getRealPath("/images");

                //创建目标文件

                File targetfile = new File(filePath, UUID.randomUUID()+extName);

                //文件上传

                files[i].transferTo(targetfile);

            }

        }

        return "success";

    }

}
SpringMVC中的文件大小和类型过滤都分别需要定义一个新的类
文件大小的限制
package com.ghq.util;

import javax.servlet.http.HttpServletRequest;

import javax.servlet.http.HttpServletResponse;

import org.springframework.web.multipart.MaxUploadSizeExceededException;

import org.springframework.web.servlet.HandlerExceptionResolver;

import org.springframework.web.servlet.ModelAndView;

//自定义一个异常解析器,捕获MaxUploadSizeExceededException异常

public class FileSizeDeal implements HandlerExceptionResolver{

    @Override

    public ModelAndView resolveException(HttpServletRequest request,

            HttpServletResponse response, Object obj, Exception e) {

        ModelAndView mv = new ModelAndView();

        if (e instanceof MaxUploadSizeExceededException) {

            mv.addObject("msg", "上传的文件大小不能超过100K");

            mv.setViewName("index");

            return mv;

        }

        return null;

    }

}
文件类型的限制
package com.ghq.util;

import java.util.Map;

import java.util.Set;

import javax.servlet.http.HttpServletRequest;

import javax.servlet.http.HttpServletResponse;

import org.springframework.web.multipart.MultipartFile;

import org.springframework.web.multipart.MultipartHttpServletRequest;

import org.springframework.web.servlet.handler.HandlerInterceptorAdapter;

//开发拦截器,用于对文件类型进行过滤

public class FileTypeInterceptro extends HandlerInterceptorAdapter{

    @Override

    public boolean preHandle(HttpServletRequest request,

            HttpServletResponse response, Object handler) throws Exception {

        boolean flag = true;

        //判断拦截的请求是上传请求

        if (request instanceof MultipartHttpServletRequest) {

            MultipartHttpServletRequest mulReq = (MultipartHttpServletRequest)request;

            //获得所有的上传文件

            Map<String, MultipartFile> maps = mulReq.getFileMap();

            //获得map中键的集合

            Set<String> keySet = maps.keySet();

            MultipartFile mulFile = null;

            for (String key : keySet) {

                //根据键获得文件

                mulFile = mulReq.getFile(key);

                //获得文件的名字

                String oriFName = mulFile.getOriginalFilename();

                //若没有上传文件则转到上传页面

                if (oriFName.equals("")||oriFName == null) {

                    request.setAttribute("msg", "请选择要上传的图片");

                    request.getRequestDispatcher("/login/index.jsp").forward(request, response);

                    return flag;

                }

                //判断上传文件的后缀是否是规定的类型

                flag = isValid(oriFName);

                if (!flag) {

                    request.setAttribute("msg", "只能上传图片");

                    request.getRequestDispatcher("/login/index.jsp").forward(request, response);

                    return flag;

                }

            }

        }

        return flag;

    }

    public boolean isValid(String oriFName){

        String allowedExts = "jpg,jpeg,gif,png,bmp";

        String extName = oriFName.substring(oriFName.lastIndexOf(".")+1);

        if (allowedExts.contains(extName)) {

            return true;

        }

        return false;

    }

}
Spring配置文件中的配置
<?xml version="1.0" encoding="UTF-8"?>

<beans xmlns="http://www.springframework.org/schema/beans"

    xmlns:xsi="http://www.w3.org/2001/XMLSchema-instance"

  xmlns:context="http://www.springframework.org/schema/context"

  xmlns:mvc="http://www.springframework.org/schema/mvc"

    xsi:schemaLocation="

    http://www.springframework.org/schema/beans

  http://www.springframework.org/schema/beans/spring-beans.xsd

  http://www.springframework.org/schema/context

  http://www.springframework.org/schema/context/spring-context.xsd

  http://www.springframework.org/schema/mvc

  http://www.springframework.org/schema/mvc/spring-mvc.xsd

  ">

  <!-- 让Spring识别注解 -->

  <context:component-scan base-package="com.ghq.controller"></context:component-scan>

  <!-- 让SpringMVC识别注解 -->

  <mvc:annotation-driven></mvc:annotation-driven>

  <!-- 配置视图解析器  如果是显式转发,则可以不需要视图解析器-->

  <bean id="resourceViewResolver" class="org.springframework.web.servlet.view.InternalResourceViewResolver">

      <property name="viewClass" value="org.springframework.web.servlet.view.JstlView"/>

      <property name="prefix" value="/login/"/>

      <property name="suffix" value=".jsp"/>

  </bean>

    <!-- 配置文件上传解析器 -->

    <bean id="multipartResolver" class="org.springframework.web.multipart.commons.CommonsMultipartResolver">

        <!-- 限制上传文件的大小的峰值是102400byte -->

        <property name="maxUploadSize" value="102400"></property>

    </bean>

    <bean id="sizeDeal" class="com.ghq.util.FileSizeDeal"></bean>

    <!-- 配置拦截器用于限制文件上传类型 -->

    <mvc:interceptors>

        <mvc:interceptor>

            <!-- 所有url -->

            <mvc:mapping path="/**"/>

            <bean class="com.ghq.util.FileTypeInterceptro"/>

        </mvc:interceptor>

    </mvc:interceptors>

</beans>
jsp页面
<body>

      ${msg }

      <form action="<%=path %>/user/fileupload.do" method="post" enctype="multipart/form-data">

          <input type="file" name="files"><br>

          <input type="file" name="files"><br>

          <input type="submit" value="上传">

      </form>

  </body>
文件上传(Servlet/Struts2/SpringMVC)的更多相关文章
- 文件上传——servlet实现
自己对照别的博主的博客实现的,记录用. 整个上传的结构如下: 上传的页面:unload.jsp <%@ page language="java" import="j ...
- form表单文件上传 servlet文件接收
需要导入jar包 commons-fileupload-1.3.2.jar commons-io-2.5.jar Upload.Jsp代码 <%@ page language="jav ...
- 文件上传下载struts2
上传方式1: // 保存上传的文件 public boolean saveFile(File file, String fileName) throws IOException { File newF ...
- springMVC文件上传与下载(六)
1..文件上传 在springmvc.xml中配置文件上传解析器 <!-- 上传图片配置实现类,id必须为这个 --> <bean id="multipartResolve ...
- Struts2文件上传和下载(原理)
转自:http://zhou568xiao.iteye.com/blog/220732 1. 文件上传的原理:表单元素的enctype属性指定的是表单数据的编码方式,该属性有3个值:1) ...
- Struts2单文件上传原理及示例
一.文件上传的原理 表单元素的enctype属性指定的是表单数据的编码方式,该属性有3个值: 1.application/x-www-form-urlencoded:这是默认编码方式,它只处理表单域里 ...
- 【SpringMVC学习08】SpringMVC中实现文件上传
之前有写过一篇struts2实现的文件上传,这一篇博文主要来总结下springmvc实现文件上传的步骤.首先来看一下单个文件的上传,然后再来总结下多个文件上传. 1. 环境准备 springmvc上传 ...
- struts2 文件上传和下载,以及部分源代码解析
struts2 文件上传 和部分源代码解析,以及一般上传原理 (1) 单文件上传 一.简单介绍 Struts2并未提供自己的请求解析器,也就是就Struts2不会自己去处理multipart/form ...
- (八)Struts2 文件上传和下载
所有的学习我们必须先搭建好Struts2的环境(1.导入对应的jar包,2.web.xml,3.struts.xml) 第一节:Struts2 文件上传 Struts2 文件上传基于Struts2 拦 ...
随机推荐
- linuxea:ELK5.5-elasticsearch-x-pack破解
本站采用知识共享署名-非商业性使用-相同方式共享国际许可协议4.0 进行许可 本文作者:www.linuxea.com for Mark 文章链接:https://www.linuxea.com/17 ...
- Swagger2使用记录
1. Swagger2使用记录 1.1. Bean配置文件 @Configuration public class Swagger2 { @Bean public Docket createRestA ...
- linux 编译PHP memcache扩展
在Linux下编译memcache:memcache官网:http://memcached.org/前期准备:如果是虚拟机 保证虚拟机 联网安装依赖包yum -y install gcc make l ...
- 教你制作自己logo专属的图片
说明:以下教程仅适合对图片分辨率要求不高的情况. 第一步:使用Windows自带的画图工具新建一个250像素*250像素的空白图片. 第二步:使用形状中的三角形,按住Shift键,将三角形拖拉至合适的 ...
- SpringMVC的 @RestController和@Controller 区别
@RestController注解,相当于@Controller+@ResponseBody两个注解的结合, 返回json数据不需要在方法前面加@ResponseBody注解了,但使用@RestCon ...
- vs2013 调试libevent 源码
自己内功的提升,无非是向前辈学习和修炼自身,对于编码也是如此,学习优秀的库只有从 源代码学起,才能深刻理解库实现的来龙去脉,加深自己的理解,提升自己的功力. 今天就介绍一下vs2013 下面调试lib ...
- java常量类的实现方式_枚举类_项目实践
前言 众所周知,系统里有很多比如订单状态.审核状态:性别.结算方式.交易类型等属性,这些属性只有几个值,一般用0.1.2.3等的数字标识存入数据库,每次对这些属性所属对象的增删改操作,都会在代码里给状 ...
- ubuntu 16.04通过源码方式安装nginx
1.下载nginx源码包 wget http://nginx.org/download/nginx-1.11.12.tar.gz 2.解压该tar包 tar zxvf nginx-1.11.12.t ...
- JVM-垃圾收集过程的内存管理
JDK1.7 JVM的垃圾收集算法有 1. 标记-清除算法: 2. 复制算法:在商业虚拟机都是使用这种算法来回收新生代的 3. 标记-整理算法: 4.分代收集算法: JDK1.7 JVM的垃圾收集器有 ...
- serilization 序列化 transient 不被序列化
Serizlizable 作用 对于一个存在于Java虚拟机中的对象来说,其内部的状态只保持在内存中.JVM停止之后,这些状态就丢失了.在很多情况下,对象的内部状态是需要被持久化下来的.提到持久化,最 ...