springboot + mybatis +druid
Druid Spring Boot Starter
mybatis-spring-boot-autoconfigure
mybatis-spring-boot-samples
新建spring boot工程,添加pom依赖
<dependency>

            <groupId>org.mybatis.spring.boot</groupId>

            <artifactId>mybatis-spring-boot-starter</artifactId>

            <version>1.3.</version>

        </dependency>

        <dependency>

            <groupId>com.alibaba</groupId>

            <artifactId>druid-spring-boot-starter</artifactId>

            <version>1.1.</version>

        </dependency>

        <dependency>

            <groupId>mysql</groupId>

            <artifactId>mysql-connector-java</artifactId>

            <scope>runtime</scope>

        </dependency>

        <dependency>

            <groupId>org.springframework.boot</groupId>

            <artifactId>spring-boot-starter-web</artifactId>

        </dependency>
新增User类
public class User {

    private Integer id;

    private String name;

    private Integer sex;

    private Integer age;

    public User(String name, Integer sex, Integer age) {

        this.name = name;

        this.sex = sex;

        this.age = age;

    }

    public User(Integer id, String name, Integer sex, Integer age) {

        this.id = id;

        this.name = name;

        this.sex = sex;

        this.age = age;

    }

    public User() {

    }

    public Integer getId() {

        return id;

    }

    public void setId(Integer id) {

        this.id = id;

    }

    public String getName() {

        return name;

    }

    public void setName(String name) {

        this.name = name;

    }

    public Integer getSex() {

        return sex;

    }

    public void setSex(Integer sex) {

        this.sex = sex;

    }

    public Integer getAge() {

        return age;

    }

    public void setAge(Integer age) {

        this.age = age;

    }

}
新增UserMapper接口
import org.apache.ibatis.annotations.Mapper;

import org.apache.ibatis.annotations.Param;

import org.apache.ibatis.annotations.Select;

@Mapper

public interface UserMapper {

    @Select("select * from person where id=#{id}")

    User findById(@Param("id") Integer id);

}
新增UserController
import org.springframework.beans.factory.annotation.Autowired;

import org.springframework.web.bind.annotation.RequestMapping;

import org.springframework.web.bind.annotation.RequestMethod;

import org.springframework.web.bind.annotation.RestController;

@RestController

public class UserController {

    @Autowired

    UserMapper userMapper;

    @RequestMapping(value = "/hello",method = RequestMethod.GET)

    public String index() {

        User user=userMapper.findById(1);

        return user.getName();

    }

}
配置文件
spring.datasource.url= jdbc:mysql://192.168.31.146:3306/mydb

spring.datasource.username= root

spring.datasource.password= pass

spring.datasource.druid.url= jdbc:mysql://192.168.31.146:3306/mydb

spring.datasource.druid.username= root

spring.datasource.druid.password= pass

spring.datasource.druid.initial-size=

spring.datasource.druid.max-active=

spring.datasource.druid.min-idle=

spring.datasource.druid.max-wait=

spring.datasource.druid.pool-prepared-statements=true

spring.datasource.druid.max-pool-prepared-statement-per-connection-size=

#spring.datasource.druid.max-open-prepared-statements=

spring.datasource.druid.validation-query=select  from dual

#spring.datasource.druid.validation-query-timeout=

spring.datasource.druid.test-on-borrow=false

spring.datasource.druid.test-on-return=false

spring.datasource.druid.test-while-idle=true

spring.datasource.druid.time-between-eviction-runs-millis=

spring.datasource.druid.min-evictable-idle-time-millis=

#spring.datasource.druid.max-evictable-idle-time-millis=

#配置多个英文逗号分隔

spring.datasource.druid.filters=stat,wall,log4j
启动应用后打开浏览器:http://localhost:8080/druid/index.html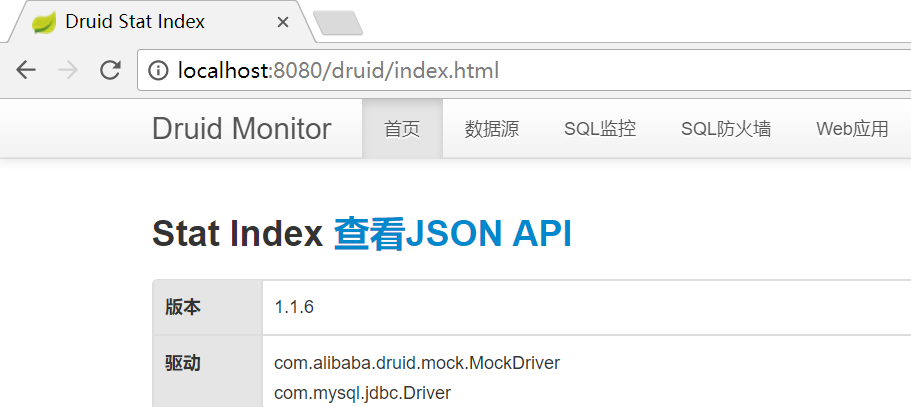
再打开:http://localhost:8080/hello
在druid界面查看sql

springboot + mybatis +druid的更多相关文章
- 基于Maven的Springboot+Mybatis+Druid+Swagger2+mybatis-generator框架环境搭建
基于Maven的Springboot+Mybatis+Druid+Swagger2+mybatis-generator框架环境搭建 前言 最近做回后台开发,重新抓起以前学过的SSM(Spring+Sp ...
- 3分钟搞定SpringBoot+Mybatis+druid多数据源和分布式事务
文章来自: https://blog.csdn.net/qq_29242877/article/details/79033287 在一些复杂的应用开发中,一个应用可能会涉及到连接多个数据源,所谓多数据 ...
- springboot+mybatis+druid+atomikos框架搭建及测试
前言 因为最近公司项目升级,需要将外网数据库的信息导入到内网数据库内.于是找了一些springboot多数据源的文章来看,同时也亲自动手实践.可是过程中也踩了不少的坑,主要原因是我看的文章大部分都是s ...
- springboot+mybatis+druid+sqlite/mysql/oracle
搭建springboot+mybatis+druid+sqlite/mysql/oracle附带测试 1.版本 springboot2.1.6 jdk1.8 2.最简springboot环境 http ...
- 记录一下自己搭建springboot+mybatis+druid 多数据源的过程
前言 上次的一个项目(springboot+mybatis+vue),做到后面的时间发现需要用到多数据源.当时没有思路..后来直接用了jdbc来实现.这几天不是很忙,所以决定自己再搭建一次.不多说, ...
- SpringBoot+Mybatis+ Druid+PageHelper 实现多数据源并分页
前言 本篇文章主要讲述的是SpringBoot整合Mybatis.Druid和PageHelper 并实现多数据源和分页.其中SpringBoot整合Mybatis这块,在之前的的一篇文章中已经讲述了 ...
- springboot+mybatis+druid数据库连接池
参考博客https://blog.csdn.net/liuxiao723846/article/details/80456025 1.先在pom.xml中引入druid依赖包 <!-- 连接池 ...
- SpringBoot+Mybatis+Druid批量更新 multi-statement not allow异常
本文链接:https://blog.csdn.net/weixin_43947588/article/details/90109325 注:该文是本博主记录学习之用,没有太多详细的讲解,敬请谅解! ...
- Springboot+mybatis+druid 配置多数据源
项目结构 application.yml配置文件 spring: application: name: service datasource: primary: jdbc-url: jdbc:orac ...
随机推荐
- 怎样导入现有的NiosII工程
查找路径
- Effective C++ 随笔(5)
条款27:尽量稍作转型动作 const_cast:常量性移除 dynamic_cast:安全向下转型 reinterpret_cast: static_cast: 如在子类当中享调用父类当中的某个方法 ...
- DEM数据及其他数据下载
GLCF大家都知道吧?http://glcf.umiacs.umd.edu/data/ +++++++++++++++去年12月份听遥感所一老师说TM08初将上网8万景,可是最近一直都没看到相关的网页 ...
- day2(基础数据类型)
一.基础数据类型操作 1.数字 int 数字主要是用于计算用的,使用方法并不是很多,就记住一种就可以: int.bit_length() -> int Number of bits necess ...
- 2.2.9静态同步synchronized方法与synchronized(class)代码块
关键字synchronized还可以应用在static静态方法上,这样写那是对当前的*.java文件对应的class类进行持锁, 测试如下 package com.cky.bean; /** * Cr ...
- Qt_模块简介
Qt4 和 Qt5最大的区别之一就是底层架构有了修改.Qt5引入了模块化的概念,讲众多功能细分到几个模块之中.需要达到,用什么模块知道到哪个模块去寻找. Qt5模块分为Essentials Modul ...
- Leetcode--136. Single Number(easy)
Given a non-empty array of integers, every element appears twice except for one. Find that single on ...
- gradle构建工具入门
实际设置:系统变量新建: PATH新加: 查看是否安装成功:
- Linux查看History记录加时间戳小技巧
Linux查看History记录加时间戳小技巧 熟悉bash的都一定知道使用history可以输出你曾经输入过的历史命令,例如[root@servyou_web ~]# history | more ...
- poj3253哈夫曼树
Fence Repair Time Limit: 2000 MS Memory Limit: 65536 KB 64-bit integer IO format: %I64d , %I64u Java ...