
python实现图片验证码
1 验证基础知识
1.1 Python生成随机验证码,需要使用PIL模块.
# 安装

pip3 install pillow
1.2 创建图片
from PIL import Image

img = Image.new(mode="RGB", size=(120, 30), color=(125, 255, 255))

# 保存图片到本地

with open("code.png",'wb') as f:

img.save(f,format="png")
1.3 创建画笔
from PIL import Image

from PIL import ImageDraw

img = Image.new(mode="RGB", size=(120, 30), color=(255,255,255))

draw = ImageDraw.Draw(img, mode="RGB")
1.4 画点
from PIL import Image

from PIL import ImageDraw

img = Image.new(mode="RGB", size=(120, 30), color=(255,255,255))

draw = ImageDraw.Draw(img, mode="RGB")

# 第一个参数:表示坐标

# 第二个参数:表示颜色

draw.point([100,20], fill="red")

draw.point([50,10], fill=(255, 135, 255))

with open("code.png",'wb') as f:

img.save(f,format="png")
1.5 画线
from PIL import Image

from PIL import ImageDraw

img = Image.new(mode="RGB", size=(120, 30), color=(255,255,255))

draw = ImageDraw.Draw(img, mode="RGB")

# 第一个参数:表示起始坐标和结束坐标

# 第二个参数:表示颜色

draw.line((10, 10, 10, 30), fill="red")

draw.line((10, 10, 30, 10), fill=(255, 135, 255))

with open("code.png",'wb') as f:

img.save(f,format="png")
1.6 画圆
from PIL import Image

from PIL import ImageDraw

img = Image.new(mode="RGB", size=(150, 150), color=(255,255,255))

draw = ImageDraw.Draw(img, mode="RGB")

# 第一个参数:表示起始坐标和结束坐标(圆要画在中间)

# 第二个参数:表示开始角度

# 第三个参数:表示结束角度

# 第四个参数:表示颜色

draw.arc((50, 50, 100, 100), 0, 360, fill="red")

with open("code.png",'wb') as f:

img.save(f,format="png")
1.7 写文本
from PIL import Image

from PIL import ImageDraw

img = Image.new(mode="RGB", size=(120, 30), color=(255,255,255))

draw = ImageDraw.Draw(img, mode="RGB")

# 第一个参数:表示起始坐标

# 第二个参数:表示写入内容

# 第三个参数:表示颜色

draw.text([20, 10], "python", fill="red")

with open("code.png",'wb') as f:

img.save(f,format="png")
1.8 设置特殊字体
from PIL import Image, ImageDraw, ImageFont

img = Image.new(mode="RGB", size=(120, 30), color=(255,255,255))

draw = ImageDraw.Draw(img, mode="RGB")

# 第一个参数:表示字体路径

# 第二个参数:表示字体大小

font = ImageFont.truetype("kumo.ttf", 25)

# 第一个参数:表示起始坐标

# 第二个参数:表示写入内容

# 第三个参数:表示颜色

# 第四个参数:表示字体

draw.text([30, 0], "python", fill="red", font=font)

with open("code.png",'wb') as f:

img.save(f,format="png")
2 应用
2.1 应用方法
import random

from io import BytesIO

from PIL import Image, ImageDraw, ImageFont

def check_code(width=120, height=30, char_length=5, font_file='kumo.ttf', font_size=28):

    f = BytesIO()

    img = Image.new(mode='RGB', size=(width, height),

                    color=(random.randint(50, 250), random.randint(50, 255), random.randint(50, 255)))

    draw = ImageDraw.Draw(img, mode='RGB')

    char_list = []

    # 画字

    for i in range(char_length):

        char = random.choice([chr(random.randint(65, 90)), str(random.randint(1, 9)), chr(random.randint(97, 122)), ])

        font = ImageFont.truetype("blog/static/fonts/"+font_file, font_size)

        draw.text([i * 24, 0], char, (random.randint(200, 255), random.randint(0, 50), random.randint(0, 50)),

                  font=font)

        char_list.append(char)

    def rndColor():

        """

        生成随机颜色

        :return:

        """

        return (random.randint(0, 255), random.randint(10, 255), random.randint(64, 255))

    # 写干扰点

    for i in range(40):

        draw.point([random.randint(0, width), random.randint(0, height)], fill=rndColor())

    # 写干扰圆圈

    for i in range(40):

        draw.point([random.randint(0, width), random.randint(0, height)], fill=rndColor())

        x = random.randint(0, width)

        y = random.randint(0, height)

        draw.arc((x, y, x + 4, y + 4), 0, 90, fill=rndColor())

    # 画干扰线

    for i in range(5):

        x1 = random.randint(0, width)

        y1 = random.randint(0, height)

        x2 = random.randint(0, width)

        y2 = random.randint(0, height)

        draw.line((x1, y1, x2, y2), fill=rndColor())

    img.save(f, "png")

    data = f.getvalue()

    s_code = ''.join(char_list)

    return data,s_code
2.2 调用方法
def get_valid_img(request):

    '''

    登录和注册的验证码

    :param request:

    :return:

    '''

    data,s_code = check_code()

    request.session["valid_code"] = s_code

    return HttpResponse(data)
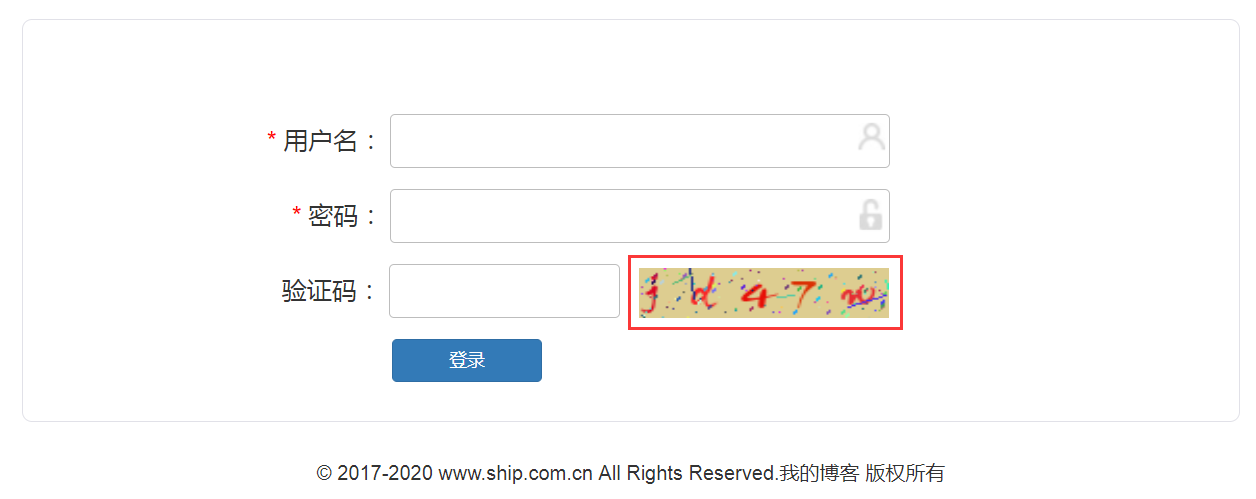
2.3 效果展示
python实现图片验证码的更多相关文章
- python随机图片验证码的生成
Python生成随机验证码,需要使用PIL模块. 安装: 1 pip3 install pillow 基本使用 1. 创建图片 1 2 3 4 5 6 7 8 9 from PIL import Im ...
- 字符识别Python实现 图片验证码识别
字符型图片验证码识别完整过程及Python实现 1 摘要 验证码是目前互联网上非常常见也是非常重要的一个事物,充当着很多系统的 防火墙 功能,但是随时OCR技术的发展,验证码暴露出来的安全问题也越 ...
- python 识别图片验证码报IOError
说一下困扰了我一周的问题:识别图片验证码 本来我按照安装步骤(http://www.cnblogs.com/yeayee/p/4955506.html?utm_source=tuicool&u ...
- python添加图片验证码
1.创建验证码模块 #!/usr/bin/env python # -*- coding:utf-8 -*- import random from PIL import Image, ImageDra ...
- python爬虫20 | 小帅b教你如何使用python识别图片验证码
当你在爬取某些网站的时候 对于你的一些频繁请求 对方会阻碍你 常见的方式就是使用验证码 验证码的主要功能 就是区分你是人还是鬼(机器人) 人 想法设法的搞一些手段来对付技术 而 技术又能对付人们的想法 ...
- 【Python实现图片验证码】
"```python import base64 import random from PIL import Image from PIL import ImageDraw # 画笔对象 f ...
- Python实现图片验证码识别
转载地址:https://blog.csdn.net/EB_NUM/article/details/77060009 具体想要实现上面的代码需要安装两个包和一个引擎 在安装之前需要先安装好Python ...
- 字符型图片验证码识别完整过程及Python实现
字符型图片验证码识别完整过程及Python实现 1 摘要 验证码是目前互联网上非常常见也是非常重要的一个事物,充当着很多系统的 防火墙 功能,但是随时OCR技术的发展,验证码暴露出来的安全问题也越 ...
- 【python】带图片验证码的登录自动化实战
近期在跟进新项目的时候,整体的业务线非常之长,会一直重复登录退出不同账号的这个流程,所以想从登录开始实现部分的自动化.因为是B/S的架构,所以采用的是selenium的框架来实现.大致实现步骤如下: ...
随机推荐
- Oracle笔记之序列(Sequence)
Oracle中序列是一种数据对象,可以视为一个等差数列,我们自增就是一个遍历这个数列的过程,可以取当前值,也可以将当前值自加n后返回,Sequence与表没有太大的关系,有的时候如果表的主键是数值类型 ...
- Vue.js 在 webpack 脚手架中使用 cssnext
Vue.js 的 webpack脚手架默认已经使用了 PostCSS 的 autoprefixer 的功能. 如果想使用下一代 css语法,即cssnext: 1. 安装依赖 npm install ...
- struts2 constant详解
<!-- 指定Web应用的默认编码集,相当于调用 HttpServletRequest的setCharacterEncoding方法 --> <constant nam ...
- SPI最大传输速率【转】
转自:https://www.silabs.com/community/mcu/8-bit/knowledge-base.entry.html/2017/01/13/spi_-asc0 问题 SPI作 ...
- 读书笔记 effective c++ Item 4 确保对象被使用前进行初始化
C++在对象的初始化上是变化无常的,例如看下面的例子: int x; 在一些上下文中,x保证会被初始化成0,在其他一些情况下却不能够保证.看下面的例子: class Point { int x,y; ...
- Transport failed: java.io.EOFException
ActiveMQ服务端有时会报Transport failed: java.io.EOFException这样的错误,这是由客户端丢失连接并反复尝试连接导致的,不是什么大问题,有时网络波动就会产生这种 ...
- 最全Pycharm教程(26)——Pycharm搜索导航之文件名、符号名搜索(转)
1.准备一个工程 向你的工程中添加一个Python文件,并输入一些源码,例如: 2.转到对应文件.类.符号 Pycharm提供的一个很强力的功能就是能够根据名称跳转到任何文件.类.符号所在定义位置. ...
- 创建 dblink
目的:oracle中跨数据库查询 两台数据库服务器db_A(本地)和db_B(远程192.168.1.100),db_A下用户user_a 需要访问到db_B下user_b的数据解决:查询 ...
- python【项目】:工资管理(简易版)
功能要求: 登录系统用户认证通过后才能列出下一级菜单员工信息表 登录系统要有用户登录.注册账号.删除账号.修改密码.退出 登录密码要有加密功能 从info.txt文件读取员工及工资信息,最后通过增加, ...
- Kail Linux渗透测试之测试工具Armitage
Kali Linux下的Armitage是一个很强大的渗透工具,图形化操作页面,但我们把kali linux装在虚拟机里面,然后再启动armitage就会出现一个error,他会给你一个message ...