构建第一个Spring Boot2.0应用之集成mybatis(六)
一、环境:
IDE:IntelliJ IDEA 2017.1.1
JDK:1.8.0_161
Maven:3.3.9
springboot:2.0.2.RELEASE
二、步骤
方式一:利用配置文件配置
1.创建springboot项目,并修改POM.xml配置如下
<?xml version="1.0" encoding="UTF-8"?>

<project xmlns="http://maven.apache.org/POM/4.0.0" xmlns:xsi="http://www.w3.org/2001/XMLSchema-instance"

    xsi:schemaLocation="http://maven.apache.org/POM/4.0.0 http://maven.apache.org/xsd/maven-4.0.0.xsd">

    <modelVersion>4.0.0</modelVersion>

    <groupId>com.yy</groupId>

    <artifactId>sbmybitas</artifactId>

    <version>0.0.1-SNAPSHOT</version>

    <packaging>jar</packaging>

    <name>sbmybitas</name>

    <description>Demo project for Spring Boot</description>

    <parent>

        <groupId>org.springframework.boot</groupId>

        <artifactId>spring-boot-starter-parent</artifactId>

        <version>2.0.2.RELEASE</version>

        <relativePath/> <!-- lookup parent from repository -->

    </parent>

    <properties>

        <project.build.sourceEncoding>UTF-8</project.build.sourceEncoding>

        <project.reporting.outputEncoding>UTF-8</project.reporting.outputEncoding>

        <java.version>1.8</java.version>

    </properties>

    <dependencies>

        <dependency>

            <groupId>org.springframework.boot</groupId>

            <artifactId>spring-boot-starter</artifactId>

        </dependency>

        <dependency>

            <groupId>org.springframework.boot</groupId>

            <artifactId>spring-boot-starter-web</artifactId>

        </dependency>

        <!--jpa-->

        <dependency>

            <groupId>org.springframework.boot</groupId>

            <artifactId>spring-boot-starter-data-jpa</artifactId>

        </dependency>

        <!--Mysql数据库驱动-->

        <dependency>

            <groupId>mysql</groupId>

            <artifactId>mysql-connector-java</artifactId>

            <version>5.1.46</version>

        </dependency>

        <!--Springboot mybatis依赖-->

        <dependency>

            <groupId>org.mybatis.spring.boot</groupId>

            <artifactId>mybatis-spring-boot-starter</artifactId>

            <version>1.3.2</version>

        </dependency>

        <!-- SpringBoot - MyBatis 逆向工程 -->

        <dependency>

            <groupId>org.mybatis.generator</groupId>

            <artifactId>mybatis-generator-core</artifactId>

            <version>1.3.2</version>

        </dependency>

        <dependency>

            <groupId>org.springframework.boot</groupId>

            <artifactId>spring-boot-starter-test</artifactId>

            <scope>test</scope>

        </dependency>

    </dependencies>

    <build>

        <plugins>

            <plugin>

                <groupId>org.springframework.boot</groupId>

                <artifactId>spring-boot-maven-plugin</artifactId>

            </plugin>

            <!-- MyBatis 逆向工程 插件 -->

            <plugin>

                 <groupId>org.mybatis.generator</groupId>

                 <artifactId>mybatis-generator-maven-plugin</artifactId>

                 <version>1.3.2</version>

                 <configuration>

                     <!-- 自动生成的配置 -->

                     <configurationFile>${basedir}/src/main/resources/generatorConfig.xml</configurationFile>

                     <!--是否覆盖-->

                     <overwrite>true</overwrite>

                     <!--允许移动生成的文件-->

                     <verbose>true</verbose>

                 </configuration>

            </plugin>

        </plugins>

    </build>

</project>
2. application.properties配置
#数据库连接信息

spring.datasource.url=jdbc:mysql://localhost/test

spring.datasource.username=root

spring.datasource.password=mysql

spring.datasource.driver-class-name=com.mysql.jdbc.Driver
3.generatorConfig.xml配置
<?xml version="1.0" encoding="UTF-8"?>

<!DOCTYPE generatorConfiguration PUBLIC "-//mybatis.org//DTD MyBatis Generator Configuration 1.0//EN"

        "http://mybatis.org/dtd/mybatis-generator-config_1_0.dtd">

<generatorConfiguration>

    <!-- 引入配置文件 -->

    <properties resource="application.properties"/>

    <!-- 指定数据库连接驱动jara地址 -->

    <!-- 数据库驱动:选择本地硬盘上面的数据库驱动包-->

    <classPathEntry location="D:\java\mysql-connector-java-5.1.17.jar"></classPathEntry>

    <!-- 一个数据库一个context -->

    <context id="mysqltable1" targetRuntime="Mybatis3">

        <!-- 生成的pojo,将implements Serializable -->

        <plugin type="org.mybatis.generator.plugins.SerializablePlugin"></plugin>

        <commentGenerator>

            <!-- 是否取消注释 -->

            <!--是否去除自动生成注释true:是 false:否-->

            <property name="suppressAll" value="true"></property>

        </commentGenerator>

          <!--数据库连接的信息:驱动类、连接地址、用户名、密码 -->

        <!--<jdbcConnection-->

                        <!--driverClass="com.mysql.jdbc.Driver"-->

                        <!--connectionURL="jdbc:mysql://localhost:3306/test"-->

                        <!--userId="root"-->

                        <!--password="mysql">-->

        <!--</jdbcConnection>-->

        <jdbcConnection driverClass="${spring.datasource.driver-class-name}"

                         connectionURL="${spring.datasource.url}"

                        userId="${spring.datasource.username}"

                        password="${spring.datasource.password}"/>

        <!--mybatis里专门用来处理NUMERIC和DECIMAL类型的策略-->

        <!-- 默认false,把JDBC DECIMAL 和 NUMERIC 类型解析为 Integer;

          设置为true,把JDBC DECIMAL 和NUMERIC 类型解析为java.math.BigDecimal -->

        <javaTypeResolver>

            <property name="forceBigDecimals" value="false"></property>

        </javaTypeResolver>

        <!--生成模型的包名和位置-->

        <javaModelGenerator targetPackage="com.yy.entity" targetProject="src/main/java">

            <!--enableSubPackages:是否让schema作为报的后缀-->

            <property name="enableSubPackages" value="true"></property>

            <!--从数据库返回的值被清理前后的空格-->

            <property name="trimStrings" value="true"></property>

        </javaModelGenerator>

            <!--生成映射文件的包名和位置 mapper.xml

            注意位置: targetProject="src/main/resources"

            -->

        <sqlMapGenerator targetPackage="mapper" targetProject="src/main/resources">

            <property name="enableSubPackages" value="true"></property>

        </sqlMapGenerator>

        <!--生成DAOMapper的包名和位置 mapper.java-->

        <javaClientGenerator type="XMLMAPPER" targetPackage="com.yy.mapper" targetProject="src/main/java">

            <property name="enableSubPackages" value="true"></property>

        </javaClientGenerator>

        <!--table是指定每个表的生成策略-->

        <!--tableName:用于自动生成代码数据库中的表名或视图名,domainObjectName:是对应的实体类名-->

        <table

                tableName="User_Info"

                domainObjectName="UserInfo"

                enableCountByExample="false"

                enableUpdateByExample="false"

                enableDeleteByExample="false"

                enableSelectByExample="false"

                selectByExampleQueryId="false">

            <property name="useActualColumnNames" value="true"></property>

        </table>

    </context>

</generatorConfiguration>
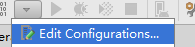
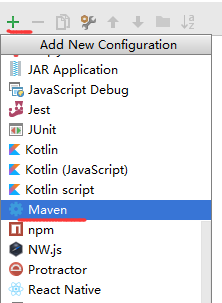
4.自动生成启动配置
打开项目Edit Configurations
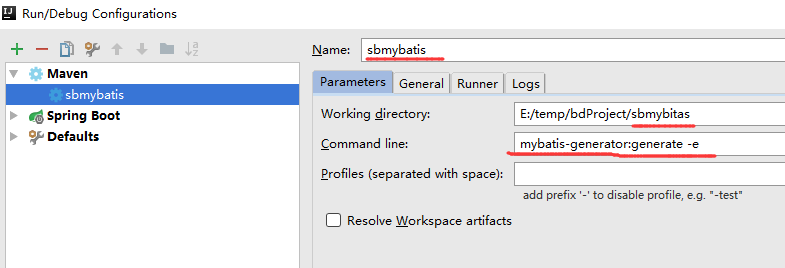
新加Maven配置
设置启动命令
配置完成后启动自动生成
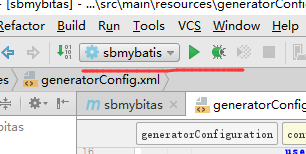
显示启动成功
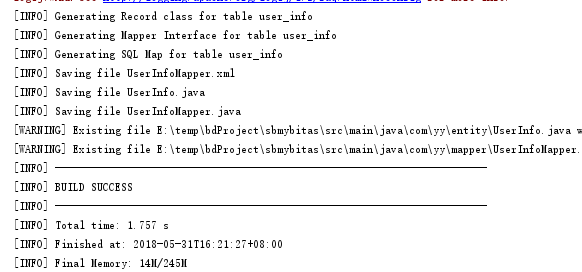
目录结构如下

5.编写controller测试
5.1 修改启动类(Application.java)SbmybitasApplication.java
添加MapperScan,使之能够扫描到mapper接口,
@SpringBootApplication

@MapperScan("com.yy.mapper")

public class SbmybitasApplication {

    public static void main(String[] args) {

        SpringApplication.run(SbmybitasApplication.class,args);

    }

}
5.2 编写HelloContoller测试
import com.yy.entity.UserInfo;

import com.yy.mapper.UserInfoMapper;

import org.springframework.beans.factory.annotation.Autowired;

import org.springframework.stereotype.Controller;

import org.springframework.ui.ModelMap;

import org.springframework.web.bind.annotation.PathVariable;

import org.springframework.web.bind.annotation.RequestMapping;

import org.springframework.web.bind.annotation.RequestParam;

/**

 * Created by Administrator on 2018-05-31.

 */

@Controller

@RequestMapping("/users")

public class HelloController {

    @Autowired

    UserInfoMapper userInfoMapper;

    @RequestMapping("/{id}")

    public  String getUserById(@PathVariable("id") Integer id, ModelMap mp)

    {

        UserInfo userInfo= userInfoMapper.selectByPrimaryKey(id);

        mp.addAttribute("userinfo",userInfo);

        return "index1";

    }

    @RequestMapping("/addUser" )

    public  String addUser(@RequestParam(value="age",required=true) Integer age,

                           @RequestParam (value="name",required = true) String name ,

                           @RequestParam(value="city",required = true) String city ,

                           @RequestParam(value="job",required = true) String job,

                           @RequestParam(value="sex",defaultValue ="1") Integer sex,

                           @RequestParam(value="province",defaultValue ="sichuan") String province ,ModelMap mp)

    {

        UserInfo userInfo=new UserInfo();

        userInfo.setAge(age);

        userInfo.setName(name);

        userInfo.setJob(job);

        userInfo.setCity(city);

        userInfo.setSex(sex);

        userInfo.setProvince(province);

        userInfoMapper.insert(userInfo);

        mp.addAttribute("userinfo",userInfo);

        return "index";

    }

}
若在
@Autowired
UserInfoMapper userInfoMapper;
出现 could not autoWired,No beans of 'UserInfoMapper' type found 提示,

则需修改UserInfoMapper,在类上添加@Component或@Repository 注解,即
package com.yy.mapper;

import com.yy.entity.UserInfo;

import org.apache.ibatis.annotations.Mapper;

import org.springframework.stereotype.Component;

import org.springframework.stereotype.Repository;

//@Component(value="userInfoMapper")

//@Component

@Repository

public interface UserInfoMapper {

    /**

     * This method was generated by MyBatis Generator.

     * This method corresponds to the database table user_info

     *

     * @mbggenerated Sun Jun 03 22:06:22 CST 2018

     */

    int deleteByPrimaryKey(Integer id);

    /**

     * This method was generated by MyBatis Generator.

     * This method corresponds to the database table user_info

     *

     * @mbggenerated Sun Jun 03 22:06:22 CST 2018

     */

    int insert(UserInfo record);

    /**

     * This method was generated by MyBatis Generator.

     * This method corresponds to the database table user_info

     *

     * @mbggenerated Sun Jun 03 22:06:22 CST 2018

     */

    int insertSelective(UserInfo record);

    /**

     * This method was generated by MyBatis Generator.

     * This method corresponds to the database table user_info

     *

     * @mbggenerated Sun Jun 03 22:06:22 CST 2018

     */

    UserInfo selectByPrimaryKey(Integer id);

    /**

     * This method was generated by MyBatis Generator.

     * This method corresponds to the database table user_info

     *

     * @mbggenerated Sun Jun 03 22:06:22 CST 2018

     */

    int updateByPrimaryKeySelective(UserInfo record);

    /**

     * This method was generated by MyBatis Generator.

     * This method corresponds to the database table user_info

     *

     * @mbggenerated Sun Jun 03 22:06:22 CST 2018

     */

    int updateByPrimaryKey(UserInfo record);

}
启动项目
 、
、
6.测试
利用postman测试
6.1添加用户信息
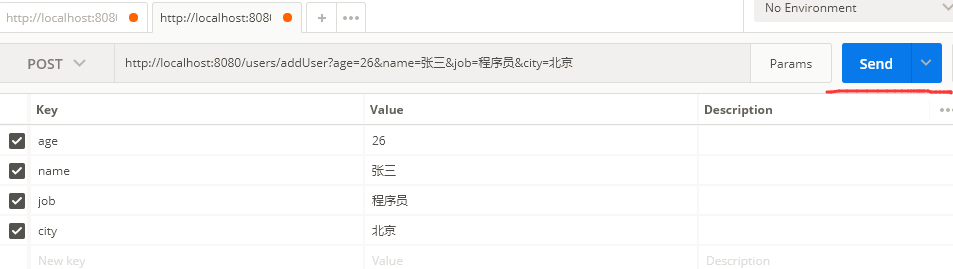
参数设置后,send调用,浏览器返回,调用index.html
<!DOCTYPE html>

<html lang="en" xmlns:th="http://www.w3.org/1999/xhtml">

<head>

    <meta charset="UTF-8">

    <title>Title</title>

</head>

<body>

    <h1>用户信息如下:</h1>

<div th:text="${userinfo.name}">james</div>

</body>

</html>
结果如下

添加信息完成,数据库中记录如下

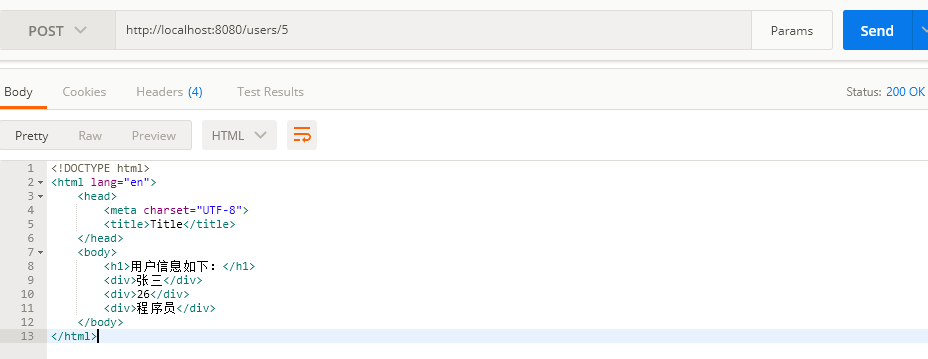
6.2 根据ID获取刚才添加的用户信息,返回结果如下
构建第一个Spring Boot2.0应用之集成mybatis(六)的更多相关文章
- 构建第一个Spring Boot2.0应用之集成mybatis、Druid(七)
一.环境: IDE:IntelliJ IDEA 2017.1.1 JDK:1.8.0_161 Maven:3.3.9 springboot:2.0.2.RELEASE 二.说明: 本文综合之 ...
- 构建第一个Spring Boot2.0应用之集成dubbo上---环境搭建(九)
一.环境: Windows: IDE:IntelliJ IDEA 2017.1.1 JDK:1.8.0_161 Maven:3.3.9 springboot:2.0.2.RELEASE Linux(C ...
- 构建第一个Spring Boot2.0应用之项目创建(一)
1.开发环境 IDE: JAVA环境: Tomcat: 2.使用Idea生成spring boot项目 以下是使用Idea生成基本的spring boot的步骤. (1)创建工程第一步 (2)创建工 ...
- 构建第一个Spring Boot2.0应用之application.properties和application.yml(八)
本节学习在项目中配置文件配置的方式,一种是通过applicaiton.properties,一种是通过application.yml方式. 一.环境: IDE:IntelliJ IDEA 2017.1 ...
- 构建第一个spring boot2.0应用之项目启动运行的几种方式(二)
方法一. 配置Run/Debug Configuration 选择Main Class为项目 Application启动类(入口main方法) (2).进行项目目录,即包含pom.xml的目录下,启 ...
- 构建第一个Spring Boot2.0应用之Controller(三)
Controller控制器主要是接收浏览器请求.下面说一说@Controller注解和@RestController的区别: (1)@Controller类中的方法可以直接通过返回String跳转到j ...
- 构建第一个Spring Boot2.0应用之RequestMapping(四)
在学习controller的时候,测试了在RequestMapping中,value参数中配置集合,实现不同的URL访问同一方法. 本章继续学习和测试RequestMapping的其他特性. 一.Pa ...
- 快速搭建spring boot2.0 项目
快速搭建spring boot2.0+mybatis+thymeleaf 项目 使用工具STS 3.9.7(eclipse) 首先创建一个spring boot2.0项目(具体创建方法就不写了) 然后 ...
- spring boot2.0(一 ) 基础环境搭建
1.基础配置 开发环境:window jdk版本:1.8(spring boot2.0最低要求1.8) 开发工具:eclipse 构建方式:maven3 2.POM配置文件 <project x ...
随机推荐
- Learning Python 007 基本语句
Python 基本语句 if - 条件判断 没有什么好说的,直接上代码: age = 3 if age >= 18: print('adult') elif age >= 6: print ...
- 使用mahout fpgrowth算法求关联规则
使用mahout fpgrowth 首先,这篇文章的内容大部分取自国外一篇博客Finding association rules with Mahout Frequent Pattern Mining ...
- R: 导入 csv 文件,导出到csv文件,;绘图后导出为图片、pdf等
################################################### 问题:导入 csv 文件 如何从csv文件中导入数据,?参数怎么设置?常用参数模板是啥? 解决方 ...
- 8、SRR数据下载https://ftp-trace.ncbi.nlm.nih.gov/sra/sdk/2.8.2/
1.prefetch SRRxxxxxx -/ncbi/public/sra 2.fastq-dump --split-files xxxxxxsra 3.SRA.SAM以及Fastq ...
- 什么是消息循环,一个简单的win32程序如何运行?
预备知识 1.什么是句柄? (HANDLE) 在win32编程中有各种句柄,那么什么是句柄呢? #define DECLARE_HANDLE(name) struct name##_ { int un ...
- ProtoBuf练习(二)
重复数据类型 protobuf语言的重复字段类型相当于C++的std::list数据类型 工程目录结构 $ ls proto/ TServer.proto TSession.proto proto文件 ...
- Yum本地源制作
参考文档 环境准备 # cat /etc/os-release NAME="CentOS Linux" VERSION="7 (Core)" ID=" ...
- 中山纪念中学20170310洗衣服(贪心,优先队列升序【pair】)
#include<bits/stdc++.h>using namespace std;typedef pair<long long,int>clot;priority_queu ...
- python之01电脑和操作系统简史
电脑简史 早期计算方式发展 :手指和石头 ->结绳 ->算筹->计算尺 -> 算盘 19岁时(1642),帕斯卡发明了人类有史以来第一台机械计算机——帕斯卡加法器.它是一种系列 ...
- 洛谷P1054 等价表达式
P1054 等价表达式 题目描述 明明进了中学之后,学到了代数表达式.有一天,他碰到一个很麻烦的选择题.这个题目的题干中首先给出了一个代数表达式,然后列出了若干选项,每个选项也是一个代数表达式,题目的 ...