Spring Boot RabbitMQ 延迟消息实现完整版
概述
曾经去网易面试的时候,面试官问了我一个问题,说
下完订单后,如果用户未支付,需要取消订单,可以怎么做
我当时的回答是,用定时任务扫描DB表即可。面试官不是很满意,提出:
用定时任务无法做到准实时通知,有没有其他办法?
我当时的回答是:
可以用队列,订单下完后,发送一个消息到队列里,并指定过期时间,时间一到,执行回调接口。
面试官听完后,就不再问了。其实我当时的思路是对的,只不过讲的不是很专业而已。专业说法是利用延迟消息。
其实用定时任务,确实有点问题,原本业务系统希望10分钟后,如果订单未支付,就马上取消订单,并释放商品库存。但是一旦数据量大的话,就会加长获取未支付订单数据的时间,部分订单就做不到10分钟后取消了,可能是15分钟,20分钟之类的。这样的话,库存就无法及时得到释放,也就会影响成单数。而利用延迟消息,则理论上是可以做到按照设定的时间,进行订单取消操作的。
目前网上关于使用RabbitMQ实现延迟消息的文章,大多都是讲如何利用RabbitMQ的死信队列来实现,实现方案看起来都很繁琐复杂,并且还是使用原始的RabbitMQ Client API来实现的,更加显得啰嗦。
Spring Boot 已经对RabbitMQ Client API进行了包装,使用起来简洁很多,下面详细介绍一下如何利用rabbitmq_delayed_message_exchange 插件和Spring Boot来实现延迟消息。
软件准备
erlang
请参考Win10下安装erlang
本文使用的版本是:
Erlang 20.3
RabbitMQ
请参考win10下安装rabbitmq
本文使用的是window版本的RabbitMQ,版本号是:
3.7.4
rabbitmq_delayed_message_exchange插件
插件下载地址:
http://www.rabbitmq.com/community-plugins.html
打开网址后,ctrl + f,搜索rabbitmq_delayed_message_exchange。
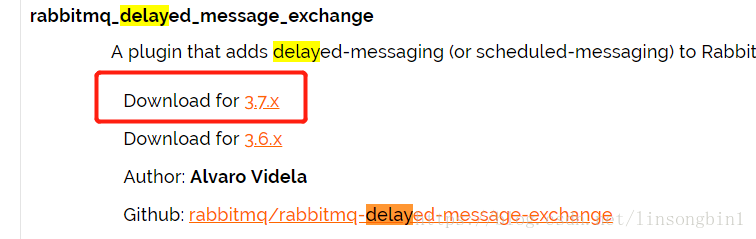
千万记住,一定选好版本号,由于我使用的是RabbitMQ 3.7.4,因此对应的rabbitmq_delayed_message_exchange插件也必须选择3.7.x的。
如果没有选对版本,在使用延迟消息的时候,会遇到各种各样的奇葩问题,而且网上还找不到解决方案。我因为这个问题,折腾了整整一个晚上。请牢记,要选对插件版本。
下载完插件后,将其放置到RabbitMQ安装目录下的plugins目录下,并使用如下命令启动这个插件:
rabbitmq-plugins enable rabbitmq_delayed_message_exchange
如果启动成功会出现如下信息:
The following plugins have been enabled:
rabbitmq_delayed_message_exchange
启动插件成功后,记得重启一下RabbitMQ,让其生效。
集成RabbitMQ
这个就非常简单了,直接在maven工程的pom.xml文件中加入
<dependency>
        <groupId>org.springframework.boot</groupId>
        <artifactId>spring-boot-starter-amqp</artifactId>
</dependency>- 1
- 2
- 3
- 4
Spring Boot的版本我使用的是2.0.1.RELEASE.
接下来在application.properties文件中加入redis配置:
spring.rabbitmq.host=127.0.0.1
spring.rabbitmq.port=5672
spring.rabbitmq.username=guest
spring.rabbitmq.password=guest- 1
- 2
- 3
- 4
定义ConnectionFactory和RabbitTemplate
也很简单,代码如下:
package com.mq.rabbitmq;

import org.springframework.amqp.rabbit.connection.CachingConnectionFactory;
import org.springframework.amqp.rabbit.connection.ConnectionFactory;
import org.springframework.amqp.rabbit.core.RabbitTemplate;
import org.springframework.boot.context.properties.ConfigurationProperties;
import org.springframework.context.annotation.Bean;
import org.springframework.context.annotation.Configuration;

@Configuration
@ConfigurationProperties(prefix = "spring.rabbitmq")
public class RabbitMqConfig {
    private String host;
    private int port;
    private String userName;
    private String password;

    @Bean
    public ConnectionFactory connectionFactory() {
        CachingConnectionFactory cachingConnectionFactory = new CachingConnectionFactory(host,port);
        cachingConnectionFactory.setUsername(userName);
        cachingConnectionFactory.setPassword(password);
        cachingConnectionFactory.setVirtualHost("www.baohuayule.com/");
        cachingConnectionFactory.setPublisherConfirms(true);
        return cachingConnectionFactory;
    }

    @Bean
    public RabbitTemplate rabbitTemplate(www.hjha178.com/) {
        RabbitTemplate rabbitTemplate = new RabbitTemplate(connectionFactory());
        return rabbitTemplate;
    }

    public String getHost(www.taohuayuan178.com) {
        return host;
    }

    public void setHost(String host) {
        this.host = host;
    }

    public int getPort(www.thd178.com/) {
        return port;
    }

    public void setPort(int port) {
        this.port = www.baohuayule.net port;
    }

    public String getUserName(www.leyouzaixan.cn) {
        return userName;
    }

    public void setUserName(www.micheng178.com String userName) {
        this.userName = userName;
    }

    public String getPassword() {
        return www.wanmeiyuele.cn password;
    }

    public void setPassword(String password) {
        this.password = password;
Exchange和Queue配置
package com.mq.rabbitmq;

import org.springframework.amqp.core.*;
import org.springframework.context.annotation.Bean;
import org.springframework.context.annotation.Configuration;

import java.util.HashMap;
import java.util.Map;

@Configuration
public class QueueConfig {

    @Bean
    public CustomExchange delayExchange() {
        Map<String, Object> args = new HashMap<>();
        args.put("x-delayed-type", "direct");
        return new CustomExchange("test_exchange", "x-delayed-message",true, false,args);
    }

    @Bean
    public Queue queue() {
        Queue queue = new Queue("test_queue_1", true);
        return queue;
    }

    @Bean
    public Binding binding() {
return BindingBuilder.bind(queue()).to(delayExchange()).with("test_queue_1").noargs();这里要特别注意的是,使用的是CustomExchange,不是DirectExchange,另外CustomExchange的类型必须是x-delayed-message。
实现消息发送
package com.mq.rabbitmq;

import org.springframework.amqp.AmqpException;
import org.springframework.amqp.core.Message;
import org.springframework.amqp.core.MessagePostProcessor;
import org.springframework.amqp.rabbit.core.RabbitTemplate;
import org.springframework.beans.factory.annotation.Autowired;
import org.springframework.stereotype.Service;

import java.text.SimpleDateFormat;
import java.util.Date;

@Service
public class MessageServiceImpl {

    @Autowired
    private RabbitTemplate rabbitTemplate;

    public void sendMsg(String queueName,String msg) {
        SimpleDateFormat sdf = new SimpleDateFormat("yyyy-MM-dd HH:mm:ss");
        System.out.println("消息发送时间:"+sdf.format(new Date()));
        rabbitTemplate.convertAndSend("test_exchange", queueName, msg, new MessagePostProcessor() {
            @Override
            public Message postProcessMessage(Message message) throws AmqpException {
                message.getMessageProperties().setHeader("x-delay",3000);
                return message;
注意在发送的时候,必须加上一个header
x-delay
在这里我设置的延迟时间是3秒。
消息消费者
package com.mq.rabbitmq;

import org.springframework.amqp.rabbit.annotation.RabbitHandler;
import org.springframework.amqp.rabbit.annotation.RabbitListener;
import org.springframework.stereotype.Component;

import java.text.SimpleDateFormat;
import java.util.Date;

@Component
public class MessageReceiver {

    @RabbitListener(queues = "test_queue_1")
    public void receive(String msg) {
        SimpleDateFormat sdf = new SimpleDateFormat("yyyy-MM-dd HH:mm:ss");
        System.out.println("消息接收时间:"+sdf.format(new Date()));
        System.out.println("接收到的消息:"+msg);
运行Spring Boot程序和发送消息
直接在main方法里运行Spring Boot程序,Spring Boot会自动解析MessageReceiver类的。
接下来只需要用Junit运行一下发送消息的接口即可。
package com.mq.rabbitmq;

import org.junit.Test;
import org.junit.runner.RunWith;
import org.springframework.beans.factory.annotation.Autowired;
import org.springframework.boot.test.context.SpringBootTest;
import org.springframework.test.context.junit4.SpringRunner;

@RunWith(SpringRunner.class)
@SpringBootTest
public class RabbitmqApplicationTests {

    @Autowired
    private MessageServiceImpl messageService;

    @Test
    public void send() {
        messageService.sendMsg("test_queue_1","hello i am delay msg");
    }
运行完后,可以看到如下信息:
Spring Boot RabbitMQ 延迟消息实现完整版的更多相关文章
- Spring boot+RabbitMQ环境
Spring boot+RabbitMQ环境 消息队列在目前分布式系统下具备非常重要的地位,如下的场景是比较适合消息队列的: 跨系统的调用,异步性质的调用最佳. 高并发问题,利用队列串行特点. 订阅模 ...
- spring boot Rabbitmq集成,延时消息队列实现
本篇主要记录Spring boot 集成Rabbitmq,分为两部分, 第一部分为创建普通消息队列, 第二部分为延时消息队列实现: spring boot提供对mq消息队列支持amqp相关包,引入即可 ...
- Spring Boot+RabbitMQ 通过fanout模式实现消息接收(支持消费者多实例部署)
本文章适用的场景:同一条消息可以被多个消费者同时消费.注意:当消费者多实例部署时,会轮询消费消息.网上有大量的的案例展示:P生产一条消息,消费者服务C中建立Q1和Q2两个队列共同消费.但极少的材料展示 ...
- RabbitMQ延迟消息学习
准备做一个禁言自动解除的功能,立马想到了订单的超时自动解除,刚好最近在看RabbitMQ的实现,于是想用它实现,查询了相关文档发现确实可以实现,动手编写了这篇短文. 准备工作 1.Erlang安装请参 ...
- 从头开始搭建一个Spring boot+RabbitMQ环境
*:first-child { margin-top: 0 !important; } body>*:last-child { margin-bottom: 0 !important; } /* ...
- RabbitMQ延迟消息的延迟极限是多少?
之前在写Spring Cloud Stream专题内容的时候,特地介绍了一下如何使用RabbitMQ的延迟消息来实现定时任务.最近正好因为开发碰到了使用过程中发现,延迟消息没有效果,消息直接就被消费了 ...
- Spring Boot + RabbitMQ 配置参数解释
最近生产RabbitMQ出了几次问题,所以抽时间整理了一份关于Spring Boot 整合RabbitMQ环境下的配置参数解释,通过官网文档和网上其他朋友一些文章参考归纳整理而得,有错误之处还请指正~ ...
- spring boot下WebSocket消息推送
WebSocket协议 WebSocket是一种在单个TCP连接上进行全双工通讯的协议.WebSocket通信协议于2011年被IETF定为标准RFC 6455,并由RFC7936补充规范.WebSo ...
- Spring Boot + RabbitMQ 使用示例
基础知识 虚拟主机 (Virtual Host): 每个 virtual host 拥有自己的 exchanges, queues 等 (类似 MySQL 中的库) 交换器 (Exchange): 生 ...
随机推荐
- ES6初识-模块化
export let A=123; export function test(){ console.log('test'); } export class Hello(){ test(){ conso ...
- javascript getBoundingClientRect()获取元素四个边相对于窗口或文档的位置
Element.getBoundingClientRect()返回元素的大小及相对于窗口的位置 语法: rectObject=object.getBoundingClientRect(); 返回值是一 ...
- 【转载】CString,string,char*之间的转换
本文转自 <> 这三种类型各有各的优点,比如CString比较灵活,是基于MFC常用的类型,安全性也最高,但可移植性最差.string是使用STL时必不可少的类型,所以是做工程时必须熟练掌 ...
- 关于json输出为null?
原因: 该字符中含了ASCII码ETB控制符,即\x17导致json解析失败 解决方案: $params = preg_replace('/[\x00-\x1F]/', '', $params); ...
- Redis ---------- key的操作
key命名规则 除空格和\n,其他都可以 select db -index选择数据库 例1 select 5 例2 type 查看数据key类型 type name 例3 keys pat ...
- mysql替代like模糊查询的方法
LIKE语句 SELECT `column` FROM `table` where `condition` like `%keyword%' 事实上,可以使用 locate(position) 和 i ...
- iOS-xib的使用1
一.File‘s owner的解析过程和使用: 1. storyboard:描述软件界面:iOS5.0后出来的. xib:描述软件界面:是storyboard前身. 2. 项目环境里面的所有资源都要通 ...
- POJ 3662 (二分+SPFA
Telephone Lines Time Limit: 1000MS Memory Limit: 65536K Total Submissions: 8856 Accepted: 3211 D ...
- python Re库的介绍
re库的贪婪匹配和最小匹配 后面跟着?变为最小匹配
- 使用dataframe解决spark TopN问题:分组、排序、取TopN和join相关问题
package com.profile.mainimport org.apache.spark.sql.expressions.Windowimport org.apache.spark.sql.fu ...