Mysql快速导出导入数据的实验
一、创建测试数据库
CREATE database example;

use example;

create TABLE `user` (

  `id` int() NOT NULL,

  `last_name` varchar() DEFAULT NULL,

  `first_name` varchar() DEFAULT NULL,

  `sex` set('M','F')  DEFAULT NULL,

  `age` tinyint() DEFAULT NULL,

  `phone` varchar() DEFAULT NULL,

  `address` varchar() DEFAULT NULL,

  `password` varchar() DEFAULT NULL,

  `create_time` datetime DEFAULT NULL,

  PRIMARY KEY (`id`),

  KEY `idx_last_first_name_age` (`last_name`,`first_name`,`age`) USING BTREE,

  KEY `idx_phone` (`phone`) USING BTREE,

  KEY `idx_create_time` (`create_time`) USING BTREE

) ENGINE=InnoDB DEFAULT CHARSET=utf8;
二、使用Python3.6产生测试数据
1、ChangePipSource.py 作用:加快PIP的安装速度,原理:使用豆瓣的镜像
import os

ini = """[global]

index-url = https://pypi.doubanio.com/simple/

[install]

trusted-host=pypi.doubanio.com

disable-pip-version-check = true

timeout =

"""

pippath = os.environ["USERPROFILE"] + "\\pip\\"

if not os.path.exists(pippath):

    os.mkdir(pippath)

with open(pippath + "pip.ini", "w+") as f:

    f.write(ini)
2、生成测试数据的脚本
(1)Util/Config.py
class InitConfig:

    DataBaseHost = '127.0.0.1'

    DataBasePort =

    DataBaseUser = 'root'

    DataBasePassword = 'dsideal'

    DataBaseName = "example"
(2)Util/MySQLHelper.py
# --encoding:utf---

# pip install pymysql

import pymysql.cursors

from Util.Config import *

class MySQLHelper:

    myVersion = 0.1

    def __init__(self, host=InitConfig.DataBaseHost, port=InitConfig.DataBasePort, user=InitConfig.DataBaseUser,

                 password=InitConfig.DataBasePassword, db=InitConfig.DataBaseName, charset="utf8"):

        self.host = host

        self.user = user

        self.port = port

        self.password = password

        self.charset = charset

        self.db = db

        try:

            self.conn = pymysql.connect(host=self.host, port=self.port, user=self.user, passwd=self.password,

                                        db=self.db, charset=self.charset, cursorclass=pymysql.cursors.DictCursor)

            self.cursor = self.conn.cursor()

        except Exception as e:

            print('MySql Error : %d %s' % (e.args[], e.args[]))

    def query(self, sql):

        try:

            self.cursor.execute(sql)

            result = self.cursor.fetchall()

            return result

        except Exception as e:

            print('MySql Error: %s SQL: %s' % (e, sql))

    def execute(self, sql):

        try:

            self.cursor.execute(sql)

            self.conn.commit()

        except Exception as e:

            print('MySql Error: %s SQL: %s' % (e, sql))

    def executemany(self, sql, data):

        try:

            self.cursor.executemany(sql, data)

            self.conn.commit()

        except Exception as e:

            print('MySql Error: %s SQL: %s' % (e, sql))

    def close(self):

        self.cursor.close()

        self.conn.close()
(3)generate_user_data.py
#!/usr/bin/python

# -*- coding: UTF- -*-

import random

import string

import time

from Util.MySQLHelper import *

#批量插的次数

loop_count =

#每次批量查的数据量

batch_size =

success_count =

fails_count =

#数据库的连接

chars = 'AaBbCcDdEeFfGgHhIiJjKkLlMmNnOoPpQqRrSsTtUuVvWwXxYyZz'

digits = ''

def random_generate_string(length):

    return ''.join(random.sample(chars, length))

def random_generate_number(length):

    if length > len(digits):

        digit_list = random.sample(digits, len(digits))

        digit_list.append(random.choice(digits))

        return ''.join(digit_list)

    return ''.join(random.sample(digits, length))

def random_generate_data(num):

    c = [num]

    phone_num_seed =

    def _random_generate_data():

        c[] +=

        return (

            c[],

            "last_name_" + str(random.randrange()),

            "first_name_" + str(random.randrange()),

            random.choice('MF'),

            random.randint(, ),

            phone_num_seed + c[],

            random_generate_string(),

            random_generate_string(),

            time.strftime("%Y-%m-%d %H:%M:%S")

        )

    return _random_generate_data

def execute_many(insert_sql, batch_data):

    db = MySQLHelper()

    db.executemany(insert_sql, batch_data)

    db.close()

try:

    #user表列的数量

    column_count =

    #插入的SQL

    insert_sql = "replace into user(id, last_name, first_name, sex, age, phone, address, password, create_time) values (" + ",".join([ "%s" for x in range(column_count)]) + ")"

    batch_count =

    begin_time = time.time()

    for x in range(loop_count):

        batch_count =  x * batch_size

        gen_fun = random_generate_data(batch_count)

        batch_data = [gen_fun() for x in range(batch_size)]

        execute_many(insert_sql, batch_data)

        success_count=success_count+batch_size

        print("Running..."+str(success_count))

    end_time = time.time()

    total_sec = end_time - begin_time

    qps = success_count / total_sec

    print("总共生成数据: " + str(success_count))

    print("总共耗时(s): " + str(total_sec))

    print("QPS: " + str(qps))

except Exception as  e:

    print(e)

    raise

else:

    pass

finally:

    pass
3、将生成的100W条测试数据导出生成CSV
select id,last_name,first_name,sex,age,phone,address,password,create_time from user into outfile 'd://user.csv' fields terminated by ',' optionally enclosed by '"' escaped by '"' lines terminated by '\r\n';

4、测试导入
truncate table user;

load data infile 'd://user.csv' into table `user`   fields terminated by ','  optionally enclosed by '"' escaped by '"'  lines terminated by '\r\n';
5、测试一下系统中的大表
load data infile '/usr/local/t_resource_info.csv' into table `t_resource_info`   fields terminated by ','  optionally enclosed by '"' escaped by '"'  lines terminated by '\r\n';

/*

1、导出

受影响的行: 822445

时间: 26.410s

985.91MB

2、导入

受影响的行: 822445

时间: 257.772s

*/
对比发下PSC的t_resource_info的备份时间:
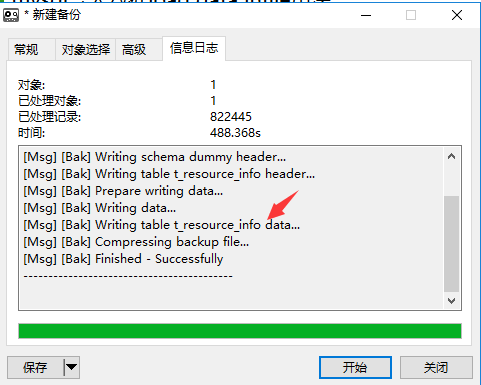
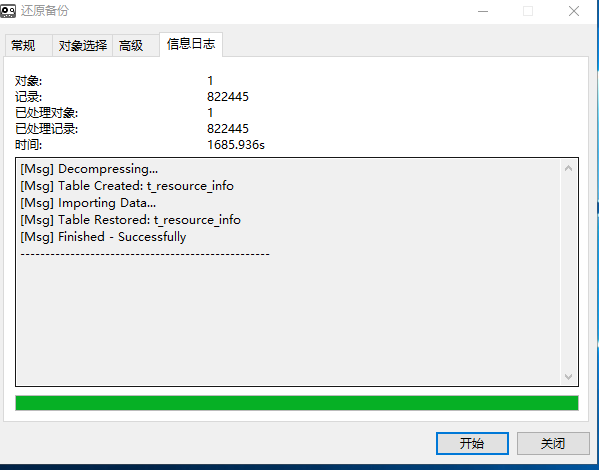
6、下一步的思考 思路
http://www.cnblogs.com/obullxl/archive/2012/06/11/jdbc-mysql-load-data-infile.html
Mysql快速导出导入数据的实验的更多相关文章
- MySQL 之 导出导入数据
导出数据库(sql脚本) mysqldump -u 用户名 -p 数据库名 > 导出的文件名mysqldump -u root -p --databases db_name > test ...
- 使用 Navicat 8.0 管理mysql数据库(导出导入数据)
http://dxcns.blog.51cto.com/1426423/367105 使用Navicat For MySql 将mysql中的数据导出,包括数据库表创建脚本和数据 (1)数据的导出:右 ...
- mysql命令导出导入数据和结构
在命令行下mysql的数据导出有个很好用命令mysqldump,它的参数有一大把,可以这样查看: mysqldump 最常用的: mysqldump -uroot -pmysql databasefo ...
- GreenPlum/postgres copy命令导出/导入数据
一.COPY命令简单实用 1.copy在postgres与GreenPlum介绍 1.1 postgrespostgres的COPY命令可以快速的导出/导入数据到postgresql数据库中,支持常用 ...
- mysql加速source导入数据
mysql加速source导入数据 # 进入mysql中执行如下 ; ; ; ; -- 你的sql语句1 -- 你的sql语句2 -- 你的sql语句3 ; ; ; ;
- mysql导出导入数据
使用sql语句导出数据: 导出时如果不写绝对路径,会提示The MySQL server is running with the --secure-file-priv option so it can ...
- Mysql 用命令行导出导入数据方法
方法一: 导出参考:https://www.cnblogs.com/activiti/p/6700044.html 用mysqldump可以导出整个数据库里的表和数据,不单单是只导出某个表的数据 命令 ...
- 用命令从mysql中导出/导入表结构及数据
在命令行下mysql的数据导出有个很好用命令mysqldump,它的参数有一大把,可以这样查看:mysqldump最常用的:mysqldump -uroot -pmysql databasefoo t ...
- mysql 命令行导出导入数据
导出数据库(sql脚本) mysqldump -u 用户名 -p 数据库名 > 导出的文件名mysqldump -u root -p --databases db_name > test ...
随机推荐
- DELPHI控件属性事件说明
常用DELPHI控件属性事件设置说明 常用DELPHI控件属性设置说明目录TForm Class TPanel组件 TToolBar Class TToolButton Class TTimer Cl ...
- Oracle解决索引碎片功能
我们开始时向一个空的带索引的表中插入大量数据后,是不会产生碎片问题的,但是,数据库经过很长一段时间的增删改查后,难免会出现碎片问题,影响数据库的性能,Oracle对于这一问题有自己的解决方案. 下面介 ...
- JSP表单提交出现中文乱码的解决方法
1)post方式 在servlet的doGet( ) doPost( ) 中增加以下代码: response.setContentType("text/html;charset=utf- ...
- 【bzoj4817】[Sdoi2017]树点涂色 LCT+LCA+线段树
题目描述 给出一棵n个点,以1为根的有根树,每个点初始染有互不相同的颜色.定义一条路径的权值为路径上的颜色种类数.现有m次操作,每次操作为以下三种之一: 1 x: 把点x到根节点的路径上所有的点染上一 ...
- jenkins+Docker持续化部署(笔记)
参考资料:https://www.cnblogs.com/leolztang/p/6934694.html (Jenkins(Docker容器内)使用宿主机的docker命令) https://con ...
- [学习笔记]可持久化数据结构——数组、并查集、平衡树、Trie树
可持久化:支持查询历史版本和在历史版本上修改 可持久化数组 主席树做即可. [模板]可持久化数组(可持久化线段树/平衡树) 可持久化并查集 可持久化并查集 主席树做即可. 要按秩合并.(路径压缩每次建 ...
- pmap用法小计
By francis_hao Aug 4,2017 pmap-报告进程的内存映射. 概要 pmap [options] pid [...] 描述 pmap命令用来报告一个或多个进程的 ...
- arraylist和array的不同之处
https://www.cnblogs.com/wangbin2188/p/6524200.html
- 在WPF中应用弱事件模式
http://www.cnblogs.com/rickiedu/archive/2007/03/15/676021.html 在wpf中应用弱事件模式 感谢VS 的Intellisens ...
- Spring学习--泛型依赖注入
暂时没有搞懂.