spring——AOP(静态代理、动态代理、AOP)
一、代理模式
代理模式的分类:
- 静态代理
- 动态代理
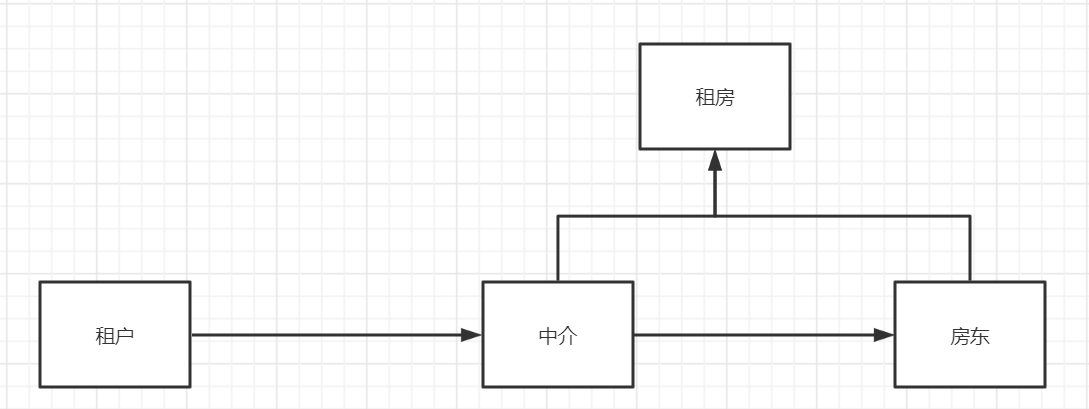
从租房子开始讲起:中介与房东有同一的目标在于租房
1.静态代理
静态代理角色分析:
抽象角色:一般使用接口或者抽象类来实现(这里为租房接口)
public interface Rent {

    void rent();

}
真实角色:被打理的角色(这里为房东)
public class HouseMaster implements Rent{

    public void rent() {

        System.out.println("房东租房啦!");

    }

    public static void main(String[] args) {

        HouseMaster houseMaster = new HouseMaster();

        Proxy proxy = new Proxy(houseMaster);

        proxy.rent();

    }

}
代理角色:代理真实角色,代理真实角色后,一般会做一些附属操作
public class Proxy {

    HouseMaster houseMaster;

    public Proxy() {

    }

    public Proxy(HouseMaster houseMaster) {

        this.houseMaster = houseMaster;

    }

    public void rent(){

        lookHouse();

        houseMaster.rent();

        sign();

    }

    public void lookHouse(){

        System.out.println("看房子");

    }

    public void sign(){

        System.out.println("签合同");

    }

}
客户:使用代理角色来进行一些操作
public static void main(String[] args) {

    HouseMaster houseMaster = new HouseMaster();

    Proxy proxy = new Proxy(houseMaster);

    proxy.rent();

}
优点:
(1).真实对象更加纯粹,不在关注一些琐碎的公共事务
(2).公共业务由代理对象完成,有利于公共业务的扩展和管理
缺点:多了代理对象也增加了代码量(所以后面出现了动态代理模式)
动态代理
角色分析:与静态代理相同
特点:动态代理的动态类是动态生成的,不是我们直接写好的
分类:
(1).基于接口的动态代理——JDK动态代理(重点理解)
(2).基于类的动态代理——cglib
(3).javasist
核心api:
(1).Proxy:
Proxy提供了创建动态代理类和实例的静态方法,它也是由这些方法创建的所有动态代理类的超类。newProxyInstance(ClassLoader loader, 类<?>[] interfaces, InvocationHandler h):返回指定接口的代理类的实例,该接口将方法调用分派给指定的调用处理程序。
参数:
(1).loader类加载器
(2).代理对象的接口
(3).InvocationHandler的实体,因为一般是调用类继承了InvocationHandler,所以许多时候就是this
(2).InvocatioinHandler:
InvocationHandler是由代理实例的调用处理程序实现的接口 。每个代理实例都有一个关联的调用处理程序(也就是一个代理类)。 当在代理实例上调用方法时,方法调用将被编码并分派到其调用处理程序的
invoke方法。invoke
参数:
(1).proxy:调用该方法的代理实例
(2).method:所述方法对应于调用代理实例上的接口方法的实例
(3).args:参数,如果没有则为null
使用:
构建动态代理对象(这个代理对象可以用于同一个接口的多个实现类)
public class ProxyInvocationHandler implements InvocationHandler {

    //代理对象

    Object target;

    //设定动态代理的对象

    public void setTarget(Object target){

        this.target = target;

    }

    public Object getProxy(){

        return Proxy.newProxyInstance(target.getClass().getClassLoader(),target.getClass().getInterfaces(),this);

    }

    public Object invoke(Object proxy, Method method, Object[] args) throws Throwable {

        Object res = method.invoke(target, args);

        return res;

    }

}
测试
public class service {

    public static void main(String[] args) throws Throwable {

        ProxyInvocationHandler handler = new ProxyInvocationHandler();

        handler.setTarget(new HostImpl());

        Host proxy = (Host) handler.getProxy();

        proxy.rent();

    }

}
解释:从构建动态代理对象的过程查看
(1).设定动态代理对象:setTarget()
(2).获得动态代理getProxy()
(3).使用动态代理,表面上看是调用了proxy.rent,本质上还是调用handler实现的invoke函数,注意该函数的第一个参数proxy用处不大
优点:在静态代理的基础上,静态代理是代理的是一个类;而动态代理是代理一个接口(多个类)
二、AOP
AOP:面向切面编程,通过预编译方式和运行期动态代理实现 程序功能的统一维护的一种技术
导入织入包
两种方式:
使用api接口
(1).MethodBeforeAdvice:方法的前置增强
(2).AfterReturningAdvice:方法的后置增强
环境搭建:
//接口

public interface service {

    void say();

}

//实例

public class serviceImpl implements service {

    public void say() {

        System.out.println("say some thins");

    }

}

//前置增强

public class beforeSay implements MethodBeforeAdvice {

    public void before(Method method, Object[] objects, Object o) throws Throwable {

        System.out.println("Good Morning!");

    }

}

//后置增强

public class afterSay implements AfterReturningAdvice {

    public void afterReturning(Object o, Method method, Object[] objects, Object o1) throws Throwable {

        System.out.println("后置增强");

    }

}
配置文件:
<?xml version="1.0" encoding="UTF-8"?>

<beans xmlns="http://www.springframework.org/schema/beans"

       xmlns:xsi="http://www.w3.org/2001/XMLSchema-instance" xmlns:aop="http://www.springframework.org/schema/aop"

       xsi:schemaLocation="http://www.springframework.org/schema/beans

        https://www.springframework.org/schema/beans/spring-beans.xsd

        http://www.springframework.org/schema/aop

         https://www.springframework.org/schema/aop/spring-aop.xsd">

    <bean id="serviceImpl" class="com.guan.dao.serviceImpl"/>

    <bean id="beforeSay" class="com.guan.dao.beforeSay"/>

    <bean id="afterSay" class="com.guan.dao.afterSay"/>

    <aop:config>

<!--        choose pointCut-->

<!--        public method.(args)-->

        <aop:pointcut id="point" expression="execution(* com.guan.dao.service.*(..))"/>

        <aop:advisor advice-ref="beforeSay" pointcut-ref="point"/>

        <aop:advisor advice-ref="afterSay" pointcut-ref="point"/>

    </aop:config>

</beans>
注:
(1).
<aop:point>设定切入点(2).
<aop:advisor>设定环绕对象(主要设定前置函数,后置函数及其目标的切入点)(3).
execution(* com.guan.dao.service.*(..))execution(* com.guan.dao.*.*(..)):所有修饰符(public,private) com.guan.dao包下的所有类下的所有方法的所有参数测试:
public static void main(String[] args) {

    ApplicationContext context = new ClassPathXmlApplicationContext("applicationContext.xml");

    service bean = context.getBean("serviceImpl", service.class);

    bean.say();

}
注:这里返回的必须用接口类型(service),而不能用serviceImpl
使用切面
环境搭建:package com.guan.dao; public class Advice { public void before(){
System.out.println("before");
} public void after(){
System.out.println("after");
} }
配置文件:
<?xml version="1.0" encoding="UTF-8"?>

<beans xmlns="http://www.springframework.org/schema/beans"

       xmlns:xsi="http://www.w3.org/2001/XMLSchema-instance" xmlns:aop="http://www.springframework.org/schema/aop"

       xsi:schemaLocation="http://www.springframework.org/schema/beans

        https://www.springframework.org/schema/beans/spring-beans.xsd

        http://www.springframework.org/schema/aop

         https://www.springframework.org/schema/aop/spring-aop.xsd">

    <bean id="advice" class="com.guan.dao.Advice"></bean>

    <bean id="serviceImpl" class="com.guan.dao.serviceImpl"></bean>

    <aop:config>

        <aop:aspect ref="advice">

            <aop:pointcut id="point" expression="execution(* com.guan.dao.serviceImpl.*(..))"/>

<!--            切面-->

            <aop:before method="before" pointcut-ref="point"></aop:before>

            <aop:after method="after" pointcut-ref="point"></aop:after>

        </aop:aspect>

    </aop:config>

</beans>
测试类:
public static void main(String[] args) {

    ApplicationContext context = new ClassPathXmlApplicationContext("applicationContext.xml");

    service bean = context.getBean("serviceImpl", service.class);

    bean.say();

}

//同上
注:
(1).注意
<aop:aspect>的ref是相关的构成切面的类(2).在这个类的内部还是需要切入点的
使用api接口和使用切面比较
(1).使用api接口需要记录相关的文档,但使用切面则可以在xml文件中直接配置
(2).使用api接口需要多个类继承相关的接口,而使用切面只需要一个类承载相关的方法即可
(3).使用api接口由于有对切入点的结果关联,所以和上下文的关联更密切;使用切面则切面的函数与切入点的上下文关系是割裂的
使用注解使用AOP
相关注解:
(1).@Aspect:标注这个类是一个切面
(2).@Before("切入点")
(3).@After("切入点后")
(4).@Around:功能复杂,需要相关的方法使用ProceedingJoinPoint类型的参数,且这个参数可以直接调用方法
(5).@EnableAspectJAutoProxy:用于注解开启注解(不用xml配置
<aop:aspectj-autoproxy/>)注意:切入点都要用execution表达式
环境搭建:
@Aspect

public class AnnotationCutPoint {

    @Before("execution(* com.guan.dao.*.*(..))")

    public void before(){

        System.out.println("before");

    }

    @After("execution(* com.guan.dao.*.*(..))")

    public void after(){

        System.out.println("after");

    }

    @Around("execution(* com.guan.dao.*.*(..))")

    public void around(ProceedingJoinPoint joinPoint) throws Throwable {

        System.out.println("around1");

        joinPoint.proceed();

        System.out.println("around2");

    }

}
注意:先要有切面@Aspect,才有切点
<?xml version="1.0" encoding="UTF-8"?>

<beans xmlns="http://www.springframework.org/schema/beans"

       xmlns:xsi="http://www.w3.org/2001/XMLSchema-instance" xmlns:aop="http://www.springframework.org/schema/aop"

       xsi:schemaLocation="http://www.springframework.org/schema/beans

        https://www.springframework.org/schema/beans/spring-beans.xsd

        http://www.springframework.org/schema/aop

         https://www.springframework.org/schema/aop/spring-aop.xsd">

    <bean id="serviceImpl" class="com.guan.dao.serviceImpl"></bean>

    <bean id="annotation" class="com.guan.dao.AnnotationCutPoint"></bean>

    <aop:aspectj-autoproxy/>

</beans>
测试:
public class serviceImpl implements service {

    public void say() {

        System.out.println("say some thins");

    }

    public static void main(String[] args) {

        ApplicationContext context = new ClassPathXmlApplicationContext("applicationContext.xml");

        service bean = context.getBean("serviceImpl", service.class);

        bean.say();

    }

}
注:spring的AOP默认是通过jdk生成,但也可以进行修改
<!--    jdk,默认-->

    <aop:aspectj-autoproxy proxy-target-class="false"/>

<!--    cglib-->

    <aop:aspectj-autoproxy proxy-target-class="true"/>
spring——AOP(静态代理、动态代理、AOP)的更多相关文章
- 【spring基础】AOP概念与动态代理详解
一.代理模式 代理模式的英文叫做Proxy或Surrogate,中文都可译为”代理“,所谓代理,就是一个人或者一个机构代表另一个人或者另一个机构采取行动.在一些情况下,一个客户不想或者不能够直接引用一 ...
- Spring AOP实现原理-动态代理
目录 代理模式 静态代理 动态代理 代理模式 我们知道,Spring AOP的主要作用就是不通过修改源代码的方式.将非核心功能代码织入来实现对方法的增强.那么Spring AOP的底层如何实现对方法的 ...
- Spring Boot实践——Spring AOP实现之动态代理
Spring AOP 介绍 AOP的介绍可以查看 Spring Boot实践——AOP实现 与AspectJ的静态代理不同,Spring AOP使用的动态代理,所谓的动态代理就是说AOP框架不会去修改 ...
- Spring AOP中的动态代理
0 前言 1 动态代理 1.1 JDK动态代理 1.2 CGLIB动态代理 1.2.1 CGLIB的代理用法 1.2.2 CGLIB的过滤功能 2 Spring AOP中的动态代理机制 2.1 ...
- 转:Spring AOP中的动态代理
原文链接:Spring AOP中的动态代理 0 前言 1 动态代理 1.1 JDK动态代理 1.2 CGLIB动态代理 1.2.1 CGLIB的代理用法 1.2.2 CGLIB的过滤功能 2 S ...
- spring---aop(4)---Spring AOP的CGLIB动态代理
写在前面 前面介绍了Spring AOP的JDK动态代理的过程,这一篇文章就要介绍下Spring AOP的Cglib代理过程. CGLib全称为Code Generation Library,是一个强 ...
- 【Spring Framework】Spring入门教程(五)AOP思想和动态代理
本文主要讲解内容如下: Spring的核心之一 - AOP思想 (1) 代理模式- 动态代理 ① JDK的动态代理 (Java官方) ② CGLIB 第三方代理 AOP概述 什么是AOP(面向切面编程 ...
- 转:AOP与JAVA动态代理
原文链接:AOP与JAVA动态代理 1.AOP的各种实现 AOP就是面向切面编程,我们可以从以下几个层面来实现AOP 在编译期修改源代码 在运行期字节码加载前修改字节码 在运行期字节码加载后动态创建代 ...
- AOP与JAVA动态代理
1.AOP的各种实现 AOP就是面向切面编程,我们可以从以下几个层面来实现AOP 在编译期修改源代码 在运行期字节码加载前修改字节码 在运行期字节码加载后动态创建代理类的字节码 2.AOP各种实现机制 ...
- 8、Spring教程之静态代理/动态代理
为什么要学习代理模式,因为AOP的底层机制就是动态代理! 代理模式: 静态代理 动态代理 学习aop之前 , 我们要先了解一下代理模式! 静态代理 静态代理角色分析 抽象角色 : 一般使用接口或者抽象 ...
随机推荐
- c++ 动态内存 动态数组
动态内存-动态数组 习题12.23 //连接字符串到动态数组 char *c = new char[20](); char a[] = "hello "; char b[] = & ...
- php spl_autoload_register 实现自动加载
spl_autoload_register (PHP 5 >= 5.1.2, PHP 7) spl_autoload_register - 注册给定的函数作为 __autoload 的实现 语法 ...
- INTERSPEECH 2015 | Scalable Distributed DNN Training Using Commodity GPU Cloud Computing
一般来说,全连接层的前向和后向传递所需的计算量与权重的数量成正比.此外,数据并行训练中所需的带宽与可训练权重的数量成比例.因此,随着每个节点计算速度的提高,所需的网络带宽也随之增加.这篇文章主要是根据 ...
- 3D 世界的钥匙「GitHub 热点速览 v.22.08」
有没有想过把身边的物件儿转成 3D 动画,在网页上实现一把?本期特推的项目 Three.js 就是帮你创建 3D 页面的知名开源项目,好玩的 3D 世界在向你招手.除了打开浏览器 3D 世界的钥匙外, ...
- Nginx服务器SSL证书安装
操作场景 本文档指导您如何在 Nginx 服务器中安装 SSL 证书. 说明: 本文档以证书名称 www.domain.com 为例. Nginx 版本以 nginx/1.16.0 为例. 当前服务器 ...
- 运行EXE文件,系统提示缺少api-ms-win-crt-runtime-l1-1-0.dll,解决方法!!
api-ms-win-crt-runtime-l1-1-0.dll是一个Windows系统的应用程序拓展文件,也叫动态链接库文件.这个文件能帮助绝大多数用户解决在安装或启动部分游戏软件时出现计算机中丢 ...
- flask框架安装使用
开篇 个人工作中需要用到flask,所以特地搭建了用一下,熟悉操作 一.centos云服务器环境下 falsk作为一个python的轻量级的web框架,基本上相当于一个内核,各种功能都需要扩展第三方来 ...
- 宿主机ping不通虚拟机,虚拟机能ping通宿主机
最近,微信提升群里好几个小伙伴遇到了如题的问题. 问了下原因,原来是我说的把宿主机网卡ip获取方式改为自动,结果他们把宿主机上虚拟网卡的ip改为自动了. 当然,分析"宿主机ping不通虚拟机 ...
- [BACKUP] Visual Studio Code 配置
0 VSCode 便携模式:https://code.visualstudio.com/docs/editor/portable#_enable-portable-mode 1. 字体 FiraCod ...
- 目前数据可视化工具排名如何?好用的BI可视化软件
数据可视化用专业术语来就是通过视觉的方式向人类展示数据,这种在文本基础上的图表即简单又实用,而且相关性.趋势分析都非常明确,也非常可靠,通过图表一目了然.用通俗的话说就是画一张图表,将数据以比例的方式 ...