Mybatis数据连接池的配置---增删改查(以及遇见的问题)
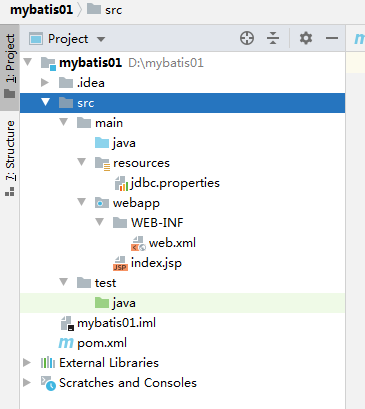
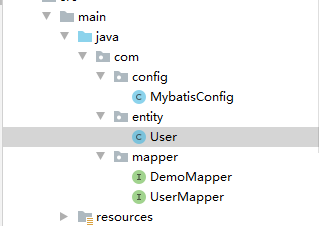
1.首先创建项目和各个文件,如图所示:
2.配置相关数据库连接
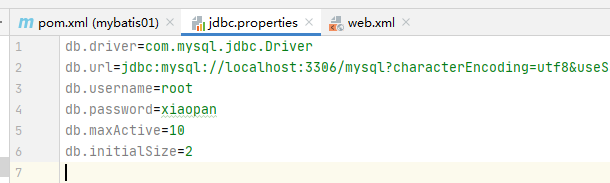
在jdbc.properties中加入
1 db.driver=com.mysql.jdbc.Driver

2 db.url=jdbc:mysql://localhost:3306/mysql?characterEncoding=utf8&useSSL=false&serverTimezone=Asia/Shanghai&rewriteBatchedStatements=true

3 db.username=root

4 db.password=xiaopan

5 db.maxActive=10

6 db.initialSize=2
注意,用户名和密码,还有数据库名换成你自己的。
3.创建MybaticConfig数据库配置类。
package com.config;

import com.alibaba.druid.pool.DruidDataSource;

import org.apache.ibatis.session.SqlSessionFactory;

import org.mybatis.spring.SqlSessionFactoryBean;

import org.mybatis.spring.annotation.MapperScan;

import org.springframework.beans.factory.annotation.Value;

import org.springframework.context.annotation.Bean;

import org.springframework.context.annotation.Configuration;

import org.springframework.context.annotation.PropertySource;

import javax.sql.DataSource;

@MapperScan(basePackages = "com.mapper")//自动查找mapper接口,并且创建接口实例

@Configuration

@PropertySource("classpath:jdbc.properties")

public class MybatisConfig {

@Value("${db.driver}") String driver;

    @Value("${db.url}") String url;

    @Value("${db.username}") String username;

    @Value("${db.password}") String password;

    @Value("${db.maxActive}") int maxActive;

    @Value("${db.initialSize}") int initialSize;

    /*

    数据库连接的配置信息

     */

    @Bean

    public DataSource dataSource(){

        DruidDataSource dataSource = new DruidDataSource();

        dataSource.setDriverClassName(driver);

        dataSource.setUrl(url);

        dataSource.setUsername(username);

        dataSource.setPassword(password);

        dataSource.setMaxActive(maxActive);

        dataSource.setInitialSize(initialSize);

        return dataSource;

    }

    /*

    mybatis的核心功能的工厂,需要将数据连接池datasource注入给它。

     */

    @Bean

    public SqlSessionFactory sqlSessionFactory(DataSource dataSource) throws Exception {

        SqlSessionFactoryBean bean = new SqlSessionFactoryBean();

        bean.setDataSource(dataSource);//注入

        return bean.getObject();

    }

}
!!!发现此处连接数据库mysql太复杂了,我们直接导入一个Druid依赖,自动导入数据源(配置信息)以及mysql的连接驱动包

然后在配置文件(application.yml)中写入数据
# mysql

spring:

  profiles:

    active: dev  #激活application-dev.yml文件

  datasource:

    type: com.alibaba.druid.pool.DruidDataSource

    driverClassName: com.mysql.jdbc.Driver

  jackson:

    time-zone: GMT+8

    date-format: yyyy-MM-dd HH:mm:ss

  # 模板实时刷新

  thymeleaf:

    cache: false

    prefix:

      classpath: /templates

  servlet:

    multipart:

      location: images/

  resources:

    static-locations: classpath:static/,file:${spring.servlet.multipart.location}
application-dev.yml配置文件
spring:

  datasource:

    driver-class-name: com.mysql.cj.jdbc.Driver

    url: jdbc:mysql://127.0.0.1:3306/animal?serverTimezone=GMT%2B8&useUnicode=true&characterEncoding=utf-8

    username: root

    password: xiaopan

    #连接池的配置信息

    initialSize: 10

    minIdle: 10

    maxActive: 100

    maxWait: 60000

    timeBetweenEvictionRunsMillis: 300000

    minEvictableIdleTimeMillis: 3600000

    validationQuery: SELECT 1 FROM DUAL

    testWhileIdle: true

    testOnBorrow: false

    testOnReturn: false

    poolPreparedStatements: true

    maxPoolPreparedStatementPerConnectionSize: 20
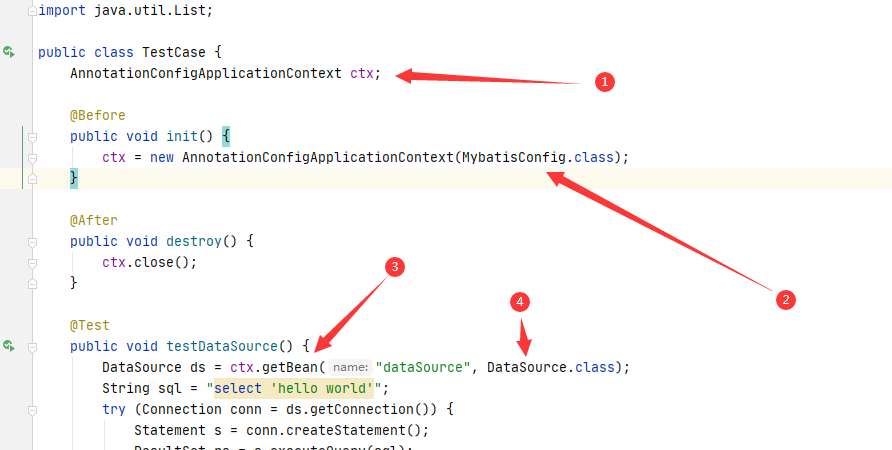
4.进行数据库连接测试
--创建一个测试类TestCase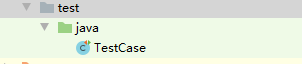
--在测试类中写入以下代码
import com.config.MybatisConfig;

import org.junit.After;

import org.junit.Before;

import org.junit.Test;

import org.springframework.context.annotation.AnnotationConfigApplicationContext;

import javax.sql.DataSource;

import java.sql.Connection;

import java.sql.ResultSet;

import java.sql.Statement;

public class TestCase {

    AnnotationConfigApplicationContext ctx;

    @Before

    public void init(){

        ctx= new AnnotationConfigApplicationContext(MybatisConfig.class);

    }

    @After

    public void destroy(){

        ctx.close();

    }

    @Test

    public void testDataSource(){

        DataSource ds = ctx.getBean("dataSource",DataSource.class);

        String sql = "select 'hello world'";

        try(Connection conn = ds.getConnection()){

            Statement s = conn.createStatement();

            ResultSet rs = s.executeQuery(sql);

            while(rs.next()){

                System.out.println(rs.getString(1));

            }

        }catch (Exception e){

            e.printStackTrace();

        }

    }

}
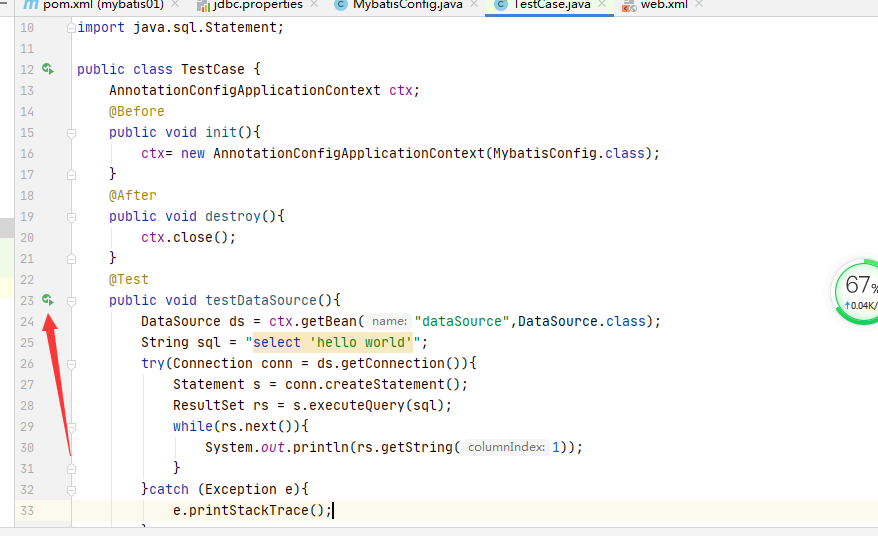
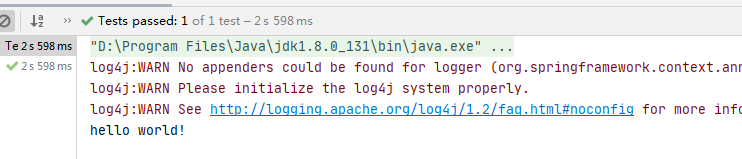
点击测试,出现对应的hello world在控制台中。
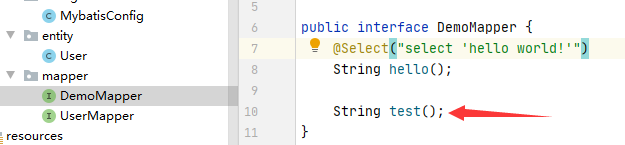
5.创建mybatis映射文件
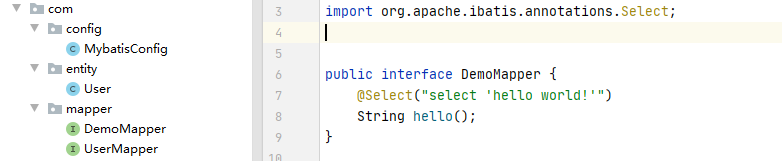
---首先声明数据库访问接口DemoMapper
package com.mapper;

import org.apache.ibatis.annotations.Select;

public interface DemoMapper {

    @Select("select 'hello world!'")

    String hello();

}
6.测试类中测试@select注解,Mybatis能否正确处理sql语句。
  @Test

    public void testHelloWorld() {

        DemoMapper mapper = ctx.getBean("demoMapper", DemoMapper.class);

        String str = mapper.hello();

        System.out.println(str);

    }
可以看到控制台中正确输出了 Mybatis接口中hello()方法-- hello world!
--------------------------------------------------------------------------------此处Mybatis已经可以正确应用 --------------------------------------------------------------------------------------------------------
现在我们用数据库来操刀
1.创建数据库的信息。
/*创建数据库和表*/
create database tedu_ums
use tedu_ums;
CREATE table t_user(
id int auto_increment comment '用户id',
username varchar(20) UNIQUE not null COMMENT '用户名',
pwd varchar(20) not null COMMENT '密码',
age int COMMENT '年龄',
phone varchar(20) COMMENT '手机号码',
email varchar(20) COMMENT '电子邮箱',
PRIMARY key(id), )DEFAULT CHARSET=UTF8;
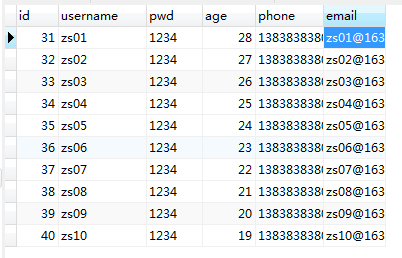
/*向数据库插入数据*/
insert into t_user(username,pwd,phone,age,email)
values("zs01",'1234','13838383800',28,'zs01@163.com'),
("zs02",'1234','13838383801',27,'zs02@163.com'),
("zs03",'1234','13838383802',26,'zs03@163.com'),
("zs04",'1234','13838383803',25,'zs04@163.com'),
("zs05",'1234','13838383804',24,'zs05@163.com'),
("zs06",'1234','13838383805',23,'zs06@163.com'),
("zs07",'1234','13838383806',22,'zs07@163.com'),
("zs08",'1234','13838383807',21,'zs08@163.com'),
("zs09",'1234','13838383808',20,'zs09@163.com'),
("zs10",'1234','13838383809',19,'zs10@163.com')
2.创建 entity实体类 去和数据库中的 属性 对应。
User实体类代码:
package com.entity;

/*

实体类

 */

public class User {

    private Integer id;

    private String username;

    private String pwd;

    private Integer age;

    private String phone;

    private String email;

    @Override

    public String toString() {

        return "User{" +

                "id=" + id +

                ", username='" + username + '\'' +

                ", pwd='" + pwd + '\'' +

                ", age=" + age +

                ", phone='" + phone + '\'' +

                ", email='" + email + '\'' +

                '}';

    }

    public User() {

    }

    public User(Integer id, String username, String pwd, Integer age, String phone, String email) {

        this.id = id;

        this.username = username;

        this.pwd = pwd;

        this.age = age;

        this.phone = phone;

        this.email = email;

    }

    public Integer getId() {

        return id;

    }

    public void setId(Integer id) {

        this.id = id;

    }

    public String getUsername() {

        return username;

    }

    public void setUsername(String username) {

        this.username = username;

    }

    public String getPwd() {

        return pwd;

    }

    public void setPwd(String pwd) {

        this.pwd = pwd;

    }

    public Integer getAge() {

        return age;

    }

    public void setAge(Integer age) {

        this.age = age;

    }

    public String getPhone() {

        return phone;

    }

    public void setPhone(String phone) {

        this.phone = phone;

    }

    public String getEmail() {

        return email;

    }

    public void setEmail(String email) {

        this.email = email;

    }

}
3.创建Mybatis接口层--UserMapper类(!!!此处有注意事项!!!)
package com.mapper;

import com.entity.User;

import org.apache.ibatis.annotations.*;

import java.util.List;

public interface UserMapper {

    /*注意事项一:在Mybatis中使用sql语句的时候,如果参数超过了一个,需要用到@Param(value="phone")注解进行声明参数,

     不然编译生成的class文件是没有对应的这个参数的

     */

    //注意事项二:不建议用*去查询数据库,此处虽然可以select *

    @Select("select id,username,pwd,age,phone,email from t_user where id=#{id}")

    User findUserById(Integer id);

    @Select("select id,username,pwd,age,phone,email from t_user ")

    List<User> findAllUser();

    /*

    增加数据

     */

    @Insert("insert into t_user(id,username,pwd,age,phone,email) "

            +"values(#{id},#{username},#{pwd},#{age},#{phone},#{email})")

//    @Options(useGeneratedKeys = true,keyProperty = "id")//设置id不自增。

    Integer insert(User user);

    /*

    更改方式1

     */

    @Update("update t_user set username=#{username},pwd=#{pwd},age=#{age},"+

            "phone=#{phone},email=#{email} where  id=#{id}")

    int updateUser(User user);

    /*

    更改方式2 (参数超过了一个使用)

     */

    @Update("update t_user set phone=#{phone},email=#{email} where id=#{id}")

    int updateUser1(@Param(value="phone") String phone, @Param(value="email") String email, @Param(value="id") int id);

    /*

    数据库删除(注意事项三:删除语句中的from不能去掉)

     */

    @Delete("delete from t_user where id=#{id}")

    int deleteUser(Integer id);

}
4.测试类的方法
import com.config.MybatisConfig;

import com.entity.User;

import com.mapper.DemoMapper;

import com.mapper.UserMapper;

import org.apache.ibatis.session.SqlSessionFactory;

import org.junit.After;

import org.junit.Before;

import org.junit.Test;

import org.springframework.context.annotation.AnnotationConfigApplicationContext;

import javax.sql.DataSource;

import java.sql.Connection;

import java.sql.ResultSet;

import java.sql.Statement;

import java.util.List;

public class TestCase {

    AnnotationConfigApplicationContext ctx;

    @Before

    public void init() {

        ctx = new AnnotationConfigApplicationContext(MybatisConfig.class);

    }

    @After

    public void destroy() {

        ctx.close();

    }

    @Test

    public void testDataSource() {

        DataSource ds = ctx.getBean("dataSource", DataSource.class);

        String sql = "select 'hello world'";

        try (Connection conn = ds.getConnection()) {

            Statement s = conn.createStatement();

            ResultSet rs = s.executeQuery(sql);

            while (rs.next()) {

                System.out.println(rs.getString(1));

            }

        } catch (Exception e) {

            e.printStackTrace();

        }

    }

    @Test

    public void testSqlSessionFactory() {

        SqlSessionFactory factory = ctx.getBean("sqlSessionFactory", SqlSessionFactory.class);

        System.out.println(factory);

    }

    @Test

    public void testHelloWorld() {

        DemoMapper mapper = ctx.getBean("demoMapper", DemoMapper.class);

        String str = mapper.hello();

        System.out.println(str);

    }

    /*

    数据库查找:根据id查找

     */

    @Test

    public void testFindUserById() {

        UserMapper userMapper = ctx.getBean("userMapper", UserMapper.class);

        User user = userMapper.findUserById(31);

        System.out.println(user);

    }

    /*

    数据库查找:查找全部。

    */

    @Test

    public void testFindAllUser() {

        UserMapper userMapper = ctx.getBean("userMapper", UserMapper.class);

        List<User> user = userMapper.findAllUser();

        System.out.println(user);

    }

    /*

    数据库插入

     */

    @Test

    public void testInsertUser() {

        User user = new User(null, "99", "1", 1, "1", "1");

        UserMapper userMapper = ctx.getBean("userMapper", UserMapper.class);

        int insert = userMapper.insert(user);

        System.out.println(insert);

    }

    /*

    数据库更改方式1

     */

    @Test

    public void testUpdateUser() {

        UserMapper userMapper = ctx.getBean("userMapper", UserMapper.class);

        User user = userMapper.findUserById(31);

        System.out.println("修改前:" + user);

        user.setAge(100);

        int update = userMapper.updateUser(user);

        User user1 = userMapper.findUserById(31);

        System.out.println("修改后:" + user1);

    }

    /*

    数据库更改方式2

     */

    @Test

    public void testUpadateUser1() {

        UserMapper userMapper = ctx.getBean("userMapper", UserMapper.class);

        int update = userMapper.updateUser1("110", "220", 100);

        System.out.println(update);

    }

    /*

    数据库删除

     */

    @Test

    public void testDeleteUser() {

        UserMapper userMapper = ctx.getBean("userMapper", UserMapper.class);

        int delete = userMapper.deleteUser(100);

        System.out.println(delete);

    }

    /**

     * 配置文件xml整合Mybatis----测试

     */

    @Test

    public void testTest() {

        DemoMapper mapper = ctx.getBean("demoMapper", DemoMapper.class);

        String str = mapper.test();

        System.out.println(str);

    }

}
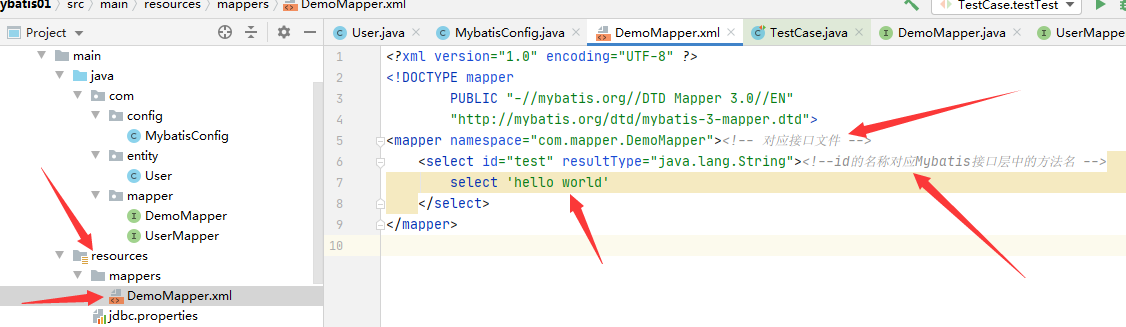
用配置文件的话,要将MybatisConfig配置文件中的——mybatis的核心功能的工厂——部分的代码换成如下:
/*

    mybatis的核心功能的工厂,需要将数据连接池datasource注入给它。

     */

    @Bean

    public SqlSessionFactory sqlSessionFactory(DataSource dataSource,

    @Value("classpath:mappers/*.xml") Resource[] mapperLocations//第二个属性是xml文件配置所需要的

    ) throws Exception {

        SqlSessionFactoryBean bean = new SqlSessionFactoryBean();

        bean.setDataSource(dataSource);//注入

        bean.setMapperLocations(mapperLocations);//xml文件操作数据库所需要的注入

        return bean.getObject();

    }
创建整合Mybatis的——xml配置文件:
总结:做这个的时候,遇到了几个问题
①在接口层写方法的时候,遇到了(注意事项)的问题,往上翻注释查阅。
②为什么在MybatisConfig中删去@Configuration这个注解还能有效的装配实例类(就是为什么@Bean还能用)?
个人理解:因为在测试类中,用到了AnnotationConfigApplicationContext这个类方法,
初始化spring的时候装配了MybatisConfig这个类,然后用getBean的方法装配了对应的类对象(例如此处的:DataSource)
mysql的连接驱动包
Mybatis数据连接池的配置---增删改查(以及遇见的问题)的更多相关文章
- MyBatis数据持久化(三)增删改查
上篇文章中我们使用mybatis成功建立数据库会话,并从表中查询出相应的数据,本文在此基础上介绍MyBatis另外几种操作,即插入.修改.删除记录. 1.修改User.xml文件,增加几条sql语句: ...
- Mybatis实现简单的CRUD(增删改查)原理及实例分析
Mybatis实现简单的CRUD(增删改查) 用到的数据库: CREATE DATABASE `mybatis`; USE `mybatis`; DROP TABLE IF EXISTS `user` ...
- MyBatis学习(三)MyBatis基于动态代理方式的增删改查
1.前言 上一期讲到MyBatis-Statement版本的增删改查.可以发现.这种代码写下来冗余的地方特别多.写一套没啥.如果涉及到多表多查询的时候就容易出现问题.故.官方推荐了一种方法.即MyBa ...
- java jdbc 连接mysql数据库 实现增删改查
好久没有写博文了,写个简单的东西热热身,分享给大家. jdbc相信大家都不陌生,只要是个搞java的,最初接触j2ee的时候都是要学习这么个东西的,谁叫程序得和数据库打交道呢!而jdbc就是和数据库打 ...
- Mybatis学习笔记之---CRUD(增删改查)
Mybatis的CRUD(增删改查) 1.pom.xml <dependencies> <dependency> <groupId>junit</groupI ...
- C++ API方式连接mysql数据库实现增删改查
这里复制的 http://www.bitscn.com/pdb/mysql/201407/226252.html 一.环境配置 1,装好mysql,新建一个C++控制台工程(从最简单的弄起,这个会了, ...
- 【C#】使用NHibernate连接MySQL数据库及增删改查
学习资料 http://www.sikiedu.com/course/51/task/891/show https://www.codeproject.com/Articles/26123/NHibe ...
- 02.Mybatis的动态代理方式实现增删改查
动态代理的方式实现增删改查: 通过约定的方式定位sql语句 约定 > 配置文件 > 硬编码 约定的目标是省略掉通过硬编码的方式定位sql的代码,通过接口直接定位出sql语句,以下代码为通过 ...
- 使用nodejs连接mysql数据库实现增删改查
首先要有数据库 使用xampp 或者 phpstudy 可以傻瓜式安装 新建一个项目文件夹 之后在这个目录下初始化package.json (npm init) 先在项目中安装mysql 和 ex ...
随机推荐
- SQL Server 查看进程阻塞及处理
修改或删除数据前先备份,先备份,先备份(重要事情说三遍)! 1.首先,查看线程,分析是否存在阻塞进程,blocked>0都是当前被阻塞的进程 SELECT * FROM sysprocesse ...
- ubuntu中执行可执行文件时报错“没有那个文件或目录”的解决办法(非权限问题)
问题:可执行文件明明存在,也有可执行权限(x),但执行时就提示"没有那个文件或目录". 原因:这个程序的是32位的程序(比如arm-linux-gcc),而系统是64位的,运行时需 ...
- BUAA OS实验调试指南:从看懂到看开
一般的调试流程其实很简单:发现问题,稳定复现,确定临界条件,定位问题,修复问题,核查结果.迭代这个过程,形成一个闭环 老实说,OS的实验代码,开箱体验极差,程序跳来跳去,进了Lab4后还要考虑内核态切 ...
- 2.Python入门-计算机组成、指令和程序、标识符、变量、数据类型、对象和变量关系、运算符
一.计算机的组成 计算机由两部分组成:硬件 和 软件 硬件包含:键盘.鼠标.显示器.CPU.主板.内存.硬盘 ... -硬件是看的见摸得着的 软件包含:系统软件(windows.macOS.Linux ...
- who -b
~]# who -b 系统引导 2020-05-03 19:57[root@localhost ~]# who -r 运行级别 5 2020-05-03 19:58
- 上,打开SSH服务的配置文件:/etc/ssh/sshd_config 加上如下两行: ClientAliveInterval 120 ClientAliveCountMax 720 第一行,表示每隔120秒向客户端
SSH的默认过一段时间会超时,有时候正在执行着脚本,出去一会回来就断开了,输出信息都看不到了... 禁止SSH自动超时最简单的办法就是,每隔一段时间在客户端和服务器之间发送一个"空包&quo ...
- linux Generating /run/initramfs/rdsosreport.txt 问题
Generating /run/initramfs/rdsosreport.txt 问题 实验室异常断电,导致Centos7重启以后出现 Generating "/run/initramfs ...
- Module not found: Error: Can't resolve 'less-loader' in ' xxx' (Day_40)
1. 错误代码: 2. 解决方法: 删除项目文件夹下的node_modules文件夹 执行npm install命令
- 实战|教你用Python玩转Mysql
爬虫采集下来的数据除了存储在文本文件.excel之外,还可以存储在数据集,如:Mysql,redis,mongodb等,今天辰哥就来教大家如何使用Python连接Mysql,并结合爬虫为大家讲解. 前 ...
- RedisPool
class RedisPool(object): instance = None def __init__(self, host='192.168.2.129', port=7000, passwor ...