Bootstrap3.0学习第六轮(表单)
Bootstrap3.0学习第六轮(表单)
前言
阅读之前您也可以到Bootstrap3.0入门学习系列导航中进行查看http://www.cnblogs.com/aehyok/p/3404867.html
本文主要讲解的是表单,这个其实对于做过网站的人来说,并不陌生,而且可以说是最为常用的提交数据的Form表单。本文主要来讲解一下内容:
基本案例
单独的表单控件会被自动赋予一些全局样式。所有设置了.form-control的<input>、<textarea>和<select>元素都将被默认设置为width: 100%;。将label和前面提到的这些控件包裹在.form-group中可以获得最好的排列。

<form role="form">

  <div class="form-group">

    <label for="exampleInputEmail1">Email address</label>

    <input type="email" class="form-control" id="exampleInputEmail1" placeholder="Enter email">

  </div>

  <div class="form-group">

    <label for="exampleInputPassword1">Password</label>

    <input type="password" class="form-control" id="exampleInputPassword1" placeholder="Password">

  </div>

  <div class="form-group">

    <label for="exampleInputFile">File input</label>

    <input type="file" id="exampleInputFile">

    <p class="help-block">Example block-level help text here.</p>

  </div>

  <div class="checkbox">

    <label>

      <input type="checkbox"> Check me out

    </label>

  </div>

  <button type="submit" class="btn btn-default">Submit</button>

</form>

两个文本框的宽度的确为100%。并且有三个form-group。
内联表单
为左对齐和inline-block级别的控件设置.form-inline,可以将其排布的更紧凑。
需要设置宽度:在Bootstrap中,input、select和textarea默认被设置为100%宽度。为了使用内联表单,你需要专门为使用到的表单控件设置宽度。
一定要设置label:如果你没有为每个输入控件设置label,屏幕阅读器将无法正确识读。对于这些内联表单,你可以通过为label设置
.sr-only已将其隐藏。
<form class="form-inline" role="form">

  <div class="form-group">

    <label class="sr-only" for="exampleInputEmail2">Email address</label>

    <input type="email" class="form-control" id="exampleInputEmail2" placeholder="Enter email">

  </div>

  <div class="form-group">

    <label class="sr-only" for="exampleInputPassword2">Password</label>

    <input type="password" class="form-control" id="exampleInputPassword2" placeholder="Password">

  </div>

  <div class="checkbox">

    <label>

      <input type="checkbox"> Remember me

    </label>

  </div>

  <button type="submit" class="btn btn-default">Sign in</button>

</form>

水平排列的表单
通过为表单添加.form-horizontal,并使用Bootstrap预置的栅格class可以将label和控件组水平并排布局。这样做将改变.form-group的行为,使其表现为栅格系统中的行(row),因此就无需再使用.row了。
<form class="form-horizontal" role="form">

  <div class="form-group">

    <label for="inputEmail3" class="col-sm-2 control-label">Email</label>

    <div class="col-sm-10">

      <input type="email" class="form-control" id="inputEmail3" placeholder="Email">

    </div>

  </div>

  <div class="form-group">

    <label for="inputPassword3" class="col-sm-2 control-label">Password</label>

    <div class="col-sm-10">

      <input type="password" class="form-control" id="inputPassword3" placeholder="Password">

    </div>

  </div>

  <div class="form-group">

    <div class="col-sm-offset-2 col-sm-10">

      <div class="checkbox">

        <label>

          <input type="checkbox"> Remember me

        </label>

      </div>

    </div>

  </div>

  <div class="form-group">

    <div class="col-sm-offset-2 col-sm-10">

      <button type="submit" class="btn btn-default">Sign in</button>

    </div>

  </div>

</form>

被支持的控件
在表单布局案例中展示了其所支持的标准表单控件。
Input
大部分表单控件、文本输入域控件。包括HTML5支持的所有类型:text、password、datetime、datetime-local、date、month、time、week、number、email、url、search、tel和color。
注意:有正确设置了
type的input控件才能被赋予正确的样式。
文本框示例
<input type="text" class="form-control" placeholder="Text input">

Textarea
支持多行文本的表单控件。可根据需要改变rows属性。
     <h1>textarea</h1>

     <textarea class="form-control" rows="3"></textarea>

Checkbox 和 radio
Checkbox用于选择列表中的一个或多个选项,而radio用于从多个选项中只选择一个。
默认外观(堆叠在一起)
<div class="checkbox">
<label>
<input type="checkbox" value="">
Option one is this and that—be sure to include why it's great
</label>
</div> <div class="radio">
<label>
<input type="radio" name="optionsRadios" id="optionsRadios1" value="option1" checked>
Option one is this and that—be sure to include why it's great
</label>
</div>
<div class="radio">
<label>
<input type="radio" name="optionsRadios" id="optionsRadios2" value="option2">
Option two can be something else and selecting it will deselect option one
</label>
</div>

Inline checkboxes
通过将.checkbox-inline 或 .radio-inline应用到一系列的checkbox或radio控件上,可以使这些控件排列在一行。
<label class="checkbox-inline">

  <input type="checkbox" id="inlineCheckbox1" value="option1"> 1

</label>

<label class="checkbox-inline">

  <input type="checkbox" id="inlineCheckbox2" value="option2"> 2

</label>

<label class="checkbox-inline">

  <input type="checkbox" id="inlineCheckbox3" value="option3"> 3

</label>

同理Radio是一样的,只需要添加一下样式即可。
Select
<select class="form-control">

  <option>1</option>

  <option>2</option>

  <option>3</option>

  <option>4</option>

  <option>5</option>

</select>

<select multiple class="form-control">

  <option>1</option>

  <option>2</option>

  <option>3</option>

  <option>4</option>

  <option>5</option>

</select>

静态控件
在水平布局的表单中,如果需要将一行纯文本放置于label的同一行,为<p>元素添加.form-control-static即可。
<form class="form-horizontal" role="form">

  <div class="form-group">

    <label class="col-sm-2 control-label">Email</label>

    <div class="col-sm-10">

      <p class="form-control-static">email@example.com</p>

    </div>

  </div>

  <div class="form-group">

    <label for="inputPassword" class="col-sm-2 control-label">Password</label>

    <div class="col-sm-10">

      <input type="password" class="form-control" id="inputPassword" placeholder="Password">

    </div>

  </div>

</form>

控件状态
控件状态
通过为控件和label设置一些基本状态,可以为用户提供回馈。
输入焦点
我们移除了某些表单控件的默认outline样式,并对其:focus状态赋予了box-shadow样式。
<input class="form-control" id="focusedInput" type="text" value="This is focused...">

被禁用的输入框
为输入框设置disabled属性可以防止用户输入,并能改变一点外观,使其更直观。
<input class="form-control" id="disabledInput" type="text" placeholder="Disabled input here..." disabled>

被禁用的fieldset
为<fieldset>设置disabled属性可以禁用<fieldset>中包含的所有控件。
<a>标签的链接功能不受影响
这个class只改变
<a class="btn btn-default">按钮的外观,并不能禁用其功能。建议自己通过JavaScript代码禁用链接功能。
跨浏览器兼容性
虽然Bootstrap会将这些样式应用到所有浏览器上,Internet Explorer 9及以下浏览器中的
<fieldset>并不支持disabled属性。因此建议在这些浏览器上通过JavaScript代码来禁用fieldset
<form role="form">

  <fieldset disabled>

    <div class="form-group">

      <label for="disabledTextInput">Disabled input</label>

      <input type="text" id="disabledTextInput" class="form-control" placeholder="Disabled input">

    </div>

    <div class="form-group">

      <label for="disabledSelect">Disabled select menu</label>

      <select id="disabledSelect" class="form-control">

        <option>Disabled select</option>

      </select>

    </div>

    <div class="checkbox">

      <label>

        <input type="checkbox"> Can't check this

      </label>

    </div>

    <button type="submit" class="btn btn-primary">Submit</button>

  </fieldset>

</form>

可将鼠标移到各个控件上进行查看效果。
校验状态
Bootstrap对表单控件的校验状态,如error、warning和success状态,都定义了样式。使用时,添加.has-warning、.has-error或.has-success到这些控件的父元素即可。任何包含在此元素之内的.control-label、.form-control和.help-block都将接受这些校验状态的样式。
<div class="form-group has-success">

  <label class="control-label" for="inputSuccess">Input with success</label>

  <input type="text" class="form-control" id="inputSuccess">

</div>

<div class="form-group has-warning">

  <label class="control-label" for="inputWarning">Input with warning</label>

  <input type="text" class="form-control" id="inputWarning">

</div>

<div class="form-group has-error">

  <label class="control-label" for="inputError">Input with error</label>

  <input type="text" class="form-control" id="inputError">

</div>

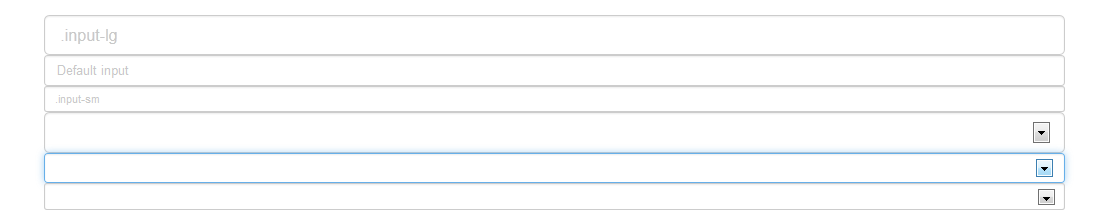
控件尺寸
通过.input-lg之类的class可以为控件设置高度,通过.col-lg-*之类的class可以为控件设置宽度。
高度尺寸
创建大一些或小一些的表单控件以匹配按钮尺寸。
    <input class="form-control input-lg" type="text" placeholder=".input-lg">

    <input class="form-control" type="text" placeholder="Default input">

    <input class="form-control input-sm" type="text" placeholder=".input-sm">

    <select class="form-control input-lg">...</select>

    <select class="form-control">...</select>

    <select class="form-control input-sm">...</select>
调整列尺寸
用栅格系统中的列包裹input或其任何父元素,都可很容易的为其设置宽度。
<div class="row">

  <div class="col-xs-2">

    <input type="text" class="form-control" placeholder=".col-xs-2">

  </div>

  <div class="col-xs-3">

    <input type="text" class="form-control" placeholder=".col-xs-3">

  </div>

  <div class="col-xs-4">

    <input type="text" class="form-control" placeholder=".col-xs-4">

  </div>

</div>

帮助文本
用于表单控件的块级帮助文本。
<span class="help-block">自己独占一行或多行的块级帮助文本。</span>
总结
本篇文章主要讲解表单中各种控件的样式控制。其中也有看到按钮的简单样式使用,下一篇文章将重点来讲解按钮的样式。
本文已更新至Bootstrap3.0入门学习系列导航中http://www.cnblogs.com/aehyok/p/3404867.html
Bootstrap3.0学习第六轮(表单)的更多相关文章
- Bootstrap3.0学习第二十一轮(JavaScript插件——工具提示)
详情请查看http://aehyok.com/Blog/Detail/27.html 个人网站地址:aehyok.com QQ 技术群号:206058845,验证码为:aehyok 本文文章链接:ht ...
- Bootstrap3.0学习第十七轮(JavaScript插件——模态框)
详情请查看http://aehyok.com/Blog/Detail/24.html 个人网站地址:aehyok.com QQ 技术群号:206058845,验证码为:aehyok 本文文章链接:ht ...
- Bootstrap3.0学习第十一轮(输入框组)
详情请查看http://aehyok.com/Blog/Detail/17.html 个人网站地址:aehyok.com QQ 技术群号:206058845,验证码为:aehyok 本文文章链接:ht ...
- Bootstrap3.0学习第七轮(按钮)
详情请查看http://aehyok.com/Blog/Detail/13.html 个人网站地址:aehyok.com QQ 技术群号:206058845,验证码为:aehyok 本文文章链接:ht ...
- bootstrap学习笔记<六>(表单二之按钮)
按钮(补充) (ps:居中元素可以使用<center></center>标签) 块级按钮(ps:按钮占一整行) <button class="btn btn-p ...
- Laravel教程 六:表单 Forms
Laravel教程 六:表单 Forms 此文章为原创文章,未经同意,禁止转载. Form laravel 5.2 之后请使用 laravelcollective/html 替换 illuminate ...
- Bootstrap3.0学习第三轮(栅格系统案例)
Bootstrap3.0学习第三轮(栅格系统案例) 前言 在前面的一篇文章当中http://www.cnblogs.com/aehyok/p/3400499.html主要学习了栅格系统的基本原理,以及 ...
- struts2官方 中文教程 系列六:表单验证
先贴个本帖的地址,以免被爬:struts2教程 官方系列六:表单验证 即 http://www.cnblogs.com/linghaoxinpian/p/6906720.html 下载本章节代码 介 ...
- Ext JS4 学习笔记之发送表单(Form)时也将表单下的表格(Grid)数据一同发送的方法
Ext JS4 学习笔记之发送表单(Form)时也将表单下的表格(Grid)数据一同发送的方法 昨天在开发的时候遇到个小问题,就是如何将Grid的内容与Form一起发送到服务器端.默认情况下,表单(F ...
随机推荐
- DynamicReports
try { response.setCharacterEncoding("UTF-8"); response.setHeader("Content-disposition ...
- git_自动同步_sync.sh
1: 使用方法 sh sync.sh code_dir 代码 #add echo $1 cd $1 git add . git commit -m "Added notes for $( ...
- error C3130: 内部编译器错误: 未能将插入的代码块写入PDB
近期编译cocos2d-x的test突然出现这个错误,又一次编译也无法解决. 一般出现这个错误是两个原因:一个是磁盘空间不足,还有一个是项目太大导致pdb文件太大,无法继续写入. 原本cocos2d- ...
- maven_基本配置
<project xmlns="http://maven.apache.org/POM/4.0.0" xmlns:xsi="http://www.w3.org/20 ...
- LeetCode:same_tree题解
一. 题目: 给定两个二叉树,编写一个函数来检查它们是否相等或为空树.假设两个二叉树被觉得是相等的,那么它们在结构上是同样的,而且随意节点具有同样的值. 二. 分析 非常easy的题目 ...
- JAVA异常处理、常用类、反射、集合
异常 异常:在Java中是指被一个方法抛出的对象. 分类:检查异常.运行时异常.错误 运行时异常(uncheckd):RuntimeException和其子类 检查异常(checkd/搜检异常):指E ...
- Uva 409-Excuses, Excuses!(串)
Judge Ito is having a problem with people subpoenaed for jury duty giving rather lame excuses in ord ...
- Cocos2d-x Lua 阅读Csv文件,使用数据更方便
在我的书或出售之前,我的源代码,有Csvshadow文件. 也许这是偏见.我与工作将是最长的轮廓Csv,所以,我会帮助不大喜欢它的游戏. Csv文件,非常格式easy,也就是说,一个数据线,字段之间用 ...
- (C语言)共用体union的使用方法举例
曾经在学校学习C语言的时候一直搞不懂那个共用体union有什么用的.工作之后才发现它的一些妙用,现举比例如以下: 1. 为了方便看懂代码. 比方说想写一个3 * 3的矩阵,能够这样写: [ 注:以下用 ...
- checkbox
选择功能和反选
使用jQuery实现checkbox全补选和反选功能.什么时候checkbox选择禁用时,不涉及功能 <!DOCTYPE html> <html> <head> & ...