【译】Spring 4 + Hibernate 4 + Mysql + Maven集成例子(注解 + XML)
前言
译文链接:http://websystique.com/spring/spring4-hibernate4-mysql-maven-integration-example-using-annotations/
本文将基于注解配置, 集成Spring 4和Hibernate 4,开发一个增删改查应用,涉及以下内容:
- 创建Hibernate实体
- 保存数据到mysql数据库中
- 在事务
transaction内部执行增删改查操作 - 典型企业应用中不同层之间的交互
- 基于注解配置
当然,我们也会给出XML配置作为对比。
如果你的应用是基于Spring MVC开发,那么可以参考该链接:Spring4 MVC Hibernate and MySQL integration.
涉及的技术及开发工具
- Spring 4.0.6.RELEASE
- Hibernate Core 4.3.6.Final
- MySQL Server 5.6
- Joda-time 2.3
- Maven 3
- JDK 1.6
- Eclipse JUNO Service Release 2
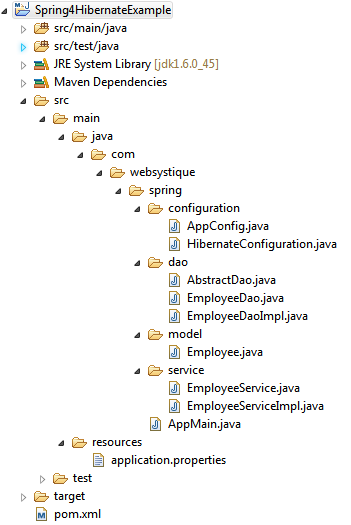
工程结构目录
步骤一:往pom.xml中添加依赖
<project xmlns="http://maven.apache.org/POM/4.0.0" xmlns:xsi="http://www.w3.org/2001/XMLSchema-instance"

    xsi:schemaLocation="http://maven.apache.org/POM/4.0.0 http://maven.apache.org/xsd/maven-4.0.0.xsd">

    <modelVersion>4.0.0</modelVersion>

    <groupId>com.websystique.spring</groupId>

    <artifactId>Spring4HibernateExample</artifactId>

    <version>1.0.0</version>

    <packaging>jar</packaging>

    <name>Spring4HibernateExample</name>

    <properties>

        <springframework.version>4.0.6.RELEASE</springframework.version>

        <hibernate.version>4.3.6.Final</hibernate.version>

        <mysql.connector.version>5.1.31</mysql.connector.version>

        <joda-time.version>2.3</joda-time.version>

    </properties>

    <dependencies>

        <!-- Spring -->

        <dependency>

            <groupId>org.springframework</groupId>

            <artifactId>spring-core</artifactId>

            <version>${springframework.version}</version>

        </dependency>

        <dependency>

            <groupId>org.springframework</groupId>

            <artifactId>spring-context</artifactId>

            <version>${springframework.version}</version>

        </dependency>

        <dependency>

            <groupId>org.springframework</groupId>

            <artifactId>spring-tx</artifactId>

            <version>${springframework.version}</version>

        </dependency>

        <dependency>

            <groupId>org.springframework</groupId>

            <artifactId>spring-orm</artifactId>

            <version>${springframework.version}</version>

        </dependency>

        <!-- Hibernate -->

        <dependency>

            <groupId>org.hibernate</groupId>

            <artifactId>hibernate-core</artifactId>

            <version>${hibernate.version}</version>

        </dependency>

        <!-- MySQL -->

        <dependency>

            <groupId>mysql</groupId>

            <artifactId>mysql-connector-java</artifactId>

            <version>${mysql.connector.version}</version>

        </dependency>

        <!-- Joda-Time -->

        <dependency>

            <groupId>joda-time</groupId>

            <artifactId>joda-time</artifactId>

            <version>${joda-time.version}</version>

        </dependency>

        <!-- To map JodaTime with database type -->

        <dependency>

            <groupId>org.jadira.usertype</groupId>

            <artifactId>usertype.core</artifactId>

            <version>3.0.0.CR1</version>

        </dependency>

    </dependencies>

    <build>

        <pluginManagement>

            <plugins>

                <plugin>

                    <groupId>org.apache.maven.plugins</groupId>

                    <artifactId>maven-compiler-plugin</artifactId>

                    <version>3.2</version>

                    <configuration>

                        <source>1.6</source>

                        <target>1.6</target>

                    </configuration>

                </plugin>

            </plugins>

        </pluginManagement>

    </build>

</project>
很明显我们需要添加Spring、Hibernate和Mysql连接器相关依赖,另外,由于我们使用了joda-time库来处理时间,所以也引入了joda-time依赖。usertype-core库引入是为了提供数据库时间类型与joda-time LocalDate之间的映射。
步骤二:配置Hibernate
com.websystique.spring.configuration.HibernateConfiguration
package com.websystique.spring.configuration;

import java.util.Properties;

import javax.sql.DataSource;

import org.hibernate.SessionFactory;

import org.springframework.beans.factory.annotation.Autowired;

import org.springframework.context.annotation.Bean;

import org.springframework.context.annotation.ComponentScan;

import org.springframework.context.annotation.Configuration;

import org.springframework.context.annotation.PropertySource;

import org.springframework.core.env.Environment;

import org.springframework.jdbc.datasource.DriverManagerDataSource;

import org.springframework.orm.hibernate4.HibernateTransactionManager;

import org.springframework.orm.hibernate4.LocalSessionFactoryBean;

import org.springframework.transaction.annotation.EnableTransactionManagement;

@Configuration

@EnableTransactionManagement

@ComponentScan({ "com.websystique.spring.configuration" })

@PropertySource(value = { "classpath:application.properties" })

public class HibernateConfiguration {

    @Autowired

    private Environment environment;

    @Bean

    public LocalSessionFactoryBean sessionFactory() {

        LocalSessionFactoryBean sessionFactory = new LocalSessionFactoryBean();

        sessionFactory.setDataSource(dataSource());

        sessionFactory.setPackagesToScan(new String[] { "com.websystique.spring.model" });

        sessionFactory.setHibernateProperties(hibernateProperties());

        return sessionFactory;

     }

    @Bean

    public DataSource dataSource() {

        DriverManagerDataSource dataSource = new DriverManagerDataSource();

        dataSource.setDriverClassName(environment.getRequiredProperty("jdbc.driverClassName"));

        dataSource.setUrl(environment.getRequiredProperty("jdbc.url"));

        dataSource.setUsername(environment.getRequiredProperty("jdbc.username"));

        dataSource.setPassword(environment.getRequiredProperty("jdbc.password"));

        return dataSource;

    }

    private Properties hibernateProperties() {

        Properties properties = new Properties();

        properties.put("hibernate.dialect", environment.getRequiredProperty("hibernate.dialect"));

        properties.put("hibernate.show_sql", environment.getRequiredProperty("hibernate.show_sql"));

        properties.put("hibernate.format_sql", environment.getRequiredProperty("hibernate.format_sql"));

        return properties;

    }

    @Bean

    @Autowired

    public HibernateTransactionManager transactionManager(SessionFactory s) {

       HibernateTransactionManager txManager = new HibernateTransactionManager();

       txManager.setSessionFactory(s);

       return txManager;

    }

}
@Configuration注解表明该类包含了用@Bean标注的方法,这些被@Bean标注的方法可以生成bean并交由spring容器管理,在这里例子中,这个类代表了hibernate的配置。
@ComponentScan注解与xml配置中的“context:component-scan base-package="..."”等价,提供了扫描bean的包路径。
@EnableTransactionManagement注解与xml配置中Spring的tx:*命名空间等价,主要用于开启基于注解的事务管理。
@PropertySource注解用于在Spring运行时Environment中声明一组属性(在应用classpath路径下的properties文件中定义),可根据不同环境灵活改变属性值。
sessionFactory()方法创建了一个LocalSessionFactoryBean,与基于XML的配置类似,我们需要一个数据源dataSource和hibernate配置文件(如hibernate.properties)。
多亏了@PropertySource注解,我们可以从.properties文件中得到具体属性值,使用Spring的Environment接口获取对应项目的配置值。
一旦创建了SessionFactory,该bean将会被注入到transactionManager方法中,最终对sessionFactory创建的sessions提供事务支持功能。
如下是本文使用的属性配置文件:
/src/main/resources/application.properties
jdbc.driverClassName = com.mysql.jdbc.Driver

jdbc.url = jdbc:mysql://localhost:3306/websystique

jdbc.username = myuser

jdbc.password = mypassword

hibernate.dialect = org.hibernate.dialect.MySQLDialect

hibernate.show_sql = false

hibernate.format_sql = false
另外,对应的基于XML配置如下
<?xml version="1.0" encoding="UTF-8"?>

<beans xmlns="http://www.springframework.org/schema/beans"

        xmlns:xsi="http://www.w3.org/2001/XMLSchema-instance"

        xmlns:context="http://www.springframework.org/schema/context"

        xmlns:tx="http://www.springframework.org/schema/tx"

        xmlns:aop="http://www.springframework.org/schema/aop"

        xsi:schemaLocation="http://www.springframework.org/schema/beans http://www.springframework.org/schema/beans/spring-beans-4.0.xsd

                            http://www.springframework.org/schema/context http://www.springframework.org/schema/context/spring-context-4.0.xsd

                            http://www.springframework.org/schema/aop http://www.springframework.org/schema/aop/spring-aop-4.0.xsd

                            http://www.springframework.org/schema/tx  http://www.springframework.org/schema/tx/spring-tx-4.0.xsd">

    <context:property-placeholder location="classpath:application.properties" />

    <context:component-scan  base-package="com.websystique.spring" />

    <tx:annotation-driven transaction-manager="transactionManager"/>

    <bean id="dataSource" class="org.springframework.jdbc.datasource.DriverManagerDataSource">

        <property name="driverClassName" value="${jdbc.driverClassName}" />

        <property name="url" value="${jdbc.url}"/>

        <property name="username" value="${jdbc.username}" />

        <property name="password" value="${jdbc.password}"/>

    </bean>

    <bean id="sessionFactory" class="org.springframework.orm.hibernate4.LocalSessionFactoryBean" >

        <property name="dataSource" ref="dataSource"/>

        <property name="packagesToScan">

            <list>

                <value>com.websystique.spring.model</value>

            </list>

        </property>

        <property name="hibernateProperties">

            <props>

                <prop key="hibernate.dialect">${hibernate.dialect}</prop>

                <prop key="hibernate.show_sql">${hibernate.show_sql:false}</prop>

                <prop key="hibernate.format_sql">${hibernate.format_sql:false}</prop>

            </props>

        </property>

    </bean>

    <bean id="transactionManager"  class="org.springframework.orm.hibernate4.HibernateTransactionManager">

        <property name="sessionFactory" ref="sessionFactory" />

    </bean>

    <bean id="persistenceExceptionTranslationPostProcessor"

        class="org.springframework.dao.annotation.PersistenceExceptionTranslationPostProcessor"/>

</beans>
步骤三:Spring配置
com.websystique.spring.configuration.AppConfig
package com.websystique.spring.configuration;

import org.springframework.context.annotation.ComponentScan;

import org.springframework.context.annotation.Configuration;

@Configuration

@ComponentScan(basePackages = "com.websystique.spring")

public class AppConfig {

}
在我们这个示例中,即使该配置类内部是空的,但是使用了@ComponentScan注解,可以自动检测到对应包下所有的beans。
其实你可以完全去除以上的配置,将bean扫描功能放在application context级别去实现(main方法里)。
在成熟的应用里,你会发现使用配置类配置beans(如messageSource、PropertySourcesPlaceHolderConfigurer...)非常方便。
对应的基于XML的配置
<beans xmlns="http://www.springframework.org/schema/beans"

    xmlns:xsi="http://www.w3.org/2001/XMLSchema-instance"

    xmlns:context="http://www.springframework.org/schema/context"

    xsi:schemaLocation="http://www.springframework.org/schema/beans http://www.springframework.org/schema/beans/spring-beans-4.0.xsd

    http://www.springframework.org/schema/context http://www.springframework.org/schema/context/spring-context-4.0.xsd">

    <context:component-scan base-package="com.websystique.spring" />

</beans>
以上就是关于本工程的所有配置了,现在,为了让工程能跑起来,我们还需要添加service、dao层,实体对象,数据库。
步骤四:DAO层
com.websystique.spring.dao.AbstractDao
package com.websystique.spring.dao;

import org.hibernate.Session;

import org.hibernate.SessionFactory;

import org.springframework.beans.factory.annotation.Autowired;

public abstract class AbstractDao {

    @Autowired

    private SessionFactory sessionFactory;

    protected Session getSession() {

        return sessionFactory.getCurrentSession();

    }

    public void persist(Object entity) {

        getSession().persist(entity);

    }

    public void delete(Object entity) {

        getSession().delete(entity);

    }

}
注意,我们在步骤二创建的SessionFactory会被自动装配到这里,这个类将作为基类用于执行数据库相关操作。
com.websystique.spring.dao.EmployeeDao
package com.websystique.spring.dao;

import java.util.List;

import com.websystique.spring.model.Employee;

public interface EmployeeDao {

    void saveEmployee(Employee employee);

    List<Employee> findAllEmployees();

    void deleteEmployeeBySsn(String ssn);

    Employee findBySsn(String ssn);

    void updateEmployee(Employee employee);

}
com.websystique.spring.dao.EmployeeDaoImpl
package com.websystique.spring.dao;

import java.util.List;

import org.hibernate.Criteria;

import org.hibernate.Query;

import org.hibernate.criterion.Restrictions;

import org.springframework.stereotype.Repository;

import com.websystique.spring.model.Employee;

@Repository("employeeDao")

public class EmployeeDaoImpl extends AbstractDao implements EmployeeDao{

    public void saveEmployee(Employee employee) {

        persist(employee);

    }

    @SuppressWarnings("unchecked")

    public List<Employee> findAllEmployees() {

        Criteria criteria = getSession().createCriteria(Employee.class);

        return (List<Employee>) criteria.list();

    }

    public void deleteEmployeeBySsn(String ssn) {

        Query query = getSession().createSQLQuery("delete from Employee where ssn = :ssn");

        query.setString("ssn", ssn);

        query.executeUpdate();

    }

    public Employee findBySsn(String ssn){

        Criteria criteria = getSession().createCriteria(Employee.class);

        criteria.add(Restrictions.eq("ssn",ssn));

        return (Employee) criteria.uniqueResult();

    }

    public void updateEmployee(Employee employee){

        getSession().update(employee);

    }

}
步骤五:添加Service层代码
com.websystique.spring.service.EmployeeService
package com.websystique.spring.service;

import java.util.List;

import com.websystique.spring.model.Employee;

public interface EmployeeService {

    void saveEmployee(Employee employee);

    List<Employee> findAllEmployees();

    void deleteEmployeeBySsn(String ssn);

    Employee findBySsn(String ssn);

    void updateEmployee(Employee employee);

}
com.websystique.spring.service.EmployeeServiceImpl
package com.websystique.spring.service;

import java.util.List;

import org.springframework.beans.factory.annotation.Autowired;

import org.springframework.stereotype.Service;

import org.springframework.transaction.annotation.Transactional;

import com.websystique.spring.dao.EmployeeDao;

import com.websystique.spring.model.Employee;

@Service("employeeService")

@Transactional

public class EmployeeServiceImpl implements EmployeeService{

    @Autowired

    private EmployeeDao dao;

    public void saveEmployee(Employee employee) {

        dao.saveEmployee(employee);

    }

    public List<Employee> findAllEmployees() {

        return dao.findAllEmployees();

    }

    public void deleteEmployeeBySsn(String ssn) {

        dao.deleteEmployeeBySsn(ssn);

    }

    public Employee findBySsn(String ssn) {

        return dao.findBySsn(ssn);

    }

    public void updateEmployee(Employee employee){

        dao.updateEmployee(employee);

    }

}
以上比较引人注目的部分是@Transactional注解,配置了该注解的类会在每个类方法开启事务,并在方法结束的时候提交事务(或者在方法内部出错时回滚事务)。
注意,由于以上事务范围是方法级别的,我们在方法内部使用DAO,DAO方法会在同样的事物内部执行。
步骤六:创建实体类(POJO)
com.websystique.spring.model.Employee
package com.websystique.spring.model;

import java.math.BigDecimal;

import javax.persistence.Column;

import javax.persistence.Entity;

import javax.persistence.GeneratedValue;

import javax.persistence.GenerationType;

import javax.persistence.Id;

import javax.persistence.Table;

import org.hibernate.annotations.Type;

import org.joda.time.LocalDate;

@Entity

@Table(name="EMPLOYEE")

public class Employee {

    @Id

    @GeneratedValue(strategy = GenerationType.IDENTITY)

    private int id;

    @Column(name = "NAME", nullable = false)

    private String name;

    @Column(name = "JOINING_DATE", nullable = false)

    @Type(type="org.jadira.usertype.dateandtime.joda.PersistentLocalDate")

    private LocalDate joiningDate;

    @Column(name = "SALARY", nullable = false)

    private BigDecimal salary;

    @Column(name = "SSN", unique=true, nullable = false)

    private String ssn;

    public int getId() {

        return id;

    }

    public void setId(int id) {

        this.id = id;

    }

    public String getName() {

        return name;

    }

    public void setName(String name) {

        this.name = name;

    }

    public LocalDate getJoiningDate() {

        return joiningDate;

    }

    public void setJoiningDate(LocalDate joiningDate) {

        this.joiningDate = joiningDate;

    }

    public BigDecimal getSalary() {

        return salary;

    }

    public void setSalary(BigDecimal salary) {

        this.salary = salary;

    }

    public String getSsn() {

        return ssn;

    }

    public void setSsn(String ssn) {

        this.ssn = ssn;

    }

    @Override

    public int hashCode() {

        final int prime = 31;

        int result = 1;

        result = prime * result + id;

        result = prime * result + ((ssn == null) ? 0 : ssn.hashCode());

        return result;

    }

    @Override

    public boolean equals(Object obj) {

        if (this == obj)

            return true;

        if (obj == null)

            return false;

        if (!(obj instanceof Employee))

            return false;

        Employee other = (Employee) obj;

        if (id != other.id)

            return false;

        if (ssn == null) {

            if (other.ssn != null)

                return false;

        } else if (!ssn.equals(other.ssn))

            return false;

        return true;

    }

    @Override

    public String toString() {

        return "Employee [id=" + id + ", name=" + name + ", joiningDate="

                + joiningDate + ", salary=" + salary + ", ssn=" + ssn + "]";

    }

}
这是一个标准的实体类,基于JPA注解@Entity, @Table, @Column以及hibernate注解@Type(用于提供数据库类型与Joda-Time LocalDate的映射)。
步骤七:在数据库里创建Schema
CREATE TABLE EMPLOYEE(

    id INT NOT NULL auto_increment,

    name VARCHAR(50) NOT NULL,

    joining_date DATE NOT NULL,

    salary DOUBLE NOT NULL,

    ssn VARCHAR(30) NOT NULL UNIQUE,

    PRIMARY KEY (id)

);
步骤八:创建main方法执行程序
package com.websystique.spring;

import java.math.BigDecimal;

import java.util.List;

import org.joda.time.LocalDate;

import org.springframework.context.annotation.AnnotationConfigApplicationContext;

import org.springframework.context.support.AbstractApplicationContext;

import com.websystique.spring.configuration.AppConfig;

import com.websystique.spring.model.Employee;

import com.websystique.spring.service.EmployeeService;

public class AppMain {

    public static void main(String args[]) {

        AbstractApplicationContext context = new AnnotationConfigApplicationContext(AppConfig.class);

        EmployeeService service = (EmployeeService) context.getBean("employeeService");

        /*

         * Create Employee1

         */

        Employee employee1 = new Employee();

        employee1.setName("Han Yenn");

        employee1.setJoiningDate(new LocalDate(2010, 10, 10));

        employee1.setSalary(new BigDecimal(10000));

        employee1.setSsn("ssn00000001");

        /*

         * Create Employee2

         */

        Employee employee2 = new Employee();

        employee2.setName("Dan Thomas");

        employee2.setJoiningDate(new LocalDate(2012, 11, 11));

        employee2.setSalary(new BigDecimal(20000));

        employee2.setSsn("ssn00000002");

        /*

         * Persist both Employees

         */

        service.saveEmployee(employee1);

        service.saveEmployee(employee2);

        /*

         * Get all employees list from database

         */

        List<Employee> employees = service.findAllEmployees();

        for (Employee emp : employees) {

            System.out.println(emp);

        }

        /*

         * delete an employee

         */

        service.deleteEmployeeBySsn("ssn00000002");

        /*

         * update an employee

         */

        Employee employee = service.findBySsn("ssn00000001");

        employee.setSalary(new BigDecimal(50000));

        service.updateEmployee(employee);

        /*

         * Get all employees list from database

         */

        List<Employee> employeeList = service.findAllEmployees();

        for (Employee emp : employeeList) {

            System.out.println(emp);

        }

        context.close();

    }

}
注意,假如你想删除AppConfig文件,那么只需将
AbstractApplicationContext context = new AnnotationConfigApplicationContext(AppConfig.class);
替换为
AnnotationConfigApplicationContext context = new AnnotationConfigApplicationContext();context.scan("com.websystique.spring"); context.refresh();Employee [id=1, name=Han Yenn, joiningDate=2010-10-10, salary=10000, ssn=ssn00000001]
Employee [id=2, name=Dan Thomas, joiningDate=2012-11-11, salary=20000, ssn=ssn00000002]
Employee [id=1, name=Han Yenn, joiningDate=2010-10-10, salary=50000, ssn=ssn00000001]
工程代码
http://websystique.com/?smd_process_download=1&download_id=802
注:源码EmployeeDaoImpl类中有一处错误,将26行表名Employee改成EMPLOYEE即可。
【译】Spring 4 + Hibernate 4 + Mysql + Maven集成例子(注解 + XML)的更多相关文章
- Spring 4 MVC+Hibernate 4+MySQL+Maven使用注解集成实例
Spring 4 MVC+Hibernate 4+MySQL+Maven使用注解集成实例 转自:通过注解的方式集成Spring 4 MVC+Hibernate 4+MySQL+Maven,开发项目样例 ...
- Spring第12篇—— Spring对Hibernate的SessionFactory的集成功能
由于Spring和Hibernate处于不同的层次,Spring关心的是业务逻辑之间的组合关系,Spring提供了对他们的强大的管理能力, 而Hibernate完成了OR的映射,使开发人员不用再去关心 ...
- Spring3 + Spring MVC+ Mybatis 3+Mysql 项目整合(注解及源码)
Spring3 + Spring MVC+ Mybatis 3+Mysql 项目整合(注解及源码) 备注: 之前在Spring3 + Spring MVC+ Mybatis 3+Mysql 项目整合中 ...
- spring+struts2+hibernate框架搭建(Maven工程)
搭建Spring 1.porm.xml中添加jar包 <!-- spring3 --> <dependency> <groupId>org.springframew ...
- spring+springmvc+hibernate架构、maven分模块开发样例小项目案例
maven分模块开发样例小项目案例 spring+springmvc+hibernate架构 以用户管理做測试,分dao,sevices,web层,分模块开发測试!因时间关系.仅仅測查询成功.其它的准 ...
- Spring和Hibernate结合的一个小例子
1.新建一个SpringHibernate的maven项目 2.pom文件的依赖为 <dependency> <groupId>junit</groupId> &l ...
- Spring Boot (五)Spring Data JPA 操作 MySQL 8
一.Spring Data JPA 介绍 JPA(Java Persistence API)Java持久化API,是 Java 持久化的标准规范,Hibernate是持久化规范的技术实现,而Sprin ...
- Spring MVC Hibernate MySQL Integration(集成) CRUD Example Tutorial【摘】
Spring MVC Hibernate MySQL Integration(集成) CRUD Example Tutorial We learned how to integrate Spring ...
- Maven+Spring+Hibernate+Shiro+Mysql简单的demo框架(二)
然后是项目下的文件:完整的项目请看 上一篇 Maven+Spring+Hibernate+Shiro+Mysql简单的demo框架(一) 项目下的springmvc-servlet.xml配置文件: ...
随机推荐
- What is Away3D
做了几个基于Flash平台的3D的项目,一路走来收获颇多.Away3D作为一个开源的Flash3D引擎,在3D页游领域,无疑是当前OGRE在国内的地位. 翻译出了多年前做Away3D中国社区的时候翻译 ...
- [MongoDB] 32Bit构建上文件大小限制问题
一. 问题概述 今天看看爬虫抓取的数据,发现数据无法插入,首先想到的就是32Bit构建的文件大小限制问题,检查一下还真的是.本文把整个检查问题,解决问题的过程记录下来. 问题: "s ...
- Centos6.5中安装和配置vsftp详细总结
一.vsftp安装篇 #查看是否安装:rpm -qa|grep vsftpd#卸载vsftpdrpm -e vsftpd-2.2.2-11.el6_3.1x86_64 --nodeps# 安装vsft ...
- 【PRINCE2是什么】PRINCE2认证之七大原则(7)
我们先来回顾一下,PRINCE2七大原则分别是持续的业务验证,经验学习,角色与责任,按阶段管理,例外管理,关注产品,剪裁 第七个原则:根据项目环境剪裁 PRINCE2的价值在于它是一个通用的项目管理方 ...
- 查看Windows下引起Oracle CPU占用率高的神器-qslice
前言: qslice是一个win2000的工具包,能分析进程的cpu占用率,我们用于分析oracle的性能 这是绿色的软件无需安装. 我们经常会碰到oracle的CPU占用居高不下,无法快速定位到问题 ...
- vue-router2.0 组件之间传参及获取动态参数
<li v-for=" el in hotLins" > <router-link :to="{path:'details',query: {id:el ...
- 使用PowerShell收集多台服务器的性能计数器
写在前面 当管理多台Windows Server服务器时(无论是DB.AD.WEB以及其他的应用服务器),当出现性能或其他问题后,参阅性能计数器都是一个非常好的维度从而推测出问题可能出现的原因 ...
- jQuery全局Ajax事件处理器
1. .ajaxComplete( handler(event, XMLHttpRequest, ajaxOptions) ) 每当一个Ajax请求完成,jQuery就会触发ajaxComplete ...
- AutoMapper对internal访问级别属性的映射
最近在使用DDD重新搭建公司内部OA的架构,具体情况搭好了应该会写一下,这里说的是今天遇到的问题. 先简单说一下相关的几个部分: 1.聚合.聚合分成了两个模块:一个包含审批单据等估计至少今年不会怎么变 ...
- javascript学习之BOM
BOM是browser object model的缩写,简称浏览器对象模型.先看看下面这张图 window对象是BOM的顶层(核心)对象,所有对象都是通过它延伸出来的,也可以称为window的子对象. ...