
0020SpringBoot使用SpringCloud中的eureka实现远程调用
要实现远程调用,主要需要三个module:一个注册中心、一个服务提供者、一个服务消费者,然后进行各自的配置和编码,详细内容如下:
1、建一个空的project,创建3各module
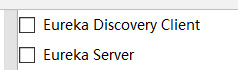
a、注册中心模块 eureka-server,依赖Eureka Server
b、服务提供者 provider-ticket,依赖Eureka Discovery Client
c、服务消费者 consumer-user,依赖Eureka Discovery Client
2、注册中心相关
a、编写application.yml
b、在主类上加上注解@EnableEurekaServer
3、编写服务提供者
a、编写TicketService类
b、编写TicketController类
c、配置application.yml
d、启动应用,访问controller的方法看是否成功
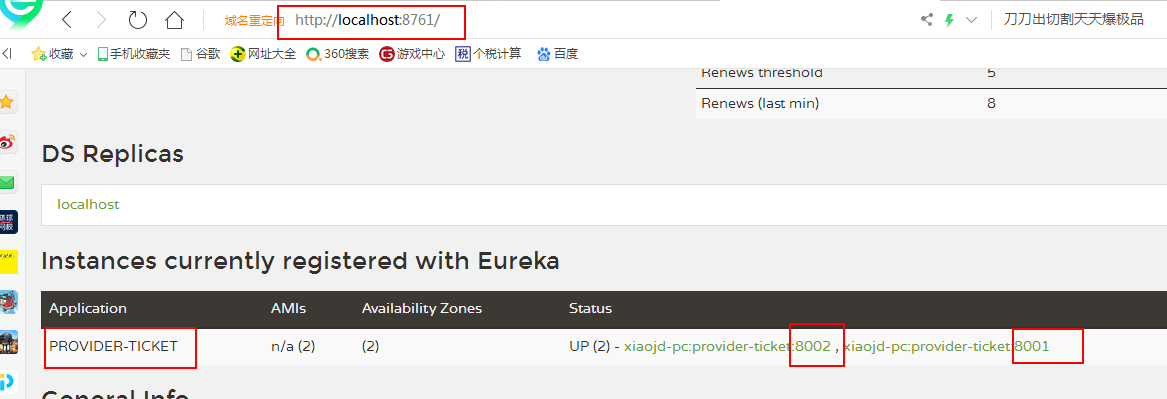
e、8001端口用maven打包一次,8002端口用maven打包一次,然后在cmd窗口分别用java -jar启动两个jar包,可在注册中心中查看到注册了两个服务,
此步骤是为了服务消费者调用的时候能看到负载均衡的效果
4、编写服务消费者
a、配置application.yml
b、在主类中使用@EnableDiscoveryClient注解来发现注册中心的服务,并且在主类中将RestTemplate类以@Bean的形式注册到容器中,使用
@LoadBalanced注解来达到远程调用服务提供者的时候使用负载均衡机制
c、编写UserController类,该类中使用RestTemplate来调用远程服务
2、3、4步骤具体如下:
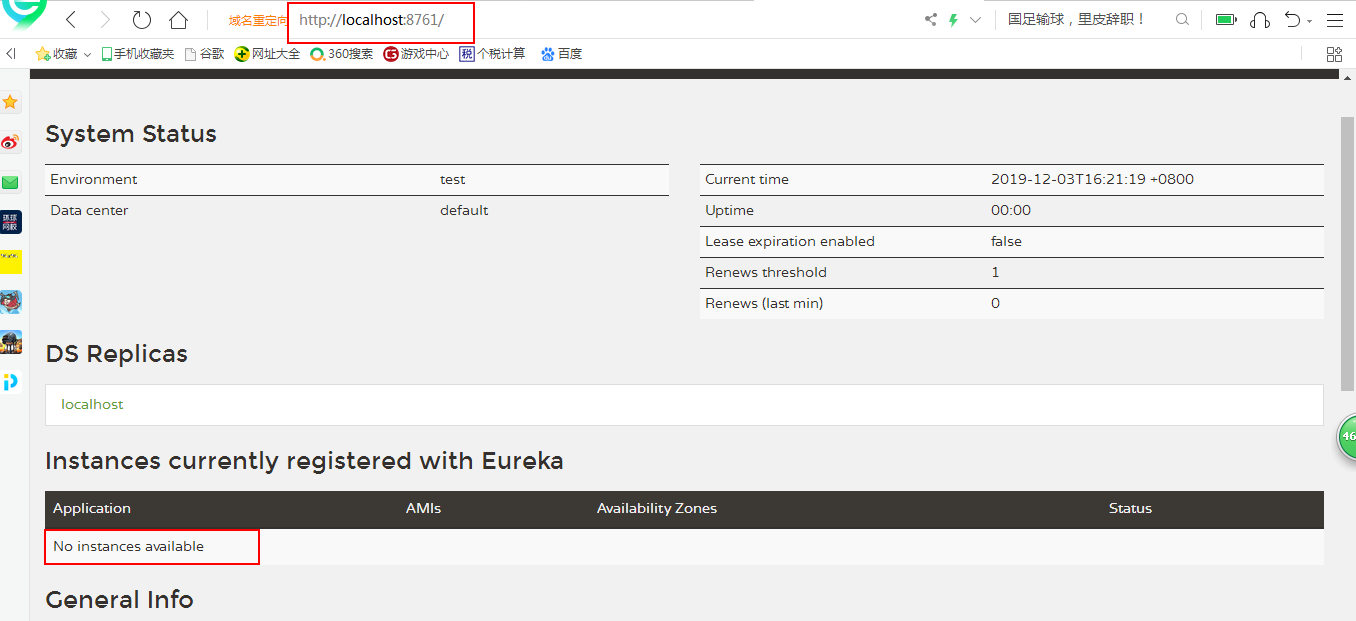
2、注册中心相关
a、编写application.yml
#访问端口8761
server:
  port: 8761
eureka:
  instance:
    hostname: eureka-server #注册中心实例名
  client:
    register-with-eureka: false #不注册自己
    fetch-registry: false #不发现自己
    service-url:
      defaultZone: http://localhost:8761/eureka/ #服务提供者和消费者需要绑定的注册中心地址
b、在主类上加上注解@EnableEurekaServer
package com.example;

import org.springframework.boot.SpringApplication;
import org.springframework.boot.autoconfigure.SpringBootApplication;
import org.springframework.cloud.netflix.eureka.server.EnableEurekaServer;

@EnableEurekaServer
@SpringBootApplication
public class EurekaServerApplication {

    public static void main(String[] args) {
        SpringApplication.run(EurekaServerApplication.class, args);
    }

}
3、编写服务提供者
a、编写TicketService类
package com.example.providerticket.service;

import org.springframework.stereotype.Service;

@Service
public class TicketService {
    public String getTicket(){
        System.out.println("端口是:8002");
        return "《厉害了,我的国》";
    }
}
b、编写TicketController类
package com.example.providerticket.controller;

import com.example.providerticket.service.TicketService;
import org.springframework.beans.factory.annotation.Autowired;
import org.springframework.web.bind.annotation.GetMapping;
import org.springframework.web.bind.annotation.RestController;

@RestController
public class TicketController {
    @Autowired
    TicketService ticketService;
    //消费方调用该方法时也使用该路径
    @GetMapping("/ticket")
    public String getTicket(){
        return ticketService.getTicket();
    }
}
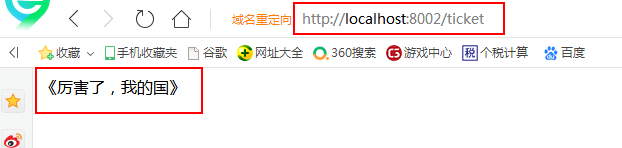
启动服务,并访问如下:
c、配置application.yml
server:
  port: 8002 #访问端口8002,打不同端口包时可改为8001
spring:
  application:
    name: provider-ticket #名字可以任意取
eureka:
  instance:
    prefer-ip-address: true  #使用ip地址
  client:
    service-url:
      defaultZone: http://localhost:8761/eureka/  #与注册中心填写的内容相同
d、启动应用,访问controller的方法看是否成功
e、8001端口用maven打包一次,8002端口用maven打包一次,然后在cmd窗口分别用java -jar启动两个jar包,可在注册中心中查看到注册了两个服务,
此步骤是为了服务消费者调用的时候能看到负载均衡的效果
4、编写服务消费者
a、配置application.yml
server:
  port: 8200
spring:
  application:
    name: consumer-user
eureka:
  instance:
    prefer-ip-address: true
  client:
    service-url:
      defaultZone: http://localhost:8761/eureka/
b、在主类中使用@EnableDiscoveryClient注解来发现注册中心的服务,并且在主类中将RestTemplate类以@Bean的形式注册到容器中,使用
@LoadBalanced注解来达到远程调用服务提供者的时候使用负载均衡机制
package com.example.consumeruser;

import org.springframework.boot.SpringApplication;
import org.springframework.boot.autoconfigure.SpringBootApplication;
import org.springframework.boot.autoconfigure.web.client.RestTemplateAutoConfiguration;
import org.springframework.boot.web.client.RestTemplateBuilder;
import org.springframework.cloud.client.discovery.EnableDiscoveryClient;
import org.springframework.cloud.client.loadbalancer.LoadBalanced;
import org.springframework.context.annotation.Bean;
import org.springframework.web.client.RestTemplate;

//加上@EnableDiscoveryClient注解,消费者才能发现注册中心的服务
@EnableDiscoveryClient
@SpringBootApplication
public class ConsumerUserApplication {

    public static void main(String[] args) {
        SpringApplication.run(ConsumerUserApplication.class, args);
    }

    //RestTemplate是消费者访问远程服务的工具,所以需要先注册到容器中,用的时候使用@Autowired取出来就可以用
    //@LoadBalanced注解用于说明调用远程服务时使用负载均衡机制
    @Bean
    @LoadBalanced
    public RestTemplate restTemplate(){
        return  new RestTemplate();
    }

}
c、编写UserController类,该类中使用RestTemplate来调用远程服务
package com.example.consumeruser.controller;

import org.springframework.beans.factory.annotation.Autowired;
import org.springframework.web.bind.annotation.GetMapping;
import org.springframework.web.bind.annotation.RestController;
import org.springframework.web.client.RestTemplate;

@RestController
public class UserController {
    @Autowired
    RestTemplate restTemplate;
    @GetMapping("buy")
    public String buyTicket(String name){
        //http://后不需要写ip地址和端口号,这样才能根据服务提供方的应用名字去负载均衡到不同的ip和端口
        //provider-ticket(不区分大小写) 为服务提供方在注册中心注册的application名字
        //ticket为服务提供方访问对应方法时使用的路径
        String str = restTemplate.getForObject("http://provider-ticket/ticket",String.class);
        return name + "购买了" + str;
    }
}

启动消费者服务,并访问测试:
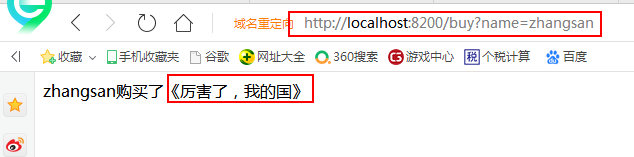
说明消费者能够调用到服务提供者的方法,且观察控制台,轮流打印8001端口和8002端口,说明负载均衡也生效了。
如有理解不到之处,望指正。
0020SpringBoot使用SpringCloud中的eureka实现远程调用的更多相关文章
- 在maven项目中 配置代理对象远程调用crm
1 在maven项目中配置代理对象远程调用crm 1.1 在项目的pom.xml中引入CXF的依赖 <dependency> <groupId>org.apache.cxf&l ...
- 阶段5 3.微服务项目【学成在线】_day09 课程预览 Eureka Feign_07-Feign远程调用-Feign测试
2.2.1 Feign介绍 Feign是Netflix公司开源的轻量级rest客户端,使用Feign可以非常方便的实现Http 客户端.Spring Cloud引入 Feign并且集成了Ribbon实 ...
- 阶段5 3.微服务项目【学成在线】_day09 课程预览 Eureka Feign_06-Feign远程调用-Ribbon测试
2.1.2 Ribbon测试 Spring Cloud引入Ribbon配合 restTemplate 实现客户端负载均衡.Java中远程调用的技术有很多,如: webservice.socket.rm ...
- 阶段5 3.微服务项目【学成在线】_day09 课程预览 Eureka Feign_05-Feign远程调用-客户端负载均衡介绍
2 Feign远程调用 在前后端分离架构中,服务层被拆分成了很多的微服务,服务与服务之间难免发生交互,比如:课程发布需要调用 CMS服务生成课程静态化页面,本节研究微服务远程调用所使用的技术. 下图是 ...
- SpringCloud(二) - Eureka注册中心,feign远程调用,hystrix降级和熔断
1.项目模块介绍 2. 父项目 主要依赖 spring-cloud 的 版本控制 <properties> <!-- springCloud 版本 --> <scd.ve ...
- SpringCloud学习(3)——Eureka服务注册中心及服务发现
Eureka概述: Eureka是Netflix的一个子模块, 也是核心模块之一.Eureka是一个基于REST的服务, 用于定位服务, 以实现云端中间层服务发现和故障转移.服务注册与发现对于微服务框 ...
- JAVAEE——BOS物流项目08:配置代理对象远程调用crm服务、查看定区中包含的分区、查看定区关联的客户
1 学习计划 1.定区关联客户 n 完善CRM服务中的客户查询方法 n 在BOS项目中配置代理对象远程调用crm服务 n 调整定区关联客户页面 n 实现定区关联客户 2.查看定区中包含的分区 n 页面 ...
- ABAP RFC远程调用
声明:原创作品,转载时请注明文章来自SAP师太技术博客( 博/客/园www.cnblogs.com):www.cnblogs.com/jiangzhengjun,并以超链接形式标明文章原始出处,否则将 ...
- 《Spring技术内幕》学习笔记17——Spring HTTP调用器实现远程调用
1.Spring中,HTTPInvoker(HTTP调用器)是通过基于HTTP协议的分布式远程调用解决方案,和java RMI一样,HTTP调用器也需要使用java的对象序列化机制完成客户端和服务器端 ...
随机推荐
- Win10利用CodeBlocks搭建Objective-C开发环境(一)
为了学习ios开发,而手头没有苹果机,若在windows平台下学习objective-c编程.则需要安装OC开发环境, 经过在网上查阅各种相关资料,历经多次失败,终于安装并测试成功,特将安装过程和经验 ...
- STL常用
nth_element(first,nth,last) first,last 第一个和最后一个迭代器,也可以直接用数组的位置. 将第n个大的元素放到nth位置上,左边元素都小于它,右边元素都大于它. ...
- mac upgrade node and npm
一直以来, 我们都可以很轻松的更新npm: npm install npm -g 而Node我却是很久没有更新了, 记得当时好像是使用安装包安装的, 实际上有更加简单的安装方法. 实际上Mac上有一个 ...
- 原生js 实现better-scroll效果,饿了么菜单内容联动,即粘即用
<!DOCTYPE html> <html> <head> <meta http-equiv="Content-Type" content ...
- [#] - .Net平台的实时性能监控
App Metricshttps://www.app-metrics.io ASP.NET Core之跨平台的实时性能监控http://www.cnblogs.com/GuZhenYin/p/7170 ...
- .NET Core IOC AOP
IOC简介 IOC思想 把类当做组件或服务来看待,组件内一定要高内聚,组件之间一定要低耦合,既然要保持低耦合,那就一定不要轻易的去new什么对象. 那组件之间的交互怎么处理呢?那最好的方式就是把new ...
- oracle加密--wallet
SQL> SELECT * FROM V$ENCRYPTION_WALLET; WRL_TYPE WRL_PARAMETER STATUS -------------------- ------ ...
- Django出错Xadmin后台报list index out of range
input_html = [ht for ht in super(AdminSplitDateTime, self).render(name, value, attrs).split('/>&l ...
- Linux下实现web服务器
说明:暂时只是实现了静态网页的响应 #include <stdio.h> #include <sys/types.h> /* See NOTES */ #include < ...
- Python中turtle库的使用
Turtle图形库 Turtle库是Python内置的图形化模块,属于标准库之一,位于Python安装目录的lib文件夹下,常用函数有以下几种: 画笔控制函数 penup():抬起画笔: pendow ...