Python3处理文档_word文档(三)_向word文档中添加表格
利用python-docx自动生成表格
add_table()方法会返回一个Table对象。rows代表行数,cols代表列数;style代表样式,具体可以查看官方文档。
一、创建一个8行5列的表格
from docx import *

doc=Document()

table = doc.add_table(rows=8,  cols=5)

doc.save('table.docx')
上述代码就在word里插入了一个8行、5列的表格。(有8*5=40个cell)
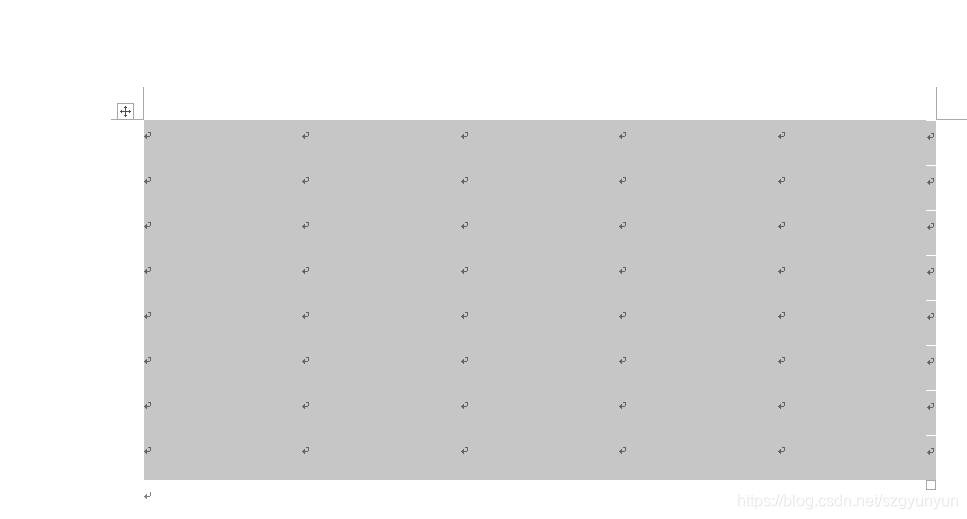
生成的每个cell都是有“坐标”的,比如上面的表格左上角cell为(0,0),右下角cell为(7,4)
Table()对象中报了对表格进行操作的方法和属性,如下:
add_column(width):添加列(需要设置列宽)

add_row():添加行

cell(row_idx, col_idx):访问单个单元格

row_cells(row_idx):返回一个序列(行号为row_idx的行内所有单元格)

column_cells(column_idx):返回一个序列(列号为column_idx的列内所有单元格)

rows:返回的是_Rows对象,是一个包含了所有行(_Row对象)的列表

columns:返回的是_Columns对象,是一个包含了所有列(_Column对象)的列表

想要熟练使用python-docx操作Word文档:需要认识Table()、_Cell()、 _Row()、 _Rows() _Column() 和 _Columns()五个类。
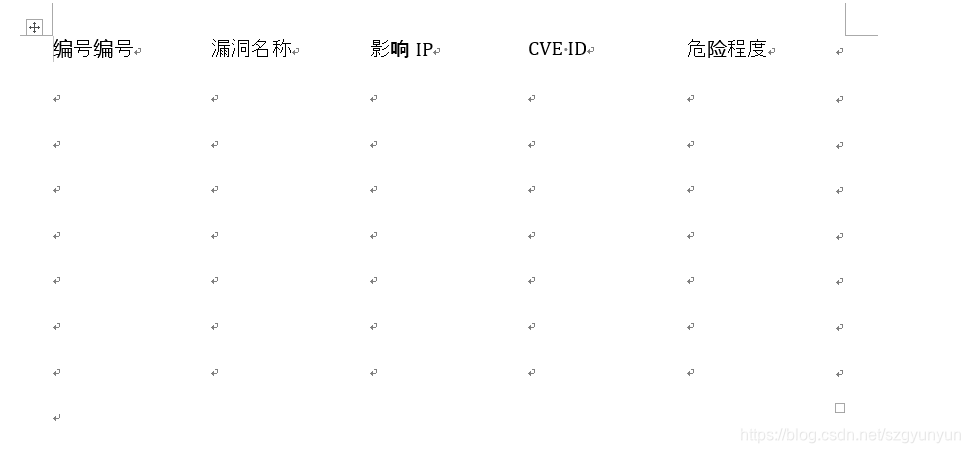
二、设置表头
rows代表行数,rows[0]即第一行。hdr_cells = table.rows[0].cells,hdr_cells即第一行的所有单元格。
from docx import *

doc=Document()

table = doc.add_table(rows=8,  cols=5)

hdr_cells = table.rows[0].cells

hdr_cells[0].text = '编号编号'

hdr_cells[1].text = '漏洞名称'

hdr_cells[2].text = '影响IP'

hdr_cells[3].text = 'CVE ID'

hdr_cells[4].text = '危险程度'

doc.save('table.docx')
运行结果:
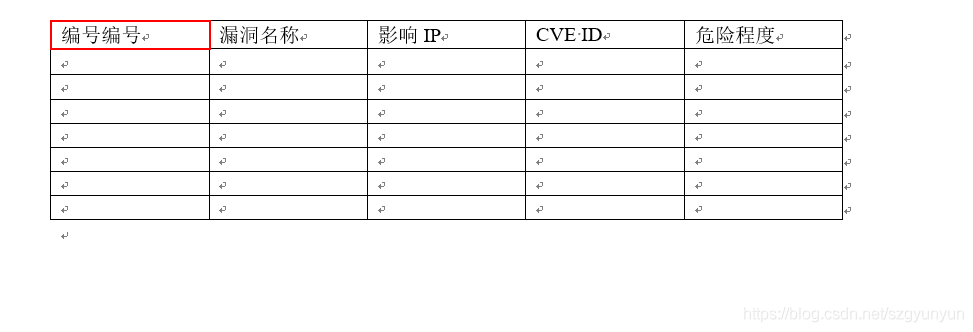
三、设置表格样式
上边的表格是默认的没有格式的,下边提供了两种设置表格边框的方式.
1、使用系统style
#方法一:创建表格时设置

doc=Document()

table = doc.add_table(rows=8, cols=5,style =‘Table Grid’)

doc.save('table.docx')

#方法二:创建表格后,再设置

doc=Document()

table = doc.add_table(rows=8, cols=5)

table.style =‘Table Grid’

doc.save('table.docx')
运行结果:

2、自定义表格边框
#设置表格的边框

def set_cell_border(cell, **kwargs):

    """

    Set cell`s border

    Usage:

    set_cell_border(

        cell,

        top={"sz": 12, "val": "single", "color": "#FF0000", "space": "0"},

        bottom={"sz": 12, "color": "#00FF00", "val": "single"},

        left={"sz": 24, "val": "dashed", "shadow": "true"},

        right={"sz": 12, "val": "dashed"},

    )

    """

    tc = cell._tc

    tcPr = tc.get_or_add_tcPr()

    # check for tag existnace, if none found, then create one

    tcBorders = tcPr.first_child_found_in("w:tcBorders")

    if tcBorders is None:

        tcBorders = OxmlElement('w:tcBorders')

        tcPr.append(tcBorders)

    # list over all available tags

    for edge in ('left', 'top', 'right', 'bottom', 'insideH', 'insideV'):

        edge_data = kwargs.get(edge)

        if edge_data:

            tag = 'w:{}'.format(edge)

            # check for tag existnace, if none found, then create one

            element = tcBorders.find(qn(tag))

            if element is None:

                element = OxmlElement(tag)

                tcBorders.append(element)

            # looks like order of attributes is important

            for key in ["sz", "val", "color", "space", "shadow"]:

                if key in edge_data:

                    element.set(qn('w:{}'.format(key)), str(edge_data[key]))
调用该函数:
set_cell_border(hdr_cells[0],

        top={"sz": 12, "val": "single", "color": "#FF0000"},

        bottom={"sz": 12, "val": "single", "color": "#FF0000"},

        left={"sz": 12, "val": "single", "color": "#FF0000"},

        right={"sz": 12, "val": "single", "color": "#FF0000"},

    )
整体代码:
from docx import *

from docx.oxml import OxmlElement

from docx.oxml.ns import  qn##qn#设置中文字体

#设置表格的边框

def set_cell_border(cell, **kwargs):

    """

    Set cell`s border

    Usage:

    set_cell_border(

        cell,

        top={"sz": 12, "val": "single", "color": "#FF0000", "space": "0"},

        bottom={"sz": 12, "color": "#00FF00", "val": "single"},

        left={"sz": 24, "val": "dashed", "shadow": "true"},

        right={"sz": 12, "val": "dashed"},

    )

    """

    tc = cell._tc

    tcPr = tc.get_or_add_tcPr()

    # check for tag existnace, if none found, then create one

    tcBorders = tcPr.first_child_found_in("w:tcBorders")

    if tcBorders is None:

        tcBorders = OxmlElement('w:tcBorders')

        tcPr.append(tcBorders)

    # list over all available tags

    for edge in ('left', 'top', 'right', 'bottom', 'insideH', 'insideV'):

        edge_data = kwargs.get(edge)

        if edge_data:

            tag = 'w:{}'.format(edge)

            # check for tag existnace, if none found, then create one

            element = tcBorders.find(qn(tag))

            if element is None:

                element = OxmlElement(tag)

                tcBorders.append(element)

            # looks like order of attributes is important

            for key in ["sz", "val", "color", "space", "shadow"]:

                if key in edge_data:

                    element.set(qn('w:{}'.format(key)), str(edge_data[key]))

doc=Document()

#设置默认字体

doc.styles['Normal'].font.name = u'宋体'

doc.styles['Normal'].font.name = u'宋体'

doc.styles['Normal'].font.name = 'Times New Roman'

doc.styles['Normal']._element.rPr.rFonts.set(qn('w:eastAsia'), u'宋体')

table = doc.add_table(rows=8,  cols=5)

table.style ='Table Grid'

hdr_cells = table.rows[0].cells

hdr_cells[0].text = '编号编号'

hdr_cells[1].text = '漏洞名称'

hdr_cells[2].text = '影响IP'

hdr_cells[3].text = 'CVE ID'

hdr_cells[4].text = '危险程度'

# #用table的row方法可以得到一个表格的一行list其中包含了这一行的所有cell

# hdr_cells0 = table.rows[1].cells

# hdr_cells0[0].add_paragraph('1')

# hdr_cells0[2].add_paragraph('192.168.1.1')

# hdr_cells0[3].add_paragraph('CVE-2019-0708')

# hdr_cells0[4].add_paragraph('高')

set_cell_border(hdr_cells[0],

        top={"sz": 12, "val": "single", "color": "#FF0000"},

        bottom={"sz": 12, "val": "single", "color": "#FF0000"},

        left={"sz": 12, "val": "single", "color": "#FF0000"},

        right={"sz": 12, "val": "single", "color": "#FF0000"},

    )

doc.save('table.docx')
运行结果:
三、向表格中添加数据
1、向表格中第二行添加数据
hdr_cells0 = table.rows[1].cells

hdr_cells0[0].add_paragraph('1')

hdr_cells0[1].add_paragraph('CVE-2019-0708 远程桌面代码执行漏洞')

hdr_cells0[2].add_paragraph('192.168.1.1')

hdr_cells0[3].add_paragraph('CVE-2019-0708')

hdr_cells0[4].add_paragraph('高')
运行结果:

2、向指定单元格添加数据
cell = table.cell(1, 3)  # 获取第二行三列的表格对象(索引是从0开始的)

cell.text='向第二行第三列添加的文字'# 在单元格中添加文本:
运行结果:

四、设置表格对齐
from docx.enum.text import WD_PARAGRAPH_ALIGNMENT

from docx.enum.table import WD_TABLE_ALIGNMENT, WD_CELL_VERTICAL_ALIGNMENT

table.alignment = WD_TABLE_ALIGNMENT.CENTER  # 设置表格居中对齐

for column in table.columns:  # 所有列

    for cell in column.cells:  # 所有单元格

        for paragraph in cell.paragraphs:  # 所有段落

            paragraph.paragraph_format.alignment = WD_PARAGRAPH_ALIGNMENT.CENTER  # 水平对齐,居中
运行结果:

我公众号大家可以关注支持一哈
主要记录一些网络安全和Python的学习。

Python3处理文档_word文档(三)_向word文档中添加表格的更多相关文章
- WPS Office for Mac如何修改Word文档文字排列?WPS office修改Word文档文字排列方向教程
Word文档如何改变文字的排列方向?最新版WPS Office for Mac修复了文字排版相关的细节问题,可以更快捷的进行Word编辑,WPS Office在苹果电脑中如何修改Word文档文字排列方 ...
- MVC学习笔记(三)—用EF向数据库中添加数据
1.在EFDemo文件夹中添加Controllers文件夹(用的是上一篇MVC学习笔记(二)—用EF创建数据库中的项目) 2.在Controllers文件夹下添加一个空的控制器(StudentsCon ...
- ASP.NET生成WORD文档,服务器部署注意事项
网上转的,留查备用,我服务器装的office2007所以修改的是Microsoft Office word97 - 2003 文档这一个. ASP.NET生成WORD文档服务器部署注意事项 1.Asp ...
- WebBrowser打开Word文档的一些注意事项
WebBrowser打开Word文档的一些注意事项 分类: C#word2010-03-31 21:26 5640人阅读 评论(3) 收藏 举报 webbrowser文档browser工具object ...
- Java将数据写入word文档(.doc)
Java可用org.apache.poi包来操作word文档.org.apache.poi包可于官网上下载,解压后各jar作用如下图所示: 可根据需求导入对应的jar. 一.HWPFDocument类 ...
- POI生成word文档完整案例及讲解
一,网上的API讲解 其实POI的生成Word文档的规则就是先把获取到的数据转成xml格式的数据,然后通过xpath解析表单式的应用取值,判断等等,然后在把取到的值放到word文档中,最后在输出来. ...
- 算法提高 新建Microsoft Word文档
算法提高 新建Microsoft Word文档 时间限制:1.0s 内存限制:256.0MB 问题描述 L正在出题,新建了一个word文档,想不好取什么名字,身旁一人惊问:“你出 ...
- python_docx制作word文档
一.docx模块 Python可以利用python-docx模块处理word文档,处理方式是面向对象的.也就是说python-docx模块会把word文档,文档中的段落.文本.字体等都看做对象,对对象 ...
- C语言 · 新建Microsoft Word文档
算法提高 新建Microsoft Word文档 时间限制:1.0s 内存限制:256.0MB 问题描述 L正在出题,新建了一个word文档,想不好取什么名字,身旁一人惊问:“你出的题 ...
- 算法笔记_104:蓝桥杯练习 算法提高 新建Microsoft Word文档(Java)
目录 1 问题描述 2 解决方案 1 问题描述 问题描述 L正在出题,新建了一个word文档,想不好取什么名字,身旁一人惊问:“你出的题目叫<新建Microsoft Word文档>吗? ...
随机推荐
- “翼”鸣惊人,天翼云两篇论文被ACM ICPP 2024收录!
*日,由天翼云科技有限公司弹性计算产品线天玑实验室撰写的两篇论文<PheCon: Fine-Grained VM Consolidation with Nimble Resource Defra ...
- 探寻SRC漏洞平台
探寻SRC漏洞平台 SRC(Security Researcher Acknowledgement Program)是各大互联网厂商开启的漏洞发现奖励计划,也就是我们常说的漏洞赏金计划(bug bou ...
- Apache Amoro数据湖管理和治理工具部署
一.Amoro介绍 2024 年 3 月 11 日,Amoro 项目顺利通过投票,正式进入 Apache 软件基金会(ASF,Apache Software Foundation)的孵化器,成为 AS ...
- AI 如何重塑劳动力市场:基于 Claude 数据的深度分析
前言 本文翻译自 Anthropic 今天发布的 The Anthropic Economic Index ,经济指数报告,这份报告基于 Claude 的数据对目前的 AI 使用情况做了汇总. 引言 ...
- 动手学深度学习-python基础知识介绍(数据处理基础流程)part2
数据预处理 import os os.makedirs(os.path.join('..','data'),exist_ok=True) data_file=os.path.join('..','da ...
- 清华大学推出第三讲普通人如何抓住 DeepSeek 红利,普通人必备的免费AI手册!
前言 在当今这个日新月异的时代,人工智能(AI)技术正以前所未有的速度改变着我们的生活.工作和社会结构.从智能手机上的语音助手到自动驾驶汽车,从医疗诊断到学术研究,AI的应用无处不在,它如同一股不可阻 ...
- Keepalived学习,双主热备高可用
双主热备可以看做双机主备的升级(双机主备链接 https://www.cnblogs.com/hmxs/p/12041735.html),它是为了让两台设备都能提供服务,而不是主节点正常时,备用节点一 ...
- php 获取post方法payload(json)形式参数的方法
用默认get方式传递的时候,接收方式没有改变,仍然是$_GET. 但是用post方式传递数据的时候,用$_POST无法接收数据,应为小程序默认post发送的content-type为applicati ...
- [tldr] 使用ip.sb检查自己所在局域网的公网IP
使用ip a等一些命令行工具可以帮助我们检查自己的内网IP,但是,如何获取自己的在公网下的IP(即当前所在的局域网被分配的公网IP) 如果使用爬虫,这个IP也是很重要的.BAN IP就是这个IP ht ...
- go module基本使用
前提 go版本为1.13及以上 官方文档 如果你想更深层次的了解GO MODULE的意义及开发者们的顾虑,可以直接访问官方文档(EN) https://github.com/golang/go/wik ...