
vue 图片放大镜效果
插件名称:vue-photo-zoom-pro
https://github.com/Mater1996/vue-photo-zoom-pro
效果图
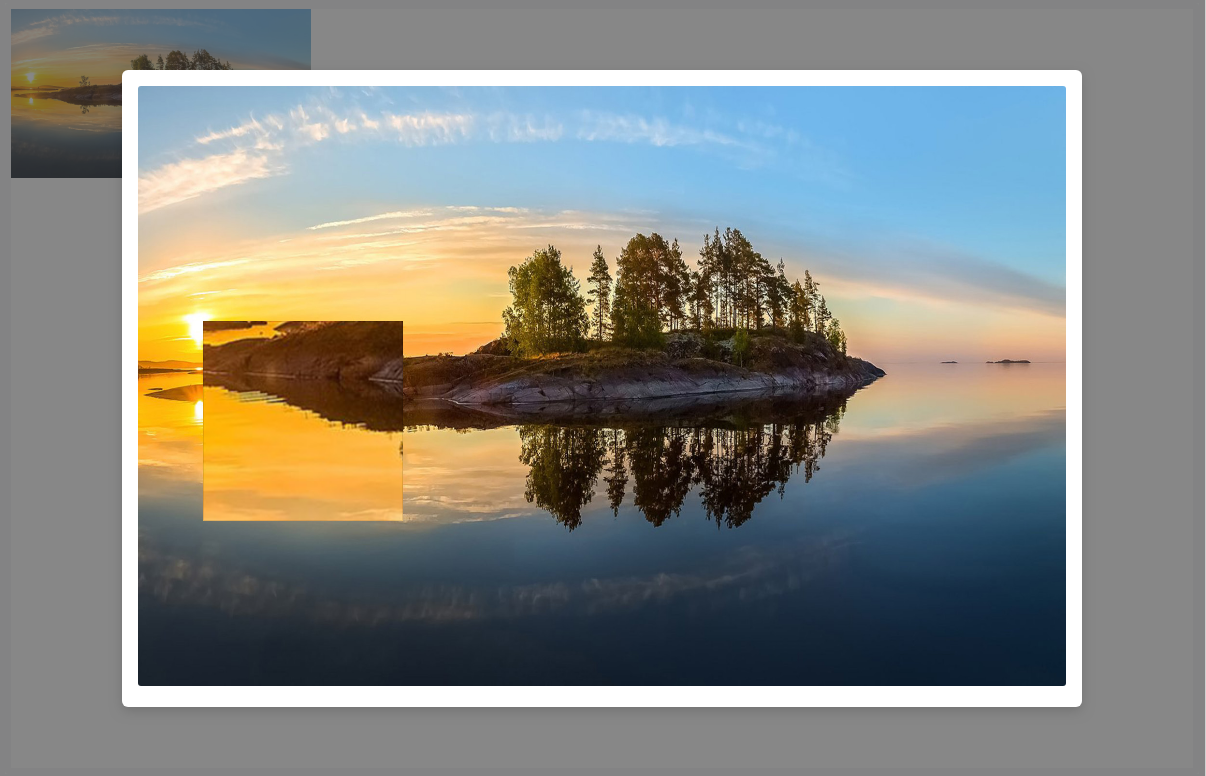
使用:
<template>

  <div class="images">

    <img style="width: 300px;" @click.stop="showBigPicture(url)" :src="url" alt="">

    <!-- 显示大图 -->

    <Modal v-model="pictureModal" width="960" footer-hide :closable="closable" class-name="vertical-center-modal">

      <photo-zoom :url="bigPictureUrl" :bigWidth="200" :scale="2"

        overlayStyle="width: 100%;height: 600px;border-radius: 3px;"></photo-zoom>

    </Modal>

  </div>

</template>

<script>

  import PhotoZoom from '@/components/photo-zoom'

  export default {

    components: { PhotoZoom },

    data() {

      return {

        url:'http://pic1.win4000.com/wallpaper/2019-01-28/5c4ebd381fc8b.jpg',

        bigPictureUrl:'',

        pictureModal: false,

        closable: false,

      }

    },

    methods: {

      showBigPicture(url) {

        this.pictureModal = true;

        this.bigPictureUrl = url;

      },

    },

  }

</script>
代码中使用了iviewUI的Modal,
组件内容:
index.vue:
<template>

  <div style="width: 100%;height: 100%">

    <vue-photo-zoom-pro :width="bigWidth" :url="url" :type="type" :scale="scale" :out-show="showType"

      :overlayStyle="overlayStyle">

    </vue-photo-zoom-pro>

  </div>

</template>

<script>

  import vuePhotoZoomPro from '@/components/photo-zoom/vue-photo-zoom-pro'

  export default {

    name: 'PicZoom',

    components: { vuePhotoZoomPro },

    data() {

      return {

        type: "square",

        showType: false,

      }

    },

    props: {

      url: {

        type: String,

        required: true,

        // default: require('@/assets/vehicle_img/blank_vehicle.jpg')

      },

      bigWidth: {

        type: Number,

        required: true,

        default: 168

      },

      scale: {

        type: Number,

        required: true,

        default: 2

      },

      overlayStyle: {

        type: String,

        default: 'width:100%;height:100%'

      }

    },

  }

</script>
vue-photo-zoom-pro.vue:
<template>

  <div class="pic-img">

    <div class="img-container">

      <img ref="img" @load="imgLoaded" :src="url" :style="overlayStyle" @error="imgerrorfun" />

      <div class="overlay" @mousemove.stop="!moveEvent && mouseMove($event)"

        @mouseout.stop="!leaveEvent && mouseLeave($event)" :style="overlayStyle">

      </div>

      <div v-if="!hideZoom && imgLoadedFlag &&!hideSelector" :class="['img-selector', {'circle': type === 'circle'}]"

        :style="[imgSelectorStyle, imgSelectorSize, imgSelectorPosition, !outShow && imgBg, !outShow && imgBgSize, !outShow && imgBgPosition]">

        <slot></slot>

      </div>

      <div v-if="outShow" v-show="!hideOutShow" :class="['img-out-show', {'base-line': baseline}]"

        :style="[imgOutShowSize, imgOutShowPosition, imgBg, imgBgSize, imgBgPosition]">

        <div v-if="pointer" class="img-selector-point"></div>

      </div>

    </div>

  </div>

</template>

<script>

  export default {

    name: "vue-photo-zoom-pro",

    props: {

      url: {

        type: String,

      },

      highUrl: String,

      width: {

        type: Number,

        default: 168

      },

      type: {

        type: String,

        default: "square",

        validator: function (value) {

          return ["circle", "square"].indexOf(value) !== -1;

        }

      },

      selectorStyle: {

        type: Object,

        default() {

          return {};

        }

      },

      outShowStyle: {},

      scale: {

        type: Number,

        default: 3

      },

      moveEvent: {

        type: [Object, MouseEvent],

        default: null

      },

      leaveEvent: {

        type: [Object, MouseEvent],

        default: null

      },

      hideZoom: {

        type: Boolean,

        default: false

      },

      outShow: {

        type: Boolean,

        default: false

      },

      pointer: {

        type: Boolean,

        default: false

      },

      baseline: {

        type: Boolean,

        default: false

      },

      overlayStyle: {

        type: String,

        default: 'width:100%;height:100%'

      },

    },

    data() {

      return {

        selector: {

          width: this.width,

          top: 0,

          left: 0,

          bgTop: 0,

          bgLeft: 0,

          rightBound: 0,

          bottomBound: 0,

          absoluteLeft: 0,

          absoluteTop: 0

        },

        imgInfo: {},

        $img: null,

        screenWidth: document.body.clientWidth,

        outShowInitTop: 0,

        outShowTop: 0,

        hideOutShow: true,

        imgLoadedFlag: false,

        hideSelector: false,

        timer: null

      };

    },

    watch: {

      moveEvent(e) {

        this.mouseMove(e);

      },

      leaveEvent(e) {

        this.mouseLeave(e);

      },

      url(n) {

        this.imgLoadedFlag = false;

        // let img = require('@/assets/vehicle_img/blank_vehicle.jpg')

        // if(n == img){

        //  this.outShow = false

        // }

      },

      width(n) {

        this.initSelectorProperty(n);

      },

      screenWidth(val) {

        if (!this.timer) {

          this.screenWidth = val;

          this.timer = setTimeout(() => {

            this.imgLoaded();

            clearTimeout(this.timer);

            this.timer = null;

          }, 400);

        }

      }

    },

    computed: {

      addWidth() {

        return !this.outShow ? (this.width / 2) * (1 - this.scale) : 0;

      },

      imgSelectorPosition() {

        let { top, left } = this.selector;

        return {

          top: `${top}px`,

          left: `${left}px`

        };

      },

      imgSelectorSize() {

        let width = this.selector.width;

        return {

          width: `${width}px`,

          height: `${width}px`

        };

      },

      imgSelectorStyle() {

        return this.selectorStyle;

      },

      imgOutShowSize() {

        let {

          scale,

          selector: { width }

        } = this;

        return {

          width: `${width * scale}px`,

          height: `${width * scale}px`

        };

      },

      imgOutShowPosition() {

        return {

          top: `${this.outShowTop}px`,

          right: `${-8}px`

        };

      },

      imgBg() {

        return {

          backgroundImage: `url(${this.highUrl || this.url})`

        };

      },

      imgBgSize() {

        let {

          scale,

          imgInfo: { height, width }

        } = this;

        return {

          backgroundSize: `${width * scale}px ${height * scale}px`

        };

      },

      imgBgPosition() {

        let { bgLeft, bgTop } = this.selector;

        return {

          backgroundPosition: `${bgLeft}px ${bgTop}px`

        };

      },

    },

    mounted() {

      this.$img = this.$refs["img"];

    },

    methods: {

      imgLoaded() {

        let imgInfo = this.$img.getBoundingClientRect();

        if (JSON.stringify(this.imgInfo) != JSON.stringify(imgInfo)) {

          this.imgInfo = imgInfo;

          this.initSelectorProperty(this.width);

          this.resetOutShowInitPosition();

        }

        if (!this.imgLoadedFlag) {

          this.imgLoadedFlag = true;

          this.$emit("created", imgInfo);

        }

      },

      mouseMove(e) {

        if (!this.hideZoom && this.imgLoadedFlag) {

          this.imgLoaded();

          const { pageX, pageY, clientY } = e;

          const { scale, selector, outShow, addWidth, outShowAutoScroll } = this;

          let { outShowInitTop } = this;

          const scrollTop = pageY - clientY;

          const { absoluteLeft, absoluteTop, rightBound, bottomBound } = selector;

          const x = pageX - absoluteLeft; // 选择器的x坐标 相对于图片

          const y = pageY - absoluteTop; // 选择器的y坐标

          if (outShow) {

            if (!outShowInitTop) {

              outShowInitTop = this.outShowInitTop = scrollTop + this.imgInfo.top;

            }

            this.hideOutShow && (this.hideOutShow = false);

            this.outShowTop =

              scrollTop > outShowInitTop ? scrollTop - outShowInitTop : 0;

          }

          this.hideSelector && (this.hideSelector = false);

          selector.top = y > 0 ? (y < bottomBound ? y : bottomBound) : 0;

          selector.left = x > 0 ? (x < rightBound ? x : rightBound) : 0;

          selector.bgLeft = addWidth - x * scale; // 选择器图片的坐标位置

          selector.bgTop = addWidth - y * scale;

        }

      },

      initSelectorProperty(selectorWidth) {

        const selectorHalfWidth = selectorWidth / 2;

        const selector = this.selector;

        const { width, height, left, top } = this.imgInfo;

        const { scrollLeft, scrollTop } = document.documentElement;

        selector.width = selectorWidth;

        selector.rightBound = width - selectorWidth;

        selector.bottomBound = height - selectorWidth;

        selector.absoluteLeft = left + selectorHalfWidth + scrollLeft;

        selector.absoluteTop = top + selectorHalfWidth + scrollTop;

      },

      mouseLeave() {

        this.hideSelector = true;

        if (this.outShow) {

          this.hideOutShow = true;

        }

      },

      reset() {

        Object.assign(this.selector, {

          top: 0,

          left: 0,

          bgLeft: 0,

          bgTop: 0

        });

        this.resetOutShowInitPosition();

      },

      resetOutShowInitPosition() {

        this.outShowInitTop = 0;

      },

      imgerrorfun(e) {

        // let img = require('@/assets/vehicle_img/blank_vehicle.jpg')

        // this.url = img

        // e.target.src = img

        // e.target.onerror= null

      }

    }

  };

</script>

<style scoped>

  .img-container { position: relative; }

  .overlay { cursor: crosshair; position: absolute; top: 0; left: 0; opacity: 0.5; z-index: 3; }

  .img-selector { position: absolute; cursor: crosshair; border: 1px solid rgba(0, 0, 0, 0.1); background-repeat: no-repeat; background-color: rgba(64, 64, 64, 0.6);}

  .img-selector.circle {border-radius: 50%;}

  .img-out-show {z-index: 5000;position: absolute;background-repeat: no-repeat;-webkit-background-size: cover;background-color: white;transform: translate(100%, 0);}

  .img-selector-point {position: absolute;width: 4px;height: 4px;top: 50%;left: 50%;transform: translate(-50%, -50%);background-color: black;}

  .img-out-show.base-line::after {position: absolute;box-sizing: border-box;content: "";width: 1px;top: 0;bottom: 0;left: 50%;transform: translateX(-50%);}

  .img-out-show.base-line::before {position: absolute;box-sizing: border-box;content: "";height: 1px;border: 1px dashed rgba(0, 0, 0, 0.36);left: 0;right: 0;top: 50%;transform: translateY(-50%);}

</style>
vue 图片放大镜效果的更多相关文章
- vue图片放大镜效果
原作者地址:https://github.com/lemontree2000/vue-magnify 经测试,原插件在使用时有bug,即在预览时进行鼠标滚动,导致遮罩层计算错误.我已修复该bug,特分 ...
- Magnifier.js - 支持鼠标滚轮缩放的图片放大镜效果
Magnifier.js 是一个 JavaScript 库,能够帮助你在图像上实现放大镜效果,支持使用鼠标滚轮放大/缩小功能.放大的图像可以显示在镜头本身或它的外部容器中.Magnifier.js 使 ...
- WPF设置VistualBrush的Visual属性制作图片放大镜效果
原文:WPF设置VistualBrush的Visual属性制作图片放大镜效果 效果图片:原理:设置VistualBrush的Visual属性,利用它的Viewbox属性进行缩放. XAML代码:// ...
- 原生javascript实现图片放大镜效果
当我们在电商网站上购买商品时,经常会看到这样一种效果,当我们把鼠标放到我们浏览的商品图片上时,会出现类似放大镜一样的一定区域的放大效果,方便消费者观察商品.今天我对这一技术,进行简单实现,实现图片放大 ...
- 【Demo】jQuery 图片放大镜效果——模仿淘宝图片放大效果
实现功能: 模仿淘宝图片放大效果,鼠标移动到小图片的某一处,放大镜对应显示大图片的相应位置. 实现效果: 实现代码: <!DOCTYPE html> <html> <he ...
- javascript图片放大镜效果展示
javascript图片放大镜效果展示 <!DOCTYPE html> <html> <head lang="en"> <meta cha ...
- canvas知识02:图片放大镜效果
效果截图: JS代码: <script> // 初始化canvas01和上下文环境 var cav01 = document.getElementById('cav01'); var cx ...
- jQuery实现图片放大镜效果
实现图片放大镜的原理: 给放大镜元素一个对应的html元素为<div class='right'> 设置这个div的宽高固定为某个值(350px,350px) 设置div的css为超出部分 ...
- 用css3的cursor:zoom-in/zoom-out实现微博看图片放大镜效果
1.前言 CSS3的出现解决了很多让人头疼的问题,至少我想很多童鞋都这样认为.css3的cursor属性大家用的应该是非常的多的,我想用的比较多的像cursor:pointer;cursor:help ...
随机推荐
- 【Linux命令】at、crontab定时任务
crontab定时任务(周期性) 一.简介 通过crontab命令可以在固定的间隔执行系统指令或shell脚本 二.crontab配置文件: Linux下的任务调度分为两类:系统任务调度和用户任务调度 ...
- 九、Spring之BeanFactory源码分析(一)
Spring之BeanFactory源码分析(一) 注意:该随笔内容完全引自https://blog.csdn.net/u014634338/article/details/82865644,写的 ...
- Vue devtool插件安装后无法使用,提示“vue.js not detected”的解决方法
vue devtool下载 极简插件 github vue devtool安装 点击谷歌浏览器箭头所指图标-更多工具-扩展程序 ①:直接将后缀为crx的安装包拖进下图区域即可自动安装 ② ...
- 小程序开发笔记(八)—Js数组按日期分组显示数据
数据分组展示有两种方式,一种是后端直接传入分组格式的Json数据,另一种是我们在前端自己转换格式,这里我们在前端处理转换按日期分组的数据格式 1.例如后端返回数据格式为: [{createtime:' ...
- jakarta-oro-2.0.8.jar-----------JAVA FTP相关
资源不好找,找到了就和大家分享一下! 链接:https://share.weiyun.com/51kBB0y 密码:2hcxcu
- 面试前必须要知道的21道Redis面试题
1.使用redis有哪些好处? 速度快,因为数据存在内存中,类似于HashMap,HashMap的优势就是查找和操作的时间复杂度都是O(1) 支持丰富数据类型,支持string,list,set,so ...
- vue中路由传值url--路径传值
在vue项目中我们使用路径的方式一般有一下两种方式this.$route.params.userId;一种需要在router上配置对应的数据key, this.$route.query.userId;
- Fundebug录屏插件更新至0.5.0,新增domain参数
摘要: 通过配置domain来保证"视频"的正确录制 录屏功能介绍 Fundebug提供专业的异常监控服务,当线上应用出现 BUG 的时候,我们可以第一时间报警,帮助开发者及时发现 ...
- linux 进程通信之 信号
一,管道PIPE 二,FIFO通信 三,mmap通信 四,信号的概念 信号的特点:简单,但不能携带大量的信息,满足特定条件就会发生 信号的机制:进程B发送信号给进程A.信号是由内核来处理的. 信号的产 ...
- openstack Train 版本dashaboard 404问题
版权声明:本文为博主原创文章,遵循 CC 4.0 BY-SA 版权协议,转载请附上原文出处链接和本声明本文链接:https://blog.csdn.net/weixin_28738845/articl ...