
初探Spring Cloud Config
Spring Cloud Config提供了分布式系统中配置功能的服务端与客户端支持。对于不同环境的应用程序它的服务端提供了一种中心化的配置管理方式。并且其不仅适用于Spring的应用程序,其它语言开发的程序同样能够使用(这点很重要)。
环境要求
- 首先需要安装JDK1.8或以上版本
- IDE可以选用Spring Tool Suite(STS)或者IntelliJ IDEA,本文选用STS作为例子
服务端
在文件菜单,点击新建Spring Starter Project。
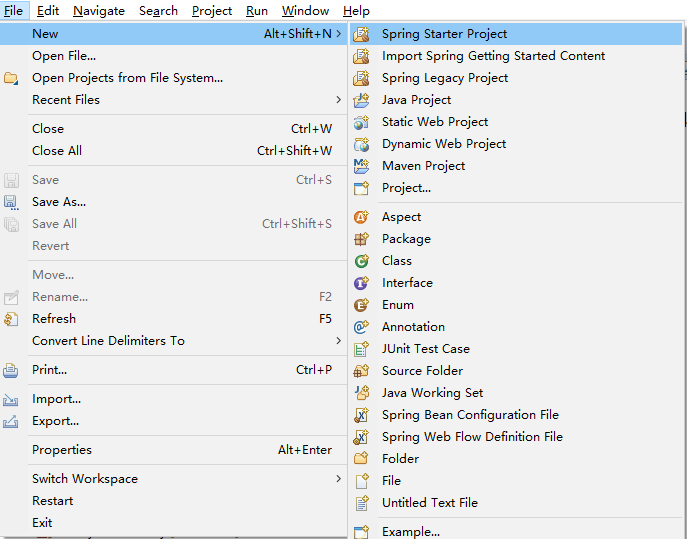
在输入工程名(这里是configuration-service)后选择下一步(Next),在依赖项中选中Config Server。
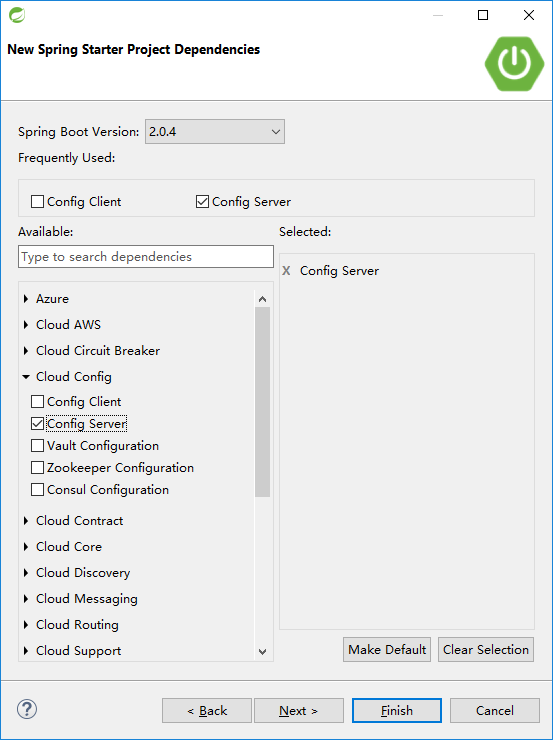
之后,点击Finish,即可完成工程的创建。
接着,在ConfigurationServiceApplication类上添加@EnableConfigServer注解。
package com.example.demo;

import org.springframework.boot.SpringApplication;

import org.springframework.boot.autoconfigure.SpringBootApplication;

import org.springframework.cloud.config.server.EnableConfigServer;

@EnableConfigServer

@SpringBootApplication

public class ConfigurationServiceApplication {

	public static void main(String[] args) {

		SpringApplication.run(ConfigurationServiceApplication.class, args);

	}

}
最后一步,在application.properties文件里配置可用的端口及用于保存服务端配置的仓库地址。
server.port=9555

#spring.profiles.active=native

#spring.cloud.config.server.native.searchLocations=file:///${USERPROFILE}/Desktop/config

spring.cloud.config.server.git.uri=file:///${USERPROFILE}/Desktop/config
Spring Cloud Config中最常用的是git仓库,这种场景下通过对spring.cloud.config.server.git.uri指定具体路径即可达成配置目的。
当然也可以不用git仓库,比如使用单纯的文件管理。
这时就需要同时使用spring.profiles.active=native及spring.cloud.config.server.native.searchLocations={配置文件目录路径}这两条配置项。
做为例子,在file:///${USERPROFILE}/Desktop/config目录下建立了一个application.properties文件,里面加入一条配置message=Hello World!。
启动这个应用,一个Spring Cloud Server便产生了。
测试下其是否正常工作,可以在浏览器中输入http://localhost:9555/application/dev地址查看。如果是类似下列的结果,说明是正常的。
{"name":"application","profiles":["dev"],"label":null,"version":"c0f022755482d4a98f66dc19c8c4e0af512dc4f2","state":null,"propertySources":[{"name":"file:///C:\\Users\\Ken/Desktop/config/application.properties","source":{"message":"Hello World!"}}]}
客户端
同样是选择新建Spring Starter Project。但这次在依赖项中选择Config Client。
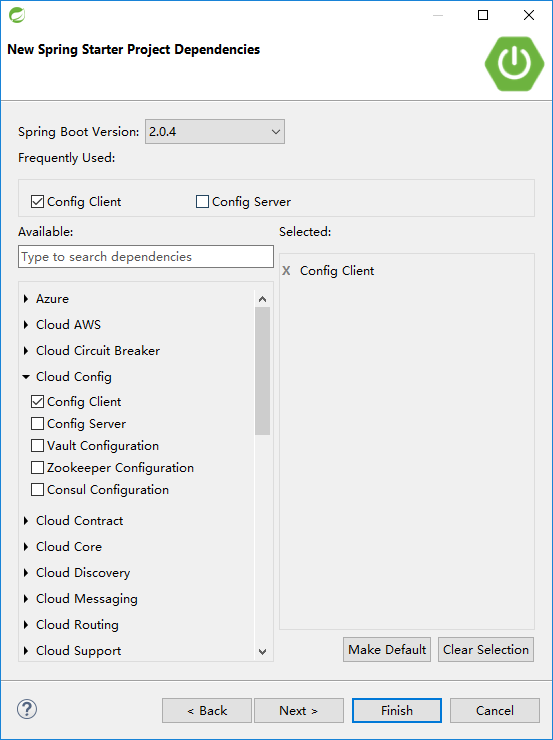
完成创建后,再在pom.xml中追加两个依赖。
<dependency>

  <groupId>org.springframework.boot</groupId>

  <artifactId>spring-boot-starter-web</artifactId>

</dependency>

<dependency>

  <groupId>org.springframework.boot</groupId>

  <artifactId>spring-boot-starter-actuator</artifactId>

</dependency>
接着在ConfigurationClientApplication文件里加入一个Controller。
package com.example.demo;

import org.springframework.beans.factory.annotation.Value;

import org.springframework.boot.SpringApplication;

import org.springframework.boot.autoconfigure.SpringBootApplication;

import org.springframework.cloud.context.config.annotation.RefreshScope;

import org.springframework.web.bind.annotation.RequestMapping;

import org.springframework.web.bind.annotation.RestController;

@SpringBootApplication

public class ConfigurationClientApplication {

	public static void main(String[] args) {

		SpringApplication.run(ConfigurationClientApplication.class, args);

	}

}

@RefreshScope

@RestController

class MessageRestController {

    @Value("${message:Hello default}")

    private String message;

    @RequestMapping("/message")

    String getMessage() {

        return this.message;

    }

}
如果此时没有运行Config Server而是单独运行Config Client的话,可以看到以下的结果:
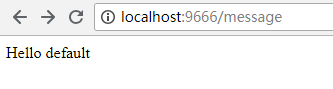
说明程序中获取的是代码里默认的配置项。
下面,开始打通与Config Server的连接。
在Config Client的application.properties文件配置应用程序启动端口server.port=9666。
再在相同resources目录下新建一个bootstrap.propertiess文件,加入与Config Server关联配置。
spring.cloud.config.uri=http://localhost:9555
然后,先启动Config Server应用程序,再启动Config Client应用程序。
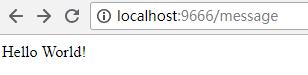
结果说明Config Client成功从Config Server获得配置内容。
接下来,尝试将配置仓库目录下application.properties文件内的配置项改成message=Hello World, Spring Cloud!。
刷新http://localhost:9666/message页面。结果未做变化。这是因为默认场景下,Config Client只在启动时向Config Server获取一次配置。
先把message配置改回message=Hello World!。
在Config Client的application.properties中添加management.endpoints.web.exposure.include=*配置。
重新启动Config Client。
再次将message配置改成message=Hello World, Spring Cloud!。
然后在命令行中执行curl localhost:9666/actuator/refresh -d {} -H "Content-Type: application/json"更新配置。
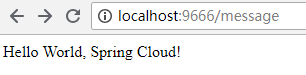
刷新页面后可以看到预期的结果:
初探Spring Cloud Config的更多相关文章
- spring cloud config 入门
简介 Spring cloud config 分为两部分 server client config-server 配置服务端,服务管理配置信息 config-client 客户端,客户端调用serve ...
- Spring Cloud Config
Spring Cloud Config provides server and client-side support for externalized configuration in a dist ...
- Spring Cloud官方文档中文版-Spring Cloud Config(上)
官方文档地址为:http://cloud.spring.io/spring-cloud-static/Dalston.SR2/#spring-cloud-feign 文中例子我做了一些测试在:http ...
- Spring Cloud官方文档中文版-Spring Cloud Config(下)-客户端等
官方文档地址为:http://cloud.spring.io/spring-cloud-static/Dalston.SR2/#_serving_alternative_formats 文中例子我做了 ...
- SpringCloud的配置管理:Spring Cloud Config
演示如何使用ConfigServer提供统一的参数配置服务 ###################################################################一.概 ...
- 搭建spring cloud config
很久没更新了,因为不是专职研究spring cloud,因此更新速度得看工作强度大不大,每天能抽出的时间不多,如果更新太慢了,并且有小伙伴看的话,请见谅了. Spring Cloud简介 Spring ...
- Spring Cloud Config - RSA简介以及使用RSA加密配置文件
简介 RSA非对称加密有着非常强大的安全性,HTTPS的SSL加密就是使用这种方法进行HTTPS请求加密传输的.因为RSA算法会涉及Private Key和Public Key分别用来加密和解密,所以 ...
- Spring Cloud Config 分布式配置中心使用教程
一.简介 在分布式系统中,由于服务数量巨多,为了方便服务配置文件统一管理,实时更新,所以需要分布式配置中心组件.在Spring Cloud中,有分布式配置中心组件spring cloud config ...
- 【spring实战第五版遇到的坑】第14章spring.cloud.config.uri和token配置项无效
本文使用的Spring Boot版本为:2.1.4.RELEASE Spring Cloud版本为:Greenwich.SR1 按照书上的做法,在application.yml中配置配置服务器的地址和 ...
随机推荐
- fiddler抓包参数乱码的解决方法
解决方法: 1.win+R 2.打开注册表编辑器:输入regedit +回车+是 3.HKEY_CURRENT_USER\Software\Microsoft\Fiddler2 4.右键新建,选字符串 ...
- Retrofit 2.0 使用详细教程
文章来自:https://blog.csdn.net/carson_ho/article/details/73732076 前言 在Andrroid开发中,网络请求十分常用 而在Android网络请求 ...
- SqlDateTime overflow / SqlDateTime 溢出
Error - SqlDateTime overflow. Must be between 1/1/1753 12:00:00 AM and 12/31/9999 11:59:59 PM SqlDat ...
- 基于Centos搭建Maven 安装与使用
CentOS 7.2 64 位操作系统 安装 Maven Maven 简介 Apache Maven 是一个软件项目管理及自动构建工具,由 Apache 软件基金会所提供.基于项目对象模型(缩写:PO ...
- OpenCV 学习笔记 05 人脸检测和识别
本节将介绍 Haar 级联分类器,通过对比分析相邻图像区域来判断给定图像或子图像与已知对象是否匹配. 本章将考虑如何将多个 Haar 级联分类器构成一个层次结构,即一个分类器能识别整体区域(如人脸) ...
- Oracle voting文件的管理
在12c中,不再支持使用dd命令进行voting disk文件的备份和恢复 投票文件的管理需要OCR文件正常工作.在删除.添加.替换或者还原voting文件之前,使用ocrcheck检查ocr文件的状 ...
- 使用RStudio远程连接MySQL
环境: 远程机: linux + Mysql 本地机: Windows + RStudio 问题: 1. 远程机为内网机器,需要跳板机连接,没有公网ip,无法连接 解决方案:修改跳板机的iptable ...
- Android解决NDK not configured问题
问题描述: // Error:Execution failed for task ':SoftkeyApp:compileDebugNdk'. // > NDK not configured. ...
- 复习下C 链表操作(双向循环链表,查找循环节点)
双向循环链表 和 单向循环链表 查找循环节点 思路都是一样. 快慢指针查找法. 理论可参考 c 链表之 快慢指针 查找循环节点 typedef struct Student_Double { ]; ...
- 译:2. RabbitMQ Java Client 之 Work Queues (工作队列)
在上篇揭开RabbitMQ的神秘面纱一文中,我们编写了程序来发送和接收来自命名队列的消息. 本篇我们将创建一个工作队列,工作队列背后的假设是每个任务都交付给一个工作者 本篇是译文,英文原文请移步:ht ...