[虚拟化/云][全栈demo] 为qemu增加一个PCI的watchdog外设(八)
目的:
1. 通过网页读取watchdog的信息
2. 通过网页设置watchdog
准备工作:
1. 选择一个web框架,选用 cherrypy
$ sudo apt-get install python-cherrypy3
2. 熟悉 RESTFUL , 参考 RESR_API(Mark McLoughlin) redhat REST API 指导
步骤:
我们选择了一个cherrypy作为web框架。 cherrypy的部署简单。
这只是个demo,没有实现MVC,大家自己练习。
此外也没有实现模板,距离一个正式的网站还差的很远。
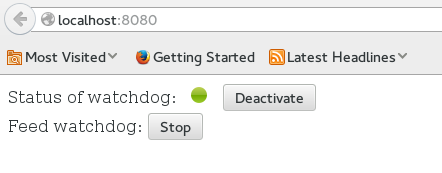
界面实现如下:
代码如下:
代码中,喂狗代码采用了一个线程。需要改进。
发现不是很好,因为每个wsgi的请求都是一个线程。
最好是采用cherrypy提供的background, 或者将该逻辑独立为一个单例模式。
watchdog.py
     import cherrypy

     import json

     import time

     import threading

     index_html = """

     <html>

     <head>

     <style type="text/css">

     .watchdog-state {

         display: inline-block;

         height: 16px;

         width: 16px;

         border-radius: 8px;

         margin-left: 10px;

         margin-right: 10px;

     }

     .up {

         background: linear-gradient(to bottom, #BFD255 0%%, #8EB92A 50%%,

                     #72AA00 51%%, #9ECB2D 100%%) repeat scroll 0 0 transparent;

     }

     .down {

         background: linear-gradient(to bottom, #AFAFAF 0%%, #AFAFAF 50%%,

                     #AFAFAF 51%%, #AFAFAF 100%%) repeat scroll 0 0 transparent;

     }

     </style>

     </head>

     <body>

     <script type="text/javascript">

         function requestJSON(url, suc, done, err) {

             var xmlhttp;

             xmlhttp = new XMLHttpRequest();

             xmlhttp.open("POST", url, true);

             xmlhttp.setRequestHeader("Content-type", "application/json");

             xmlhttp.setRequestHeader("dataType", "application/json");

             xmlhttp.onreadystatechange=function(){

                 if (xmlhttp.readyState==4 && xmlhttp.status==200) {

                     var responseContext = xmlhttp.responseText;

                     var jsonobj=eval('('+responseContext+')');

                     suc(jsonobj);

                 } else{

                     // alert("readyState: " + xmlhttp.readyState + "status" + xmlhttp.status);

                 }

             }

             xmlhttp.send();

         }

         function operationWatchdog()

         {

             // alert("operationWatchdog");

             var url = "watchdog/deactivate";

             var action = document.getElementById("watchdog-action");

             if (action.innerHTML == "Activate"){

                 url = "watchdog/activate";

             }

             requestJSON(url, function(data){

                 // alert(data.value);

             });

             if (action.innerHTML == "Activate"){

                 action.innerHTML = "Deactivate";

             } else {

                 action.innerHTML = "Activate";

             }

             var status = document.getElementById("watch-status");

             if (status.className.match("up$")){

                 status.className = "watchdog-state down";

             } else{

                 status.className = "watchdog-state up";

             }

         }

         function FeedWatchod()

         {

             // alert("FeedWatchod");

             var url = "watchdog/feedstop";

             var feed = document.getElementById("feed-watchdog");

             if (feed.innerHTML == "Start"){

                 url = "watchdog/feedstart";

             }

             requestJSON(url, function(data){

                 //alert(data.value);

             });

             if (feed.innerHTML == "Start"){

                 feed.innerHTML = "Stop";

             } else {

                 feed.innerHTML = "Start";

             }

         }

     </script>

         <div>

             Status of watchdog: <span id="watch-status" class="watchdog-state %s"> </span>

             <button id="watchdog-action" type="button" onclick="operationWatchdog()">%s</button>

         </div>

         <div>

             Feed watchdog:

             <button id="feed-watchdog" type="button" onclick="FeedWatchod()">Start</button>

         </div>

     </body>

     </html> """

     def jsonObj(data):

         cherrypy.response.headers['Content-Type'] = 'application/json;charset=utf-8'

         return json.dumps(data, indent=2, separators=(',', ':'))

     watchdog_hadle = open("/dev/cwd_demo", "w+")

     def watchdogStatus():

         vals = watchdog_hadle.readlines();

         return vals[0] == ['B\x01\n']

     def watchdogAction(action):

         watchdog_hadle.write(action)

         watchdog_hadle.flush()

     class WelcomePage(object):

         def __init__(self):

             self.watchdog = Watchdog()

         def index(self):

             watchdog_state = "down"

             watchdog_action = "Activate"

             if watchdogStatus():

                 watchdog_state = "up"

                 watchdog_action = "Deactivate"

             a = index_html % (watchdog_state, watchdog_action)

             print a

             return a

         index.exposed = True

         def default(*args, **kwargs):

             data = {"hello": "world"}

             return jsonObj(data)

         default.exposed = True

     class Watchdog(object):

         exposed = True

         feed_running = False

         feed_thread = None

         def __init__(self):

             pass

         @classmethod

         def worker(cls):

             while cls.feed_running:

                  print "worker"

                  watchdogAction('t')

                  time.sleep(1)

             return

         @cherrypy.expose

         def index(self, *args, **kwargs):

             data = {"value": False}

             data = {"value": watchdogStatus()}

             return jsonObj(data)

         @cherrypy.tools.accept(media='application/json')

         @cherrypy.expose

         def activate(self, *args, **kwargs):

             watchdogAction('a')

             print "activate"

             raise cherrypy.InternalRedirect("/watchdog")

         @cherrypy.tools.accept(media='application/json')

         @cherrypy.expose

         def deactivate(self, *args, **kwargs):

             watchdogAction('d')

             print "deactivate"

             raise cherrypy.InternalRedirect("/watchdog")

         @cherrypy.tools.accept(media='application/json')

         @cherrypy.expose

         def feedstart(self, *args, **kwargs):

             watchdogAction('t')

             print "feed start"

             if self.__class__.feed_thread == None:

                 self.__class__.feed_thread = threading.Thread(

                     target=self.__class__.worker)

             if self.__class__.feed_running == False:

                 self.__class__.feed_running = True

                 self.__class__.feed_thread.start()

             raise cherrypy.InternalRedirect("/watchdog")

         @cherrypy.expose

         def feedstop(self, *args, **kwargs):

             print "feed stop"

             if self.__class__.feed_thread.isAlive():

                 self.__class__.feed_running = False

                 self.__class__.feed_thread.join(1.5)

                 self.__class__.feed_thread = None

             raise cherrypy.InternalRedirect("/watchdog")

     if __name__ == '__main__':

         # CherryPy always starts with app.root when trying to map request URIs

         # to objects, so we need to mount a request handler root. A request

         # to '/' will be mapped to HelloWorld().index().

         cherrypy.quickstart(WelcomePage())

     else:

         # This branch is for the test suite; you can ignore it.

         cherrypy.tree.mount(WelcomePage())
[虚拟化/云][全栈demo] 为qemu增加一个PCI的watchdog外设(八)的更多相关文章
- [虚拟化/云][全栈demo] 为qemu增加一个PCI的watchdog外设(九)
目的 1. 使用verilog/vhdl设计一个PCI的watchdog设备. 2. 通过systemverilog 写testbench. 很久之前研究过AC97的verilog代码.但是很久没用v ...
- [虚拟化/云][全栈demo] 为qemu增加一个PCI的watchdog外设(四)
通过前面的操作,我们已经可以创建一个带有我们自己的PCI的watchdog外设qemu 虚拟机了. 目的: 1. 了解我们的外设情况. 2. 为在guest中开发我们自己的linux PCI驱动程序做 ...
- [虚拟化/云][全栈demo] 为qemu增加一个PCI的watchdog外设(一)
目的: 结合现在比较流行的技术,通过一个demo 展示一个全栈式设计的各种技能. 一个全栈式的工程师,应该能设计通过verilog/VHDL做logical设计.能写内核驱动,能架站. 要熟悉veri ...
- [虚拟化/云][全栈demo] 为qemu增加一个PCI的watchdog外设(六)
目的: 1. 为我们自己的watchdog写一个驱动 步骤: 通过之前的介绍,我们很容易猜想到写我们基于PCI的watchdog驱动,可以分2个步骤. 1. 探测加载PCI设备 这部分代码跟我们的设备 ...
- [虚拟化/云][全栈demo] 为qemu增加一个PCI的watchdog外设(二)
这篇文章的理解,需要一些专业知识了. 我们可以创建模拟自己的外设吗? 我们已经知道什么是qemu了,我们可以通过qmeu的提供的外设,DIY一个计算机了. 但是我们可能还不满足,我们可以自己制造一个外 ...
- [虚拟化/云][全栈demo] 为qemu增加一个PCI的watchdog外设(五)
目的: 1. 了解PCI的基本知识,为完成watchdog的设备做准备. 准备知识: 简单的说,PCI 设备分3个空间. 配置空间,IO空间,内存地址空间. PCI设备厂家决定了外设是使用IO空间还是 ...
- [虚拟化/云][全栈demo] 为qemu增加一个PCI的watchdog外设(七)
目标: 1. 完成最终的设备驱动,增加具体的watchdog设备操作的代码. 测试代码: 代码最终实现见cwd_demo.c 代码只实现了read与write. 没有实现ioctl. 因此,我们可以 ...
- [虚拟化/云][全栈demo] 为qemu增加一个PCI的watchdog外设(三)
我们已经设计了一个基于qemu的watchdog了.下一步工作就是创建一个含有我们的watchdog的虚拟计算机器了. 准备工作: 1. 使用virt-manager或者virsh创建一个虚拟机器. ...
- 从零开始的全栈工程师——利用CSS3画一个正方体 ( css3 )
transform属性 CSS3的变形(transform)属性让元素在一个坐标系统中变形.transform属性的基本语法如下: transform:none | <transform-fun ...
随机推荐
- linux 机器出现or type control d to continue问题的处理办法
当出现这个界面时,主要是因为磁盘问题 直接输入root密码进入修复模式 在命令行下执行fsck命令 进行相关挂载目录或是磁盘的修改 看下 /etc/fatab下是否有 自己加的开机自动挂载的目录 ,看 ...
- 【Chromium中文文档】Chrome/Chromium沙箱 - 安全架构设计
沙箱 转载请注明出处:https://ahangchen.gitbooks.io/chromium_doc_zh/content/zh//General_Architecture/Sandbox.ht ...
- Robot Framework语法学习(一)
Robot Framework语法学习: 一.变量的声明.赋值与使用 1.变量标识符:每个变量都可以用 变量标识符 ${变量名} 来表示. 2.变量声明:可以在TestSuite上点右键或者在Edi ...
- WPF中图形表示语法详解(Path之Data属性语法)
原文 http://blog.csdn.net/johnsuna/article/details/1885597 老规矩,看图说话. 先看显示效果:(图1) XAML(代码A):<Page xm ...
- css案例学习之div与span的区别
代码: <html> <head> <title>div 标记范例</title> <style type="text/css" ...
- CC++初学者编程教程(13) 基于Oracle linux 的Oracle12c环境搭建
1设置虚拟机选项 2 设置文件夹共享 3启动文件夹共享向导 4 设置共享文件夹 5 启用共享 6 关闭虚拟机设置 7 开启虚拟机 8 登陆帐户 9 看见虚拟机桌面 10 安装vmwaretools 1 ...
- UITableViewCell性能优化
5.UITableViewCell性能优化 > 定义一个循环利用标识 static NSString *ID = @"C1"; > 从缓存池中取出可循环利用的cell ...
- 精通CSS+DIV基础总结(一)
这段时间学习了玩了DIV+CSS的视频,感觉效率不高.前边的Javascript总结的不好,但是看了后边的JQuery,觉得学习的再多一点,再进行Javascript的总结.DIV+CSS总结,估计会 ...
- Setup Factory
Setup Factory 生成安装程序
- Java面试题之Struts优缺点
优点: 1. 实现MVC模式,结构清晰,使开发者只关注业务逻辑的实现. 2.有丰富的tag可以用 ,Struts的标记库(Taglib),如能灵活动用,则能大大提高开发效率 3. 页面导航 使系统的脉 ...