elastic-job集成到springboot教程,和它的一个异常处理办法:Sharding item parameters '1' format error, should be int=xx,int=xx
先说这个Sharding item parameters '1' format error, should be int=xx,int=xx异常吧,这是在做动态添加调度任务的时候出现的,网上找了一会没有搜到任何信息,最后发现,是添加任务这个方法里有一个漏洞。
这个源码出自:
 private ShardingItem parse(final String shardingItemParameter, final String originalShardingItemParameters) {

         String[] pair = shardingItemParameter.trim().split(KEY_VALUE_DELIMITER);

         if (2 != pair.length) {

             throw new JobConfigurationException("Sharding item parameters '%s' format error, should be int=xx,int=xx", originalShardingItemParameters);

         }

         try {

             return new ShardingItem(Integer.parseInt(pair[0].trim()), pair[1].trim());

         } catch (final NumberFormatException ex) {

             throw new JobConfigurationException("Sharding item parameters key '%s' is not an integer.", pair[0]);

         }

     }
修改前代码(报这个异常的代码):
  public void addJobScheduler(final Class<? extends SimpleJob> jobClass,

       final String cron,

       final int shardingTotalCount,

       final String shardingItemParameters) {

     JobCoreConfiguration coreConfig = JobCoreConfiguration.newBuilder(jobClass.getName(), cron, shardingTotalCount).shardingItemParameters(shardingItemParameters).build();

     SimpleJobConfiguration simpleJobConfig = new SimpleJobConfiguration(coreConfig, jobClass.getCanonicalName());

     JobScheduler jobScheduler = new JobScheduler(regCenter, LiteJobConfiguration.newBuilder(simpleJobConfig).build());

     jobScheduler.init();

   }
是不是发现不管你怎么设置,都给你报这个,你明明传的就不是1这个参数,还是给你报这个,问题出在build()那里,需要overwrite。修改后:
  public void addJobScheduler(final Class<? extends SimpleJob> jobClass,

       final String cron,

       final int shardingTotalCount,

       final String shardingItemParameters) {

     JobCoreConfiguration coreConfig = JobCoreConfiguration.newBuilder(jobClass.getName(), cron, shardingTotalCount).shardingItemParameters(shardingItemParameters).build();

     SimpleJobConfiguration simpleJobConfig = new SimpleJobConfiguration(coreConfig, jobClass.getCanonicalName());

     JobScheduler jobScheduler = new JobScheduler(regCenter, LiteJobConfiguration.newBuilder(simpleJobConfig).overwrite(true).build());

     jobScheduler.init();

   }
红色代码为修改后加的代码。
先说说这个dangdang的elastic-job,它是一个分布式任务调度插件。今天我遇到的问题就是,有部分任务,在多节点环境中,不需要每个节点执行,比如只需要一个节点(确切地说就是作业分片总数=1)上运行的任务,这时候elastic-job就是个不错的选择,它可以很灵活的配置作业分片总数等。它的官方文档,链接指向配置说明:http://elasticjob.io/docs/elastic-job-lite/02-guide/config-manual/
那么spring boot中如何集成进它。需要的一个前提条件是zookeeper服务,这个一般项目里都会用到,你只需要连就好了,如果dev或者你们还没用上,可以找个教程安装一下。链接指向在 CentOS7 上安装 Zookeeper服务 。
然后.propertis配置文件(yml类同):
regCenter.serverList=10.0.30.140:2181

regCenter.namespace=elastic-job

simpleJob.cron=0/5 * * * * ?

# 作业分片总数,设为1只在一个节点执行

simpleJob.shardingTotalCount=1

simpleJob.shardingItemParameters=0=A,1=B,2=C
当然,pom中需要引入elastic-job:
<dependency>

    <artifactId>elastic-job-common-core</artifactId>

    <groupId>com.dangdang</groupId>

    <version>${elastic-job.version}</version>

  </dependency>

  <dependency>

    <artifactId>elastic-job-lite-core</artifactId>

    <groupId>com.dangdang</groupId>

    <version>${elastic-job.version}</version>

  </dependency>

  <dependency>

    <artifactId>elastic-job-lite-spring</artifactId>

    <groupId>com.dangdang</groupId>

    <version>${elastic-job.version}</version>

  </dependency>

  <dependency>

    <groupId>org.apache.curator</groupId>

    <artifactId>curator-test</artifactId>

    <version>${curator.version}</version>

  </dependency>
本示例代码用到的版本是:
<elastic-job.version>2.1.5</elastic-job.version>

    <curator.version>2.10.0</curator.version>
连接zookeeper注册中心:
import com.dangdang.ddframe.job.reg.zookeeper.ZookeeperConfiguration;

import com.dangdang.ddframe.job.reg.zookeeper.ZookeeperRegistryCenter;

import org.springframework.beans.factory.annotation.Value;

import org.springframework.boot.autoconfigure.condition.ConditionalOnExpression;

import org.springframework.context.annotation.Bean;

import org.springframework.context.annotation.Configuration;

/**

 * @author binhy

 *@date 2019-1-22

 */

@Configuration

@ConditionalOnExpression("'${regCenter.serverList}'.length() > 0")

public class RegistryCenterConfig {

  @Bean(initMethod = "init")

  public ZookeeperRegistryCenter regCenter(@Value("${regCenter.serverList}") final String serverList, @Value("${regCenter.namespace}") final String namespace) {

    return new ZookeeperRegistryCenter(new ZookeeperConfiguration(serverList, namespace));

  }

}
然后做一个任务信息持久化:
import javax.annotation.Resource;

import javax.sql.DataSource;

import org.springframework.context.annotation.Bean;

import org.springframework.context.annotation.Configuration;

import com.dangdang.ddframe.job.event.JobEventConfiguration;

import com.dangdang.ddframe.job.event.rdb.JobEventRdbConfiguration;

/**

 * @author binhy

 *@date 2019-1-22

 */

@Configuration

public class JobEventConfig {

  @Resource

  private DataSource dataSource;

  @Bean

  public JobEventConfiguration jobEventConfiguration() {

    return new JobEventRdbConfiguration(dataSource);

  }

}
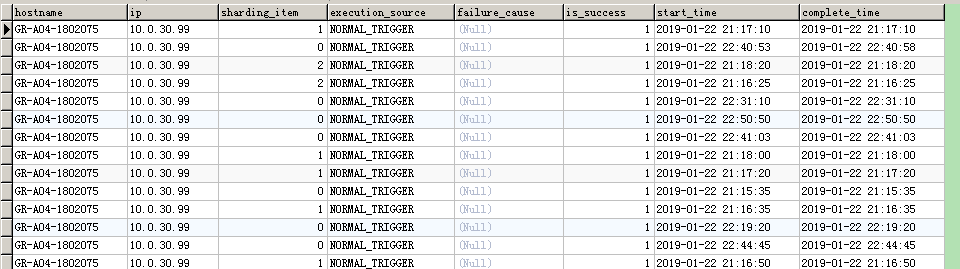
当你最后运行后会发现你的库里多了两张表job_execution_log和job_status_trace_log他们会详细的记录你的任务执行信息,包括执行ip,开始结束时间等,还是非常不错的。
然后需要一个任务管理类,初始化一些任务,我这里把动态添加任务的方法也写在了这里。因为这种形式需要你一个任务写一个配置和类去实现。动态添加会省很多事。
import com.goopal.exdata.dangdang.DemoJob;

import javax.annotation.Resource;

import org.springframework.beans.factory.annotation.Value;

import org.springframework.boot.ApplicationArguments;

import org.springframework.context.annotation.Bean;

import org.springframework.context.annotation.Configuration;

import com.dangdang.ddframe.job.api.simple.SimpleJob;

import com.dangdang.ddframe.job.config.JobCoreConfiguration;

import com.dangdang.ddframe.job.config.simple.SimpleJobConfiguration;

import com.dangdang.ddframe.job.event.JobEventConfiguration;

import com.dangdang.ddframe.job.lite.api.JobScheduler;

import com.dangdang.ddframe.job.lite.config.LiteJobConfiguration;

import com.dangdang.ddframe.job.lite.spring.api.SpringJobScheduler;

import com.dangdang.ddframe.job.reg.zookeeper.ZookeeperRegistryCenter;

/**

 * @author binhy

 * @date 2019-1-22

 */

@Configuration

public class SimpleJobConfig {

  @Resource

  private ZookeeperRegistryCenter regCenter;

  @Resource

  private JobEventConfiguration jobEventConfiguration;

  @Bean

  public SimpleJob simpleJob() {

    return new DemoJob();

  }

  @Bean(initMethod = "init")

  public JobScheduler simpleJobScheduler(final SimpleJob simpleJob, @Value("${simpleJob.cron}") final String cron, @Value("${simpleJob.shardingTotalCount}") final int shardingTotalCount,

      @Value("${simpleJob.shardingItemParameters}") final String shardingItemParameters) {

    return new SpringJobScheduler(simpleJob, regCenter, getLiteJobConfiguration(simpleJob.getClass(), cron, shardingTotalCount, shardingItemParameters), jobEventConfiguration);

  }

  private LiteJobConfiguration getLiteJobConfiguration(final Class<? extends SimpleJob> jobClass, final String cron, final int shardingTotalCount, final String shardingItemParameters) {

    return LiteJobConfiguration.newBuilder(new SimpleJobConfiguration(JobCoreConfiguration.newBuilder(

        jobClass.getName(), cron, shardingTotalCount).shardingItemParameters(shardingItemParameters).build(), jobClass.getCanonicalName())).overwrite(true).build();

  }

  /**

   * 动态添加

   * @param jobClass

   * @param cron

   * @param shardingTotalCount

   * @param shardingItemParameters

   */

  public void addJobScheduler(final Class<? extends SimpleJob> jobClass,

      final String cron,

      final int shardingTotalCount,

      final String shardingItemParameters) {

    JobCoreConfiguration coreConfig = JobCoreConfiguration.newBuilder(jobClass.getName(), cron, shardingTotalCount).shardingItemParameters(shardingItemParameters).build();

    SimpleJobConfiguration simpleJobConfig = new SimpleJobConfiguration(coreConfig, jobClass.getCanonicalName());

    JobScheduler jobScheduler = new JobScheduler(regCenter, LiteJobConfiguration.newBuilder(simpleJobConfig).overwrite(true).build());

    jobScheduler.init();

  }

}
到这里,你在配置文件中配置的定时任务就已经可以在多节点环境中,仅在1个节点执行了。需要添加更多的不同cron的任务,只需要在代码业务逻辑处调用即可。如:
 @Autowired

  private  SimpleJobConfig simpleJobConfig;

  @Override

  public void run(ApplicationArguments args) throws Exception {

    simpleJobConfig.addJobScheduler(AnalysisData.class,"0/3 * * * * ?",3,"0=A,1=B,2=C");//0=A,1=B,2=C

  }
如果有帮助到你,给我点个赞哦~
elastic-job集成到springboot教程,和它的一个异常处理办法:Sharding item parameters '1' format error, should be int=xx,int=xx的更多相关文章
- Spring Data JPA系列2:SpringBoot集成JPA详细教程,快速在项目中熟练使用JPA
大家好,又见面了. 这是Spring Data JPA系列的第2篇,在上一篇<Spring Data JPA系列1:JDBC.ORM.JPA.Spring Data JPA,傻傻分不清楚?给你个 ...
- SpringBoot教程——检视阅读
SpringBoot教程--检视阅读 参考 SpringBoot教程--一点--蓝本--springboot2.1.1 SpringBoot教程--易百--springboo2.0.5.RELEASE ...
- 移动应用开发测试工具Bugtags集成和使用教程
前段时间,有很多APP突然走红,最终却都是樱花一现.作为一个创业团队,突然爆红是非常难得的机会.然并卵,由于没有经过充分的测试,再加上用户的激增,APP闪退.服务器数据异常等问题就被暴露出来,用户的流 ...
- 移动应用开发测试工具Bugtags集成和使用教程【转载】
前段时间,有很多APP突然走红,最终却都是樱花一现.作为一个创业团队,突然爆红是非常难得的机会.然并卵,由于没有经过充分的测试,再加上用户的激增,APP闪退.服务器数据异常等问题就被暴露出来,用户的流 ...
- SpringBoot | 教程
Spring Boot 2.0(一):[重磅]Spring Boot 2.0权威发布 Spring Boot 2.0(二):Spring Boot 2.0尝鲜-动态 Banner Spring Boo ...
- SpringBoot系列教程web篇之自定义异常处理HandlerExceptionResolver
关于Web应用的全局异常处理,上一篇介绍了ControllerAdvice结合@ExceptionHandler的方式来实现web应用的全局异常管理: 本篇博文则带来另外一种并不常见的使用方式,通过实 ...
- SpringBoot系列教程web篇之全局异常处理
当我们的后端应用出现异常时,通常会将异常状况包装之后再返回给调用方或者前端,在实际的项目中,不可能对每一个地方都做好异常处理,再优雅的代码也可能抛出异常,那么在 Spring 项目中,可以怎样优雅的处 ...
- SpringBoot教程(学习资源)
SpringBoot教程 SpringBoot–从零开始学SpringBoot SpringBoot教程1 SpringBoot教程2 --SpringBoot教程2的GitHub地址 SpringB ...
- springboot2.x基础教程:动手制作一个starter包
上一篇博客介绍了springboot自动装配的原理.springboot本身有丰富的spring-boot-starter-xx集成组件,这一篇趁热打铁加深理解,我们利用springboot自动装配的 ...
随机推荐
- WebLogic使用总结(一)——WebLogic安装
一.下载WebLogic 到Oracle官网http://www.oracle.com/ 下载WebLogic(根据自己的情况选择),本文档下载的是Generic WebLogic Server an ...
- 动态规划——Edit Distance
大意:给定两个字符串word1和word2,为了使word1变为word2,可以进行增加.删除.替换字符三种操作,请输出操作的最少次数 Example 1: Input: word1 = &quo ...
- Android的BroadcastReceiver组件
BroadcastReceiver的作用: BroadcastReceiver,是和Intent有很大关系的Android组件. Android中的 Intent 可以用来: 1. 在应用程序内部和应 ...
- springboot2.0以后WebMvcConfigurationSupport代替WebMvcConfigurationAdapter
1:WebMvcConfigurationSupport代替WebMvcConfigurationAdapter https://blog.csdn.net/wilsonsong1024/articl ...
- Ubuntu 配置安装PCL
Ubuntu 配置安装PCL 之前一直在Mac下开发,现在入手Ubuntu,也借此学习一下Linux下的源码编译安装过程. PCL简介 PCL(Point Cloud Library)是在吸收了前人点 ...
- c#学习个人总结
c#一门程序语言,我的专业课.有了一学期的接触对它的了解还只是皮毛,里面有许多的知识都有待了解学习和提高,熟练掌握程序的语法,能够熟练的调用,对于一些理论性的知识还需要今后更多的揣摩和研究,讲书本中的 ...
- (62)Wangdao.com第十天_JavaScript 变量的作用域
在 js 中有两种作用域:全局作用域,局部作用域. 全局作用域 直接写在 <script> 标签中的变量和方法. 在网页打开时创建,在网页关闭时销毁. 全局作用域有一个全局对象 windo ...
- Servlet 文件上传
Servlet 可以与 HTML form 标签一起使用,来允许用户上传文件到服务器.上传的文件可以是文本文件或图像文件或任何文档. 本文使用到的文件有: 创建一个文件上传表单 下面的 HTML 代码 ...
- viewport的故事(二)
挑重点的翻译 自原文 https://www.quirksmode.org/mobile/viewports2.html 在这一页我们将聊一聊移动端的浏览器. 移动端的问题 最明显的问题 ...
- js表单提交到后台对象接收
$.extend({ StandardPost:function(url,args){ var form = $("<form method='post' target='_blank ...