
Azure AD(五)使用多租户应用程序模式让任何 Azure Active Directory 用户登录
一,引言
距离上次分享关于 “Azure AD" 的知识过去差不多2个多月了, 今天最近刚好也是学习,分享一下关于Azure AD 使用多租户应用程序模式让任何 Azure Active Directory 用户登录,之前仅仅都是在当初租户的用户或者受邀来宾来访问和使用我们的api资源的。今天我们将以下关于只要拥有微软 的工作/学校账号的用户都可以使用我们受AD保护的 API 资源。接下来就开始我们今天的分享
--------------------我是分割线--------------------
1,Azure AD(一)入门认识
2,Azure AD(二)调用受Microsoft 标识平台保护的 ASP.NET Core Web API 上
3,Azure AD(二)调用受Microsoft 标识平台保护的 ASP.NET Core Web API 下
4,Azure AD(三)知识补充-Azure资源的托管标识
5,Azure AD(四)知识补充-服务主体
6,Azure AD(五)使用多租户应用程序模式让任何 Azure Active Directory 用户登录
二,正文
1,修改受保护资源的应用的账号类型
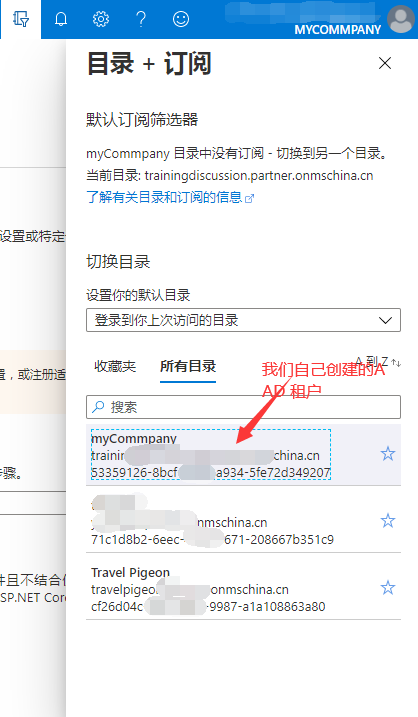
首先我们登陆Azure Portal 上,并且切换一下当前活动的目录(也就是当前所在的租户)
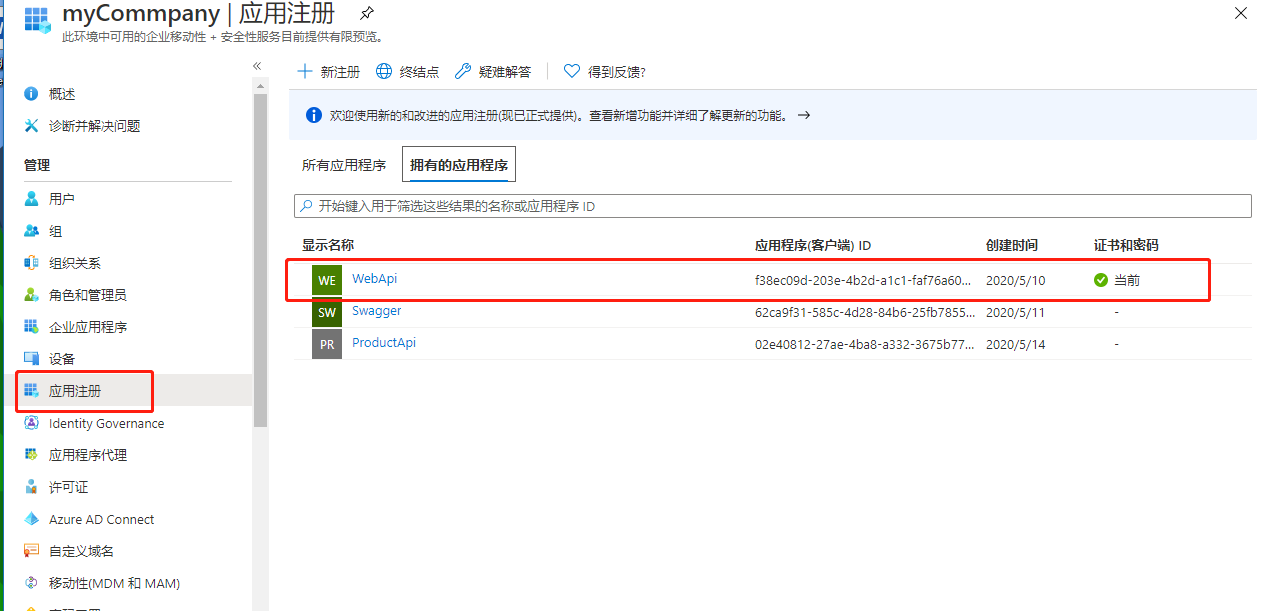
在之前在AAD中注册好的应用注册---”WebApi“,点击进入WebApi的设置
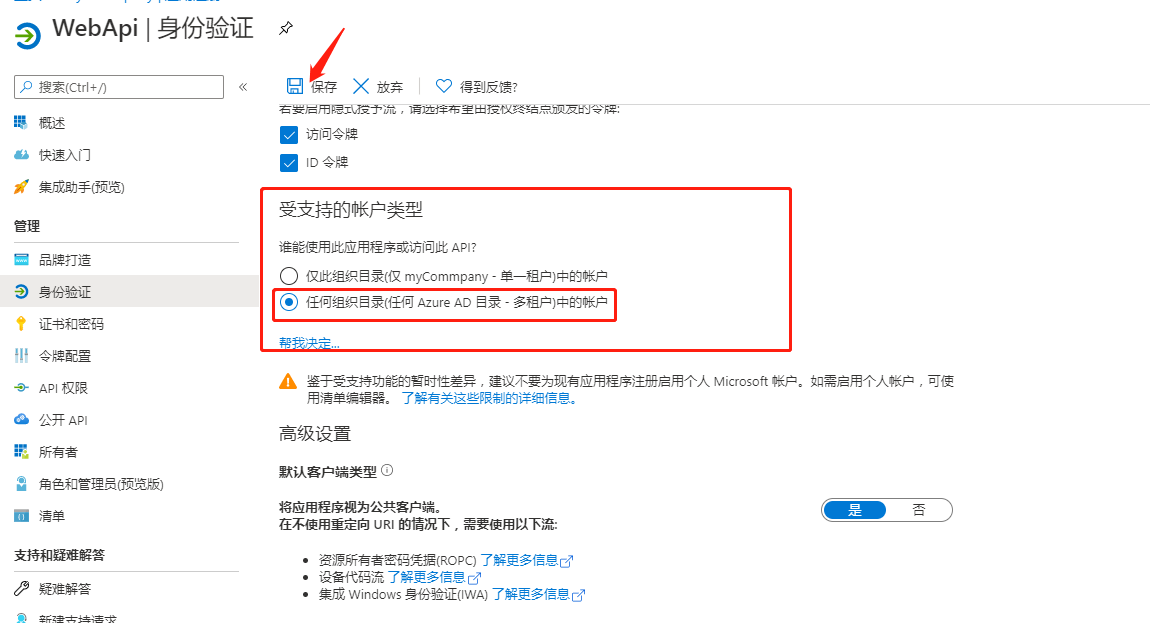
点击图中圈中的受支持的账户类型---仅我的组织

修改 受支持的账号类型 为 ”任何组合目录(任何 Azure AD 目录 - 都租户)中的账户“,点击 ”保存“
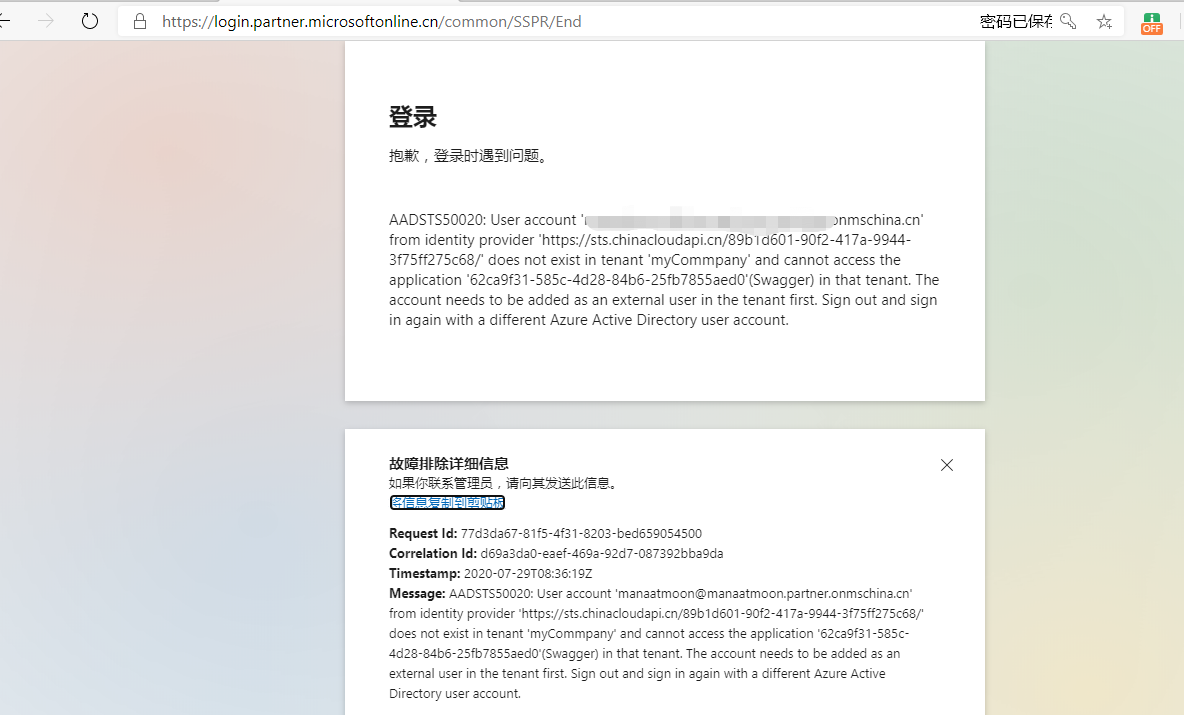
我们使用其他租户的账号登陆认证,提示 当前登陆账号不在当前登陆的租户内
2,修改代码配置
微软官方文档给出,当使用多租户模式的时候,
(1)代码需要更为为向/common 发出请求
在单租户应用程序中,登录请求将发送到租户的登录终结点。 以 trainingdiscussion.partner.onmschina.cn 为例,终结点将是:https://login.chinacloudapi.cn/trainingdiscussion.partner.onmschina.cn。 发送到租户终结点的请求可以让该租户中的用户(或来宾)登录该租户中的应用程序。
使用多租户应用程序时,应用程序事先并不知道用户来自哪个租户,因此无法将请求发送到租户的终结点。 取而代之的是,请求将发送到在所有 Azure AD 租户之间多路复用的终结点:https://login.chinacloudapi.cn/common
当 Microsoft 标识平台在 /common 终结点上收到请求时,会使用户登录,因而可以发现用户来自哪个租户。 /Common 终结点可与 Azure AD 支持的所有身份验证协议配合使用: OpenID Connect、OAuth 2.0、SAML 2.0 和 WS 联合身份验证。
/common 终结点不是租户,也不是颁发者,而只是一个多路复用器。 使用 /common 时,需要更新应用程序中用于验证令牌的逻辑。然后,对应用程序做出的登录响应会包含代表该用户的令牌。 令牌中的颁发者值告知应用程序该用户来自哪个租户。 从 /common 终结点返回响应时,令牌中的颁发者值将与用户的租户相对应。
(2)将代码更新为处理多个颁发者值
单租户应用程序通常采用类似于下面的终结点值:https://login.chinacloudapi.cn/trainingdiscussion.partner.onmschina.cn
并使用该值构造元数据 URL(在本例中为 OpenID Connect),例如:https://login.chinacloudapi.cn/trainingdiscussion.partner.onmschina.cn/.well-known/openid-configuration
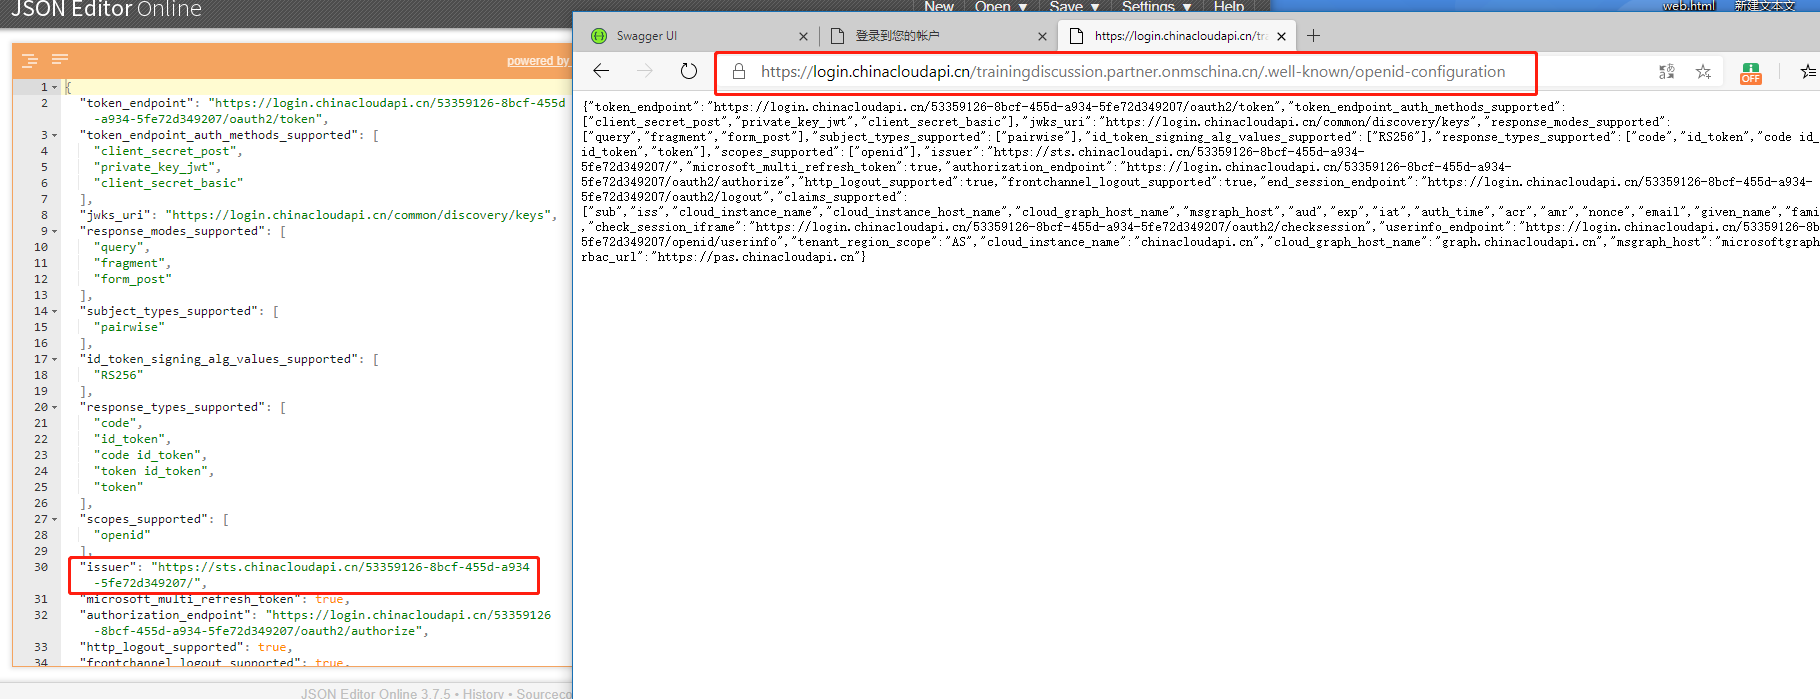
以下载用于验证令牌的两项关键信息:租户的签名密钥和颁发者值。 每个 Azure AD 租户使用以下格式的唯一颁发者值:https://sts.chinacloudapi.cn/53359126-8bcf-455d-a934-5fe72d349207/
下图中,是我当前AAD 租户中注册的 Web Api 的OpenID Connect 元数据文档
Authentication 配置
services.AddAuthentication("Bearer")

                .AddJwtBearer(o =>

                {

                    o.Audience = Appsettings.app(new string[] { "AzureAD", "ClientId" });

                    o.RequireHttpsMetadata = false;

                    o.SaveToken = true;

                    o.Authority = Appsettings.app(new string[] { "AzureAD", "Authority" });

                    o.TokenValidationParameters = new Microsoft.IdentityModel.Tokens.TokenValidationParameters()

                    {

                        ValidateIssuerSigningKey = true,

                        ValidIssuer = Appsettings.app(new string[] { "AzureAD", "Issuer" }),

                        ValidateLifetime = true,

                    };

                });
Swagger服务的配置
 services.AddSwaggerGen(c =>

            {

                c.SwaggerDoc("v1", new OpenApiInfo { Title = "My API", Version = "v1" });

                c.AddSecurityDefinition("oauth2", new OpenApiSecurityScheme

                {

                    Description = "JWT授权(数据将在请求头中进行传输) 直接在下框中输入Bearer {token}(注意两者之间是一个空格)\"",

                    Type = SecuritySchemeType.OAuth2,

                    In = ParameterLocation.Header,//jwt默认存放Authorization信息的位置(请求头中)

                    Flows = new OpenApiOAuthFlows()

                    {

                        Implicit = new OpenApiOAuthFlow

                        {

                            //AuthorizationUrl = new Uri($"https://login.chinacloudapi.cn/{ Appsettings.app(new string[] { "AzureAD", "TenantId" })}/oauth2/authorize")

                            AuthorizationUrl = new Uri($"https://login.chinacloudapi.cn/common/oauth2/authorize")

                        }

                    }

                });

                // 在header中添加token,传递到后台

                c.OperationFilter<SecurityRequirementsOperationFilter>();

            });
开启中间件
#region Swagger

            app.UseSwagger();

            app.UseSwaggerUI(c =>

            {

                //根据版本名称倒序 遍历展示

                var ApiName = Appsettings.app(new string[] { "Startup", "ApiName" });

                c.SwaggerEndpoint($"/swagger/v1/swagger.json", $"{ApiName} v1");

                c.OAuthClientId(Appsettings.app(new string[] { "Swagger", "ClientId" }));

                //c.OAuthClientSecret(Appsettings.app(new string[] { "Swagger", "ClientSecret" }));

                c.OAuthRealm(Appsettings.app(new string[] { "AzureAD", "ClientId" }));

                c.OAuthAppName("My API V1");

                c.OAuthScopeSeparator(" ");

                c.OAuthAdditionalQueryStringParams(new Dictionary<string, string>() { { "resource", Appsettings.app(new string[] { "AzureAD", "ClientId" }) } });

            });

            #endregion

            IdentityModelEventSource.ShowPII = true; // here

            app.UseAuthentication();
完整代码:


public class Startup

    {

        public Startup(IConfiguration configuration, IWebHostEnvironment environment)

        {

            Configuration = configuration;

            Environment = environment;

        }

        public IConfiguration Configuration { get; }

        public IWebHostEnvironment Environment { get; }

        // This method gets called by the runtime. Use this method to add services to the container.

        public void ConfigureServices(IServiceCollection services)

        {

            services.AddSingleton(new Appsettings(Environment.ContentRootPath));

            //services.AddAuthentication(AzureADDefaults.JwtBearerAuthenticationScheme)

            //    .AddAzureADBearer(options => Configuration.Bind("AzureAd", options));

            services.AddAuthentication("Bearer")

                .AddJwtBearer(o =>

                {

                    o.Audience = Appsettings.app(new string[] { "AzureAD", "ClientId" });

                    o.RequireHttpsMetadata = false;

                    o.SaveToken = true;

                    o.Authority = Appsettings.app(new string[] { "AzureAD", "Authority" });

                    o.TokenValidationParameters = new Microsoft.IdentityModel.Tokens.TokenValidationParameters()

                    {

                        ValidateIssuerSigningKey = false,

                        ValidIssuer = Appsettings.app(new string[] { "AzureAD", "Issuer" }),

                        ValidateLifetime = true,

                    };

                });

            services.AddSwaggerGen(c =>

            {

                c.SwaggerDoc("v1", new OpenApiInfo { Title = "My API", Version = "v1" });

                c.AddSecurityDefinition("oauth2", new OpenApiSecurityScheme

                {

                    Description = "JWT授权(数据将在请求头中进行传输) 直接在下框中输入Bearer {token}(注意两者之间是一个空格)\"",

                    Type = SecuritySchemeType.OAuth2,

                    In = ParameterLocation.Header,//jwt默认存放Authorization信息的位置(请求头中)

                    Flows = new OpenApiOAuthFlows()

                    {

                        Implicit = new OpenApiOAuthFlow

                        {

                            //AuthorizationUrl = new Uri($"https://login.chinacloudapi.cn/{ Appsettings.app(new string[] { "AzureAD", "TenantId" })}/oauth2/authorize")

                            AuthorizationUrl = new Uri($"https://login.chinacloudapi.cn/common/oauth2/authorize")

                        }

                    }

                });

                // 在header中添加token,传递到后台

                c.OperationFilter<SecurityRequirementsOperationFilter>();

            });

            services.AddControllers();

        }

        // This method gets called by the runtime. Use this method to configure the HTTP request pipeline.

        public void Configure(IApplicationBuilder app, IWebHostEnvironment env)

        {

            if (env.IsDevelopment())

            {

                app.UseDeveloperExceptionPage();

            }

            #region Swagger

            app.UseSwagger();

            app.UseSwaggerUI(c =>

            {

                //根据版本名称倒序 遍历展示

                var ApiName = Appsettings.app(new string[] { "Startup", "ApiName" });

                c.SwaggerEndpoint($"/swagger/v1/swagger.json", $"{ApiName} v1");

                c.OAuthClientId(Appsettings.app(new string[] { "Swagger", "ClientId" }));

                //c.OAuthClientSecret(Appsettings.app(new string[] { "Swagger", "ClientSecret" }));

                c.OAuthRealm(Appsettings.app(new string[] { "AzureAD", "ClientId" }));

                c.OAuthAppName("My API V1");

                c.OAuthScopeSeparator(" ");

                c.OAuthAdditionalQueryStringParams(new Dictionary<string, string>() { { "resource", Appsettings.app(new string[] { "AzureAD", "ClientId" }) } });

            });

            #endregion

            IdentityModelEventSource.ShowPII = true; // here

            app.UseAuthentication();

            app.UseRouting();

            app.UseAuthorization();

            app.UseEndpoints(endpoints =>

            {

                endpoints.MapControllers();

            });

        }

    }
Startup
{

  "Logging": {

    "LogLevel": {

      "Default": "Information",

      "Microsoft": "Warning",

      "Microsoft.Hosting.Lifetime": "Information"

    }

  },

  "AllowedHosts": "*",

  "AzureAd": {

      "Instance": "https://login.chinacloudapi.cn/common",

      "Domain": "trainingdiscussion.partner.onmschina.cn",

      "TenantId": "common",

      "ClientId": "f38ec09d-203e-4b2d-a1c1-faf76a608528",

"CallbackPath": "/signin-oidc",

    "Authority": "https://login.chinacloudapi.cn/organizations/v2.0/",

    "Issuer": "https://sts.chinacloudapi.cn/53359126-8bcf-455d-a934-5fe72d349207/"

    },

    "Swagger": {

      "ClientId": "62ca9f31-585c-4d28-84b6-25fb7855aed0",

      "ClientSecret": "" //  ?fxV/=/pwlRjwQgoIdLRlPNlWBBQ8939

    }

}
application
3,运行项目,进行测试
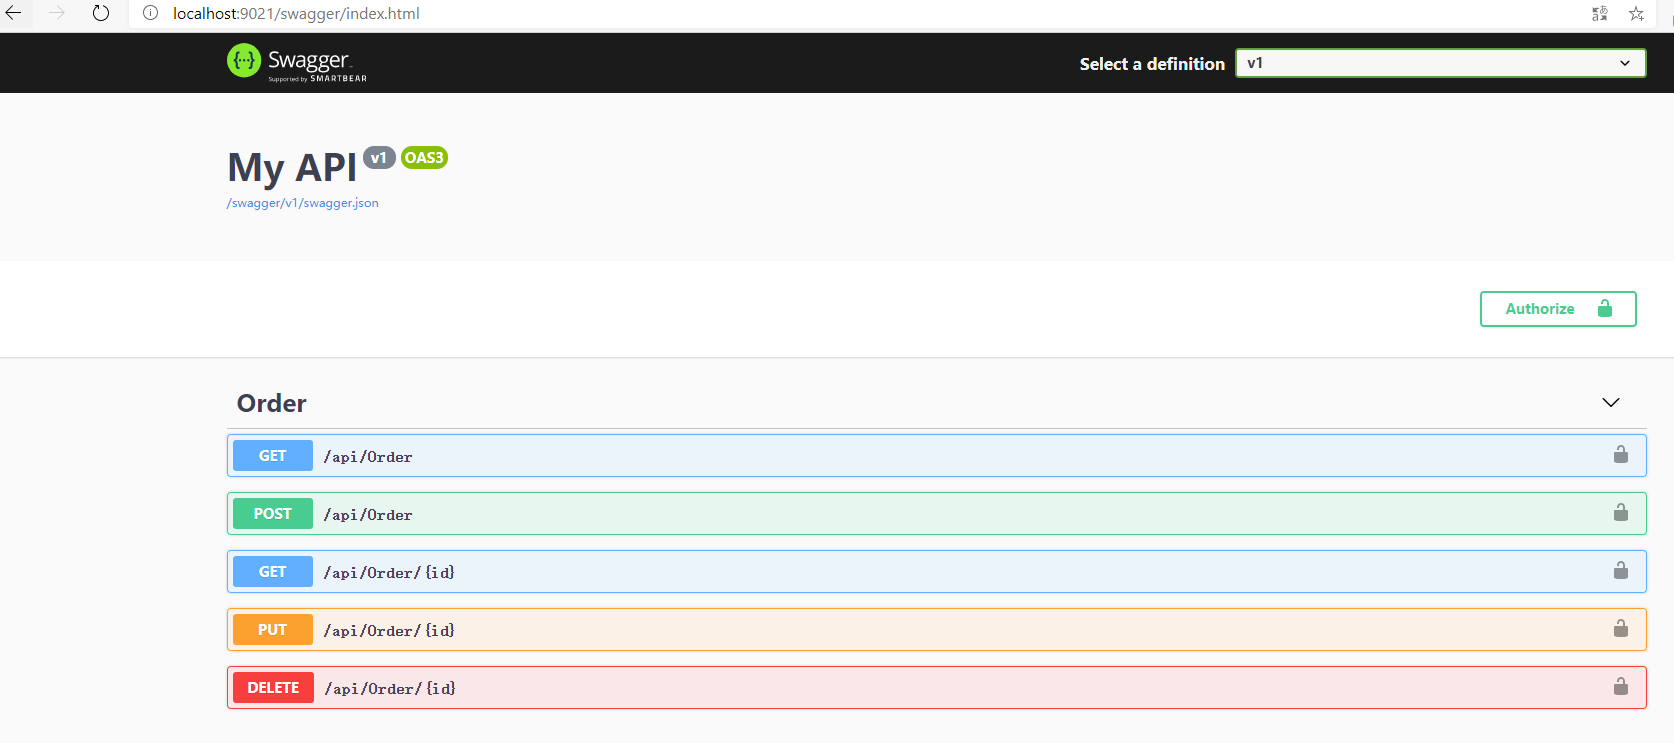
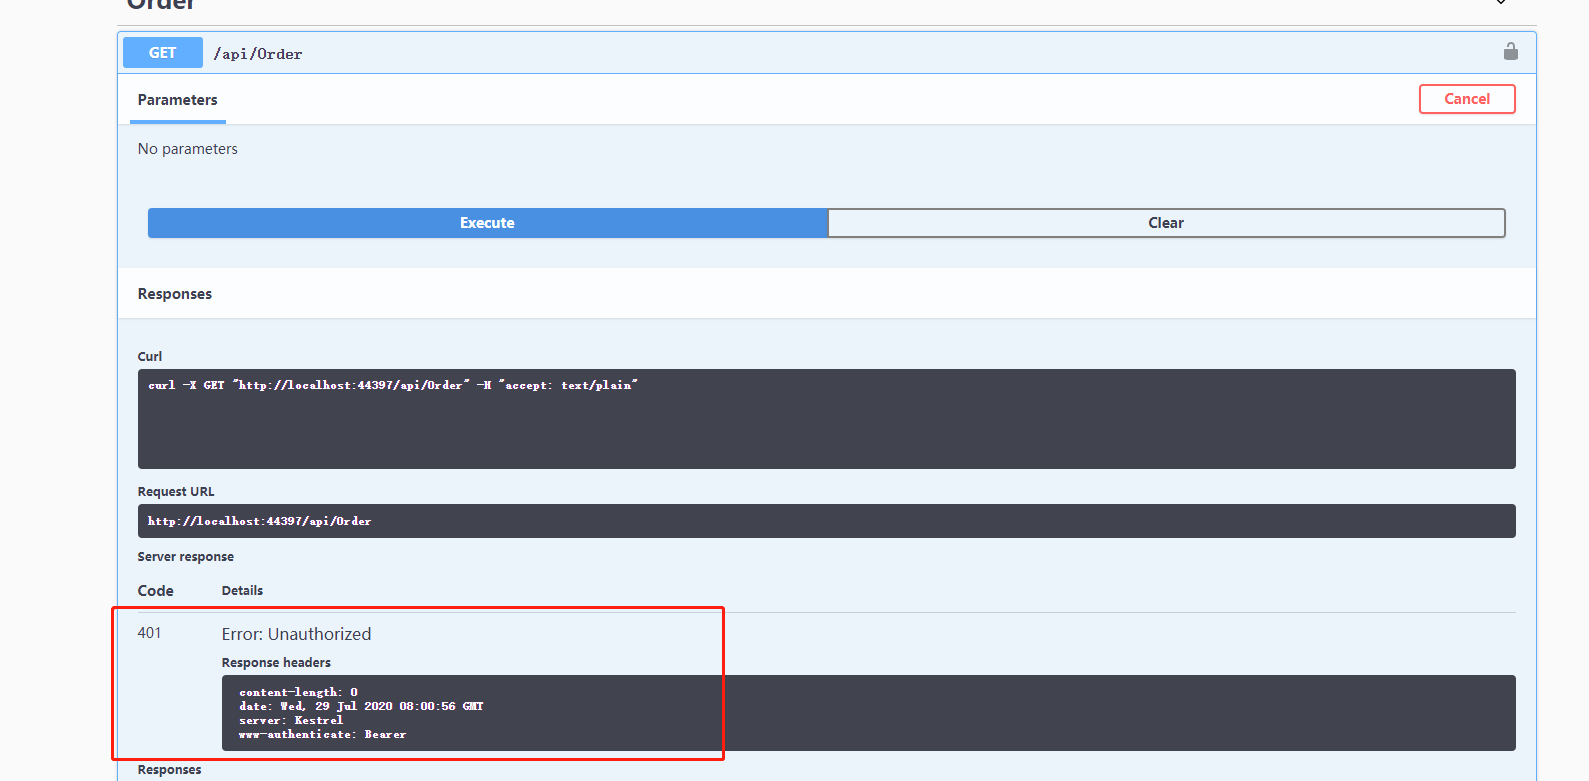
我们进行测试 order 接口,提示 返回码 401,无权限。
我们点击页面上的 ”Authorize“ 进行验证
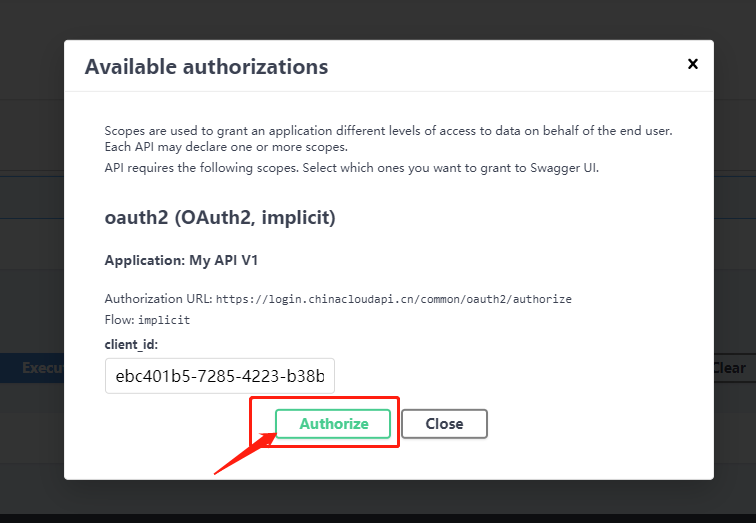
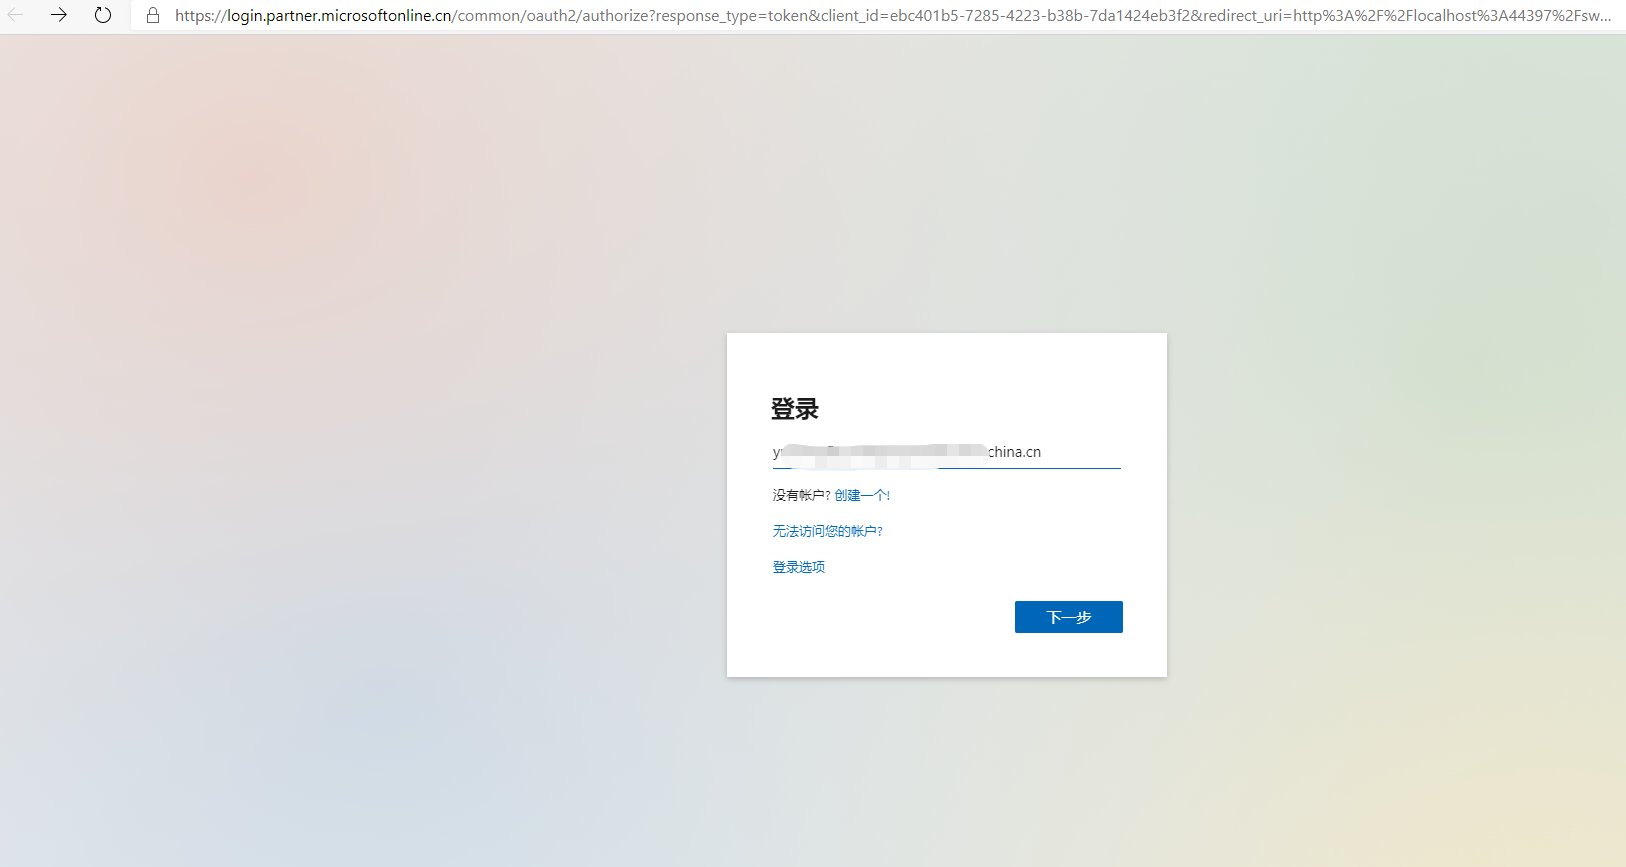
这里,我们输入其他azure租户的用户的账号信息进行登陆验证(因为这号牵扯个人隐私,所以目前不展示),点击下一步
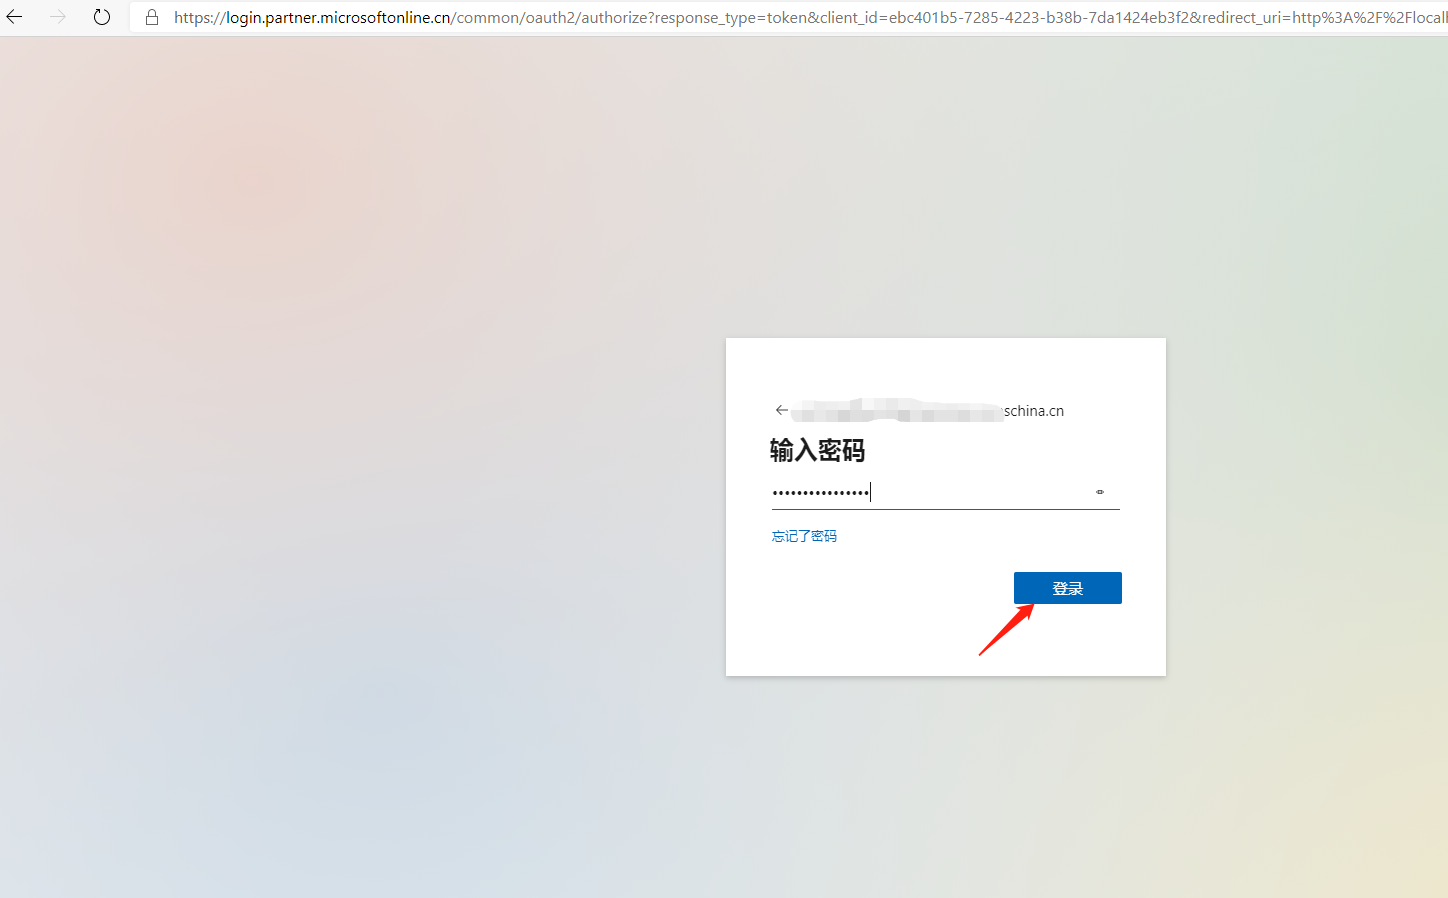
输入 账号密码信息,点击登陆
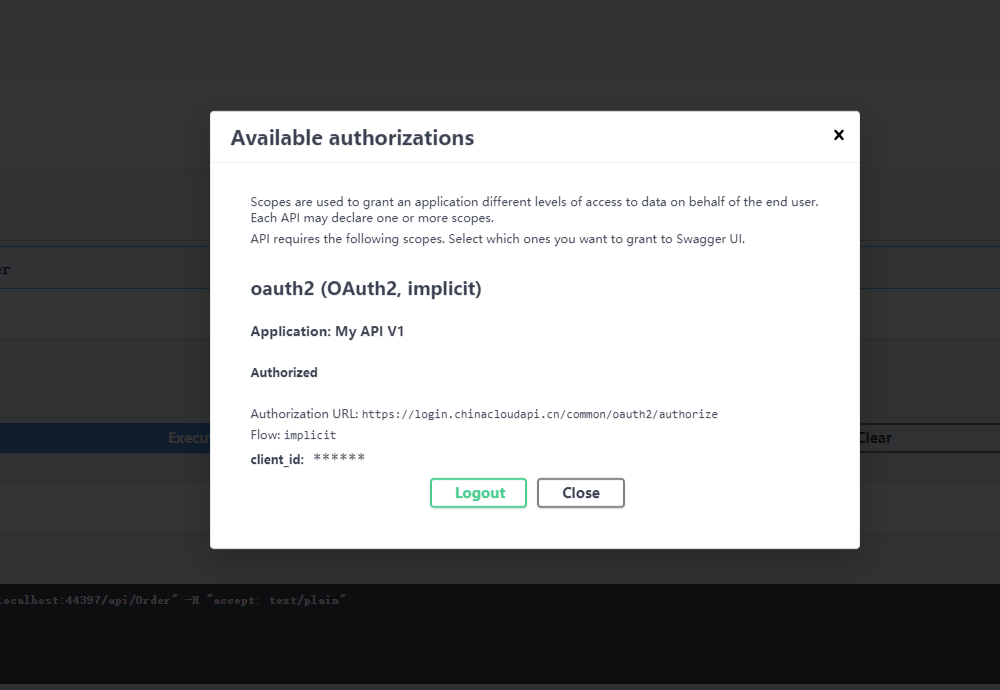
登陆验证通过后,我们再次进行验证操作
我们再次进行测试,ok,成功
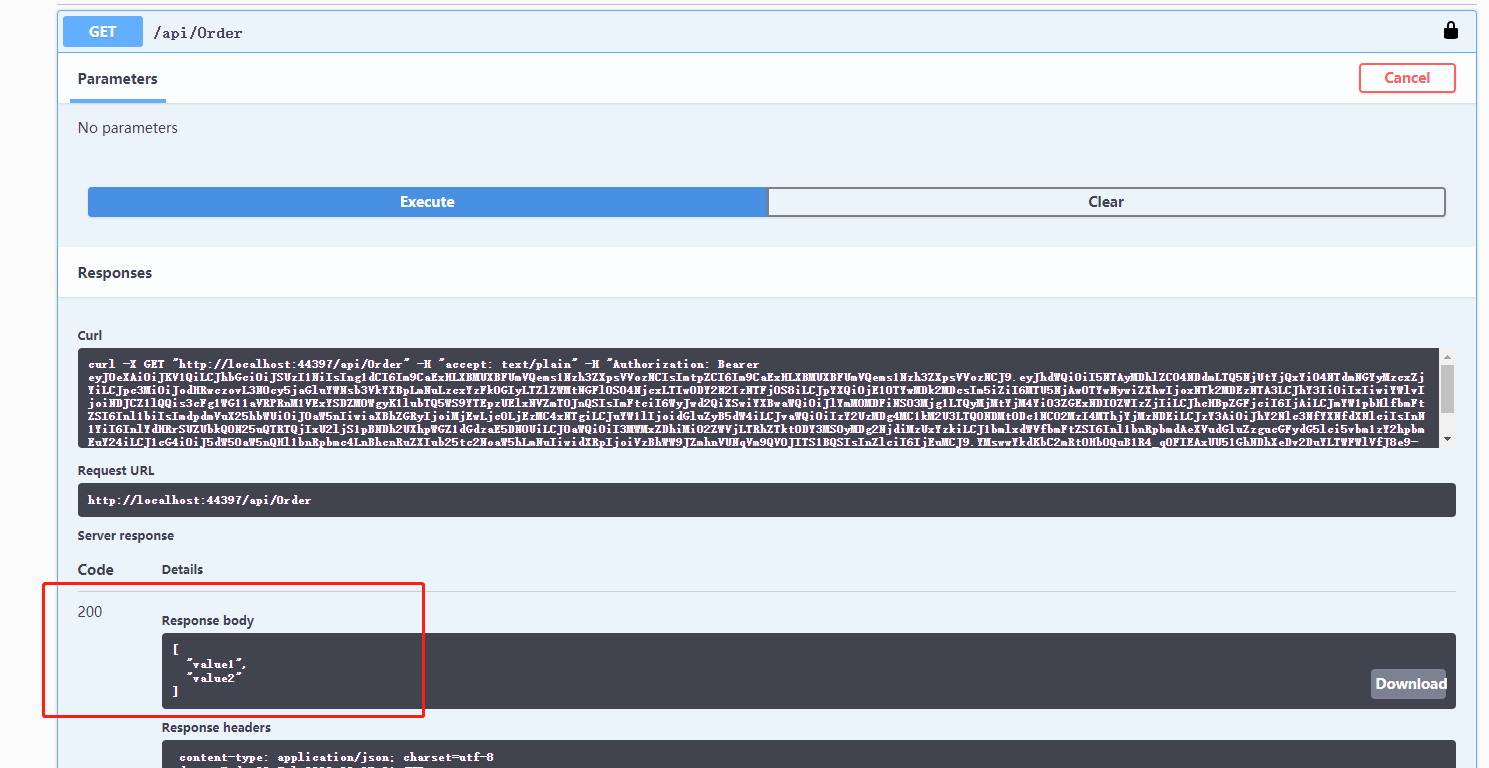
!!! 成功!,大家可以都试试哈
三,结尾
今天的文章大概介绍了多租户模式登陆/访问我们的受Azure AD保护的api资源,以及通过 Swagger中使用隐式授权模式来访问Api资源。
代码稍等,我会整理一下,上传到github中
作者:Allen
版权:转载请在文章明显位置注明作者及出处。如发现错误,欢迎批评指正。
Azure AD(五)使用多租户应用程序模式让任何 Azure Active Directory 用户登录的更多相关文章
- Azure AD B2C(二)使用Azure AD B2C为ASP.NET Core 应用设置社交帐户(邮箱)登录/注册
一,引言 上次关于Azure AD B2C 讲到一些概念,有介绍到,Azure AD B2C 也是一种身份验证的解决方案,但是它运行客户使用其首选的社交,企业或者本地账户标识对应用程序和API进行单一 ...
- Windows Azure Virtual Machine (38) 跨租户迁移使用托管磁盘的Azure虚拟机
<Windows Azure Platform 系列文章目录> 背景介绍: (1)我们建议使用Azure Manage Disk托管磁盘来创建Azure虚拟机 (2)使用托管磁盘的好处是, ...
- AD域的安装(在Windows Server 2003中安装Active Directory)
在Active Directory中提供了一组服务器作为身份验证服务器或登录服务器,这类服务器被称作域控制器(Domain Controller,简称DC).建立一个AD域的过程实际就是在一台运行Wi ...
- 编写Java程序,使用Swing事件处理机制实现用户登录和英雄信息显示
返回本章节 返回作业目录 需求说明: 使用Swing事件处理机制实现用户登录和英雄信息显示 实现思路: 创建LoginView类,该类用于显示登录界面,为登录按钮添加ActionListener事件, ...
- Azure AD(六)添加自定义域名
一,引言 每当我们在 Azure Portal 上创建新的租户时,都会在设置租户的 "初始域名" 后加上 ".onmicrosoft.com",默认情况下 &q ...
- 在 Windows Azure 上设计多租户应用程序
作者:Suren Machiraju 和 Ralph Squillace 审校:Christian Martinez.James Podgorski.Valery Mizonov 和 Michael ...
- 无责任Windows Azure SDK .NET开发入门(二):使用Azure AD 进行身份验证
<編者按>本篇为系列文章,带领读者轻松进入Windows Azure SDK .NET开发平台.本文为第二篇,将教导读者使用Azure AD进行身分验证.也推荐读者阅读无责任Windows ...
- Azure AD(一)入门认识
一,引言(吹水) 距离上一次介绍Azure Functions的相关博文以及过期快一个月了,本来早早都想好已经规划好的Azure的相关的学习的路线,无奈还是由于自己文笔不好以及自身太懒,导致博文没有更 ...
- Azure AD(二)调用受Microsoft 标识平台保护的 ASP.NET Core Web API 上
一,引言 上一节讲到Azure AD的一些基础概念,以及Azure AD究竟可以用来做什么?本节就接着讲如何在我们的项目中集成Azure AD 包含我们的API资源(其实这里还可以在 SPA单页面应用 ...
随机推荐
- SpringBoot2.x入门:快速创建一个SpringBoot应用
前提 这篇文章是<SpringBoot2.x入门>专辑的第2篇文章,使用的SpringBoot版本为2.3.1.RELEASE,JDK版本为1.8. 常规的套路会建议使用Spring官方提 ...
- centos7时间调整
查看时区是否正确,命令date -R: 不正确先调整时区,命令tzselect: 安装ntp,命令yum install ntp: 同步时间,命令ntpdate cn.pool.ntp.org: 设置 ...
- SharePoint2013 上传文件到文档库
SPSecurity.RunWithElevatedPrivileges(delegate() { using (SPSite site = new SPSite(SPContext.Current. ...
- Spring IoC 属性赋值阶段
前言 本系列全部基于 Spring 5.2.2.BUILD-SNAPSHOT 版本.因为 Spring 整个体系太过于庞大,所以只会进行关键部分的源码解析. 本篇文章主要介绍 Spring IoC 容 ...
- 二进制小数和IEEE浮点标准
二进制小数 首先复习进位计数制的要素: 数码:用来表示进制数的元素.比如 二进制数的数码为:0,1 十进制数的数码为:0,1,2,3,4,5,6,7,8,9 十六进制数的数码为:0,1,2,3,4,5 ...
- 利用binarySearch实现抽奖计算逻辑
前言 我们平时抽奖总感觉想抽到最高的奖那么难,哈哈当然不会那么容易啦,正巧写了个抽奖的功能,趁着有时间把抽奖的功能实现整理一下,我们要抽奖首先要定义一个奖品的实体类,这个实体类中包含奖品的基本信息,比 ...
- html table表格斜线表头的实现方法总汇
在html中给table加一个斜线的表头有时是很有必要的,但是到底该怎么实现这种效果呢?总结了以下几种方法: 1.UI背景图实现 直接去找公司的UI,让她做一张图片,作为背景图片放到这里,然后撑满就可 ...
- redo log 与 binlog
redo log 与 binlog redo log redo log (重做日志)是处于存储引擎层的,是InnoDB引擎特有的 redo log 存储的是物理日志 --- 即,"在某个 ...
- call,apply,bind的内部原理实现
call call 方法使用一个函数执行的时候更改本身 this 指向,并传入一个或者多个参数. var obj = { name: '$call' } function _fun() { conso ...
- DLL注入之修改PE静态注入
DLL注入之修改PE静态注入 0x00 前言 我们要注入的的力量功能是下载baidu首页数据.代码如下: #include "stdio.h" #include"stdi ...