
Xctf-easyapk
Xctf-easyapk Write UP
前期工作
查壳
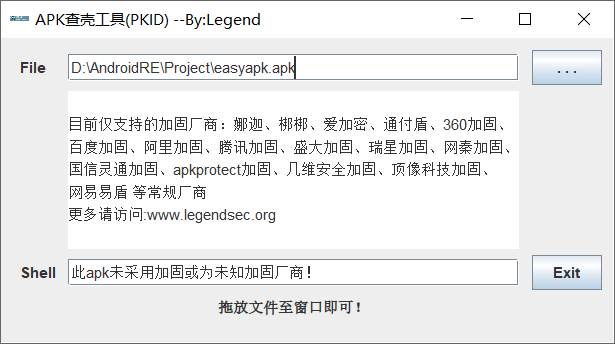
无壳
运行
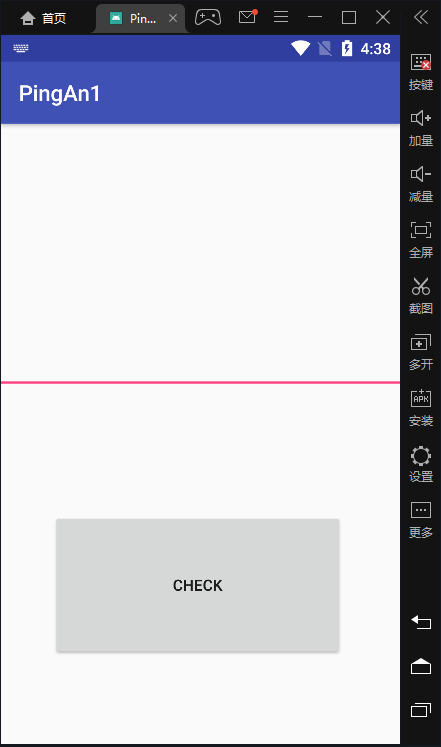
没什么特别的
逆向分析
使用jadx反编译查看代码
先看看文件结构
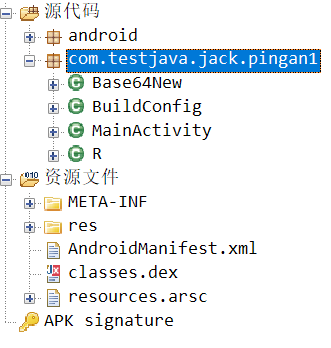
MainActivity代码
public class MainActivity extends AppCompatActivity {

    /* access modifiers changed from: protected */

    public void onCreate(Bundle savedInstanceState) {

        super.onCreate(savedInstanceState);

        setContentView((int) R.layout.activity_main);

        ((Button) findViewById(R.id.button)).setOnClickListener(new View.OnClickListener() {

            public void onClick(View view) {

                if (new Base64New().Base64Encode(((EditText) MainActivity.this.findViewById(R.id.editText)).getText().toString().getBytes()).equals("5rFf7E2K6rqN7Hpiyush7E6S5fJg6rsi5NBf6NGT5rs=")) {

                    Toast.makeText(MainActivity.this, "验证通过!", 1).show();

                } else {

                    Toast.makeText(MainActivity.this, "验证失败!", 1).show();

                }

            }

        });

    }

}
可以看到大概就是将通过Base64编码后比较。但是将代码中的Base64字符串拿去解码得不到正常字符串。注意到Base64New里的New,猜测是自己实现了一个新的Base64编码。
看看Base64New类的代码
public class Base64New {

    private static final char[] Base64ByteToStr = {'v', 'w', 'x', 'r', 's', 't', 'u', 'o', 'p', 'q', '3', '4', '5', '6', '7', 'A', 'B', 'C', 'D', 'E', 'F', 'G', 'H', 'I', 'J', 'y', 'z', '0', '1', '2', 'P', 'Q', 'R', 'S', 'T', 'K', 'L', 'M', 'N', 'O', 'Z', 'a', 'b', 'c', 'd', 'U', 'V', 'W', 'X', 'Y', 'e', 'f', 'g', 'h', 'i', 'j', 'k', 'l', 'm', 'n', '8', '9', '+', '/'};

    private static final int RANGE = 255;

    private static byte[] StrToBase64Byte = new byte[128];

    public String Base64Encode(byte[] bytes) {

        StringBuilder res = new StringBuilder();

        for (int i = 0; i <= bytes.length - 1; i += 3) {

            byte[] enBytes = new byte[4];

            byte tmp = 0;

            for (int k = 0; k <= 2; k++) {

                if (i + k <= bytes.length - 1) {

                    enBytes[k] = (byte) (((bytes[i + k] & 255) >>> ((k * 2) + 2)) | tmp);

                    tmp = (byte) ((((bytes[i + k] & 255) << (((2 - k) * 2) + 2)) & 255) >>> 2);

                } else {

                    enBytes[k] = tmp;

                    tmp = 64;

                }

            }

            enBytes[3] = tmp;

            for (int k2 = 0; k2 <= 3; k2++) {

                if (enBytes[k2] <= 63) {

                    res.append(Base64ByteToStr[enBytes[k2]]);

                } else {

                    res.append('=');

                }

            }

        }

        return res.toString();

    }

}
可以看到应该是替换了码表
编写脚本
# s = "ABCDEFGHIJKLMNOPQRSTUVWXYZabcdefghijklmnopqrstuvwxyz0123456789+/"

a = [

    'v', 'w', 'x', 'r', 's', 't', 'u', 'o', 'p', 'q', '3', '4', '5', '6', '7',

    'A', 'B', 'C', 'D', 'E', 'F', 'G', 'H', 'I', 'J', 'y', 'z', '0', '1', '2',

    'P', 'Q', 'R', 'S', 'T', 'K', 'L', 'M', 'N', 'O', 'Z', 'a', 'b', 'c', 'd',

    'U', 'V', 'W', 'X', 'Y', 'e', 'f', 'g', 'h', 'i', 'j', 'k', 'l', 'm', 'n',

    '8', '9', '+', '/'

]

s = ''.join(a)

def My_base64_encode(inputs):

    # 将字符串转化为2进制

    bin_str = []

    for i in inputs:

        x = str(bin(ord(i))).replace('0b', '')

        bin_str.append('{:0>8}'.format(x))

    #print(bin_str)

    # 输出的字符串

    outputs = ""

    # 不够三倍数,需补齐的次数

    nums = 0

    while bin_str:

        #每次取三个字符的二进制

        temp_list = bin_str[:3]

        if (len(temp_list) != 3):

            nums = 3 - len(temp_list)

            while len(temp_list) < 3:

                temp_list += ['0' * 8]

        temp_str = "".join(temp_list)

        #print(temp_str)

        # 将三个8字节的二进制转换为4个十进制

        temp_str_list = []

        for i in range(0, 4):

            temp_str_list.append(int(temp_str[i * 6:(i + 1) * 6], 2))

        #print(temp_str_list)

        if nums:

            temp_str_list = temp_str_list[0:4 - nums]

        for i in temp_str_list:

            outputs += s[i]

        bin_str = bin_str[3:]

    outputs += nums * '='

    print("Encrypted String:\n%s " % outputs)

def My_base64_decode(inputs):

    # 将字符串转化为2进制

    bin_str = []

    for i in inputs:

        if i != '=':

            x = str(bin(s.index(i))).replace('0b', '')

            bin_str.append('{:0>6}'.format(x))

    #print(bin_str)

    # 输出的字符串

    outputs = ""

    nums = inputs.count('=')

    while bin_str:

        temp_list = bin_str[:4]

        temp_str = "".join(temp_list)

        #print(temp_str)

        # 补足8位字节

        if (len(temp_str) % 8 != 0):

            temp_str = temp_str[0:-1 * nums * 2]

        # 将四个6字节的二进制转换为三个字符

        for i in range(0, int(len(temp_str) / 8)):

            outputs += chr(int(temp_str[i * 8:(i + 1) * 8], 2))

        bin_str = bin_str[4:]

    print("Decrypted String:\n%s " % outputs)

print()

print("     *************************************")

print("     *    (1)encode         (2)decode    *")

print("     *************************************")

print()

num = input("Please select the operation you want to perform:\n")

if (num == "1"):

    input_str = input("Please enter a string that needs to be encrypted: \n")

    My_base64_encode(input_str)

else:

    input_str = input("Please enter a string that needs to be decrypted: \n")

    My_base64_decode(input_str)
运行结果
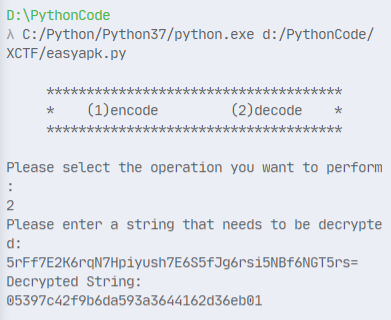
验证
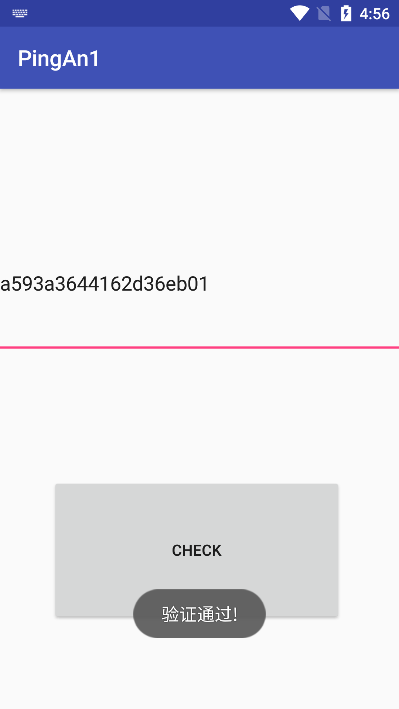
flag
flag{05397c42f9b6da593a3644162d36eb01}
Xctf-easyapk的更多相关文章
- 攻防世界(XCTF)WEB(进阶区)write up(四)
ics-07 Web_php_include Zhuanxv Web_python_template_injection ics-07 题前半部分是php弱类型 这段说当传入的id值浮点值不能为1 ...
- 攻防世界(XCTF)WEB(进阶区)write up(三)
挑着做一些好玩的ctf题 FlatScience web2 unserialize3upload1wtf.sh-150ics-04web i-got-id-200 FlatScience 扫出来的lo ...
- 攻防世界(XCTF)WEB(进阶区)write up(一)
cat ics-05 ics-06 lottery Cat XCTF 4th-WHCTF-2017 输入域名 输入普通域名无果 输入127.0.0.1返回了ping码的结果 有可能是命令执行 ...
- XCTF攻防世界Web之WriteUp
XCTF攻防世界Web之WriteUp 0x00 准备 [内容] 在xctf官网注册账号,即可食用. [目录] 目录 0x01 view-source2 0x02 get post3 0x03 rob ...
- xctf进阶-unserialize3反序列化
一道反序列化题: 打开后给出了一个php类,我们可以控制code值: `unserialize()` 会检查是否存在一个 `__wakeup()` 方法.如果存在,则会先调用 `__wakeup` 方 ...
- 日常破解--从XCTF的app3题目简单了解安卓备份文件以及sqliteCipher加密数据库
一.题目来源 题目来源:XCTF app3题目 二.解题过程 1.下载好题目,下载完后发现是.ab后缀名的文件,如下图所示: 2.什么是.ab文件?.ab后缀名的文件是Andr ...
- 日常破解--XCTF easy_apk
一.题目来源 来源:XCTF社区安卓题目easy_apk 二.破解思路 1.首先运行一下给的apk,发现就一个输入框和一个按钮,随便点击一下,发现弹出Toast验证失败.如下图所示: ...
- XCTF练习题-WEB-webshell
XCTF练习题-WEB-webshell 解题步骤: 1.观察题目,打开场景 2.根据题目提示,这道题很有可能是获取webshell,再看描述,一句话,基本确认了,观察一下页面,一句话内容,密码为sh ...
- 【XCTF】ics-04
信息: 题目来源:XCTF 4th-CyberEarth 标签:PHP.SQL注入 题目描述:工控云管理系统新添加的登录和注册页面存在漏洞,请找出flag 解题过程 进入注册页面,尝试注册: 进行登录 ...
- 【XCTF】ics-05
信息: 题目来源:XCTF 4th-CyberEarth 标签:PHP.伪协议 题目描述:其他破坏者会利用工控云管理系统设备维护中心的后门入侵系统 解题过程 题目给了一个工控管理系统,并提示存在后门, ...
随机推荐
- 简述java多态
一.多态性: 1.java实现多态的前提:继承.覆写: 2.覆写调用的前提:看new是哪个类的对象,而后看方法是否被子类覆写,若覆写则调用覆写的方法,若没覆写则调用父类的方法: 二.多态性组成: 1方 ...
- 主从同步遇到 Got fatal error 1236 from master when reading data from binary log: 'Could not find first log file name in binary log index file'时怎么解决
首先遇到这个是因为binlog位置索引处的问题,不要reset slave: reset slave会将主从同步的文件以及位置恢复到初始状态,一开始没有数据还好,有数据的话,相当于重新开始同步,可能会 ...
- WEBSERVICE之CXF框架开发webservice
之前学习了使用jdk开发webservice服务,现在开始学习使用框架(cxf)开发webservice. 1.准备工作 A.使用cxf开发webservice服务,需要用到apache-cxf-3. ...
- Java Object to Class
User user = new User(username,password); //添加构成JWT的参数 JwtBuilder builder = Jwts.builder().setHeaderP ...
- MMDetection 快速开始,训练自定义数据集
本文将快速引导使用 MMDetection ,记录了实践中需注意的一些问题. 环境准备 基础环境 Nvidia 显卡的主机 Ubuntu 18.04 系统安装,可见 制作 USB 启动盘,及系统安装 ...
- 解决FastJson循环引用的问题
temp 本来被循环引用,运行方法报错. 解决方法:对temp进行处理 SerializerFeature feature = SerializerFeature.DisableCircularRef ...
- kubernets之job资源
一 介绍job资源 1.1 前面介绍的RC,RS,DS等等,管控的pod都是需要长期持久的运行的应用,但是尝试考虑另外一种场景,在微服务的场景下,有些pod的作用就是需要 执行完一些命令之后正常 ...
- SDUST数据结构 - chap6 树与二叉树
判断题: 选择题: 函数题: 6-1 求二叉树高度: 裁判测试程序样例: #include <stdio.h> #include <stdlib.h> typedef char ...
- python—打开图像文件报错
今天使用python打开一张图像文件的时候报错了 UnicodeDecodeError: 'gbk' codec can't decode byte 0xff in position 0: illeg ...
- ctfhub技能树—信息泄露—备份文件下载—.DS_Store
打开靶机 查看页面信息 使用dirsearch进行扫描 访问该网页,下载文件 使用Linux系统打开文件 发现一个特殊文件,使用浏览器打开 拿到flag 二.使用Python-dsstore工具查看该 ...