
SpringBoot--- 使用SpringSecurity进行授权认证
SpringBoot--- 使用SpringSecurity进行授权认证
前言
在未接触 SpringSecurity 、Shiro 等安全认证框架之前,如果有页面权限需求需要满足,通常可以用拦截器,过滤器来实现。
但是,这需要大量配置类去完成,代码编写工作量是巨大的。为提高工作效率,学习SpringSecurity 等框架变得十分必要。
环境
IDEA :2020.1
Maven:3.5.6
SpringBoot: 2.3.2
MySQL 8.0
1、导入正确的依赖
重要依赖
 <dependency>

        <groupId>org.springframework.boot</groupId>

        <artifactId>spring-boot-starter-security</artifactId>

</dependency>
也可以在构建工程师勾选

另外,笔者使用的模板引擎是 Thymeleaf ,因此也需要导入该依赖,不适用该模板引擎的不需要导入该依赖。
<!--       thymeleaf-->

        <dependency>

            <groupId>org.thymeleaf</groupId>

            <artifactId>thymeleaf-spring5</artifactId>

        </dependency>

        <dependency>

            <groupId>org.thymeleaf.extras</groupId>

            <artifactId>thymeleaf-extras-java8time</artifactId>

        </dependency>
2、编写或导入页面素材,HTML页面等
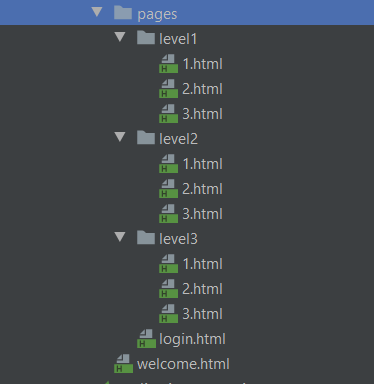
读者可以自行编写,除了login 页面必须要有 form 表单提交,以便处理登录请求外,其他页面可根据需要编写。
关于页面,登录提交表单有一个注意事项
<form class="form-signin" method="post" action="/login">
一般提交表单,这样写是没有问题的,但是,我们添加了 spring-boot-starter-security 依赖,使用了SpringSecurity ,提交所有表单(包括这次的登录表单),都会交由SpringSecurity 处理。
SpringSecurity 默认开启了防止跨域攻击的功能,任何 POST 提交到后台的表单都要验证是否带有 _csrf 参数,一旦传来的 _csrf 参数不正确,服务器便返回 403 错误;
上述写法,我们可以访问后,在调试模式查看元素。
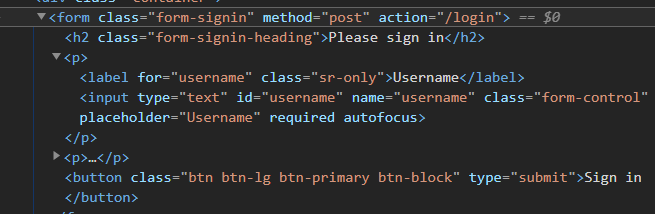
是没有 _csrf 参数的,这样提交的时候将会被拦截。
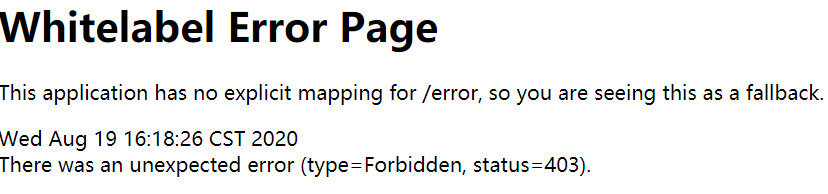
提交表单403解决方法
1、直接关闭防止域攻击功能。(可以在下面介绍到的配置类中使用)
http.csrf().disable()
这样的做法是不建议的,安全级别会降低。有违使用 SpringSecurity 的初衷。
2、使用 Thymeleaf 在 form 表单添加 th:action 元素,Thymeleaf 会自动为我们添加 _csrf 元素。
<form class="form-signin" method="post" th:action="@{/login}">
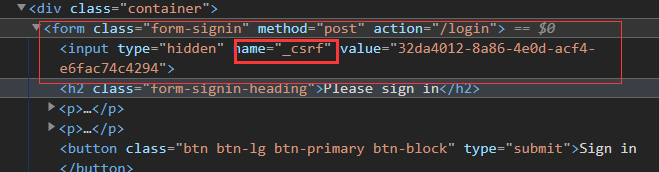
3、在 form 表单中手动添加隐藏 _csrf
在 form 表单中手动添加隐藏 _csrf,比较麻烦,这里不做过多介绍。都用SpringBoot 了,还手动配置这么多,这不有违初衷了吗?当然,感兴趣的可以自己摸索。
3、测试环境,保证页面访问成功
这里要做的是编写一个 Controller 类
@Controller

public class RouterController {

    @RequestMapping( {"/","/index"} )

    public String index(){

        return "welcome";

    }

    @RequestMapping("/toLogin")

    public String toLogin(){

        return "pages/login";

    }

    @RequestMapping("/level1/{id}")

    public String toLevel1(@PathVariable("id") int id){

        return "pages/level1/"+ id;

    }

    @RequestMapping("/level2/{id}")

    public String toLevel2(@PathVariable("id") int id){

        return "pages/level2/"+ id;

    }

    @RequestMapping("/level3/{id}")

    public String toLevel3(@PathVariable("id") int id){

        return "pages/level3/"+ id;

    }

}
启动程序,访问页面。当然,测试之前,我们需要把 SpringSecurity 的依赖导入暂时注释掉,否则,SpringSecurity 将会拦截下我们的请求。

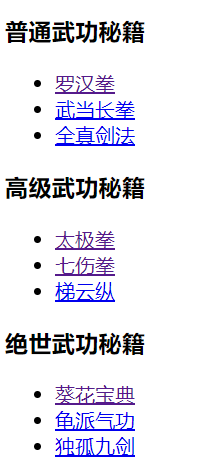
访问成功,页面是没有问题的。这样做有利于我们后面出问题时,排查问题,并非多此一举。类似于断点Debug ,相当于我们在这一阶段前的工作是无误的。问题出现应该在这一断点(阶段)后排查。
别忘了,注释掉的SpringSecurity ,我们要解除掉注释。
4、配置用户,权限
1、yml
spring:

  security:

    user:

      name: tom001

      password: 1234

      roles: [level1,level2]
这样就可以配置用户名,密码和权限了,太方便了吧!
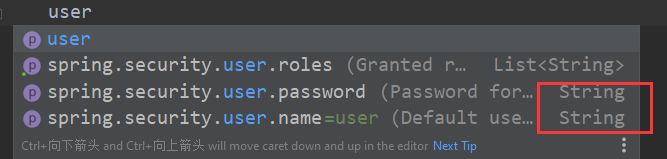
但是,却只能添加一个用户,因为user,password 等属性都只是String类型的,只有roles 才是List 类型的。笔者内问百度博客,外问谷歌,Stack Overflow 都没有找到SpringSecurity可以在yml配置文件下配置多用户的方法。如果你知道,请评论留言告诉我,小弟谢过了。
2、配置类
所以最后还是回到配置类上来吧,很多问题还可以从官方和源码中找到正确的配置方法。(虽然不能用 yml 提【tou】高【gong】效【jian】率【liao】了 T_T )
@EnableWebSecurity

public class SecurityConfig extends WebSecurityConfigurerAdapter {

    @Override

    protected void configure(HttpSecurity http) throws Exception {

         //定义访问权限规则

        http.authorizeRequests()

                .antMatchers("/").permitAll()

                .antMatchers("/level1/**").hasRole("level1")

                .antMatchers("/level2/**").hasRole("level2")

                .antMatchers("/level3/**").hasRole("level3");

        //没有权限将跳转到登录页面

        http.formLogin();

    }

}
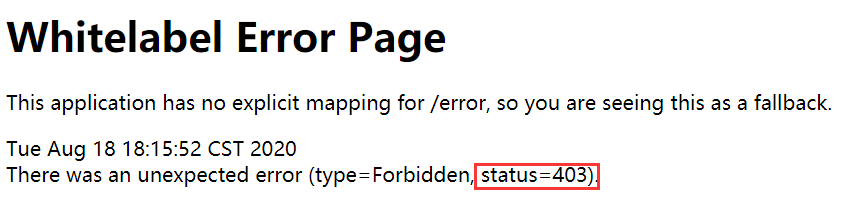
很遗憾,主页依然可以访问,在访问需要权限的页面时候,被服务器拒绝访问(403 表示服务器拒绝该访问请求)。
http.formLogin();
上面这个方法值得我们来分析一下,因为我们 Controller 配置的并没有 login 而是 toLogin 。
    @RequestMapping("/toLogin")

    public String toLogin(){

        return "pages/login";

    }
SpringSecurity 是如何帮我们自动配置的呢?
我们去到 formLogin() 方法即可一探究竟。
	 * Specifies to support form based authentication. If

	 * {@link FormLoginConfigurer#loginPage(String)} is not specified a default login page

	 * will be generated.

	 *

	 * <h2>Example Configurations</h2>

	 *

	 * The most basic configuration defaults to automatically generating a login page at

	 * the URL "/login", redirecting to "/login?error" for authentication failure. The

	 * details of the login page can be found on

	 * {@link FormLoginConfigurer#loginPage(String)}

	 *
在方法体上,找到了注释。请特别注意以下这句话:
The most basic configuration defaults to automatically generating a login page at
the URL "/login", redirecting to "/login?error" for authentication failure.
默认情况下,最基本的配置是在URL“ /login”处自动生成一个登录页面,并重定向到“ /login?error”来进行身份验证失败。
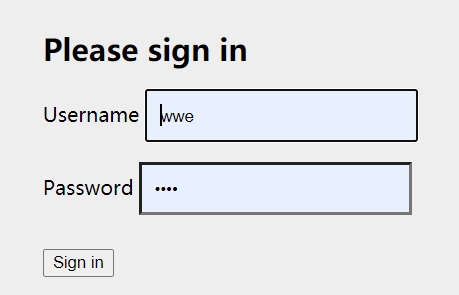
而且,调转到的 /login ,并不是我们编写的 login.html 页面,而是由 SpringSecurity 提供的登录页面。
这里跳转了很久,难道是 SpringSecurity 在后天写页面?哈哈
我们可以点进查看一下 formLogin() 方法
	 * 	@Override

	 * 	protected void configure(HttpSecurity http) throws Exception {

	 * 		http.authorizeRequests().antMatchers("/**").hasRole("USER").and().formLogin()

	 * 				.usernameParameter("username") // default is username

	 * 				.passwordParameter("password") // default is password

	 * 				.loginPage("/authentication/login") // default is /login with an HTTP get

	 * 				.failureUrl("/authentication/login?failed") // default is /login?error

	 * 				.loginProcessingUrl("/authentication/login/process"); // default is /login

	 * 																		// with an HTTP

	 * 																		// post
原来,我们可以指定登录页面,SpringSecurity 会帮助我们跳转过去。
.formLogin().loginPage("/toLogin");
这下帮刘都统接上了腿,一下子就可跳过去了吧?哈哈哈
接下来就是认证方面的工作了。我们需要编写的类可以通过查看,需要重写哪些类,它的参数一般可以标明他要做的配置工作。
既然是配置,那自然是 configure 方法,我们可以去查看下图所示的这一 configure方法。
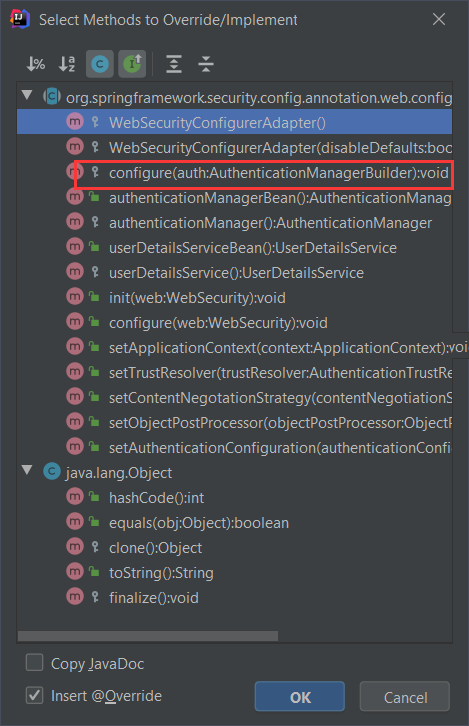
在源码,我们发现框架开发者在方法的注释上,贴心地为我们写好了配置示例。
	 * @Override

	 * protected void configure(AuthenticationManagerBuilder auth) {

	 * 	auth

	 * 	// enable in memory based authentication with a user named

	 * 	// "user" and "admin"

	 * 	.inMemoryAuthentication().withUser("user").password("password").roles("USER").and()

	 * 			.withUser("admin").password("password").roles("USER", "ADMIN");

	 * }
我们按照他说要求的配置如下:
    //认证

    @Override

    protected void configure(AuthenticationManagerBuilder auth) throws Exception {

        auth.inMemoryAuthentication()

                .withUser("tom001").password("1234").roles("level1","level3");

    }
哈哈,终于要完成了,我们来验证一下吧!
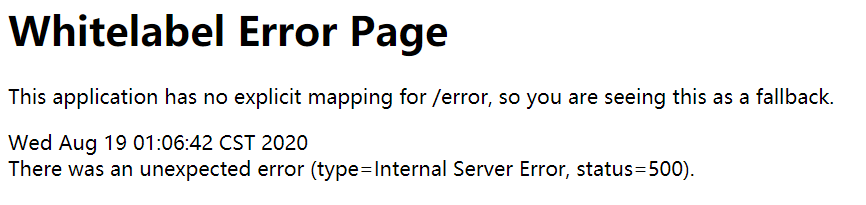
java.lang.IllegalArgumentException: There is no PasswordEncoder mapped for the id "null"
密码没有编码?啥意思?
都说了是 SpringSecurity,登录密码还是明文密码,那还了得?人家一个反编译,你岂不是底裤都让人看光了?
但是官方一句提醒都没有,啊,这......
确实有点麻烦,但是我们的目的是让它起作用,还是找找方法吧。
    //认证

    @Override

    protected void configure(AuthenticationManagerBuilder auth) throws Exception {

        auth.inMemoryAuthentication().passwordEncoder(new BCryptPasswordEncoder())

                .withUser("tom001").password(new BCryptPasswordEncoder().encode("1234")).roles("level1","level3");

    }
最后加上加密类,这次总该成了吧?
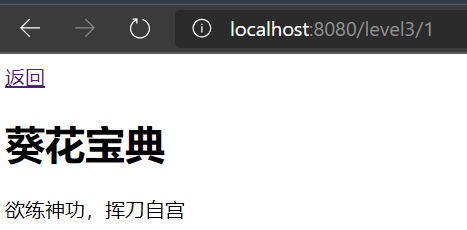
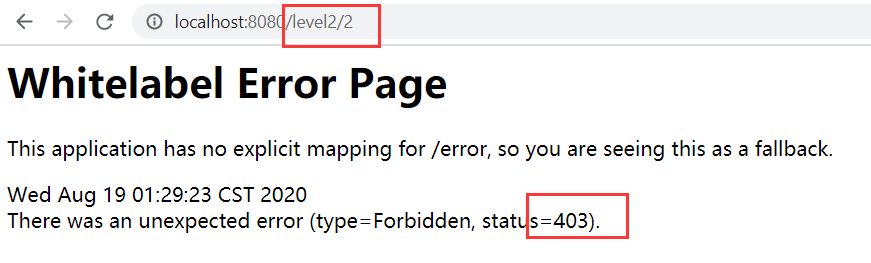
成功了!
实际使用中,还是要结合数据库获取用户密码,权限等信息的。
SpringBoot--- 使用SpringSecurity进行授权认证的更多相关文章
- SpringBoot整合SpringSecurity实现JWT认证
目录 前言 目录 1.创建SpringBoot工程 2.导入SpringSecurity与JWT的相关依赖 3.定义SpringSecurity需要的基础处理类 4. 构建JWT token工具类 5 ...
- 使用SpringSecurity搭建授权认证服务(1) -- 基本demo认证原理
使用SpringSecurity搭建授权认证服务(1) -- 基本demo 登录认证是做后台开发的最基本的能力,初学就知道一个interceptor或者filter拦截所有请求,然后判断参数是否合理, ...
- 用JWT技术为SpringBoot的API增加授权保护(转),需要自己实现userdetailservice接口
转自:https://blog.csdn.net/haiyan_qi/article/details/77373900 概述 示例 https://github.com/qihaiyan/jwt-bo ...
- 【使用篇二】SpringBoot集成SpringSecurity(22)
SpringSecurity是专门针对基于Spring项目的安全框架,充分利用了依赖注入和AOP来实现安全管控.在很多大型企业级系统中权限是最核心的部分,一个系统的好与坏全都在于权限管控是否灵活,是否 ...
- SpringBoot 集成SpringSecurity JWT
目录 1. 简介 1.1 SpringSecurity 1.2 OAuth2 1.3 JWT 2. SpringBoot 集成 SpringSecurity 2.1 导入Spring Security ...
- SpringSecurity之授权
SpringSecurity之授权 目录 SpringSecurity之授权 1. 写在前面的话 2. web授权 1. 建库 2. 添加查询权限的接口 3. 前端页面的编写 4. SpringSec ...
- SpringBoot整合SpringSecurity示例实现前后分离权限注解
SpringBoot 整合SpringSecurity示例实现前后分离权限注解+JWT登录认证 作者:Sans_ juejin.im/post/5da82f066fb9a04e2a73daec 一.说 ...
- 9、SpringBoot整合之SpringBoot整合SpringSecurity
SpringBoot整合SpringSecurity 一.创建项目,选择依赖 选择Spring Web.Thymeleaf即可 二.在pom文件中导入相关依赖 <!-- 导入SpringSecu ...
- SpringSecurity个性化用户认证流程
⒈自定义登录页面 package cn.coreqi.security.config; import org.springframework.context.annotation.Bean; impo ...
随机推荐
- python 批量重命名文件名字
import os print(os.path) img_name = os.listdir('./img') for index, temp_name in enumerate(img_name): ...
- 最近建了一个.net源码共享群,群共享有大量网友分享的.net(C#)商业源码
.net源码共享群 324087998. 本群创建于2013/6/21: 群里都是.net(C#)程序开发人员,群共享有大量网友分享的.net(C#)商业源码.比如:DTCMS旗舰版,hishop微分 ...
- javascrip jason
JavaScript JSONJSON 是用于存储和传输数据的格式. JSON 通常用于服务端向网页传递数据 . <html><head><meta http-equiv ...
- Day13_商品详情及静态化
学于黑马和传智播客联合做的教学项目 感谢 黑马官网 传智播客官网 微信搜索"艺术行者",关注并回复关键词"乐优商城"获取视频和教程资料! b站在线视频 0.学习 ...
- MacOS 键盘符号和修饰键说明
原文链接:https://www.cnblogs.com/exmyth/p/5949192.html Mac键盘符号和修饰键说明 ⌘ Command ⇧ Shift ⌥ Option ⌃ Cont ...
- MySQL在同一个表上,删除查询出来的结果
背景 有一个程序员员工表(code_user),包含用户id.姓名.掌握的语言. 表数据如下: +---------+-----------+----------+ | user_id | user_ ...
- Python os.fpathconf() 方法
概述 os.fpathconf() 方法用于返回一个打开的文件的系统配置信息.高佣联盟 www.cgewang.com Unix上可用. 语法 fpathconf()方法语法格式如下: os.fpat ...
- 7.18 NOI模拟赛 因懒无名 线段树分治 线段树维护直径
LINK:因懒无名 20分显然有\(n\cdot q\)的暴力. 还有20分 每次只询问一种颜色的直径不过带修改. 容易想到利用线段树维护直径就可以解决了. 当然也可以进行线段树分治 每种颜色存一下直 ...
- Spring Boot的自动配置,到底是怎么做到?
作者:祖大帅 链接:juejin.im/post/5b679fbc5188251aad213110 来源:掘金 1. Spring Boot.Spring MVC 和 Spring 有什么区别? 分开 ...
- 7月13日考试 题解(DFS序+期望+线段树优化建图)
T1 sign 题目大意:给出一棵 N 个节点的树,求所有起点为叶节点的有向路径,其 上每一条边权值和的和.N<=10000 水题.考试的时候毒瘤出题人(学长orz)把读入顺序改了一下,于是很多 ...