Android 自定义简易的方向盘操作控件
最近在做一款交互性较为复杂的APP,需要开发一个方向操作控件。最终用自定义控件做了一个简单的版本。
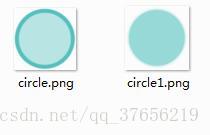
这里我准备了两张素材图,作为方向盘被点击和没被点击的背景图。下面看看自定义的Wheel类
public class Wheel extends View implements View.OnTouchListener{

    int xPosition;//点击按钮的x坐标

    int yPosition;//点击按钮的y坐标

    int centerX;//方向盘X轴中心

    int centerY;//方向盘Y轴中心

    int mainRadius;

    int secondRadius;//点击的圆形按钮的半径

    boolean isClicked;//用于判断方向盘是否被点击

    public Wheel(Context context) {

        super(context);

    }

    public Wheel(Context context, @Nullable AttributeSet attrs) {

        super(context, attrs);

    }

    public Wheel(Context context, @Nullable AttributeSet attrs, int defStyleAttr) {

        super(context, attrs, defStyleAttr);

        isClicked=false;//初始化为未点击状态

    }

}
上面这是最初的代码,仅仅是声明了一些变量。
接下来我们来复写OnMeasure
@Override

    protected void onMeasure(int widthMeasureSpec, int heightMeasureSpec) {

        super.onMeasure(widthMeasureSpec, heightMeasureSpec);

        int width =MeasureSpec.getMode(widthMeasureSpec)==MeasureSpec.UNSPECIFIED?:MeasureSpec.getSize(widthMeasureSpec);

        int height = MeasureSpec.getMode(heightMeasureSpec)==MeasureSpec.UNSPECIFIED?:MeasureSpec.getSize(heightMeasureSpec);

        if(width>height){//将自定义控件的区域限制为正方形

            width=height;

        }else{

            height=width;

        }

        this.mainRadius=(getWidth()-)/;//给主要半径赋值

        this.secondRadius=mainRadius/*;//赋值可点击的圆形按钮的半径

        setMeasuredDimension(width, height);

        this.centerX=getWidth()/;//确定中心

        this.centerY=getHeight()/;

        this.xPosition=centerX;//最初可点击的圆形按钮在中心位置

        this.yPosition=centerY;

    }
接着是OnDraw函数
    @Override

    protected void onDraw(Canvas canvas){

        Bitmap bm;//背景图的bitmap

        Paint circlePaint=new Paint();//可点击的圆形按钮的Paint对象

        circlePaint.setColor(Color.parseColor("#52c1bd"));//设置颜色

        circlePaint.setStyle(Paint.Style.FILL);//设置作图形式为填满

        if(!isClicked){//如果为点击就将bm赋值为circle1这张图的bitmap对象,否则为circle

            bm=((BitmapDrawable)getResources().getDrawable(R.mipmap.circle1)).getBitmap();

        }

        else {

            bm = ((BitmapDrawable) getResources().getDrawable(R.mipmap.circle)).getBitmap();

        }

        Rect mSrcRect = new Rect(, , bm.getWidth(), bm.getHeight());//设置原始图像中要被画出来的区域

        Rect mDestRect = new Rect(, ,getWidth()-, getHeight()-);//设置目标区域中会被画进去图像的区域

        canvas.drawBitmap(bm,mSrcRect,mDestRect,BackgroundPaint);//画背景图

        canvas.drawCircle(this.xPosition,this.yPosition,secondRadius,circlePaint);//画出可点击的中心按钮

    }
上面我们创建Wheel类时还使用了OnTouchListener接口,所以要复写onTouch函数,但这里我们仅仅是写成下面的代码就行
不需要实现额外功能
    @Override

    public boolean onTouch(View v, MotionEvent event) {

        return false;

    }
我们实际上要用的是下面这个函数
   @Override

    public boolean onTouchEvent(MotionEvent event){

        isClicked=true;//设置为已经点击

        this.xPosition = (int) event.getX();//得到点击的x坐标

        this.yPosition = (int) event.getY();//得到点击的y坐标

        //如果点击的位置与圆心距离差距大于半径,就限制按钮的位置在边界处

        if(Math.sqrt((this.xPosition-this.centerX)*(this.xPosition-this.centerX)+(this.yPosition-this.centerY)*(this.yPosition-this.centerY))>mainRadius){
            double Yrate=(this.yPosition-this.centerY)/Math.sqrt((this.xPosition-this.centerX)*(this.xPosition-this.centerX)+(this.yPosition-this.centerY)*(this.yPosition-this.centerY));

            double Xrate=(this.xPosition-this.centerX)/Math.sqrt((this.xPosition-this.centerX)*(this.xPosition-this.centerX)+(this.yPosition-this.centerY)*(this.yPosition-this.centerY));

            this.yPosition=(int)(mainRadius*Yrate)+this.centerY;//设置可点击圆心按钮的位置在边界处

            this.xPosition=(int)(mainRadius*Xrate)+this.centerX;

        }


        if(this.myWheelMoveListener!=null){//这里是之后我们要实现交互用的,限制先忽略

            this.myWheelMoveListener.onValueChanged(this.xPosition,this.yPosition);

        }

        invalidate();

        if(event.getAction()==){//如果点击释放后

            isClicked=false;//设置为未点击状态

            this.yPosition=this.centerY;//按钮归于圆心

            this.xPosition=this.centerX;

            if(this.myWheelMoveListener!=null){

                this.myWheelMoveListener.onValueChanged(this.xPosition,this.yPosition);

            }

            invalidate();//重新绘图

        }

        return true;

    }
到这里我们的按钮已经可以用了,但是我们还需要实现控件与外部的交互所以我们要定义接口,如下
public void setOnMyWheelMoveListener(OnMyWheelMoveListener listener){    //设置交互事件

        this.myWheelMoveListener=listener;

    }

    public static abstract interface OnMyWheelMoveListener {

        public abstract void onValueChanged(int xDistance, int yDistance);

    }
下面看看完整的代码
public class Wheel extends View implements View.OnTouchListener{

    int xPosition;

    int yPosition;

    int centerX;

    int centerY;

    int mainRadius;

    int secondRadius;

    boolean isClicked;

    OnMyWheelMoveListener myWheelMoveListener;

    public Wheel(Context context) {

        super(context);

    }

    public Wheel(Context context, @Nullable AttributeSet attrs) {

        super(context, attrs);

    }

    public Wheel(Context context, @Nullable AttributeSet attrs, int defStyleAttr) {

        super(context, attrs, defStyleAttr);

        isClicked=false;

    }

    @Override

    protected void onMeasure(int widthMeasureSpec, int heightMeasureSpec) {

        super.onMeasure(widthMeasureSpec, heightMeasureSpec);

        int width =MeasureSpec.getMode(widthMeasureSpec)==MeasureSpec.UNSPECIFIED?:MeasureSpec.getSize(widthMeasureSpec);

        int height = MeasureSpec.getMode(heightMeasureSpec)==MeasureSpec.UNSPECIFIED?:MeasureSpec.getSize(heightMeasureSpec);

        if(width>height){

            width=height;

        }else{

            height=width;

        }

        this.mainRadius=(getWidth()-)/;

        this.secondRadius=mainRadius/*;

        setMeasuredDimension(width, height);

        this.centerX=getWidth()/;

        this.centerY=getHeight()/;

        this.xPosition=centerX;

        this.yPosition=centerY;

    }

    @Override

    protected void onDraw(Canvas canvas){

        Bitmap bm;

        Paint BackgroundPaint = new Paint(Paint.ANTI_ALIAS_FLAG);

        BackgroundPaint.setFilterBitmap(true);

        BackgroundPaint.setDither(true);

        Paint circlePaint=new Paint();

        circlePaint.setColor(Color.parseColor("#52c1bd"));

        circlePaint.setStyle(Paint.Style.FILL);

        if(!isClicked){

            bm=((BitmapDrawable)getResources().getDrawable(R.mipmap.circle1)).getBitmap();

        }

        else {

            bm = ((BitmapDrawable) getResources().getDrawable(R.mipmap.circle)).getBitmap();

        }

        Rect mSrcRect = new Rect(, , bm.getWidth(), bm.getHeight());

        Rect mDestRect = new Rect(, ,getWidth()-, getHeight()-);

        canvas.drawBitmap(bm,mSrcRect,mDestRect,BackgroundPaint);

        canvas.drawCircle(this.xPosition,this.yPosition,secondRadius,circlePaint);

    }

    @Override

    public boolean onTouch(View v, MotionEvent event) {

        return false;

    }

    @Override

    public boolean onTouchEvent(MotionEvent event){

        isClicked=true;

        this.xPosition = (int) event.getX();

        this.yPosition = (int) event.getY();

        if(Math.sqrt((this.xPosition-this.centerX)*(this.xPosition-this.centerX)+(this.yPosition-this.centerY)*(this.yPosition-this.centerY))>mainRadius){

            double Yrate=(this.yPosition-this.centerY)/Math.sqrt((this.xPosition-this.centerX)*(this.xPosition-this.centerX)+(this.yPosition-this.centerY)*(this.yPosition-this.centerY));

            double Xrate=(this.xPosition-this.centerX)/Math.sqrt((this.xPosition-this.centerX)*(this.xPosition-this.centerX)+(this.yPosition-this.centerY)*(this.yPosition-this.centerY));

            this.yPosition=(int)(mainRadius*Yrate)+this.centerY;

            this.xPosition=(int)(mainRadius*Xrate)+this.centerX;

        }

        if(this.myWheelMoveListener!=null){

            this.myWheelMoveListener.onValueChanged(this.xPosition,this.yPosition);

        }

        invalidate();

        if(event.getAction()==){

            isClicked=false;

            this.yPosition=this.centerY;

            this.xPosition=this.centerX;

            if(this.myWheelMoveListener!=null){

                this.myWheelMoveListener.onValueChanged(this.xPosition,this.yPosition);

            }

            invalidate();

        }

        return true;

    }

    public void setOnMyWheelMoveListener(OnMyWheelMoveListener listener){

        this.myWheelMoveListener=listener;

    }

    public static abstract interface OnMyWheelMoveListener {

        public abstract void onValueChanged(int xDistance, int yDistance);

    }

}
到这里自定义简单方向盘控件就基本实现了,下面看看具体使用
布局文件
<?xml version="1.0" encoding="utf-8"?>

<RelativeLayout xmlns:android="http://schemas.android.com/apk/res/android"

    xmlns:app="http://schemas.android.com/apk/res-auto"

    xmlns:tools="http://schemas.android.com/tools"

    android:layout_width="match_parent"

    android:layout_height="match_parent"

    tools:context="com.drw.myapplication.MainActivity"

    android:background="#fff">

    <com.drw.myapplication.Wheel

        android:id="@+id/myWheel"

        android:layout_width="200dp"

        android:layout_height="200dp"

        android:layout_alignParentLeft="true"

        android:layout_alignParentStart="true"

        android:layout_alignParentTop="true" />

    <TextView

        android:id="@+id/tv"

        android:layout_width="match_parent"

        android:layout_height="wrap_content"

        android:layout_alignParentBottom="true"/>

</RelativeLayout>
主类
public class MainActivity extends AppCompatActivity {

    Wheel wheel;

    TextView tv;

    @Override

    protected void onCreate(Bundle savedInstanceState) {

        super.onCreate(savedInstanceState);

        setContentView(R.layout.activity_main);

        wheel=(Wheel)findViewById(R.id.myWheel);

        tv=(TextView)findViewById(R.id.tv);

        wheel.setOnMyWheelMoveListener(new Wheel.OnMyWheelMoveListener() {//设置交互事件

            @Override

            public void onValueChanged(int xDistance, int yDistance) {

                tv.setText(""+xDistance+","+yDistance);

            }

        });

    }

}
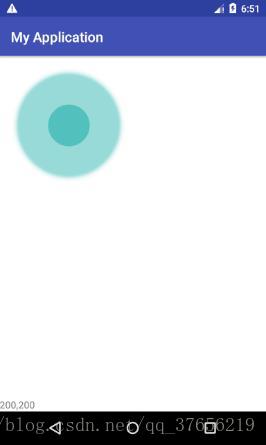
执行的效果图如下

Android 自定义简易的方向盘操作控件的更多相关文章
- Android 自定义View之自绘控件
首先要提前声明一下,我对于自定义View的理解并不是很深,最近啃了几天guolin博主写的关于自定义View的博客,讲的非常棒,只不过涉及到源码和底层的一些东西,我自己就懵逼了,目前只是会了关于自定义 ...
- Android判断Touch为滑动事件还是操作控件
Android判断Touch为滑动事件还是操作控件 因为在项目中要判断WebView是否处于滚动状态,但它不像ListView有onScrollStateChanged方法来监听,要实现就得手动监听它 ...
- Android support library支持包常用控件介绍(二)
谷歌官方推出Material Design 设计理念已经有段时间了,为支持更方便的实现 Material Design设计效果,官方给出了Android support design library ...
- Android开发技巧——自定义控件之组合控件
Android开发技巧--自定义控件之组合控件 我准备在接下来一段时间,写一系列有关Android自定义控件的博客,包括如何进行各种自定义,并分享一下我所知道的其中的技巧,注意点等. 还是那句老话,尽 ...
- (转载)Android UI设计之AlertDialog弹窗控件
Android UI设计之AlertDialog弹窗控件 作者:qq_27630169 字体:[增加 减小] 类型:转载 时间:2016-08-18我要评论 这篇文章主要为大家详细介绍了Android ...
- (转载) Android 带清除功能的输入框控件ClearEditText,仿IOS的输入框
Android 带清除功能的输入框控件ClearEditText,仿IOS的输入框 标签: Android清除功能EditText仿IOS的输入框 2013-09-04 17:33 70865人阅读 ...
- winform 跨线程操作控件
当进行winform的开发时,经常遇到用时比较久的操作,在传统的单线程程序中,用户必须等待这个耗时操作完成以后才能进行下一步的操作,这个时候,多线程编程就派上用场了,将这个耗时的操作放到一个新的子线程 ...
- WinForm中新开一个线程操作 窗体上的控件(跨线程操作控件)
最近在做一个winform的小软件(抢票的...).登录窗体要从远程web页面获取一些数据,为了不阻塞登录窗体的显示,开了一个线程去加载数据远程的数据,会报一个错误"线程间操作无效: 从不是 ...
- WinForm中跨线程操作控件
在WinForm编程时会遇到通过后台线程操作界面的情况,直接在后台线程执行的方法中直接操作控件会报错,这时候就要使用跨线程方式间接操作控件.下面是两种实现方式. 1.采用定义delegate的方式 ...
随机推荐
- golang (5) ---工程管理
1. go mod 添加本地package依赖 go mod 作为golang新的版本管理工具,减少了对GOPATH的依赖. 但是对本地文件的依赖的时候,提示 build server: cannot ...
- 关于c#中委托与事件的一些理解
文章目的:作者(初学者)在学习c#的过程中,对事件.委托及其中的“object sender,EventArgs e”一直感觉理解不透,因此在网上找了一些资料,学习并整理出了该篇笔记,希望能将自己的心 ...
- Java 8学习之Lambda表达式
一.lambda表达式 一个lambda表达式包含三个部分: 一段代码 参数 自由变量的值,这里的自由指的是哪些不是参数并且没有在代码中定义的变量. 示例: public static void re ...
- hibernate多对一单向关联注解方式
多对一单向关联,在多的一方加上一的一方作为外键.在程序里表现为:在多的一方加上一的引用. 小组类Group,用户User: Group: package com.oracle.hibernate; i ...
- ubuntu18.04 安装docker
https://docs.docker.com/install/linux/docker-ce/ubuntu/#install-docker-ce-1Change "stable" ...
- secret
## 概览 Secret是用来保存小片敏感数据的k8s资源,例如密码,token,或者秘钥.这类数据当然也可以存放在Pod或者镜像中,但是放在Secret中是为了更方便的控制如何使用数据,并减少暴露的 ...
- 作为一个编程新手,我再也不怕Flink迷了我的眼!
欢迎大家前往腾讯云+社区,获取更多腾讯海量技术实践干货哦~ 本文由kyledong发表于云+社区专栏 使用 Flink 编写处理逻辑时,新手总是容易被林林总总的概念所混淆: 为什么 Flink 有那么 ...
- 【转】合理的布局,绚丽的样式,谈谈Winform程序的界面设计
从事Winform开发很多年了,由于项目的需要,设计过各种各样的界面效果.一般来说,运用传统的界面控件元素,合理设计布局,能够设计出比较中规中矩的标准界面:利用一些换肤的控件或者部分界面组件,能够设计 ...
- linux ssh 免密码登录的配置过程
# ssh-keygen -t rsa -C "自定义描述" -f ~/.ssh/自定义生成的rsa文件 # cd ./.ssh # touch config # 粘贴 Host ...
- Android组件--碎片(fragment)
1. 基本概念 参考资料:http://blog.csdn.net/lmj623565791/article/details/37970961/ 一.什么是事务: 事务是应用程序中一系列严密的操作,所 ...