Spring3.0 demo (注解自动注入)
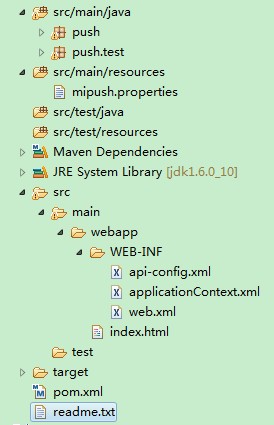
这个demo是maven工程,目录结构如下
pom.xml maven依赖
。。。。。省略

       <dependency>

            <groupId>org.springframework</groupId>

            <artifactId>spring-context</artifactId>

            <version>3.0.7.RELEASE</version>

        </dependency>

        <dependency>

            <groupId>javax.servlet</groupId>

            <artifactId>servlet-api</artifactId>

            <version>2.5</version>

        </dependency>

        <dependency>

            <groupId>org.springframework</groupId>

            <artifactId>spring-webmvc</artifactId>

            <version>3.0.3.RELEASE</version>

        </dependency>

        <dependency>

            <groupId>org.springframework</groupId>

            <artifactId>spring-web</artifactId>

            <version>3.0.7.RELEASE</version>

        </dependency>

。。。。。省略
入口web.xml
<?xml version="1.0" encoding="UTF-8"?>

<web-app version="2.4" xmlns="http://java.sun.com/xml/ns/j2ee"

    xmlns:xsi="http://www.w3.org/2001/XMLSchema-instance"

    xsi:schemaLocation="http://java.sun.com/xml/ns/j2ee

    http://java.sun.com/xml/ns/j2ee/web-app_2_4.xsd">

    <display-name>SpringDemo</display-name>

    <context-param>

        <param-name>contextConfigLocation</param-name>

        <param-value>

               /WEB-INF/applicationContext.xml

          </param-value>

    </context-param>

    <listener>

        <listener-class>org.springframework.web.context.ContextLoaderListener</listener-class>

    </listener>

    <servlet>

        <servlet-name>api</servlet-name>

        <servlet-class>org.springframework.web.servlet.DispatcherServlet</servlet-class>

        <init-param>

            <param-name>contextConfigLocation</param-name>

            <param-value>/WEB-INF/api-config.xml</param-value>

        </init-param>

        <load-on-startup>1</load-on-startup>

    </servlet>

    <servlet-mapping>

        <servlet-name>api</servlet-name>

        <url-pattern>*.s</url-pattern>

    </servlet-mapping>

    <filter>

        <filter-name>setCharacterEncoding</filter-name>

        <filter-class>org.springframework.web.filter.CharacterEncodingFilter</filter-class>

        <init-param>

            <param-name>encoding</param-name>

            <param-value>UTF-8</param-value>

        </init-param>

        <init-param>

            <param-name>forceEncoding</param-name>

            <param-value>true</param-value>

        </init-param>

    </filter>

    <filter-mapping>

        <filter-name>setCharacterEncoding</filter-name>

        <url-pattern>/*</url-pattern>

    </filter-mapping>

    <welcome-file-list>

        <welcome-file>index.html</welcome-file>

    </welcome-file-list>

</web-app>
分发bean配置api-config.xml
<beans xmlns="http://www.springframework.org/schema/beans"

    xmlns:task="http://www.springframework.org/schema/task" xmlns:xsi="http://www.w3.org/2001/XMLSchema-instance"

    xmlns:aop="http://www.springframework.org/schema/aop" xmlns:tx="http://www.springframework.org/schema/tx"

    xmlns:context="http://www.springframework.org/schema/context"

    xsi:schemaLocation="http://www.springframework.org/schema/beans http://www.springframework.org/schema/beans/spring-beans-3.0.xsd

                        http://www.springframework.org/schema/context http://www.springframework.org/schema/context/spring-context-3.0.xsd

                        http://www.springframework.org/schema/aop http://www.springframework.org/schema/aop/spring-aop.xsd

                        http://www.springframework.org/schema/tx http://www.springframework.org/schema/tx/spring-tx.xsd

                        http://www.springframework.org/schema/task http://www.springframework.org/schema/task/spring-task-3.0.xsd">

    <context:component-scan base-package="push" />

    <!-- 将自动探测包中有控制器注释的类-->

</beans>
处理action的java类
package push;

import java.io.IOException;

import javax.servlet.http.HttpServletRequest;

import javax.servlet.http.HttpServletResponse;

import org.springframework.stereotype.Controller;

import org.springframework.web.bind.annotation.RequestMapping;

import org.springframework.web.bind.annotation.RequestMethod;

import org.springframework.web.bind.annotation.RequestParam;

/**

 * @author yanghh

 */

@Controller

@RequestMapping("/api")

public class ApiController {

    @RequestMapping(value = "/age.s", method = RequestMethod.GET)

    public void methodAge(HttpServletRequest request, HttpServletResponse response,

            @RequestParam(value="id", required=true) String id) {

        System.out.println(id);

        String json = "{name:'中文',age:23, requestid:"+ id +"}";

        try {

            //response.setContentType("text/html;charset=UTF-8");

            response.getWriter().print(json);

        } catch (IOException e) {

            e.printStackTrace();

        }

    }

}
打好war包,找个tomcat容器部署下(webapps下),通过 http://localhost:8080/api/age.s?id=1 即可访问
enjoy it~
Spring3.0 demo (注解自动注入)的更多相关文章
- Spring @Autowired 注解自动注入流程是怎么样?
面试中碰到面试官问:"Spring 注解是如果工作的?",当前我一惊,完了这不触及到我的知识误区了吗?,还好我机智,灵机一动回了句:Spring 注解的工作流程倒还没有看到,但是我 ...
- 缓存初解(三)---Spring3.0基于注解的缓存配置+Ehcache和OScache
本文将构建一个普通工程来说明spring注解缓存的使用方式,关于如何在web应用中使用注解缓存,请参见: Spring基于注解的缓存配置--web应用实例 一.简介 在spring的modules包中 ...
- Spring 4.0.2 学习笔记(2) - 自动注入及properties文件的使用
接上一篇继续, 学习了基本的注入使用后,可能有人会跟我一样觉得有点不爽,Programmer的每个Field,至少要有一个setter,这样spring配置文件中才能用<property> ...
- Spring 完成自动注入(autowire)
目录 两个测试类 普通方式手动注入 普通方式注入的缺点 自动注入的介绍 配置自动注入的方式 配置全局自动注入 局部单独配置 利用注解实现自动注入 两个测试类 package cn.ganlixin.p ...
- Spring(二十三):Spring自动注入的实现方式
注解注入顾名思义就是通过注解来实现注入,Spring和注入相关的常见注解包含:Autowrired/Resource/Qualifier/Service/Controller/Repository/C ...
- Cxf + Spring3.0 入门开发WebService
转自原文地址:http://sunny.blog.51cto.com/182601/625540/ 由于公司业务需求, 需要使用WebService技术对外提供服务,以前没有做过类似的项目,在网上搜寻 ...
- @Autowired @Resource @Inject 自动注入
一.@AutoWired ( spring 的注解 )自动注入 /** * @Autowired: * 默认按照 Student 类型去容器中找对应的组件:applicationContext.get ...
- spring3.0注解
一.前言 在日常的开发过程中,我们基本上都是采用注解的方式进行开发,提升开发的效率.不管是struts2.spring.hibernate.或者ibatis,这样方便开发,减少配置文件的数量:有益于团 ...
- 使用spring注解——定义bean和自动注入
对于java bean的定义和依赖配置,使用xml文件真心是不方便. 今天学习如何用注解,解决bean的定义和注入. 常用注解: 1.自动注入:@Resources,@Autowired 2.Bean ...
随机推荐
- 将txt多行文本合并成一行
1.用word打开txt文本2.打开“替换”功能,查找内容“^p”,替换内容为“,”(均无双引号).即可把多列文字合并为一行.
- self dismissModalViewControllerAnimated:YES 无效(dismissviewcontrolleranimated无效)
作为一个viewController(VC),想要消失的时候可以从parent VC里面调用dismissModalViewControllerAnimated来消去改VC,也可以在该VC里面手动调用 ...
- mysql my.cnf配置文件详解
本配置文件针对Dell R710,双至强E5620.16G内存的硬件配置.CentOS 5.6 64位系统,MySQL 5.5.x 稳定版.适用于日IP 50-100w,PV 100-300w的站点, ...
- Android Hybrid开发
参考:谈谈Android App混合开发 Html 5和Native的交互 WebView 本来就支持js和Java相互调用,你只需要开启 WebView 的JavaScript脚本执行, 然后通过代 ...
- DB2 for Z/os Statement prepare
The PREPARE statement creates an executable SQL statement from a string form of the statement. The c ...
- 二维码相关工具Qrcode笔记
- iOS - 线程管理
iOS开发多线程篇—GCD的常见用法 一.延迟执行 1.介绍 iOS常见的延时执行有2种方式 (1)调用NSObject的方法 [self performSelector:@selector(run) ...
- Java -- 访问控制
原文:http://www.cnblogs.com/diyingyun/archive/2011/12/21/2295947.html 可见/访问性 在同一类中 同一包中 不同包中 同一包子类中 ...
- 多图上传 - Web Uploader
http://fex.baidu.com/webuploader/ 官方DEMO,我都不想说了,各种问题.参考ShuaiBi文章 http://www.cnblogs.com/ismars/p ...
- 一个简单的Promise 实现
用了这么长时间的promise,也看了很多关于promise 的文章博客,对promise 算是些了解.但是要更深的理解promise,最好的办法还是自己实现一个. 我大概清楚promise 是对异步 ...