
OAuth2简易实战(四)-Github社交联合登录
1. OAuth2简易实战(四)-Github社交联合登录
1.1. 用到的第三方插件
https://github.com/spring-projects/spring-social-github
1.2. 测试步骤
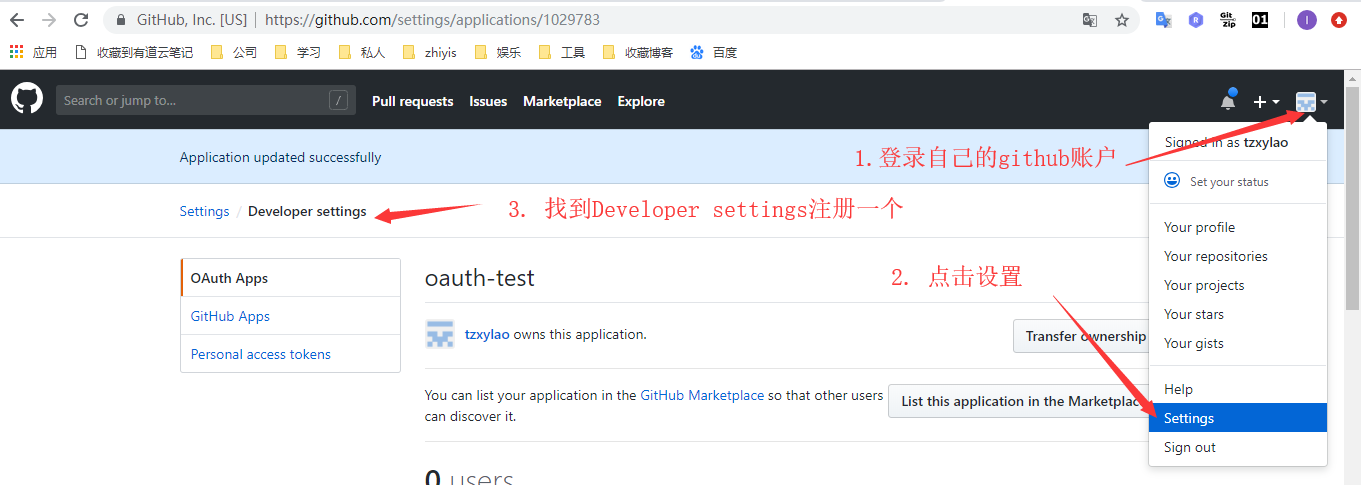
1.2.1. 先在github上注册一个OAuth Apps
我的配置内容如下
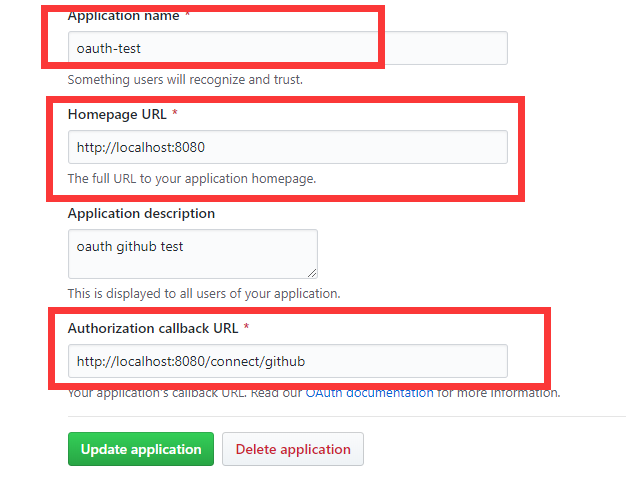
- 需要注意的,这里的最后一个回调地址的配置,格式严格规定,/connect/xxx,最后的github参数对应了特定页面,后面我通过阅读源码来详细解释
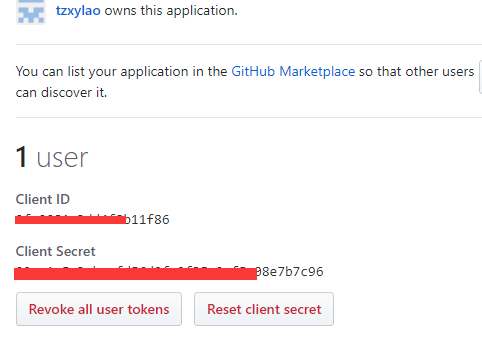
- 注册完之后,会有一个client id和client secret,这是需要配置到程序中的
1.2.2. 属性配置
- applicaton.properties
spring.social.github.app-id=xxxx

spring.social.github.app-secret=xxxx
- 属性类
@ConfigurationProperties(prefix = "spring.social.github")

public class GitHubProperties extends SocialProperties {

}
1.2.3. social核心配置
- 属性配置导入,建立与github连接
@Configuration

@EnableSocial

@EnableConfigurationProperties(GitHubProperties.class)

public class GitHubConfiguration extends SocialAutoConfigurerAdapter {

	private final GitHubProperties properties;

	public GitHubConfiguration(GitHubProperties properties) {

		this.properties = properties;

	}

	@Bean

	@Scope(value = "request", proxyMode = ScopedProxyMode.INTERFACES)

	public GitHub gitHub(ConnectionRepository repository) {

		Connection<GitHub> connection = repository

				.findPrimaryConnection(GitHub.class);

		return connection != null ? connection.getApi() : null;

	}

	@Bean

	public ConnectController connectController(

			ConnectionFactoryLocator factoryLocator,

			ConnectionRepository repository) {

		ConnectController controller = new ConnectController(

			factoryLocator, repository);

		controller.setApplicationUrl("http://localhost:8080");

		return controller;

	}

	@Override

	protected ConnectionFactory<?> createConnectionFactory() {

		return new GitHubConnectionFactory(properties.getAppId(),

				properties.getAppSecret());

	}

}
1.2.4. controller层
@Controller

public class RepositoriesController {

	@Autowired

	private GitHub github;

	@Autowired

	private ConnectionRepository connectionRepository;

	@GetMapping

	public String repositories(Model model) {

		if (connectionRepository.findPrimaryConnection(GitHub.class) == null) {

			return "redirect:/connect/github";

		}

		String name = github.userOperations().getUserProfile().getUsername();

		String username = github.userOperations().getUserProfile()

				.getUsername();

		model.addAttribute("name", name);

		String uri = "https://api.github.com/users/{user}/repos";

		GitHubRepo[] repos = github.restOperations().getForObject(uri,

				GitHubRepo[].class, username);

		model.addAttribute("repositories", Arrays.asList(repos));

		return "repositories";

	}

}
- 当我们请求localhost:8080 会重定向到localhost:8080/connect/github ,这又是写在哪呢?查看源代码,会发现在social-web包的ConnectController类中有
@Controller

@RequestMapping({"/connect"})

public class ConnectController implements InitializingBean {
    @RequestMapping(

        value = {"/{providerId}"},

        method = {RequestMethod.GET}

    )

    public String connectionStatus(@PathVariable String providerId, NativeWebRequest request, Model model) {

        this.setNoCache(request);

        this.processFlash(request, model);

        List<Connection<?>> connections = this.connectionRepository.findConnections(providerId);

        this.setNoCache(request);

        if (connections.isEmpty()) {

            return this.connectView(providerId);

        } else {

            model.addAttribute("connections", connections);

            return this.connectedView(providerId);

        }

    }
- 进入connectView方法
    protected String connectView(String providerId) {

        return this.getViewPath() + providerId + "Connect";

    }
- 可以看到,在这里它固定拼接了参数Connect,所以,在自己的跳转页面中需要有特定的命名规范,这里一定就是githubConnect.html了
<html>

<head>

	<title>Social Authcode</title>

</head>

<body>

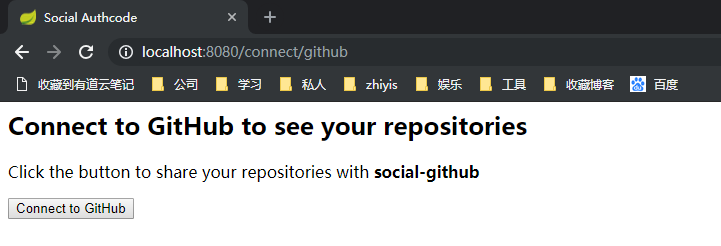
	<h2>Connect to GitHub to see your repositories</h2>

	<form action="/connect/github" method="POST">

		<input type="hidden" name="scope" value="public_repo user" />

		<div class="formInfo">

			Click the button to share your repositories with <b>social-github</b>

		</div>

		<p><button type="submit">Connect to GitHub</button></p>

	</form>

</body>

</html>
- 显示页面如下
- 点击按钮进行post请求,进入源码如下
    @RequestMapping(

        value = {"/{providerId}"},

        method = {RequestMethod.POST}

    )

    public RedirectView connect(@PathVariable String providerId, NativeWebRequest request) {

        ConnectionFactory<?> connectionFactory = this.connectionFactoryLocator.getConnectionFactory(providerId);

        MultiValueMap<String, String> parameters = new LinkedMultiValueMap();

        this.preConnect(connectionFactory, parameters, request);

        try {

            return new RedirectView(this.connectSupport.buildOAuthUrl(connectionFactory, request, parameters));

        } catch (Exception var6) {

            this.sessionStrategy.setAttribute(request, "social_provider_error", var6);

            return this.connectionStatusRedirect(providerId, request);

        }

    }
- 层层深入后,会发现它本质还是在组装授权参数,使用的是OAuth2的授权码模式,最后组装的http请求为如下,很明显为了去获得授权码
https://github.com/login/oauth/authorize?client_id=9fc0081c3dd4f8b11f86&response_type=code&redirect_uri=http%3A%2F%2Flocalhost%3A8080%2Fconnect%2Fgithub&scope=public_repo+user&state=e37f1891-cd45-47b4-adb4-5c541f777e60&state=48742b99-c04e-4dfd-af0a-f19b0193f1bb&state=c2737022-3cc7-4b80-92ce-fcba2ca9beb4
- 这最后跳转这层的代码如下,封装成buildOAuthUrl方法进行了组装
    public RedirectView connect(@PathVariable String providerId, NativeWebRequest request) {

        ConnectionFactory<?> connectionFactory = this.connectionFactoryLocator.getConnectionFactory(providerId);

        MultiValueMap<String, String> parameters = new LinkedMultiValueMap();

        this.preConnect(connectionFactory, parameters, request);

        try {

            return new RedirectView(this.connectSupport.buildOAuthUrl(connectionFactory, request, parameters));

        } catch (Exception var6) {

            this.sessionStrategy.setAttribute(request, "social_provider_error", var6);

            return this.connectionStatusRedirect(providerId, request);

        }

    }
获取授权码后,跳转github登录页面
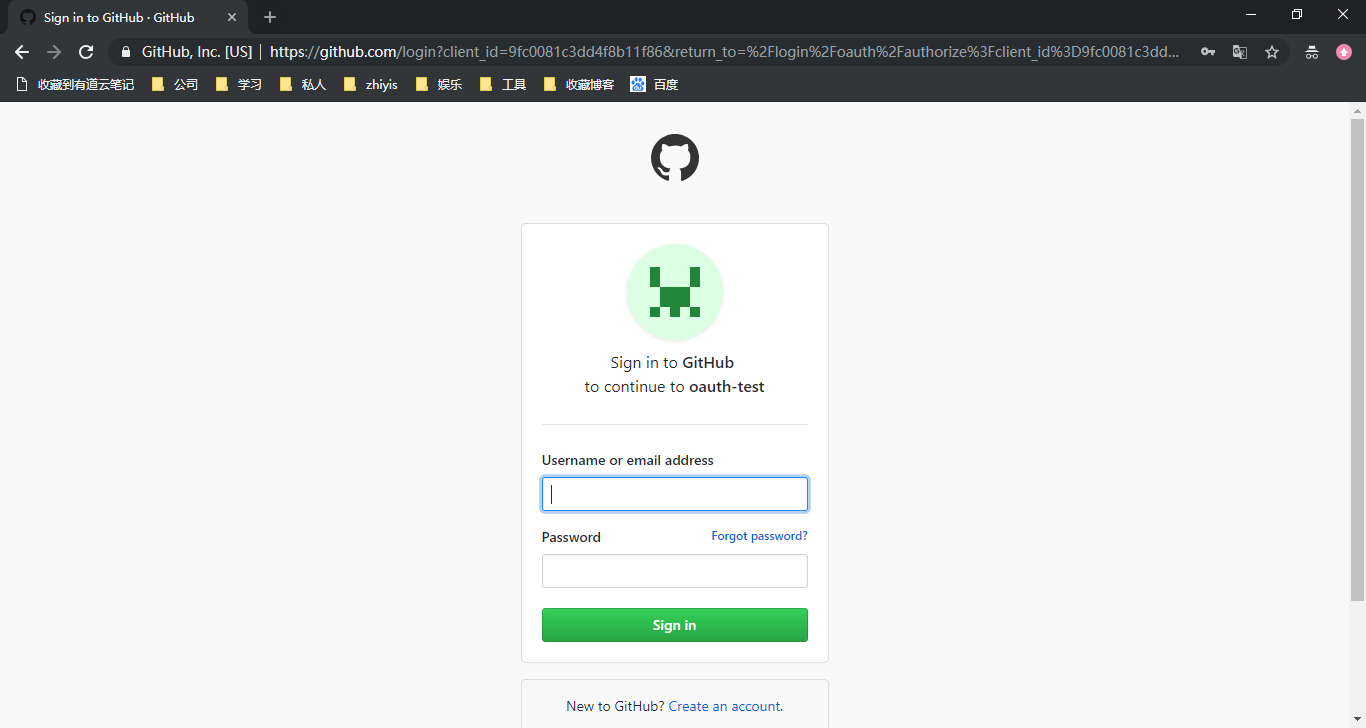
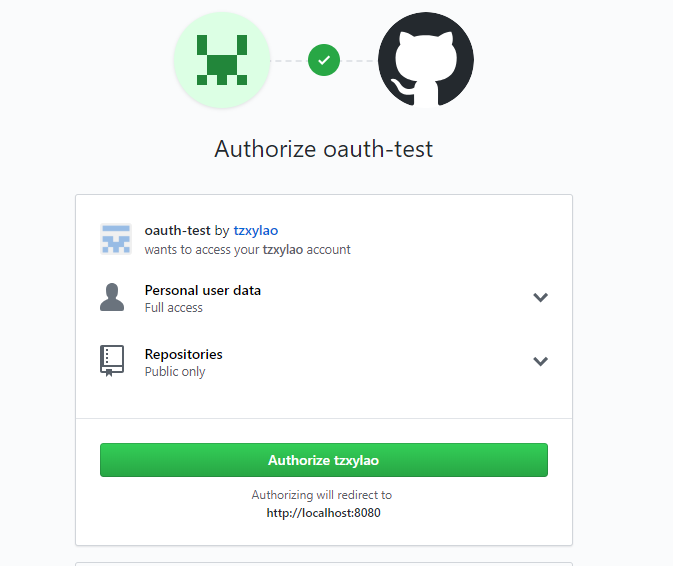
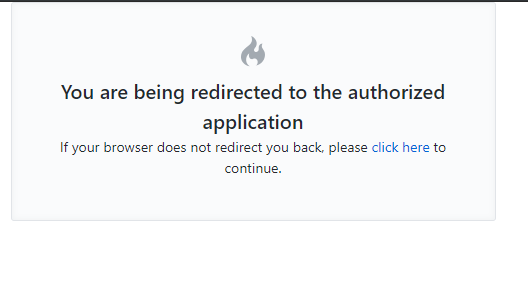
输入用户名密码正确后立即回调到方法
    @RequestMapping(

        value = {"/{providerId}"},

        method = {RequestMethod.GET},

        params = {"code"}

    )

    public RedirectView oauth2Callback(@PathVariable String providerId, NativeWebRequest request) {

        try {

            OAuth2ConnectionFactory<?> connectionFactory = (OAuth2ConnectionFactory)this.connectionFactoryLocator.getConnectionFactory(providerId);

            Connection<?> connection = this.connectSupport.completeConnection(connectionFactory, request);

            this.addConnection(connection, connectionFactory, request);

        } catch (Exception var5) {

            this.sessionStrategy.setAttribute(request, "social_provider_error", var5);

            logger.warn("Exception while handling OAuth2 callback (" + var5.getMessage() + "). Redirecting to " + providerId + " connection status page.");

        }

        return this.connectionStatusRedirect(providerId, request);

    }
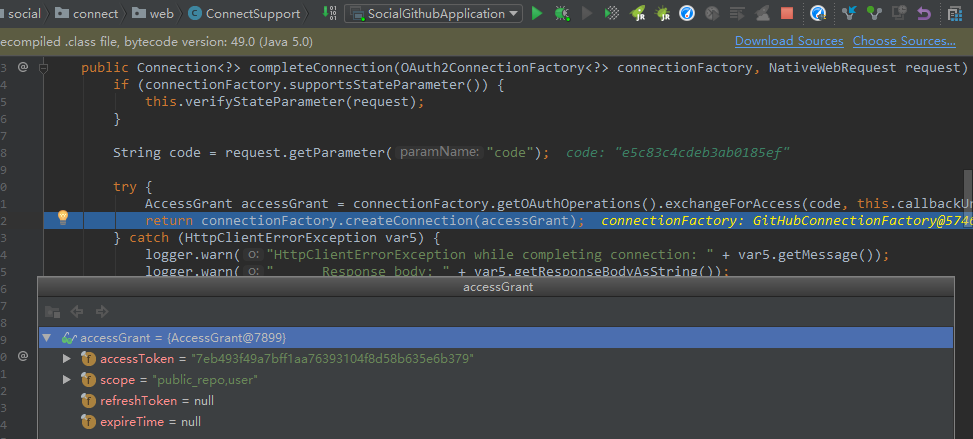
- 通过授权码再去取得token
- 再继续跳转/connect/github
 @RequestMapping(

        value = {"/{providerId}"},

        method = {RequestMethod.GET}

    )

    public String connectionStatus(@PathVariable String providerId, NativeWebRequest request, Model model) {

        this.setNoCache(request);

        this.processFlash(request, model);

        List<Connection<?>> connections = this.connectionRepository.findConnections(providerId);

        this.setNoCache(request);

        if (connections.isEmpty()) {

            return this.connectView(providerId);

        } else {

            model.addAttribute("connections", connections);

            return this.connectedView(providerId);

        }

    }
- 此时connections有值,进入connectedView方法
    protected String connectedView(String providerId) {

        return this.getViewPath() + providerId + "Connected";

    }
- 由此可以知道,下个页面我们命名也定下来了,githubConnected.html,这里简单一个点击连接,跳转到主页
<html>

	<head>

		<title>Social Authcode</title>

	</head>

	<body>

		<h2>Connected to GitHub</h2>

		<p>

			Click <a href="/">here</a> to see your repositories.

		</p>

	</body>

</html>
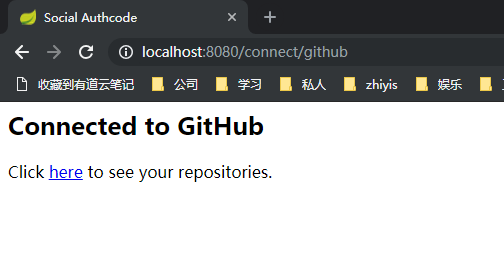
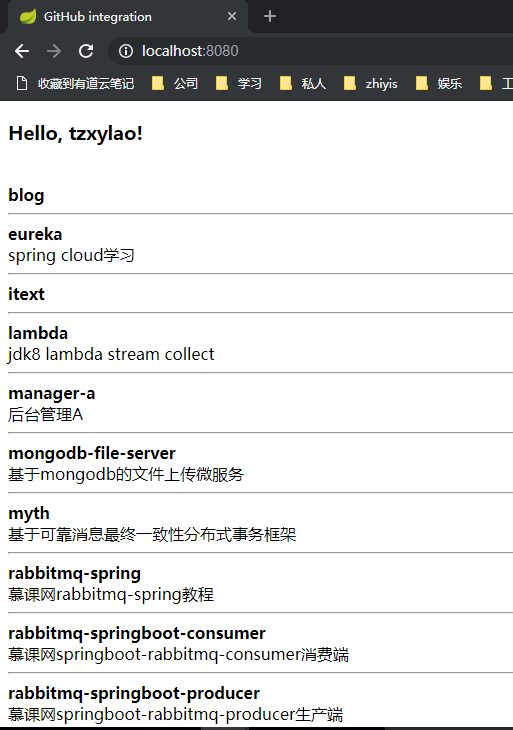
- 到此其实授权操作都已经完成了,接下来就是正式调用github需要权限的接口了,点击here
OAuth2简易实战(四)-Github社交联合登录的更多相关文章
- OAuth2简易实战(一)-四种模式
1. OAuth2简易实战(一)-四种模式 1.1. 授权码授权模式(Authorization code Grant) 1.1.1. 流程图 1.1.2. 授权服务器配置 配置授权服务器中 clie ...
- OAuth2简易实战(二)-模拟客户端调用
1. OAuth2简易实战(二) 1.1. 目标 模拟客户端获取第三方授权,并调用第三方接口 1.2. 代码 1.2.1. 核心流程 逻辑就是从数据库读取用户信息,封装成UserDetails对象,该 ...
- OAuth2简易实战(三)-JWT
1. OAuth2简易实战(三)-JWT 1.1. 与OAuth2授权码模式差别 授权服务器代码修改 @Configuration @EnableAuthorizationServer public ...
- OAuth2.0的四种授权模式
1.什么是OAuth2 OAuth(开放授权)是一个开放标准,允许用户授权第三方移动应用访问他们存储在另外的服务提供者上的信息,而不需要将用户名和密码提供给第三方移动应用或分享他们数据的所有内容,OA ...
- OAuth2.0的四种授权模式(转)
1. OAuth2简易实战(一)-四种模式 1.1. 隐式授权模式(Implicit Grant) 第一步:用户访问页面时,重定向到认证服务器. 第二步:认证服务器给用户一个认证页面,等待用户授权. ...
- 没错,用三方 Github 做授权登录就是这么简单!(OAuth2.0实战)
本文收录在个人博客:www.chengxy-nds.top,技术资源共享. 上一篇<OAuth2.0 的四种授权方式>文末说过,后续要来一波OAuth2.0实战,耽误了几天今儿终于补上了. ...
- 使用OAuth2.0协议的github、QQ、weibo第三方登录接入总结
目录 第三方接入总结 OAuth2.0介绍 github OAuth2.0登录接入 国内第三方应用商SDK使用 微博SDK 腾讯QQ SDK passport.js插件使用 安装 相关中间件.路由 返 ...
- QQ联合登录(基于Oauth2.0协议)
1. 获取授权码Authorization Code https://graph.qq.com/oauth2.0/authorize?response_type=code&client_id= ...
- 社交媒体登录Spring Social的源码解析
在上一篇文章中我们给大家介绍了OAuth2授权标准,并且着重介绍了OAuth2的授权码认证模式.目前绝大多数的社交媒体平台,都是通过OAuth2授权码认证模式对外开放接口(登录认证及用户信息接口等). ...
随机推荐
- docker环境下solrcloud+zookeeper集群部署教程
前言:两个月前的16年11月份完成的配置,使用的solr6.1和zookeeper3.4,刚刚写成blog,目前版本可能有小版本的变化. 本例完成结果为:在docker环境下部署solrcloud集群 ...
- js兼容公用方法
var utils = (function(){ //把类数组转换为数组(兼容所有的浏览器) function toArray(classAry){ var ary = []; try { ary = ...
- Java中的4个并发工具类 CountDownLatch CyclicBarrier Semaphore Exchanger
在 java.util.concurrent 包中提供了 4 个有用的并发工具类 CountDownLatch 允许一个或多个线程等待其他线程完成操作,课题点 Thread 类的 join() 方法 ...
- Python之路(第三十九篇)管道、进程间数据共享Manager
一.管道 概念 管道可用于具有亲缘关系进程间的通信,有名管道克服了管道没有名字的限制,因此,除具有管道所具有的功能外,它还允许无亲缘关系进程间的通信. 先画一幅图帮助大家理解下管道的基本原理 现有2个 ...
- PM学习梳理--建模型
- angular4.0懒加载
用angular4.0进行前后端分离已经好几个月了,现在接近了尾声,pc端和移动端.可是却还存在着很多问题,最近这几天一直在研究懒加载问题,因为通过ng build --prod打包后主文件很大,有2 ...
- oracle创建新用户和用户表空间
.首先,创建(新)用户: create user username identified by password; username:新用户名的用户名 password: 新用户的密码 也可以不创建新 ...
- MySQL/Oracle索引的创建与使用
MySQL索引的建立对于MySQL的高效运行是很重要的,索引可以大大提高MySQL的检索速度. 索引分单列索引和组合索引. 单列索引,即一个索引只包含单个列,一个表可以有多个单列索引,但这不是组合索引 ...
- CentOS7配置阿里云源
cd /etc/yum.repos.d/ mkdir backup mv CentOS-* backup/ wget -O /etc/yum.repos.d/CentOS-Base.repo http ...
- metasploit生成payload的格式
转自https://www.cnblogs.com/zlgxzswjy/p/6881904.html Often one of the most useful (and to the beginner ...