[JWT] AngularJS Authentication with JWT
Set up server for JWT Authentication
1. require express
2. require faker:
If faker is not install yet, do:
npm install express faker // faker is what user used to create mock user
Code for server.js:
var express = require('express');

var faker = require('faker');

var app = express();

app.get('/random-user',function(req, res){

   var user = faker.helpers.userCard();

   user.avatar = faker.image.avatar();

   res.json(user);

}).listen(3000, function(){

   console.log('App is listen on port 3000');

})
3. Start the server:
nodemon server.js //nodemon will restart the server once the server.js is updated
4. Now then we go to the url:
http://localhost:3000/random-user
We will get a mock user back:
{"name":"Skylar Emmerich","username":"Jermaine_Romaguera74","email":"Quincy_Pfeffer@gmail.com","address":{"street":"Robel Passage","suite":"Apt. 113","city":"Port Tristianbury","zipcode":"40164-4358","geo":{"lat":"78.9744","lng":"-128.5724"}},"phone":"932.064.7112 x1389","website":"jairo.info","company":{"name":"Schiller-Windler","catchPhrase":"Extended object-oriented support","bs":"holistic revolutionize architectures"},"avatar":"https://s3.amazonaws.com/uifaces/faces/twitter/dudestein/128.jpg"}
Read More:
Screen cast: https://egghead.io/lessons/angularjs-basic-server-setup-for-jwt-authentication
About nodemon: http://stackoverflow.com/questions/17975999/i-can%C2%B4t-install-nodemon-globally-nodemon-not-recognized
About faker: https://github.com/marak/Faker.js/
Client Setup for JWT Authentication
1. User cors. It is pretty important to use 'cors' to coress origin to get the data.
npm install cors
2. Install bower if possilbe:
npm install bower
3. Get AngularJS library by using bower:
bower install angular
4. Create an Html page:
<!DOCTYPE html>
<html ng-app="app">
<head lang="en">
<meta charset="UTF-8">
<title>JWT Example</title>
</head>
<body ng-controller="MainCtrl as vm">
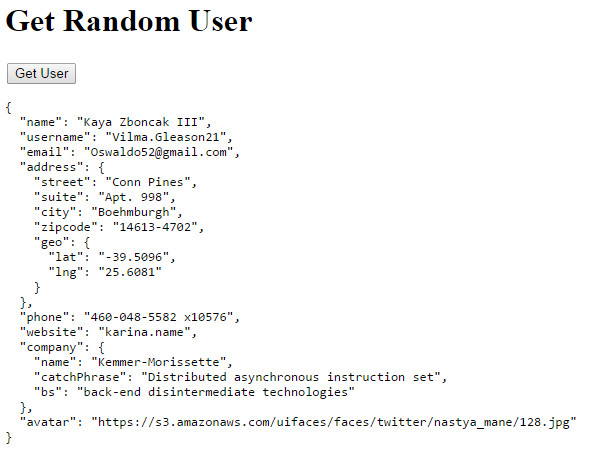
<h1>Get Random User</h1>
<div>
<button ng-click="vm.getRandomUser()">Get User</button>
<pre ng-bind="vm.randomUser | json"></pre>
</div>
<script src="../bower_components/angular/angular.js"></script>
<script src="app.js"></script>
</body>
</html>
5. Create an JS file: app.js
(function(){

    'use strict';

    var app = angular.module('jwt', []);
   app.constant('API_URL', 'http://localhost:3000')

    app.controller('MainCtrl', function(){

         'use strict';

          var vm = this;

          vm.getRandomUser = getRandomUser;

          function getRandomUser(){

                RandomUserFacotry.getUser().then(function success(response){

                       vm.randomUser = response.data;

                 })

          }

    });

    app.factory('RandomUserFactory', function($http, API_URL){

           return{

                getUser: getUser

           };

           function getUser(){

                return $http.get(API_URL + '/random-user');

           };

    })

})();
6. Test:
Read More:
Screen Case: https://egghead.io/lessons/angularjs-client-setup-for-jwt-authentication
Code: https://github.com/eggheadio/egghead-angularjs-aunthentication-with-jwt/blob/02-client-setup/
Bower: https://github.com/yeoman/yeoman/issues/1224
http-server: https://www.npmjs.org/package/http-server
In the scrren cast, it used http-server to listen 8080, but since we have webstorm, it does all those thing automaticlly for us.
JWT Authentication Setup
1. in html, build a form to let user input the username and password.
<form ng-submit="vm.submitLogin(vm.username, vm.password);">

    <label>Username: </label><input type="text" ng-model="vm.username"/><br/>

    <label>Password: </label><input type="password" ng-model="vm.password"/><br/>

    <input type="submit" value="Login"/>

</form>
2. On app.js, get username and password in controller and use factory to post data to the server.js.
    app.controller('MainCtrl', function MainCtrl(RandomUserFactory, UserFactory) {

        'use strict';

        var vm = this;

        vm.getRandomUser = getRandomUser;

        vm.submitLogin = submitLogin;

        function getRandomUser() {

            RandomUserFactory.getUser().then(function success(response) {

                vm.randomUser = response.data;

            },handleError);

        }

        function submitLogin(username, password){

            UserFactory.login(username, password).then(function success(response){

                vm.user = response.data;

            },handleError);

        }

        function handleError(response){

            console.log("Error: "+response.data);

        }

    });
    app.factory('UserFactory', function ($http, API_URL) {

        return{

            login: login

        };

        function login(username, password) {

            return $http.post(API_URL + '/login',{

                username: username,

                password: password

            });

        }

    });
3. on Server.js, because we need to parse data in json, so first intall body-parser.
npm install body-parser
var body_parser = require('body-parser');

app.use(body_parser.json())
4. get the login data and set authenticate function
var user = {
  userename: "zhentian",
  password: "xx"
}

app.post('/login', authenticate, function (req, res) {

    res.send(user);

});

function authenticate(req,res,next) {

    var body = req.body;

    if(!body.username || !body.password){

        res.status(400).end('Must pass in username and password');

    }

    if(body.username!=user.username || body.password != user.password){

        res.status(401).end('Username or password in incorrect');

    }

    next(); // tell the system to go next function which mark in red color

}
Server JWT Authentication Setup
1. Install jsonwebtoken in npm.
npm install jsonwebtoken
//server.js

var jwt = require('jsonwebtoken');
2. After the authentication, create a secert key and using jwt to sign a token. And send back the token.
var jsonSercert = "opjgpsk8564565afwe65541a8ef";

app.post('/login', authenticate, function (req, res) {

    var token = jwt.sign({

        userename: user.username

    }, jsonSercert);

    res.send({

        token: token,

        user:user

    });

});
3. On the client side, we can have a look at the token.
{"token":"eyJ0eXAiOiJKV1QiLCJhbGciOiJIUzI1NiJ9.eyJ1c2VyZW5hbWUiOiJ6aGVudGlhbiIsImlhdCI6MTQxMzM3MTcyOH0.alTFp3TBMbu3OJZXd1IKMeL2gEjG8cN3fPsVt95uIfA","user":{"username":"zhentian","password":"xx"}}
Auth Interceptor in Angular for JWT
OK, until now, I finally understand what JWT should be used for.
In short, after user logged in, the server will return back an json web token.
We store this token somewhere on the client (localstorge) for example, then later each request we send, we will intercept the JWT in headers.
This is somehow to protected user.
1. set up localstorage to store the token. We use $window service to call localSorage in AngularJS.
    app.factory('AuthTokenFactory', function AuthTokenFactory($window) {

        'use strict';

        var store = $window.localStorage;

        var key = 'auth-token';

        return {

            getToken: getToken,

            setToken: setToken

        };

        function getToken() {

            return store.getItem(key);

        }

        function setToken(token) {

            if (token) {

                store.setItem(key, token);

            } else {

                store.removeItem(key);

            }

        }

    });
2. in the UserFactory factory, after user successfully login, we call the token factory to save the token into the localStorage.
To notice that: We use promise chains to do this. Remeber, which returned value in then() function will be the input value in the next then() function. So remember to return back the response data.
    app.factory('UserFactory', function ($http, API_URL,AuthTokenFactory) {

        return{

            login: login,

            logout: logout

        };

        function login(username, password) {

            return $http.post(API_URL + '/login',{

                username: username,

                password: password

            }).then(function(response){

                AuthTokenFactory.setToken(response.data.token);

                return response;

            });

        }

    });
3. We create a facoty to setup AuthInterceptor, here we pass in a config param in the method function:
function addToken(config)
It indecteds that we should use app.config() in our app.
There are two kinds of interceptors (and two kinds of rejection interceptors):
request: interceptors get called with a httpconfigobject. The function is free to modify theconfigobject or create a new one. The function needs to return theconfigobject directly, or a promise containing theconfigor a newconfigobject.requestError: interceptor gets called when a previous interceptor threw an error or resolved with a rejection.response: interceptors get called with httpresponseobject. The function is free to modify theresponseobject or create a new one. The function needs to return theresponseobject directly, or as a promise containing theresponseor a newresponseobject.responseError: interceptor gets called when a previous interceptor threw an error or resolved with a rejection.
    app.factory('AuthInterceptor', function AuthInterceptor(AuthTokenFactory) {

        'use strict';

        return {

            request: addToken

        };

        function addToken(config) {

            var token = AuthTokenFactory.getToken();

            if (token) {

                config.headers = config.headers || {};

                config.headers.Authorization = 'Bearer ' + token;

            }

            return config;

        }

    });
4. In config function, we should setup a interceptors to push our AuthInterceptor factory into the headers request.
    var app = angular.module('app', [], function config($httpProvider) {

        $httpProvider.interceptors.push('AuthInterceptor');

    });
Read More about $httpProvider, interceptors: https://code.angularjs.org/1.3.0-rc.4/docs/api/ng/service/$http#setting-http-headers
5. Add a logout functionality to clean the localstorage.
<button ng-if="vm.user.username" ng-click="vm.logout()">Logout</button>
   app.controller('MainCtrl', function MainCtrl(RandomUserFactory, UserFactory) {

        'use strict';

        var vm = this;

        vm.logout = logout;

        function logout() {

            UserFactory.logout();

            vm.user = "";

        }

    });
    app.factory('UserFactory', function ($http, API_URL,AuthTokenFactory) {

        return{

            logout: logout

        };

        function logout() {

            AuthTokenFactory.setToken();

        }

    });
6. Test the app.
1. If we are not logged in. We use Get user button to see the request header we send:

As we can see in the request, there is not Authorithention.
2. After we tired to logged in.
In the localStorage, we have stored the key-value pair about the token.

3. Then we try to do another Get User request.

We can see that the Authorization has been added into the request header.
4. If we do logout, the localstorage will be cleaned up and the authoirzation will gone also.
Finalizing JWT Authentication with AngularJS
1. On the server side, we need express-jwt npm package.
npm install express-jwt
var expressJWT = require('express-jwt');

//Check the jwt token should be passed in, however when user want to login

//there is no token, so we use unless

app.use(expressJWT({ secret: jsonSercert}).unless({path: ['/login']}));
2. In the mainCtrl, we init when there is token set in the localStorge, then we let user auto login.
        //init

        UserFactory.getUser().then(function success(response) {

            vm.user = response.data;

            console.log(response.data);

        })
   app.factory('UserFactory', function ($http, $q,API_URL,AuthTokenFactory) {

        return{

            getUser: getUser

        };

        function getUser(){

            if(AuthTokenFactory.getToken()){

                return $http.get(API_URL+'/me');

            }else{

                return $q.reject({data: 'client has no autho token'});

            }

        }

    });
3. On the server.js, we get request ('/me'), because every reqeust should pass the jwt auth first:
app.use(expressJWT({ secret: jsonSercert}).unless({path: ['/login']}));
Therefore we can rely on that, we just send back user object on server.js:
app.get('/me', function(req, res){

    res.send(req.user);

});
That is all what we need to do.
4. So if you logged in, then refresh the page, we can see that the system can help us login automaticlly.
-------------------------------------Code:----------------------------------
Read More: https://github.com/eggheadio/egghead-angularjs-aunthentication-with-jwt/tree/06-jwt-authentication
index.html:
<!DOCTYPE html>

<html ng-app="app">

<head lang="en">

    <meta charset="UTF-8">

    <title>JWT Example</title>

</head>

<body ng-controller="MainCtrl as vm">

<h1>Get Random User</h1>

<form ng-submit="vm.submitLogin(vm.username, vm.password);" ng-hide="vm.user">

    <label>Username: </label><input type="text" ng-model="vm.username"/><br/>

    <label>Password: </label><input type="password" ng-model="vm.password"/><br/>

    <input type="submit" value="Login"/>

</form>

<div ng-show="vm.user">

    <h1 >Weclome {{vm.user.username}}</h1>

    <button ng-click="vm.logout()">Logout</button>

    <button ng-click="vm.getRandomUser()">Get User</button>

    <pre ng-bind="vm.randomUser | json"></pre>

</div>

<script src="../bower_components/angular/angular.js"></script>

<script src="app.js"></script>

</body>

</html>
app.js:
(function () {

    'use strict';

    var app = angular.module('app', [], function config($httpProvider) {

        $httpProvider.interceptors.push('AuthInterceptor');

    });

    app.constant('API_URL', 'http://localhost:3000');

    app.controller('MainCtrl', function MainCtrl(RandomUserFactory, UserFactory) {

        'use strict';

        var vm = this;

        vm.getRandomUser = getRandomUser;

        vm.submitLogin = submitLogin;

        vm.logout = logout;

        //init

        UserFactory.getUser().then(function success(response) {

            vm.user = response.data;

            console.log(response.data);

        })

        function getRandomUser() {

            RandomUserFactory.getUser().then(function success(response) {

                vm.randomUser = response.data;

            },handleError);

        }

        function submitLogin(username, password){

            UserFactory.login(username, password).then(function success(response){

                vm.user = response.data.user;

                alert( response.data.token);

            },handleError);

        }

        function logout() {

            UserFactory.logout();

            vm.user = null;

        }

        function handleError(response){

            alert("Error: "+response.data);

        }

    });

    app.factory('RandomUserFactory', function($http, API_URL) {

        'use strict';

        return {

            getUser: getUser

        };

        function getUser() {

            return $http.get(API_URL + '/random-user');

        }

    });

    app.factory('UserFactory', function ($http, $q,API_URL,AuthTokenFactory) {

        return{

            login: login,

            logout: logout,

            getUser: getUser

        };

        function login(username, password) {

            return $http.post(API_URL + '/login',{

                username: username,

                password: password

            }).then(function(response){

                AuthTokenFactory.setToken(response.data.token);

                return response;

            });

        }

        function getUser(){

            if(AuthTokenFactory.getToken()){

                return $http.get(API_URL+'/me');

            }else{

                return $q.reject({data: 'client has no autho token'});

            }

        }

        function logout() {

            AuthTokenFactory.setToken();

        }

    });

    //We want to use localStorage to save the token for each request

    app.factory('AuthTokenFactory', function AuthTokenFactory($window) {

        'use strict';

        var store = $window.localStorage;

        var key = 'auth-token';

        return {

            getToken: getToken,

            setToken: setToken

        };

        function getToken() {

            return store.getItem(key);

        }

        function setToken(token) {

            if (token) {

                store.setItem(key, token);

            } else {

                store.removeItem(key);

            }

        }

    });

    app.factory('AuthInterceptor', function AuthInterceptor(AuthTokenFactory) {

        'use strict';

        return {

            request: addToken

        };

        function addToken(config) {

            var token = AuthTokenFactory.getToken();

            if (token) {

                config.headers = config.headers || {};

                config.headers.Authorization = 'Bearer ' + token;

            }

            return config;

        }

    });

})();
server.js:
var express = require('express');

var faker = require('faker');

var cors = require('cors');

var body_parser = require('body-parser');

var jwt = require('jsonwebtoken');

var expressJWT = require('express-jwt');

var app = express();

var jsonSercert = "opjgpsk8564565afwe65541a8ef";

app.use(cors());

app.use(body_parser.json());

//Check the jwt token should be passed in, however when user want to login

//there is no token, so we use unless

app.use(expressJWT({ secret: jsonSercert}).unless({path: ['/login']}));

var user = {

    username: "zhentian",

    password: "xx"

}

app.get('/random-user', function (req, res) {

    var user = faker.helpers.userCard();

    user.avatar = faker.image.avatar();

    res.json(user);

});

app.get('/me', function(req, res){

    res.send(req.user);

});

app.post('/login', authenticate, function (req, res) {

    var token = jwt.sign({

        userename: user.username

    }, jsonSercert);

    res.send({

        token: token,

        user:user

    });

});

app.listen(3000, function () {

    console.log('App listening on localhost:3000');

});

function authenticate(req,res,next) {

    var body = req.body;

    if(!body.username || !body.password){

        res.status(400).end('Must pass in username and password');

    }

    if(body.username!=user.username || body.password != user.password){

        res.status(401).end('Username or password in incorrect');

    }

    next();

}
Aslo look for: http://code.tutsplus.com/tutorials/token-based-authentication-with-angularjs-nodejs--cms-22543
[JWT] AngularJS Authentication with JWT的更多相关文章
- Web API 2 authentication with JWT
Web API 2 authentication with JWT JSON Web Token (JWT) 使用 AngularJS & NodeJS 实现基于 token 的认证应用
- [转]C# 实现Jwt bearer Authentication
本文转自:https://www.cnblogs.com/aishangyipiyema/p/9262642.html 什么是JWT JWT(JSON Web Token), 顾名思义就是在Web上以 ...
- drf框架中jwt认证,以及自定义jwt认证
0909自我总结 drf框架中jwt 一.模块的安装 官方:http://getblimp.github.io/django-rest-framework-jwt/ 他是个第三方的开源项目 安装:pi ...
- jwt以及如何使用jwt实现登录
目录 jwt的使用和使用jwt进行登录 什么是jwt jwt的组成 为什么选择jwt session的缺点 jwt的优点 一个jwt的工具类 将jwt和登录进行结合 axios方式将jwt放在head ...
- Spring Cloud authentication with JWT service
@RequestMapping(value = "/authenticate", method = RequestMethod.POST) public ResponseEntit ...
- asp.net core-14.JWT认证授权 生成 JWT Token
源码下载 语言组织能力不好 ,看这个 视频 用visual studio code打开文件,运行dotnet watch run 之后在postman里面去访问 拿到Token后
- 【angularJS】前后台分离,angularJS使用Token认证
参考资料: [AngularJS系列(4)] 那伤不起的provider们啊~ (Provider, Value, Constant, Service, Factory, Decorator):htt ...
- JWT Authentication Tutorial: An example using Spring Boot--转
原文地址:http://www.svlada.com/jwt-token-authentication-with-spring-boot/ Table of contents: Introductio ...
- JWT实现token-based会话管理
上文<3种web会话管理的方式>介绍了3种会话管理的方式,其中token-based的方式有必要从实现层面了解一下.本文主要介绍这方面的内容.上文提到token-based的实现目前有一个 ...
随机推荐
- 不均匀的Windows处理器编组
不均匀的Windows处理器编组 之前写过一篇文章,关于SQLSERVER能识别多少个逻辑CPU的,前些天在论坛里有人问Windows处理器编组是如何划分的?? SQLSERVER到底能识别多少个逻辑 ...
- JqueryEasyUI浅谈---视频教程公布
http://pan.baidu.com/s/1pJqGXez 前两天我在博客园发了一个关于JqueryEasyUI浅谈本地化应用的博客,我简单的介绍了JqueryEasyUI的应用,今天我录制了了一 ...
- 【笔记】select2的使用
<script src="~/Scripts/jquery-1.10.2.js"></script> <script src="~/Cont ...
- 用msbuild跑xunit单元测试
用了Visual Studio 2015之后,发现没法跑xUnit单元测试,xUnit.net runner不支持VS2015,TestDriven.Net也不支持VS2015. 等它们支持VS201 ...
- kali linux 系列教程之metasploit 连接postgresql可能遇见的问题
kali linux 系列教程之metasploit 连接postgresql可能遇见的问题 文/玄魂 目录 kali linux 下metasploit 连接postgresql可能遇见的问题. ...
- [51单片机] EEPROM 24c02 + 数码管 + 中断 [统计开机次数]
>_<:24c02的SCL连P2.0;SDA连P2.1;WP接GND;P0接8位数码管的8针;P2.2连段码;P2.3连位码; >_<:delay.c #include &qu ...
- jenkins插件 查看job修改历史
文章来自:http://www.ciandcd.com文中的代码来自可以从github下载: https://github.com/ciandcd 插件jobConfigHistory(https:/ ...
- 免费好用的web应用托管平台
1.前言 曾经很久以前,想找一个免费的空间部署一个属于自己的技术博客真是太难了,使用过SAE,但是很快就面临收费了,后面也就不了了之了.目前自己又找到一个免费的PAAS平台,可以部署各种语言的web应 ...
- spring常用jar包总结(转载)
spring.jar是包含有完整发布的单个jar 包,spring.jar中包含除了spring-mock.jar里所包含的内容外其它所有jar包的内容,因为只有在开发环境下才会用到 spring-m ...
- linux php环境搭建以及magento安装教程
听朋友用magento在搭建电商系统,我好奇.遂自己下载了一个包部署了一套. 主机采用linux center os6.5,安装程序非常顺利,部署一套大概费时一个小时左右. ########### ...