SpringCache自定义过期时间及自动刷新
背景前提
阅读说明(十分重要)
对于Cache和SpringCache原理不太清楚的朋友,可以看我之前写的文章:Springboot中的缓存Cache和CacheManager原理介绍
能关注SpringCache,想了解过期实现和自动刷新的朋友,肯定有一定Java基础的,所以先了解我的思想,达成共识比直接看代码重要许多
你可能只需要我里面其中一个点而不是原搬照抄
我在实现过程遇到三大坑,先跟大家说下,兴许对你有帮助
坑一:自己造轮子
对SpringCache不怎么了解,直接百度缓存看到Redis后,就直接使用RedisTemple开始工具类的搭建(说白了就是自己撸一个增删查改功能的类,然后到处使用)
自己造轮子不仅重复了前人的工作,还做的没别人好... ,不让Spring帮忙管理就享受不到@Cacheable这些注解等一系列福利
对于管理,扩展,使用方便程度都不友好
结论:不能放弃别人写好的工具类(我用Redis做缓存,那么对应的就是RedisCache、RedisManager和SpringCache注解等一套要用上)
坑二:Cache的设计思想不对(最重要)
在了解了SpringCache后,我十分愉快的用上了RedisCache和RedisCacheManager,真的十分简单方便
但跟看这边文章的你们一样,不满足于此,想着如果一个频繁访问缓存,到时候过期一个或多个过期了,是不是就缓存雪崩了
可当时我纠结的粗粒度太细了:
我希望每个缓存里的每个数据都能控制过期时间
比如:CacheName为systemCache的Cache里有a,b两个数据,我希望a数据5分钟过期,b数据10分钟过期
结论:这是完全没必要的,我们控制过期时间,应该以Cache为最小单位,而不是以里面单个数据
实际中缓存数据是不需要精细到单独处理的,都是一组一组的,如这几个数据在30分钟内失效,那一组数据是在
1小时内失效等等
例如:systemCache的ttl(详见1.2的CacheConfig)设置为半小时,那么它里面所有的数据都为离存入时间间隔30分钟后过期
我希望数据能纯自动刷新(不需要外在的触发条件)
比如:跑个线程,隔断时间自动扫描数据,进行纯自动更新
结论:目前没办法实现缓存纯自动更新,必须要使用到该缓存拿数据才能触发更新检查
纯自动更新没有意义,假设一个数据放了半小时没人访问要过期了,那就过期吧
因为缓存前提是一段时间频繁访问的数据,如果都没人访问了,就不能称之为缓存
不然就是一个系统长期存在的动态变量,不适用于缓存
坑三:对@Cacheble的理解太浅
于是想缓存数据能在过期前的几分钟里自动刷新一下,那就很不错
着手实现就想拦截@Cacheble,因为我们把@Cacheble放在访问数据库的方法上,那么做个切面针对@Cacheble,在调用目标方法前判断一下储存的时间,快过期就重新取数据,不过期就不执行方法不就行了(不得不吐槽SpringCache对于过期设计有点考虑不足,封装的死死的,没向外暴露任何接口)
结果@Cacheble的代理类的逻辑是这样的:
发现系统需要此缓存数据 -> 自动尝试get方法获得缓存 -> 存在则返回
发现系统需要此缓存数据 -> 自动尝试get方法获得缓存 -> 不存在才调用目标方法
所以切面切@Cacheble压根没用,别人是在缓存失效的情况下才进入目标方法,这个过程才会被你写的切面切!!
我的设计
网上有个比较好的自动刷新的实现(参考):https://www.jianshu.com/p/275cb42080d9 但是不太喜欢
原因主要是不喜欢在@Cacheable里面的变量做文章(会对原来已有的注解有影响),关键还会覆盖,以第一个
@Cacheble写的时间为准,代码开发一段时间,天知道这个Cache哪个地方第一次指定
在这阐述下设计逻辑,大家看看下面内容不懂的时候可以回来这里看看
[中括号为涉及到的类]

涉及到如下8个类:
系统更新缓存的注解:
@UpdataCache:是缓存自动更新的标志,在Cache的get方法上表明,然后每次get数据时就会在切面判断是否快要过期
系统缓存管理器的接口:
I_SystemCacheMgr:此接口继承CacheManager,自定义缓存管理器需要实现此接口,需要实现里面一些更新缓存相关的方法
Spring中的Cache接口和CacheManager的实现:
RedisCacheEnhance:继承RedisCache,对其增强
RedisCacheMgr:继承RedisManager,对其增强(说白了就是增加些自己的方法,改写方法)
系统缓存管理器的注册类(向Spring注册):
CacheConfig:Spring初始化时,向其注册管理类,里面写自己实现的注册逻辑
目标方法记载类:
CacheInvocation:为了能自动更新,那目标获得数据的方法要记录下来,才能要调用的时候主动调用
系统更新缓存的线程:
UpdateDataTask:实现Callable接口的线程类,负责数据更新时执行目标方法,写入缓存
系统缓存管理:
SystemCacheMgr:缓存数据存储信息在此保存,也负责管理I_SystemCacheMgr的实现类,进行更新操作的调用
系统缓存AOP切面:
CacheAspect:对@Cacheable拦截,进行获取数据的方法注册。对@UpdateCache注解进行拦截,进行自动更新判
断
接下来将依次展示代码,说下关键点
代码展示
@UpdataCache
该注解主要是对Cache的get方法进行标记,然后用AOP切面进行更新检查
 /**

  * @author NiceBin

  * @description: 缓存更新接口,在Cache实现类的get方法上注解即可

  * @date 2019/11/18 8:56

  */

 @Target({ElementType.METHOD, ElementType.TYPE})

 @Retention(RetentionPolicy.RUNTIME)

 @Inherited

 public @interface UpdateCache {

 }
I_SystemCacheMgr
主要是规定了系统缓存管理器应该有的行为
 /**

  * 本系统的缓存接口,SystemCacheMgr统一保存数据记录的时间和控制缓存自动刷新流程

  *

  * 为了实现数据快过期前的自动刷新,需要以下操作:

  * 1.实现此接口

  *   如果用如RedisCacheManager这种写好的类,需要子类继承再实现此接口

  *   如果Cache是CacheManager内部生成的,还需要重写createCache方法

  *   使生成的Cache走一遍Spring初始化Bean的过程,交给Spring管理

  *   这里主要为了Spring帮忙生成代理类,让注解生效

  * 2.实现了 {@link Cache} 接口的类在get方法上加上注解 {@link UpdateCache} 才有更新效果,所以如果要用如RedisCache

  *   这种写好的类,需要子类继承,并重写get方法

  *   然后在get方法上加@UpdateCache

  */

 public interface I_SystemCacheMgr extends CacheManager{

     /**

      * 该数据是否过期

      * true为已经过期

      * @param cacheName 缓存名字

      * @param id 数据id

      * @param saveTime 该缓存内该数据的存储时间

      * @return

      * @throws Exception

      */

     boolean isApproachExpire(String cacheName, Object id, Timestamp saveTime) throws Exception;

     /**

      * 删除指定Cache里的指定数据

      * @param cacheName

      * @param id

      * @throws Exception

      */

     void remove(String cacheName, Object id) throws Exception;

     /**

      * 清除所有缓存内容

      * @throws Exception

      */

     void clearAll() throws Exception;

     /**

      * 获得所有的Cache

      * @return

      */

     ConcurrentMap<String, Cache> getAllCaches();

 }
RedisCacheEnhance
写上@UpdateCache后,才能被AOP切入
 /**

  * @author NiceBin

  * @description:    增强RedisCache

  *                  为了能在get方法写上@Update注解,实现自动刷新

  * @date 2019/7/4 13:24

  */

 public class RedisCacheEnhance extends RedisCache {

     /**

      * Create new {@link RedisCacheEnhance}.

      *

      * @param name        must not be {@literal null}.

      * @param cacheWriter must not be {@literal null}.

      * @param cacheConfig must not be {@literal null}.

      */

     protected RedisCacheEnhance(String name, RedisCacheWriter cacheWriter, RedisCacheConfiguration cacheConfig) {

         super(name, cacheWriter, cacheConfig);

     }

     @UpdateCache

     public ValueWrapper get(Object key){

         System.out.println("进入get方法");

         return super.get(key);

     }

     @UpdateCache

     public <T> T get(Object key, @Nullable Class<T> type){

         return super.get(key,type);

     }

     @UpdateCache

     public <T> T get(Object key, Callable<T> valueLoader){

         return super.get(key,valueLoader);

     }
RedisCacheMgr
RedisManager的增强类,这里涉及的知识点比较多,跟大家简单聊聊
 /**

  * @author NiceBin

  * @description: RedisCacheManager增强类,为了实现本系统缓存自动更新功能

  * @date 2019/11/25 9:07

  */

 public class RedisCacheMgr extends RedisCacheManager implements I_SystemCacheMgr {

     private final RedisCacheWriter cacheWriter;

     private ConcurrentMap<String, Cache> caches = new ConcurrentHashMap<>();

     private DefaultListableBeanFactory defaultListableBeanFactory;

     public RedisCacheMgr(RedisCacheWriter cacheWriter, RedisCacheConfiguration defaultCacheConfiguration, Map<String, RedisCacheConfiguration> initialCacheConfigurations, boolean allowInFlightCacheCreation) {

         super(cacheWriter, defaultCacheConfiguration, initialCacheConfigurations, allowInFlightCacheCreation);

         this.cacheWriter = cacheWriter;

     }

     /**

      * 重写createRedisCache的方法,生成自己定义的Cache

      * 这里主要要让Spring来生成代理Cache,不然在Cache上的注解是无效的

      * @param name

      * @param cacheConfig

      * @return

      */

     @Override

     protected RedisCacheEnhance createRedisCache(String name, @Nullable RedisCacheConfiguration cacheConfig) {

         //利用Spring生成代理Cache

         BeanDefinition beanDefinition = new RootBeanDefinition(RedisCacheEnhance.class);

         //因为只有有参构造方法,所以要添加参数

         ConstructorArgumentValues constructorArgumentValues = beanDefinition.getConstructorArgumentValues();

         constructorArgumentValues.addIndexedArgumentValue(0,name);

         constructorArgumentValues.addIndexedArgumentValue(1,cacheWriter);

         constructorArgumentValues.addIndexedArgumentValue(2,cacheConfig);

         //如果有属性需要设置,还能这样做,不过需要有对应属性名的set方法

         //definition.getPropertyValues().add("propertyName", beanDefinition.getBeanClassName());

         ApplicationContext applicationContext = SystemContext.getSystemContext()

                 .getApplicationContext();

         //需要这样获取的DefaultListableBeanFactory类才能走一遍完整的Bean初始化流程!!

         //像applicationContext.getBean(DefaultListableBeanFactory.class)都不好使!!

         DefaultListableBeanFactory defaultListableBeanFactory = (DefaultListableBeanFactory)applicationContext.getAutowireCapableBeanFactory();

         defaultListableBeanFactory.registerBeanDefinition(name,beanDefinition);

         RedisCacheEnhance redisCacheEnhance = (RedisCacheEnhance)applicationContext.getBean(name);

         caches.put(name, redisCacheEnhance);

         return redisCacheEnhance;

     }

     /**

      * 过期规则为:缓存有效时间-(目前时间-记录时间)<= 随机时间

      * 随机时间是防止同一时刻过期时间太多,造成缓存雪崩,在SystemStaticValue中缓存项里配置

      * true为将要过期(可以刷新了)

      *

      * @param cacheName 缓存名称

      * @param id 数据id

      * @param saveTime 储存时间

      * @return

      */

     @Override

     public boolean isApproachExpire(String cacheName, Object id, Timestamp saveTime) throws NoSuchAlgorithmException {

         long ttl = -1;

         RedisCacheConfiguration configuration = this.getCacheConfigurations().get(cacheName);

         ttl = configuration.getTtl().getSeconds();

         if (ttl != -1 && saveTime!=null) {

                 int random = Tool.getSecureRandom(SystemStaticValue.CACHE_MIN_EXPIRE, SystemStaticValue.CACHE_MAX_EXPIRE);

                 Date date = new Date();

                 long theNowTime = date.getTime() / 1000;

                 long theSaveTime = saveTime.getTime() / 1000;

                 if (ttl - (theNowTime - theSaveTime) <= random) {

                     return true;

                 }

         }

         return false;

     }

     @Override

     public void remove(String cacheName, Object id) throws Exception {

         Cache cache = this.getCache(cacheName);

         cache.evict(id);

     }

     /**

      * 清除所有缓存内容

      *

      * @throws Exception

      */

     @Override

     public void clearAll() throws Exception {

         Collection<String> cacheNames = this.getCacheNames();

         Iterator<String> iterator = cacheNames.iterator();

         while (iterator.hasNext()) {

             String cacheName = iterator.next();

             Cache redisCache = this.getCache(cacheName);

             redisCache.clear();

         }

     }

     @Override

     public ConcurrentMap<String, Cache> getAllCaches() {

         return caches;

     }

 }
知识点:如何阅读源码来帮助自己注册目标类
这是个很关键的点,我们想继承RedisManager,那构造函数肯定要super父类的构造函数(而且RedisManager看设计并不太推荐让我们继承它的)
所以父类构造函数的参数,我们怎么获取,怎么模拟就是关键性问题
第一步:百度,继承RedisManager怎么写
不过这类不热门的问题,大多数没完美答案(就是能针对你的问题),可是有很多擦边答案可以给你借鉴,我获取到这样的信息
 RedisCacheManager redisCacheManager = RedisCacheManager.builder(redisConnectionFactory)

                 .cacheDefaults(defaultCacheConfig) // 默认配置(强烈建议配置上)。  比如动态创建出来的都会走此默认配置

                 .withInitialCacheConfigurations(initialCacheConfiguration) // 不同cache的个性化配置

                 .build();
如果我们想配个性化的RedisCacheManager,可以这样创建
可以发现,这个build()方法就是我们的入手点,我们跟进去看看它的参数有什么
 /**

 * Create new instance of {@link RedisCacheManager} with configuration options applied.

 *

 * @return new instance of {@link RedisCacheManager}.

 */

 6 public RedisCacheManager build() {

   RedisCacheManager cm = new RedisCacheManager(cacheWriter, defaultCacheConfiguration, initialCaches,

                     allowInFlightCacheCreation);

   cm.setTransactionAware(enableTransactions);

   return cm;

 }
继续跟踪看RedisCacheManager的方法
 public RedisCacheManager(RedisCacheWriter cacheWriter, RedisCacheConfiguration defaultCacheConfiguration,

             Map<String, RedisCacheConfiguration> initialCacheConfigurations, boolean allowInFlightCacheCreation) {

         this(cacheWriter, defaultCacheConfiguration, allowInFlightCacheCreation);

         Assert.notNull(initialCacheConfigurations, "InitialCacheConfigurations must not be null!");

         this.initialCacheConfiguration.putAll(initialCacheConfigurations);

     }
这里可发现defaultCacheConfiguration和initialCacheConfigurations是我们传入的参数,allowInFlightCacheCreation就是简单的布尔值,能不能动态创建Cache而已
所以我们想办法得到RedisCacheWriter这就大功告成了呀,怎么找,Ctrl+F,搜索变量,如图: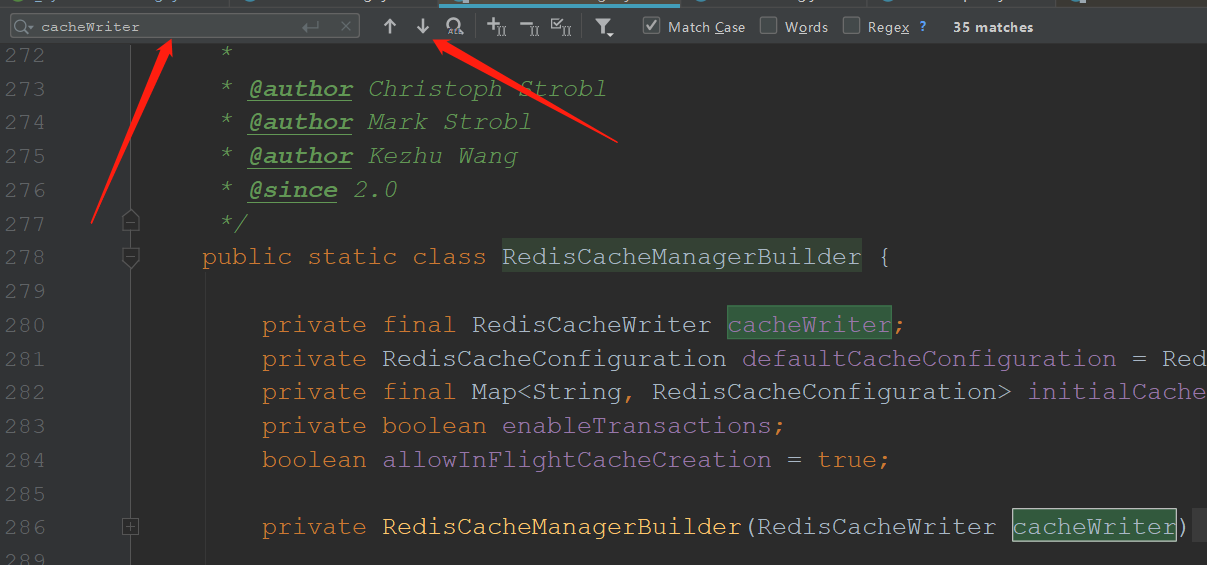
一个个查找,看cacheWriter是哪里赋值进来的,最后发现
 private RedisCacheManagerBuilder(RedisCacheWriter cacheWriter) {

             this.cacheWriter = cacheWriter;

         }
然后继续搜索RedisCacheManagerBuilder哪里被调用:
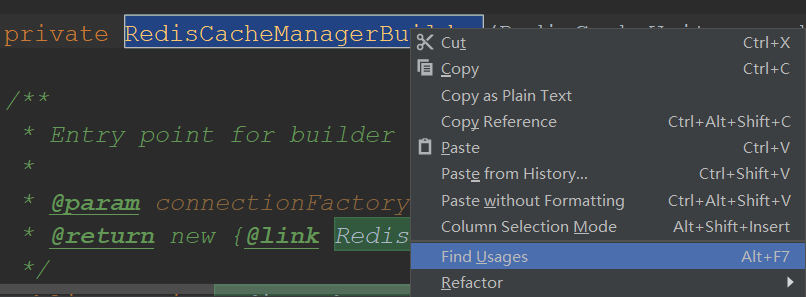
重复以上步骤,有变量就搜索变量,有方法就搜索调用的地方,最后发现
         public static RedisCacheManagerBuilder fromConnectionFactory(RedisConnectionFactory connectionFactory) {

             Assert.notNull(connectionFactory, "ConnectionFactory must not be null!");

             return builder(new DefaultRedisCacheWriter(connectionFactory));

         }
看第5行,我只要有了RedisConnectionFactory,直接new一个就行(事实真的如此吗),进去后发现

这个类不是public,外部是不允许new的,兄弟,还得继续跟代码呀,这个类不是public,所以再看这个类已经无意义了,我们发现它实现了RedisCacheWriter接口,应该从这入手看看
 public interface RedisCacheWriter {

     /**

      * Create new {@link RedisCacheWriter} without locking behavior.

      *

      * @param connectionFactory must not be {@literal null}.

      * @return new instance of {@link DefaultRedisCacheWriter}.

      */

     static RedisCacheWriter nonLockingRedisCacheWriter(RedisConnectionFactory connectionFactory) {

         Assert.notNull(connectionFactory, "ConnectionFactory must not be null!");

         return new DefaultRedisCacheWriter(connectionFactory);

     }

     /**

      * Create new {@link RedisCacheWriter} with locking behavior.

      *

      * @param connectionFactory must not be {@literal null}.

      * @return new instance of {@link DefaultRedisCacheWriter}.

      */

     static RedisCacheWriter lockingRedisCacheWriter(RedisConnectionFactory connectionFactory) {

         Assert.notNull(connectionFactory, "ConnectionFactory must not be null!");

         return new DefaultRedisCacheWriter(connectionFactory, Duration.ofMillis(50));

     }
到这问题就彻底解决了,接口定义了两个获取RedisCacheWriter的方法,只需要传参数RedisConnectionFactory即可,而这个类Spring会自动配置(具体Spring中如何配置Redis自行百度,十分简单)
至此super父类所需要的参数,我们都能自己构造了
这个知识点主要是想让大家遇到问题有这个最基本的解决的思路,迎难而上~
知识点:用代码动态向Spring注册Bean
RedisCacheMgr的createRedisCache方法中看到,我们生成的Cache需要像Spring注册,这是为什么呢
因为我们要想@UpdateCache注解,那必须得生成代理类,交给Spring管理,否则注解无效的
具体注册我也没深入研究(今后会写一篇此博文),不过要按照这种方式注册才有效
 ApplicationContext applicationContext = SystemContext.getSystemContext()

                 .getApplicationContext();

         //需要这样获取的DefaultListableBeanFactory类才能走一遍完整的Bean初始化流程!!

         //像applicationContext.getBean(DefaultListableBeanFactory.class)都不好使!!

         DefaultListableBeanFactory defaultListableBeanFactory = (DefaultListableBeanFactory)applicationContext.getAutowireCapableBeanFactory();

         defaultListableBeanFactory.registerBeanDefinition(name,beanDefinition);
CacheConfig
这个类是为了加载自定义的CacheManager
 /**

  * @author NiceBin

  * @description: CacheManager初始化

  *               目前系统只用一个Manager,使用RedisCacheManager

  *               根据SystemStaticValue中的SystemCache枚举内容进行Cache的注册

  *               配置启动前需要DefaultListableBeanFactory.class先加载完成

  *               不然CacheManager或者Cache想用的时候会报错

  * @date 2019/11/13 17:02

  */

 @Configuration

 @Import(DefaultListableBeanFactory.class)

 public class CacheConfig {

     @Autowired

     RedisConnectionFactory redisConnectionFactory;

     @Bean

     public RedisCacheMgr cacheManager() {

         //创建Json自定义序列化器

         FastJsonRedisSerializer<Object> fastJsonRedisSerializer = new FastJsonRedisSerializer<>(Object.class);

         //包装成SerializationPair类型

         RedisSerializationContext.SerializationPair serializationPair = RedisSerializationContext.SerializationPair.fromSerializer(fastJsonRedisSerializer);

         RedisCacheConfiguration defaultCacheConfig = RedisCacheConfiguration.defaultCacheConfig()

                 .entryTtl(Duration.ofDays(1))

                 .computePrefixWith(cacheName -> "Cache"+cacheName);

         // 针对不同cacheName,设置不同的过期时间,用了双括号初始化方法~

         Map<String, RedisCacheConfiguration> initialCacheConfiguration = new HashMap<String, RedisCacheConfiguration>() {{

             SystemStaticValue.SystemCache[] systemCaches = SystemStaticValue.SystemCache.values();

             Arrays.asList(systemCaches).forEach((systemCache)->

                     put(systemCache.getCacheName(),RedisCacheConfiguration.defaultCacheConfig().entryTtl(Duration.ofSeconds(systemCache.getSurviveTime()))

                     .serializeValuesWith(serializationPair)));

         }};

         RedisCacheMgr redisCacheMgr = new RedisCacheMgr(RedisCacheWriter.lockingRedisCacheWriter(redisConnectionFactory),defaultCacheConfig,initialCacheConfiguration,true);

         //设置白名单---非常重要********

         /*

         使用fastjson的时候:序列化时将class信息写入,反解析的时候,

         fastjson默认情况下会开启autoType的检查,相当于一个白名单检查,

         如果序列化信息中的类路径不在autoType中,autoType会默认开启

         反解析就会报com.alibaba.fastjson.JSONException: autoType is not support的异常

         */

         ParserConfig.getGlobalInstance().addAccept("com.tophousekeeper");

         return redisCacheMgr;

     }

 }
自定义JSON序列化类
 /*

 要实现对象的缓存,定义自己的序列化和反序列化器。使用阿里的fastjson来实现的方便多。

  */

 public class FastJsonRedisSerializer<T> implements RedisSerializer<T> {

     private static final Charset DEFAULT_CHARSET = Charset.forName("UTF-8");

     private Class<T> clazz;

     public FastJsonRedisSerializer(Class<T> clazz) {

         super();

         this.clazz = clazz;

     }

     @Override

     public byte[] serialize(T t) throws SerializationException {

         if (null == t) {

             return new byte[0];

         }

         return JSON.toJSONString(t, SerializerFeature.WriteClassName).getBytes(DEFAULT_CHARSET);

     }

     @Override

     public T deserialize(byte[] bytes) throws SerializationException {

         if (null == bytes || bytes.length <= 0) {

             return null;

         }

         String str = new String(bytes, DEFAULT_CHARSET);

         return (T) JSON.parseObject(str, clazz);

     }

 }
29-34行就是根据配置加载系统默认的几个缓存(涉及到Lambda表达式的循环知识)
 public class SystemStaticValue {

    .....

 //以下为缓存信息的配置(CACHE开头)--------------------------------------------------------

     //系统缓存名称及过期时间(秒)

     public enum SystemCache{

         //每日缓存,有效时间24小时

         DAY("dailyCache",60),

         //半日缓存,有效时间12小时

         HALF_DAY("halfDayCache",12*60*60),

         //1小时缓存

         ONE_HOUR("oneHour",1*60*60),

         //半小时缓存

         HALF_HOUR("halfHour",30*60);

         private String cacheName;

         private long surviveTime;

         SystemCache(String cacheName,long surviveTime){

             this.cacheName = cacheName;

             this.surviveTime = surviveTime;

         }

         public String getCacheName() {

             return cacheName;

         }

         public void setCacheName(String cacheName) {

             this.cacheName = cacheName;

         }

         public long getSurviveTime() {

             return surviveTime;

         }

         public void setSurviveTime(long surviveTime) {

             this.surviveTime = surviveTime;

         }

     }

 }
知识点:@Import的重要性
在35行,创建RedisCacheMgr 的时候,就会调用里面的CreateCache的方法,里面会把Cache向Spring注册,需要用到DefaultListableBeanFactory类
所以在这里必须要@import,保证其已经加载,不然到时候创建会报类不存在
知识点:自定义序列化
因为不自定义成JSON格式序列化,那么存在Redis的内容不可直观的看出来(都是乱七八糟的东西,不知道存的对不对),所以在21-23行要换成JSON序列化格式
大家有兴趣可以看下这篇博文:https://blog.csdn.net/u010928589/article/details/84313987 这是一篇说Redis序列化如何自定义的思考过程,跟我上面的RedisCacheMgr实现思想类似
知识点:Lambda表达式
之前我也觉得不好用,不便于理解(其实就是我不会),然后这次下定决心弄懂,发现还是很不错的(真香),给大家推荐这篇博文理解:https://blog.csdn.net/qq_25955145/article/details/82670160
CacheInvocation:
这个类主要是为了记录调用的获得缓存数据的方法信息,以便于自动更新时主动调用(下面这个Task就用到了)
 /**

  * @author NiceBin

  * @description: 记录被 {@link Cacheable} 注解过的方法信息,为了主动更新缓存去调用对应方法

  * @date 2019/11/26 16:28

  */

 public class CacheInvocation {

     private Object key;

     private final Object targetBean;

     private final Method targetMethod;

     private Object[] arguments;

     public CacheInvocation(Object key, Object targetBean, Method targetMethod, Object[] arguments) {

         this.key = key;

         this.targetBean = targetBean;

         this.targetMethod = targetMethod;

         //反射时不用检查修饰符,略微提高性能

         this.targetMethod.setAccessible(true);

         if (arguments != null && arguments.length != 0) {

             this.arguments = Arrays.copyOf(arguments, arguments.length);

         }

     }

     public Object[] getArguments() {

         return arguments;

     }

     public Object getTargetBean() {

         return targetBean;

     }

     public Method getTargetMethod() {

         return targetMethod;

     }

     public Object getKey() {

         return key;

     }

 }
UpdateDataTask:
这里就是主动更新数据的地方啦
 /**

  * @author NiceBin

  * @description: 刷新缓存某个数据的任务

  * @date 2019/11/29 15:29

  */

 public class UpdateDataTask implements Callable {

     //将要执行的方法信息

     private CacheInvocation cacheInvocation;

     //对应要操作的缓存

     private Cache cache;

     //对应要更新的数据id

     private Object id;

     /**

      * 初始化任务

      * @param cacheInvocation

      * @param cache

      * @param id

      */

     public UpdateDataTask(CacheInvocation cacheInvocation,Cache cache,Object id){

         this.cacheInvocation = cacheInvocation;

         this.cache = cache;

         this.id = id;

     }

     @Override

     public Object call() throws Exception {

         if(cacheInvocation == null){

             throw new SystemException(SystemStaticValue.CACHE_EXCEPTION_CODE,"更新数据线程方法信息不能为null");

         }

         cache.put(id,methodInvoke());

         return true;

     }

     /**

      * 代理方法的调用

      * @return

      */

     private Object methodInvoke() throws Exception{

         MethodInvoker methodInvoker = new MethodInvoker();

         methodInvoker.setArguments(cacheInvocation.getArguments());

         methodInvoker.setTargetMethod(cacheInvocation.getTargetMethod().getName());

         methodInvoker.setTargetObject(cacheInvocation.getTargetBean());

         methodInvoker.prepare();

         return methodInvoker.invoke();

     }

 }
SystemCacheMgr:
系统缓存管理的核心类,统筹全局
 /**

  * @author NiceBin

  * @description: 本系统的缓存管理器

  * 数据自动刷新功能,要配合 {@link UpdateCache}才能实现

  *

  * 目前没办法实现缓存纯自动更新,必须要使用到该缓存拿数据进行触发

  * 纯自动更新没有意义,假设一个数据放了半小时没人访问要过期了,那就过期吧

  * 因为缓存前提是一段时间频繁访问的数据,如果都没人访问了,就不能称之为缓存

  * 不然就是一个系统长期存在的动态变量,不适用于缓存

  * @date 2019/11/14 16:18

  */

 @Component

 public class SystemCacheMgr {

     //目前系统只考虑一个CacheManager

     //必须有一个I_SystemCache的实现类,多个实现类用@Primary注解,类似于Spring的缓存管理器

     @Autowired

     private I_SystemCacheMgr defaultCacheMgr;

     //系统的线程池类

     @Autowired

     private SystemThreadPool systemThreadPool;

     //所有缓存的所有数据记录Map

     //外部Map中,key为缓存名称,value为该缓存内的数据储存信息Map

     //内部Map中,key为数据的id,value为记录该数据的储存信息

     private ConcurrentHashMap<String, ConcurrentHashMap<Object, DataInfo>> dataInfoMaps = new ConcurrentHashMap<>();

     /**

      * 储存信息内部类,用于记录

      * 获取要调用获取方法,因为加锁了线程才安全

      */

     class DataInfo {

         //记录该数据的时间

         private Timestamp saveTime;

         //获得此数据的方法信息

         private CacheInvocation cacheInvocation;

         //保证只有一个线程提前更新此数据

         private ReentrantLock lock;

         public synchronized void setSaveTime(Timestamp saveTime) {

             this.saveTime = saveTime;

         }

         public synchronized void setCacheInvocation(CacheInvocation cacheInvocation) {

             this.cacheInvocation = cacheInvocation;

         }

         public synchronized void setLock(ReentrantLock lock) {

             this.lock = lock;

         }

     }

     /**

      * 获得DataInfo类,如果为空则创建一个

      * @param cacheName

      * @param id

      * @return

      */

     private DataInfo getDataInfo(String cacheName, Object id) {

         ConcurrentHashMap<Object, DataInfo> dateInfoMap = dataInfoMaps.get((cacheName));

         DataInfo dataInfo;

         if (dateInfoMap == null) {

             //简单的锁住了,因为创建这个对象挺快的

             synchronized (this) {

                 //重新获取一次进行判断,因为dateInfoMap是局部变量,不能保证同步

                 dateInfoMap = dataInfoMaps.get((cacheName));

                 if (dateInfoMap == null) {

                     dateInfoMap = new ConcurrentHashMap<>();

                     dataInfo = new DataInfo();

                     dataInfo.setLock(new ReentrantLock(true));

                     dateInfoMap.put(id, dataInfo);

                     dataInfoMaps.put(cacheName, dateInfoMap);

                 }

             }

         }

         //这里不能用else,因为多线程同时进入if,后面进的dataInfo会是null

         dataInfo = dateInfoMap.get(id);

         return dataInfo;

     }

     /**

      * 为该数据放入缓存的时间记录

      *

      * @param id 数据id

      */

     public void recordDataSaveTime(String cacheName, Object id) {

         Date date = new Date();

         Timestamp nowtime = new Timestamp(date.getTime());

         DataInfo dataInfo = getDataInfo(cacheName, id);

         dataInfo.setSaveTime(nowtime);

     }

     /**

      * 记录获得此数据的方法信息,为了主动更新缓存时的调用

      *

      * @param cacheName    缓存名称

      * @param id           数据id

      * @param targetBean   目标类

      * @param targetMethod 目标方法

      * @param arguments    目标方法的参数

      */

     public void recordCacheInvocation(String cacheName, String id, Object targetBean, Method targetMethod, Object[] arguments) {

         DataInfo dataInfo = getDataInfo(cacheName, id);

         CacheInvocation cacheInvocation = new CacheInvocation(id, targetBean, targetMethod, arguments);

         //锁在这方法里面有

         dataInfo.setCacheInvocation(cacheInvocation);

     }

     /**

      * 数据自动刷新功能,要配合 {@link UpdateCache}才能实现

      * 原理:先判断数据是否过期,如果数据过期则从缓存删除。

      *

      * @param cacheName 缓存名称

      * @param id        数据id

      * @return

      */

     public void autoUpdate(String cacheName, Object id) throws Exception {

         DataInfo dataInfo = getDataInfo(cacheName, id);

         Cache cache = defaultCacheMgr.getCache(cacheName);

         //如果没有保存的时间,说明该数据还从未载入过

         if (dataInfo.saveTime == null) {

             return;

         }

         if (defaultCacheMgr.isApproachExpire(cacheName, id, dataInfo.saveTime)) {

             if (dataInfo.lock.tryLock()) {

                 //获取锁后再次判断数据是否过期

                 if (defaultCacheMgr.isApproachExpire(cacheName, id, dataInfo.saveTime)) {

                     ThreadPoolExecutor threadPoolExecutor = systemThreadPool.getThreadPoolExecutor();

                     UpdateDataTask updateDataTask = new UpdateDataTask(dataInfo.cacheInvocation, cache, id);

                     FutureTask futureTask = new FutureTask(updateDataTask);

                     try {

                         threadPoolExecutor.submit(futureTask);

                         futureTask.get(1, TimeUnit.MINUTES);

                         //如果上一步执行完成没报错,那么重新记录保存时间

                         recordDataSaveTime(cacheName,id);

                     } catch (TimeoutException ex) {

                         //如果访问数据库超时

                         throw new SystemException(SystemStaticValue.CACHE_EXCEPTION_CODE, "系统繁忙,稍后再试");

                     } catch (RejectedExecutionException ex) {

                         //如果被线程池拒绝了

                         throw new SystemException(SystemStaticValue.CACHE_EXCEPTION_CODE, "系统繁忙,稍后再试");

                     } finally {

                         dataInfo.lock.unlock();

                     }

                 }

             }

         }

     }

     /**

      * 清除所有缓存内容

      */

     public void clearAll() throws Exception {

         defaultCacheMgr.clearAll();

     }

     //以下为Set和Get

     public I_SystemCacheMgr getDefaultCacheMgr() {

         return defaultCacheMgr;

     }

     public void setDefaultCacheMgr(I_SystemCacheMgr defaultCacheMgr) {

         this.defaultCacheMgr = defaultCacheMgr;

     }

     public ConcurrentHashMap<String, ConcurrentHashMap<Object, DataInfo>> getDataInfoMaps() {

         return dataInfoMaps;

     }

     public void setDataInfoMaps(ConcurrentHashMap<String, ConcurrentHashMap<Object, DataInfo>> dataInfoMaps) {

         this.dataInfoMaps = dataInfoMaps;

     }

 }
知识点:再次说下接口的重要性
17行直接让Spring注入实现了I_SystemCacheMgr的类,直接使用实现的方法而不用关心具体的实现细节(对于SystemCacheMgr类来说,你换了它的实现逻辑也丝毫不影响它原来的代码调用)
CacheAspect
CacheAspect是注册和触发更新的核心类,Tool是用到的工具类的方法
 /**

  * @author NiceBin

  * @description: 处理缓存注解的地方:包括@UpdateCache,@Cacheable

  *

  * @date 2019/11/18 14:57

  */

 @Aspect

 @Component

 public class CacheAspect {

     @Autowired

     SystemCacheMgr systemCacheMgr;

     /**

      * 数据注册到SystemCacheMgr

      * 为数据自动更新做准备

      */

     @Before("@annotation(org.springframework.cache.annotation.Cacheable)")

     public void registerCache(JoinPoint joinPoint){

         System.out.println("拦截了@Cacheable");

         //获取到该方法前的@Cacheable注解,来获取CacheName和key的信息

         Method method = Tool.getSpecificMethod(joinPoint);

         Cacheable cacleable = method.getAnnotation(Cacheable.class);

         String[] cacheNames = cacleable.value()!=null?cacleable.value():cacleable.cacheNames();

         String theKey = cacleable.key();

         //取出来的字符串是'key',需要去掉''

         String key = theKey.substring(1,theKey.length()-1);

         Arrays.stream(cacheNames).forEach(cacheName ->{

             //记录数据保存时间

             systemCacheMgr.recordDataSaveTime(cacheName,key);

             //记录数据对应的方法信息

             systemCacheMgr.recordCacheInvocation(cacheName,key,joinPoint.getTarget(),method,joinPoint.getArgs());

         });

     }

     /**

      * 检测该键是否快过期了

      * 如果快过期则进行自动更新

      * @param joinPoint

      */

     @Before(value = "@annotation(com.tophousekeeper.system.annotation.UpdateCache)&&args(id)")

     public void checkExpire(JoinPoint joinPoint,String id) throws Exception {

         System.out.println("拦截了@UpdateCache");

         RedisCacheEnhance redisCacheEnhance = (RedisCacheEnhance) joinPoint.getTarget();

         systemCacheMgr.autoUpdate(redisCacheEnhance.getName(),id);

     }

 }
 public class Tool {

     /**

      * 获得代理类方法中真实的方法

      * 小知识:

      * ClassUtils.getMostSpecificMethod(Method method, Class<?> targetClass)

      * 该方法是一个有趣的方法,他能从代理对象上的一个方法,找到真实对象上对应的方法。

      * 举个例子,MyComponent代理之后的对象上的someLogic方法,肯定是属于cglib代理之后的类上的method,

      * 使用这个method是没法去执行目标MyComponent的someLogic方法,

      * 这种情况下,就可以使用getMostSpecificMethod,

      * 找到真实对象上的someLogic方法,并执行真实方法

      *

      * BridgeMethodResolver.findBridgedMethod(Method bridgeMethod)

      * 如果当前方法是一个泛型方法,则会找Class文件中实际实现的方法

      * @param poxyMethod 代理的方法

      * @param targetclass 真实的目标类

      * @return

      */

     public static Method getSpecificMethod(Method poxyMethod,Class targetclass){

         Method specificMethod = ClassUtils.getMostSpecificMethod(poxyMethod,targetclass);

         specificMethod = BridgeMethodResolver.findBridgedMethod(specificMethod);

         return specificMethod;

     }

     /**

      * 获得代理类方法中真实的方法

      * 小知识:

      * AopProxyUtils.ultimateTargetClass()

      * 获取一个代理对象的最终对象类型

      * @param joinPoint 切面的切点类

      * @return

      */

     public static Method getSpecificMethod(JoinPoint joinPoint){

         MethodSignature methodSignature = (MethodSignature) joinPoint.getSignature();

         Method poxyMethod = methodSignature.getMethod();

         Class targetClass = AopProxyUtils.ultimateTargetClass(joinPoint.getTarget());

         return Tool.getSpecificMethod(poxyMethod,targetClass);

     }

 }
总结
整套流程在磕磕碰碰中弄出来了,最后简单的用了jmeter测试了一下,感觉还不错
收获最多的不只是新知识的学习,更多是解决问题的能力,在碰到这种并不是很热门的问题,网上的答案没有完全针对你问的,只能从中获取你需要的小部分知识(就像现在你看这篇博文一样)
然后自己再尝试拼凑起来,有些问题百度无果之后,不妨自己跟跟源码,或者搜索XXX源码解析,看看流程,没准就有新发现
有什么想法或问题欢迎评论区留言,一起探讨~
尽我最大努力分享给大家,欢迎大家转载(写作不易,请标明出处)或者给我点个赞呀(右下角),谢啦!
SpringCache自定义过期时间及自动刷新的更多相关文章
- 采用Asp.Net的Forms身份验证时,非持久Cookie的过期时间会自动扩展
问题描述 之前没有使用Forms身份验证时,如果在登陆过程中把HttpOnly的Cookie过期时间设为半个小时,总会收到很多用户的抱怨,说登陆一会就过期了. 所以总是会把Cookie过期时间设的长一 ...
- 采用Asp.Net的Forms身份验证时,持久Cookie的过期时间会自动扩展
原文:http://www.cnblogs.com/sanshi/archive/2012/06/22/2558476.html 若是持久Cookie,Cookie的有效期Expiration属性有当 ...
- Mysql设置binlog过期时间并自动删除
问题: Mysql数据库由于业务原因,数据量增长迅速,binlog日志会增加较多,占用大部分磁盘空间. 解决方案: 出于节约空间考虑,可进行删除多余binary日志,并设置定期删除操作. .查看bin ...
- 黄聪:PHP如何实现延迟一定时间后自动刷新当前页面、自动跳转header("refresh:1;url={$url}");
//1秒后自动跳转 header("refresh:1;url={$url}"); exit; //1秒后自动刷新当前页面header("refresh:1;" ...
- 封装cookie,自定义过期时间,domain,path
在使用Cookie进行存储的时候,遇到了许多不可思议的bug,特地标识出来,以作总结. 是这样一个项目,登录是放在官网进行操作的,而登录进入的是后台,后台和官网属于同一域名的不同目录,那么常规进行co ...
- springboot redis-cache 自动刷新缓存
这篇文章是对上一篇 spring-data-redis-cache 的使用 的一个补充,上文说到 spring-data-redis-cache 虽然比较强悍,但还是有些不足的,它是一个通用的解决方案 ...
- JS设置Cookie过期时间
//JS操作cookies方法! //写cookies function setCookie(name,value) { var Days = 30; var exp = new Date(); ex ...
- spring-redis-session 自定义 key 和过期时间
对于分布式应用来说,最开始遇到的问题就是 session 的存储了,解决方案大致有如下几种 使用 spring-session 它可以把 session 存储到你想存储的位置,如 redis,mysq ...
- Node.js刷新session过期时间
在Node.js中,我们通常使用express-session这个包来使用和管理session,保存服务端和客户端浏览器之间的会话状态.那如何才能实现当用户刷新当前页面或者点击页面上的按钮时重新刷新s ...
随机推荐
- [UWP]使用CompositionAPI的翻转动画
1. 运行效果 在 使用GetAlphaMask和ContainerVisual制作长阴影(Long Shadow) 这篇文章里我介绍了一个包含长阴影的番茄钟,这个番茄钟在状态切换时用到了翻转动画,效 ...
- 域名解析 | A记录 ,CNAME,MX,NS 你懂了吗
域名解析 | A记录 ,CNAME,MX,NS 你懂了吗 域名解析 什么是域名解析?域名解析就是国际域名或者国内域名以及中文域名等域名申请后做的到IP地址的转换过程.IP地址是网路上标识您站点的数字地 ...
- jquery翻页turnjs简单实例
jquery翻页turnjs简单实例<pre><div id="flipbook"> <div class="hard" styl ...
- Javascript模块化开发2——Gruntfile.js详解
一.grunt模块简介 grunt插件,是一种npm环境下的自动化工具.对于需要反复重复的任务,例如压缩.编译.单元测试.linting等,自动化工具可以减轻你的劳动,简化你的工作.grunt模块根据 ...
- deepin 、 windows10,双系统安装
deepin . windows10,双系统安装: 首先,最好专门分一个盘用来存放deepin操作系统的安装位置(我这里分给它60个G). 1.在 http://rsync.deepin.com/de ...
- nyoj 24-素数距离问题 (素数算法)
24-素数距离问题 内存限制:64MB 时间限制:3000ms Special Judge: No accepted:21 submit:71 题目描述: 现在给出你一些数,要求你写出一个程序,输出这 ...
- django_4数据库3——admin
生成admin界面 1.setting.py中,保证'django.contrib.admin',应用打开,django1.11默认打开的 2.url.py中的admin默认时打开的 3.对model ...
- 作业要求20191031-7 beta week 1/2 Scrum立会报告+燃尽图 05
此作业要求参见:https://edu.cnblogs.com/campus/nenu/2019fall/homework/9915 一.小组情况 队名:扛把子 组长:孙晓宇 组员:宋晓丽 梁梦瑶 韩 ...
- Linux LVM 配置
本文出自 “www.kisspuppet.com” 博客,请务必保留此出处http://dreamfire.blog.51cto.com/418026/1084729 许多Linux使用者安装操作系统 ...
- Spring Cloud Alibaba基础教程:Nacos服务发现与配置管理
随着微服务概念的流行,越来越多的公司采用`Spring Cloud`全家桶构建微服务系统,实现业务的快速迭代.`Spring Cloud`提供了快速构建分布式微服务常用组件,包括`Spring Clo ...