使用WebApi和Asp.Net Core Identity 认证 Blazor WebAssembly(Blazor客户端应用)
原文:https://chrissainty.com/securing-your-blazor-apps-authentication-with-clientside-blazor-using-webapi-aspnet-core-identity/
由于Blazor框架已经有所更新,翻译中有些内容我根据实际情况做了更改。
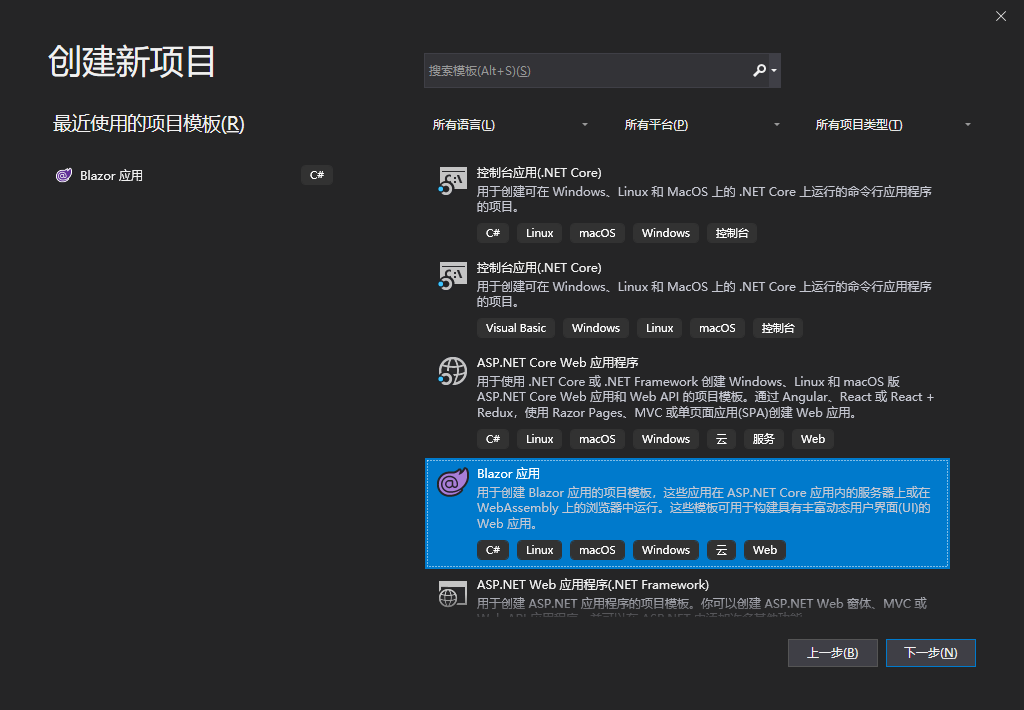
设置:创建解决方案
选择Blazor应用
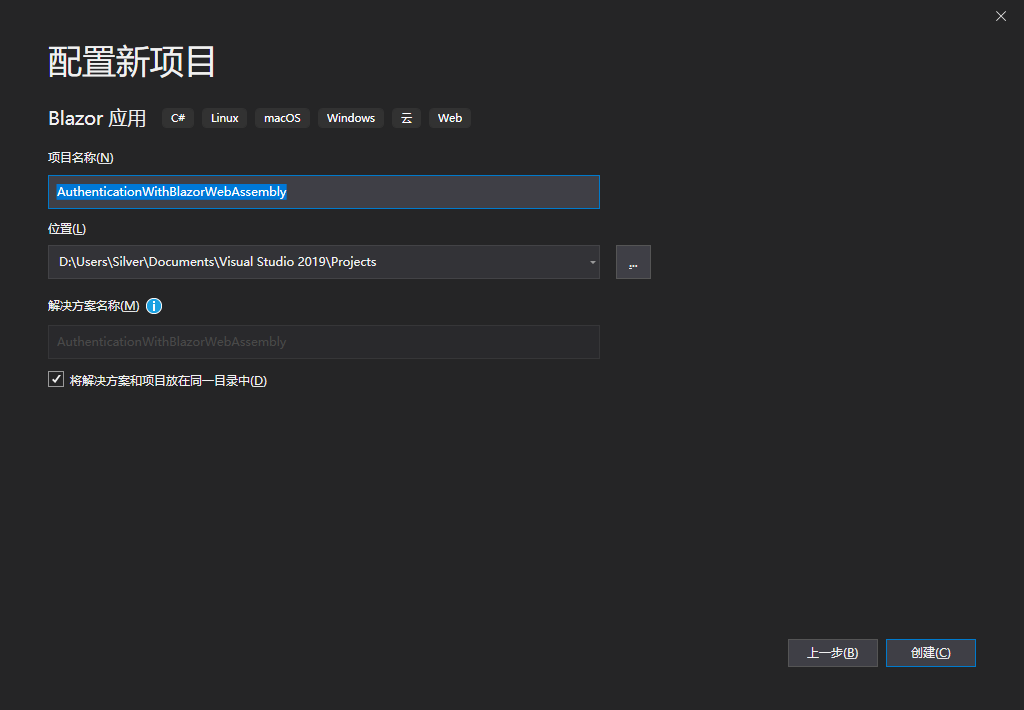
项目名称
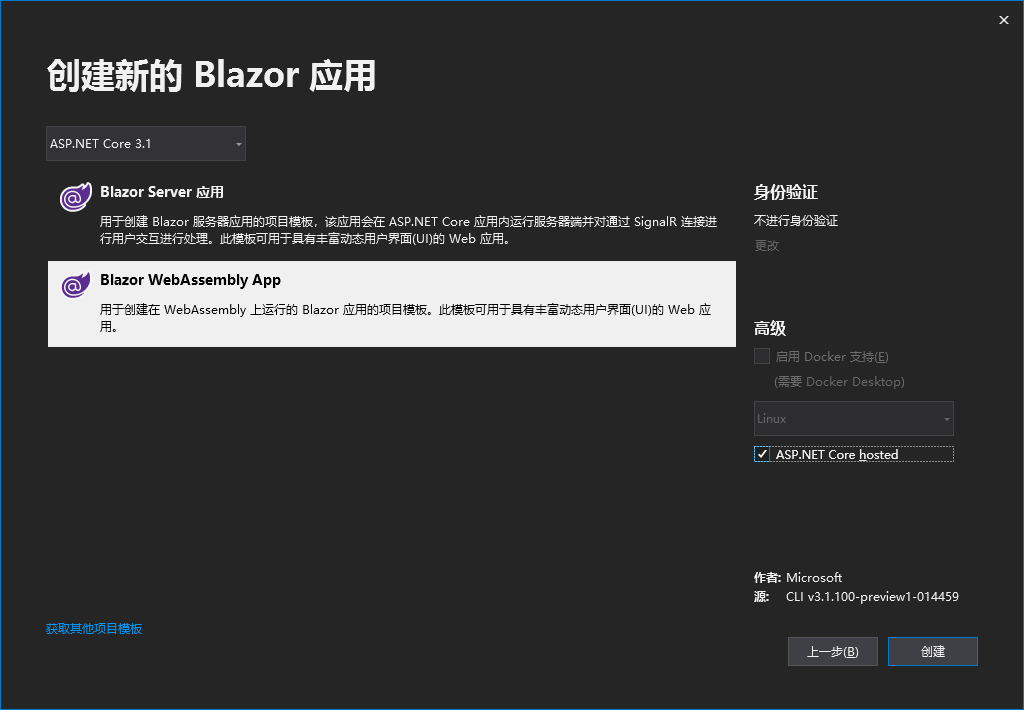
选择Blazor WebAssembly App(这里要勾选Asp.Net Core Host),如果找不到Blazor WebAssembly App,请先在命令行执行以下命令:
dotnet new -i Microsoft.AspNetCore.Blazor.Templates::3.1.0-preview1.19508.20
解决方案创建之后,我们将开始对AuthenticationWithBlazorWebAssembly.Server这个项目进行一些更改。
配置WebAPI
在配置WebAPI之前我先安装一些NuGet包:
    <PackageReference Include="Microsoft.AspNetCore.Authentication.JwtBearer" Version="3.0.0" />

    <PackageReference Include="Microsoft.AspNetCore.Blazor.Server" Version="3.0.0-preview9.19465.2" />

    <PackageReference Include="Microsoft.AspNetCore.Diagnostics.EntityFrameworkCore" Version="3.0.0" />

    <PackageReference Include="Microsoft.AspNetCore.Identity.EntityFrameworkCore" Version="3.0.0" />

    <PackageReference Include="Microsoft.AspNetCore.Identity.UI" Version="3.0.0" />

    <PackageReference Include="Microsoft.EntityFrameworkCore.SqlServer" Version="3.0.0" />

    <PackageReference Include="Microsoft.EntityFrameworkCore.Tools" Version="3.0.0">

    <PackageReference Include="Microsoft.VisualStudio.Web.CodeGeneration.Design" Version="3.0.0" />
设置Identity数据库:连接字符串
在进行任何设置之前,数据库方面需要一个连接字符串。这通常是保存在appsettings.json中的,但Blazor托管模版并未提供此文件,所以我们需要手动添加此文件。
在AuthenticationWithBlazorWebAssembly.Server项目右键添加 -> 新建项,然后选择应用设置文件。
{

  "ConnectionStrings": {

    "DefaultConnection": "Server=(localdb)\\MSSQLLocalDB;Database=AuthenticationWithBlazorWebAssembly;Trusted_Connection=True;MultipleActiveResultSets=true"

  }

}
该文件带有一个已经设置好的连接字符串,你可以随时将其指向需要的地方。我们只需要添加一个数据库名就可以了,其余的保持默认值。
设置Identity数据库:DbContext
在AuthenticationWithBlazorWebAssembly.Server项目跟目录创建一个名为Data的目录,然后使用下面代码添加一个名为ApplicationDbContext的类文件。
    public class ApplicationDbContext : IdentityDbContext

    {

        public ApplicationDbContext(DbContextOptions options) : base(options) {

        }

    }
因为我们使用Identity需要将信息存储在数据库中,所以我们不是从DbContext继承,而是从IdentityDbContext继承。IdentityDbContext基类包含EF配置管理Identity数据库表需要的所有配置。
设置Identity数据库:注册服务
在Startup类中,我们需要添加一个构造函数,接收IConfiguration参数和一个属性来存储它。IConfiguration允许我们访问appsettings.json文件,如:连接字符串。
        public IConfiguration Configuration { get; }

        public Startup(IConfiguration configuration)

        {

            Configuration = configuration;

        }
接下来我们将以下代码添加到ConfigureServices方法的顶部。
        public void ConfigureServices(IServiceCollection services)

        {

            services.AddDbContext<ApplicationDbContext>(options =>

                options.UseSqlServer(Configuration.GetConnectionString("DefaultConnection")));

            services.AddDefaultIdentity<IdentityUser>()

                .AddEntityFrameworkStores<ApplicationDbContext>();

      //这里省略掉其他代码

        }
这里两行代码将ApplicationDbContext添加到服务集合中。然后为ASP.NET Core Identity注册各种服务并通过ApplicationDbContext使用Entity Framework作为数据存储。
设置Identity数据库:创建数据库
现在可以为数据库创建初始迁移。在程序包管理器控制台运行以下命令。
Add-Migration CreateIdentitySchema -o Data/Migations
命令运行完成,你应该能在Data > Migrations文件夹中看到迁移文件。在控制台中运行命令Update-Database将迁移应用到数据库。
在运行迁移命令时遇到任何问题,请确保在程序包管理器中选择AuthenticationWithBlazorWebAssembly.Server项目作为默认项目。
启用身份验证:注册服务
接下来在API中启用身份验证。同样,在ConfigureServices中,在上一节添加的代码之后添加以下代码。
public void ConfigureServices(IServiceCollection services)

{

  //这里省略到其他代码

  services.AddAuthentication(JwtBearerDefaults.AuthenticationScheme)

                .AddJwtBearer(options =>

                {

                    options.TokenValidationParameters = new TokenValidationParameters

                    {

                        ValidateIssuer = true,

                        ValidateAudience = true,

                        ValidateLifetime = true,

                        ValidateIssuerSigningKey = true,

                        ValidIssuer = Configuration["JwtIssuer"],

                        ValidAudience = Configuration["JwtAudience"],

                        IssuerSigningKey = new SymmetricSecurityKey(Encoding.UTF8.GetBytes(Configuration["JwtSecurityKey"]))

                    };

                });
//这里省略掉其他代码
}
上面代码想服务容器添加和设置一些身份验证所需的服务。然后为JSON Web Tokens(JWT)添加处理程序,并配置接收到的JWTs应该如何验证。你可以根据需求调整这些设置。
启用身份验证:应用程序设置
有一些设置要从appsettings.json文件中加载。
Configuration["JwtIssuer"]Configuration["JwtAudience"]Configuration["JwtSecurityKey"]
我们还未将它们添加到appsettings文件中。现在添加它们并添加一个设置用来控制令牌的持续时间,稍后我们会使用这个设置。
"JwtSecurityKey": "RANDOM_KEY_MUST_NOT_BE_SHARED",

"JwtIssuer": "https://localhost",

"JwtAudience": "https://localhost",

"JwtExpiryInDays": ,
保证JwtSecurityKey 的安全是非常重要的,因为这是用来对API产生的令牌签名的,如果泄露那么你的应用程序将不在安全。
由于我们在本地运行所有内容,所以我将Issuer和Audience设置为localhost。如果在生产环境使用它,我们需要将Issuer 设置为API运行的域名,将Audience设置为客户端应用程序运行的域名。
启用身份验证:添加中间件
最后,我们需要在Configure 方法中将必要的中间件添加到管道中。这将在API中启用身份验证和授权功能。将以下代码添加到app.UseEndpoints中间件前面。
app.UseAuthentication();

app.UseAuthorization();
这就是Startup类所需要的所有东西。现在API已经启用了身份验证。
你可以通过向WeatherForecastController中的Get方法添加[Authorize]属性来测试一切是否正常。然后启用应用程序并导航到Fetch Data页面,应该不会加载任何数据,应该会在控制台中看到401错误。
添加账户(account)控制器
为了让人们登录到我们的应用程序,他们需要能够注册。我们将添加一个帐户控制器,它将负责创建新帐户。
    [Route("api/[controller]")]

    [ApiController]

    public class AccountsController : ControllerBase

    {

        //private static UserModel LoggedOutUser = new UserModel { IsAuthenticated = false };

        private readonly UserManager<IdentityUser> _userManager;

        public AccountsController(UserManager<IdentityUser> userManager)

        {

            _userManager = userManager;

        }

        [HttpPost]

        public async Task<IActionResult> Post([FromBody]RegisterModel model)

        {

            var newUser = new IdentityUser { UserName = model.Email, Email = model.Email };

            var result = await _userManager.CreateAsync(newUser, model.Password);

            if (!result.Succeeded)

            {

                var errors = result.Errors.Select(x => x.Description);

                return BadRequest(new RegisterResult { Successful = false, Errors = errors });

            }

            return Ok(new RegisterResult { Successful = true });

        }

    }
Post操作使用ASP.NET Core Identity从RegisterModel来创建系统的新用户。
我们还没用添加注册模型,现在使用以下代码添加到AuthenticationWithBlazorWebAssembly.Shared项目中,稍后我们的Blazor应用程序将会使用到它。
    public class RegisterModel

    {

        [Required]

        [EmailAddress]

        [Display(Name = "Email")]

        public string Email { get; set; }

        [Required]

        [StringLength(, ErrorMessage = "The {0} must be at least {2} and at max {1} characters long.", MinimumLength = )]

        [DataType(DataType.Password)]

        [Display(Name = "Password")]

        public string Password { get; set; }

        [DataType(DataType.Password)]

        [Display(Name = "Confirm password")]

        [Compare("Password", ErrorMessage = "The password and confirmation password do not match.")]

        public string ConfirmPassword { get; set; }

    }
如果一切顺利,则会返回一个成功的RegisterResult,否则会返回一个失败的RegisterResult,我们一样将它添加到AuthenticationWithBlazorWebAssembly.Shared项目中。
    public class RegisterResult

    {

        public bool Successful { get; set; }

        public IEnumerable<string> Errors { get; set; }

    }
添加登录(login)控制器
现在我们有了用户注册的方式,我们还需要用户登录方式。
 [Route("api/[controller]")]

    [ApiController]

    public class LoginController : ControllerBase

    {

        private readonly IConfiguration _configuration;

        private readonly SignInManager<IdentityUser> _signInManager;

        public LoginController(IConfiguration configuration,

            SignInManager<IdentityUser> signInManager)

        {

            _configuration = configuration;

            _signInManager = signInManager;

        }

        [HttpPost]

        public async Task<IActionResult> Login([FromBody] LoginModel login)

        {

            var result = await _signInManager.PasswordSignInAsync(login.Email, login.Password, false, false);

            if (!result.Succeeded) return BadRequest(new LoginResult { Successful = false, Error = "Username and password are invalid." });

            var claims = new[]

            {

                new Claim(ClaimTypes.Name, login.Email)

            };

            var key = new SymmetricSecurityKey(Encoding.UTF8.GetBytes(_configuration["JwtSecurityKey"]));

            var creds = new SigningCredentials(key, SecurityAlgorithms.HmacSha256);

            var expiry = DateTime.Now.AddDays(Convert.ToInt32(_configuration["JwtExpiryInDays"]));

            var token = new JwtSecurityToken(

                _configuration["JwtIssuer"],

                _configuration["JwtAudience"],

                claims,

                expires: expiry,

                signingCredentials: creds

            );

            return Ok(new LoginResult { Successful = true, Token = new JwtSecurityTokenHandler().WriteToken(token) });

        }

    }
登录控制器(login controller)使用ASP.NET Core Identity SignInManger验证用户名和密码。如果它们都正确,则生成一个新的JSON Web Token并在LoginResult返回给客户端。
像之前一样,我们需要将LoginModel和LoginResult添加到AuthenticationWithBlazorWebAssembly.Shared项目中。
    public class LoginModel

    {

        [Required]

        public string Email { get; set; }

        [Required]

        public string Password { get; set; }

        public bool RememberMe { get; set; }

    }
    public class LoginResult

    {

        public bool Successful { get; set; }

        public string Error { get; set; }

        public string Token { get; set; }

    }
这就是API需要的所有东西。我们现在已经将其配置为通过JSON web tokens进行身份验证。接下来我们需要为Blazor WebAssembly(客户端)应用程序添加注册新用户和登录控制器。
配置Blazor客户端
接下来我们关注Blazor。首先需要安装Blazored.LocalStorage,我们稍后将需要它在登录时从API中持久化验证令牌。
我们还需要在App组件中使用AuthorizeRouteView组件替换RouteView组件(这里需要使用Microsoft.AspNetCore.Components.Authorization NuGet包并在_Imports.razor添加@using Microsoft.AspNetCore.Components.Authorization)。
<Router AppAssembly="@typeof(Program).Assembly">

    <Found Context="routeData">

        <AuthorizeRouteView RouteData="@routeData" DefaultLayout="@typeof(MainLayout)" />

    </Found>

    <NotFound>

        <LayoutView Layout="@typeof(MainLayout)">

            <p>Sorry, there's nothing at this address.</p>

        </LayoutView>

    </NotFound>

</Router>
此组件提供类型为Task<AuthenticationState>的级联参数。AuthorizeView通过使用它来确定当前用户的身份验证状态。
但是任何组件都可以请求参数并使用它来执行过程逻辑,例如:
@page "/"

<button @onclick="@LogUsername">Log username</button>

@code {

    [CascadingParameter]

    private Task<AuthenticationState> authenticationStateTask { get; set; }

    private async Task LogUsername()

    {

        var authState = await authenticationStateTask;

        var user = authState.User;

        if (user.Identity.IsAuthenticated)

        {

            Console.WriteLine($"{user.Identity.Name} is authenticated.");

        }

        else

        {

            Console.WriteLine("The user is NOT authenticated.");

        }

    }

}
创建自定义AuthenticationStateProvider
因为我们使用Blazor WebAssembly,所以我们需要为AuthenticationStateProvider提供自定义实现。因为在客户端应用程序有太多的选项,所以无法设计一个适用于所有人的默认类。
我们需要重写GetAuthenticationStateAsync方法。在此方法中,我们需要确定当前用户是否经过身份验证。我们还将添加两个辅助方法,当用户登录或注销时,我们将使用这些方法更新身份验证状态。
public class ApiAuthenticationStateProvider : AuthenticationStateProvider

    {

        private readonly HttpClient _httpClient;

        private readonly ILocalStorageService _localStorage;

        public ApiAuthenticationStateProvider(HttpClient httpClient, ILocalStorageService localStorage)

        {

            _httpClient = httpClient;

            _localStorage = localStorage;

        }

        public override async Task<AuthenticationState> GetAuthenticationStateAsync()

        {

            var savedToken = await _localStorage.GetItemAsync<string>("authToken");

            if (string.IsNullOrWhiteSpace(savedToken))

            {

                return new AuthenticationState(new ClaimsPrincipal(new ClaimsIdentity()));

            }

            _httpClient.DefaultRequestHeaders.Authorization = new AuthenticationHeaderValue("bearer", savedToken);

            return new AuthenticationState(new ClaimsPrincipal(new ClaimsIdentity(ParseClaimsFromJwt(savedToken), "jwt")));

        }

        public void MarkUserAsAuthenticated(string token)

        {

            var authenticatedUser = new ClaimsPrincipal(new ClaimsIdentity(ParseClaimsFromJwt(token), "jwt"));

            var authState = Task.FromResult(new AuthenticationState(authenticatedUser));

            NotifyAuthenticationStateChanged(authState);

        }

        public void MarkUserAsLoggedOut()

        {

            var anonymousUser = new ClaimsPrincipal(new ClaimsIdentity());

            var authState = Task.FromResult(new AuthenticationState(anonymousUser));

            NotifyAuthenticationStateChanged(authState);

        }

        private IEnumerable<Claim> ParseClaimsFromJwt(string jwt)

        {

            var claims = new List<Claim>();

            var payload = jwt.Split('.')[];

            var jsonBytes = ParseBase64WithoutPadding(payload);

            var keyValuePairs = JsonSerializer.Deserialize<Dictionary<string, object>>(jsonBytes);

            keyValuePairs.TryGetValue(ClaimTypes.Role, out object roles);

            if (roles != null)

            {

                if (roles.ToString().Trim().StartsWith("["))

                {

                    var parsedRoles = JsonSerializer.Deserialize<string[]>(roles.ToString());

                    foreach (var parsedRole in parsedRoles)

                    {

                        claims.Add(new Claim(ClaimTypes.Role, parsedRole));

                    }

                }

                else

                {

                    claims.Add(new Claim(ClaimTypes.Role, roles.ToString()));

                }

                keyValuePairs.Remove(ClaimTypes.Role);

            }

            claims.AddRange(keyValuePairs.Select(kvp => new Claim(kvp.Key, kvp.Value.ToString())));

            return claims;

        }

        private byte[] ParseBase64WithoutPadding(string base64)

        {

            switch (base64.Length % )

            {

                case : base64 += "=="; break;

                case : base64 += "="; break;

            }

            return Convert.FromBase64String(base64);

        }

    }
这里有很多代码,让我们一步一步来分析。
CascadingAuthenticationState组件调用GetAuthenticationStateAsync方法来确定当前用户是否经过验证。
上面的代码,我们检查local storge是否有验证令牌。如果local storge中没有令牌,那么我们将返回一个新的AuthenticationState,其中包含一个空的ClaimsPrincipal。这就说明当前用户用户没有经过身份验证。
如果有令牌,读取并设置HttpClient的默认Authorization Header,并返回一个包含ClaimsPrincipal新的AuthenticationState的令牌声明。该声明(Claims)使用ParseClaimsFromJwt方法从令牌中提取。此方法解码令牌并返回其中包含的声明。
MarkUserAsAuthenticated辅助方法用于登录时调用NotifyAuthenticationStateChanged方法,该方法触发AuthenticationStateChanged事件。这将通过CascadingAuthenticationState组件级联新的身份验证状态。
MarkUserAsLoggedOut用于用户注销时。
Auth Service
Auth Service将在组件中注册用户并登录到应用程序和用户注销使用。
public class AuthService : IAuthService

    {

        private readonly HttpClient _httpClient;

        private readonly AuthenticationStateProvider _authenticationStateProvider;

        private readonly ILocalStorageService _localStorage;

        public AuthService(HttpClient httpClient,

            AuthenticationStateProvider authenticationStateProvider,

            ILocalStorageService localStorage)

        {

            _httpClient = httpClient;

            _authenticationStateProvider = authenticationStateProvider;

            _localStorage = localStorage;

        }

        public async Task<RegisterResult> Register(RegisterModel registerModel)

        {

            var result = await _httpClient.PostJsonAsync<RegisterResult>("api/accounts", registerModel);

            return result;

        }

        public async Task<LoginResult> Login(LoginModel loginModel)

        {

            var loginAsJson = JsonSerializer.Serialize(loginModel);

            var response = await _httpClient.PostAsync("api/Login", new StringContent(loginAsJson, Encoding.UTF8, "application/json"));

            var loginResult = JsonSerializer.Deserialize<LoginResult>(await response.Content.ReadAsStringAsync(), new JsonSerializerOptions { PropertyNameCaseInsensitive = true });

            if (!response.IsSuccessStatusCode)

            {

                return loginResult;

            }

            await _localStorage.SetItemAsync("authToken", loginResult.Token);

            ((ApiAuthenticationStateProvider)_authenticationStateProvider).MarkUserAsAuthenticated(loginResult.Token);

            _httpClient.DefaultRequestHeaders.Authorization = new AuthenticationHeaderValue("bearer", loginResult.Token);

            return loginResult;

        }

        public async Task Logout()

        {

            await _localStorage.RemoveItemAsync("authToken");

            ((ApiAuthenticationStateProvider)_authenticationStateProvider).MarkUserAsLoggedOut();

            _httpClient.DefaultRequestHeaders.Authorization = null;

        }

    }
Register方法提交registerModel给accounts controller并返回RegisterResult给调用者。
Login 方法类似于Register 方法,它将LoginModel 发送给login controller。但是,当返回一个成功的结果时,它将返回一个授权令牌并持久化到local storge。
最后我们调用ApiAuthenticationStateProvider上的方法MarkUserAsAuthenticated ,设置HttpClient的默认authorization header。
Logout 这个方法就是执行与Login 方法相反的操作。
注册组件(Register Component)
我们已经到了最后阶段了。现在我们可以将注意力转向UI,并创建一个允许人们在站点注册的组件。
@page "/register"

@inject IAuthService AuthService

@inject NavigationManager NavigationManager

<h1>Register</h1>

@if (ShowErrors) {

    <div class="alert alert-danger" role="alert">

        @foreach (var error in Errors) {

            <p>@error</p>

        }

    </div>

}

<div class="card">

    <div class="card-body">

        <h5 class="card-title">Please enter your details</h5>

        <EditForm Model="RegisterModel" OnValidSubmit="HandleRegistration">

            <DataAnnotationsValidator />

            <ValidationSummary />

            <div class="form-group">

                <label for="email">Email address</label>

                <InputText Id="email" class="form-control" @bind-Value="RegisterModel.Email" />

                <ValidationMessage For="@(() => RegisterModel.Email)" />

            </div>

            <div class="form-group">

                <label for="password">Password</label>

                <InputText Id="password" type="password" class="form-control" @bind-Value="RegisterModel.Password" />

                <ValidationMessage For="@(() => RegisterModel.Password)" />

            </div>

            <div class="form-group">

                <label for="confirmpassword">Confirm Password</label>

                <InputText Id="confirmpassword" type="password" class="form-control" @bind-Value="RegisterModel.ConfirmPassword" />

                <ValidationMessage For="@(() => RegisterModel.ConfirmPassword)" />

            </div>

            <button type="submit" class="btn btn-primary">Submit</button>

        </EditForm>

    </div>

</div>

@code {

    private RegisterModel RegisterModel = new RegisterModel();

    private bool ShowErrors;

    private IEnumerable<string> Errors;

    private async Task HandleRegistration() {

        ShowErrors = false;

        var result = await AuthService.Register(RegisterModel);

        if (result.Successful) {

            NavigationManager.NavigateTo("/login");

        } else {

            Errors = result.Errors;

            ShowErrors = true;

        }

    }

}
注册组件包含一个表单让用户输入他们的电子邮件和密码。提交表单时,会调用AuthService 的方法Register 。如果注册成功那么用户会被导航到登录页,否则,会将错误显示给用户。
登录组件(Login Component)
现在我们可以注册一个新的帐户,我们需要能够登录。登录组件将用于此。
@page "/login"

@inject IAuthService AuthService

@inject NavigationManager NavigationManager

<h1>Login</h1>

@if (ShowErrors) {

    <div class="alert alert-danger" role="alert">

        <p>@Error</p>

    </div>

}

<div class="card">

    <div class="card-body">

        <h5 class="card-title">Please enter your details</h5>

        <EditForm Model="loginModel" OnValidSubmit="HandleLogin">

            <DataAnnotationsValidator />

            <ValidationSummary />

            <div class="form-group">

                <label for="email">Email address</label>

                <InputText Id="email" Class="form-control" @bind-Value="loginModel.Email" />

                <ValidationMessage For="@(() => loginModel.Email)" />

            </div>

            <div class="form-group">

                <label for="password">Password</label>

                <InputText Id="password" type="password" Class="form-control" @bind-Value="loginModel.Password" />

                <ValidationMessage For="@(() => loginModel.Password)" />

            </div>

            <button type="submit" class="btn btn-primary">Submit</button>

        </EditForm>

    </div>

</div>

@code {

    private LoginModel loginModel = new LoginModel();

    private bool ShowErrors;

    private string Error = "";

    private async Task HandleLogin() {

        ShowErrors = false;

        var result = await AuthService.Login(loginModel);

        if (result.Successful) {

            NavigationManager.NavigateTo("/");

        } else {

            Error = result.Error;

            ShowErrors = true;

        }

    }

}
与注册组件类似的设计,我们也提供一个表单用于用户输入电子邮件和密码。表单提交时,将调用AuthService的方法Login。如果登录成功,用户将被重定向到主页,否则将显示错误消息。
注销组件(Logout Component)
我们现在可以注册和登录,但我们也需要注销的功能。我用了一个页面组件来做这个,但是你也可以通过点击某个地方的按钮来实现。
@page "/logout"

@inject IAuthService AuthService

@inject NavigationManager NavigationManager

@code {

    protected override async Task OnInitializedAsync() {

        await AuthService.Logout();

        NavigationManager.NavigateTo("/");

    }

}
这个组件没有用户界面,当用户导航到它时,将调用AuthService上的方法Logout,然后将用户重定向回主页。
添加一个LoginDisplay组件并更新MainLayout组件
最后的任务是添加一个LoginDisplay组件并更新MainLayout 组件。
LoginDisplay 组件与Blazor Server模版一样,如果未经验证,它将显示登录与注册链接,否则显示电子邮件和注销链接。
<AuthorizeView>

    <Authorized>

        Hello, @context.User.Identity.Name!

        <a href="/logout">Log out</a>

    </Authorized>

    <NotAuthorized>

        <a href="/register">Register</a>

        <a href="/login">Log in</a>

    </NotAuthorized>

</AuthorizeView>
我们现在只需要更新MainLayout组件。
@inherits LayoutComponentBase

<div class="sidebar">

    <NavMenu />

</div>

<div class="main">

    <div class="top-row px-4">

        <LoginDisplay />

        <a href="http://blazor.net" target="_blank" class="ml-md-auto">About</a>

    </div>

    <div class="content px-4">

        @Body

    </div>

</div>
注册服务(Registering Services)
最后在Startup类中注册服务。
            services.AddBlazoredLocalStorage();

            services.AddAuthorizationCore();

            services.AddScoped<AuthenticationStateProvider, ApiAuthenticationStateProvider>();

            services.AddScoped<IAuthService, AuthService>();
如果一切都按计划进行,那么你应该得到这样的结果。
总结
这篇文章展示了如何WebAPI和ASP.NET Core Identity创建一个带有身份验证的Blazor WebAssembly(Blazor客户端)应用程序。
展示WebAPI如何处理和签发令牌(JSON web tokens)。以及如何设置各种控制器操作来为客户端应用程序提供服务。最后,展示如何配置Blazor来使用API和它签发的令牌来设置应用的身份验证状态。
最后也提供我学习本文跟随作者所写的源码(GITHUB)。
使用WebApi和Asp.Net Core Identity 认证 Blazor WebAssembly(Blazor客户端应用)的更多相关文章
- ASP.NET Core Identity Hands On(1)——Identity 初次体验
ASP.NET Core Identity是用于构建ASP.NET Core Web应用程序的成员资格系统,包括成员资格.登录和用户数据存储 这是来自于 ASP.NET Core Identity 仓 ...
- ASP.NET Core Identity Hands On(2)——注册、登录、Claim
上一篇文章(ASP.NET Core Identity Hands On(1)--Identity 初次体验)中,我们初识了Identity,并且详细分析了AspNetUsers用户存储表,这篇我们将 ...
- asp.net core 自定义认证方式--请求头认证
asp.net core 自定义认证方式--请求头认证 Intro 最近开始真正的实践了一些网关的东西,最近写几篇文章分享一下我的实践以及遇到的问题. 本文主要介绍网关后面的服务如何进行认证. 解决思 ...
- IdentityServer4 中文文档 -14- (快速入门)使用 ASP.NET Core Identity
IdentityServer4 中文文档 -14- (快速入门)使用 ASP.NET Core Identity 原文:http://docs.identityserver.io/en/release ...
- ASP.NET Core Identity 实战(2)——注册、登录、Claim
上一篇文章(ASP.NET Core Identity Hands On(1)--Identity 初次体验)中,我们初识了Identity,并且详细分析了AspNetUsers用户存储表,这篇我们将 ...
- ASP.NET Core Identity 实战(4)授权过程
这篇文章我们将一起来学习 Asp.Net Core 中的(注:这样描述不准确,稍后你会明白)授权过程 前情提要 在之前的文章里,我们有提到认证和授权是两个分开的过程,而且认证过程不属于Identity ...
- 用一个应用场景理解ASP.NET Core Identity是什么?
目录 前言 基于声明的认证(Claims-based Authentication) 应用场景一 在ASP.NET Core 中Identity是如何实现的 类ClaimsPrincipal 考察另外 ...
- ASP.NET Core Token认证
翻译:Token Authentication in ASP.NET Core 令牌认证(Token Authentication)已经成为单页应用(SPA)和移动应用事实上的标准.即使是传统的B/S ...
- 用例子看ASP.NET Core Identity是什么?
原文:用例子看ASP.NET Core Identity是什么? 目录 前言 基于声明的认证(Claims-based Authentication) Claim 在ASP.NET Core Iden ...
随机推荐
- 你以为你真的了解final吗?
本人免费整理了Java高级资料,涵盖了Java.Redis.MongoDB.MySQL.Zookeeper.Spring Cloud.Dubbo高并发分布式等教程,一共30G,需要自己领取.传送门:h ...
- XAF-从业务类继承 (XPO)
In this lesson, you will learn how to implement business classes for your application using the Busi ...
- ts常用数据类型
1.1 布尔值 let isTrue: boolean = false; console.log(isTrue); 1.2 数字 let age: number = 26; console.log(a ...
- Socket简单实现ssh笔记
Scoket概念: socket本质上就是在2台网络互通的电脑之间,架设一个通道,两台电脑通过这个通道来实现数据的互相传递. 我们知道网络 通信 都 是基于 ip+port 方能定位到目标的具体机器上 ...
- centos7中启动tomcat提示bash: tomcat8.0.39/bin/startup.sh: 权限不够
问题描述: centos7中启动tomcat提示bash: tomcat8.0.39/bin/startup.sh: 权限不够 解决方案:先进入bin目录 [root@localhost/]# cd ...
- CodeForces - 1236B (简单组合数学)
题意 有n种物品和m个背包,每种物品有无限个,现将若干个物品放到这些背包中,满足: 1.每个背包里不能出现相同种类的物品(允许有空背包): 2.在所有的m个背包中,每种物品都出现过. 求方案数,对10 ...
- 01day-webpack
<!-- .sass后缀的文件名 比较老了 现在它的后缀名是.scss 其实他们是同一个东西 只是 后缀名发生了变化 以 .sass写的文件的内容是 他没有括号 没有分号 有点怪 它跟新为了.s ...
- java的加载与运行
jdk中有一个javac.exe(java编译器) *Java程序的运行包括两非常重要的阶段 -编译阶段 -运行阶段 *编译阶段 -主要任务是检查Java源程序是否符合Java语法 符合Java语法则 ...
- pytest-2:allure 的安装、使用
版本对应: python3.4==>allure-pytest2.7.0 python3.6==>allure0pytest2.8.6 环境安装: 1.先安装好对应的python,准备好p ...
- jmeter连接不上MySQL数据库的原因以及解决方法
1.Cannot create PoolableConnectionFactory (Client does not support authentication protocol requested ...