CentOS7部署LAMP+xcache (php-fpm模式)
此次实验准备3台CentOS7服务器,版本号:CentOS Linux release 7.2.1511。

搭建Apache服务器
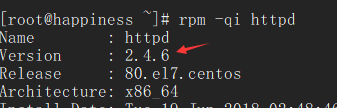
- 通过 yum -y install httpd 安装Apache:
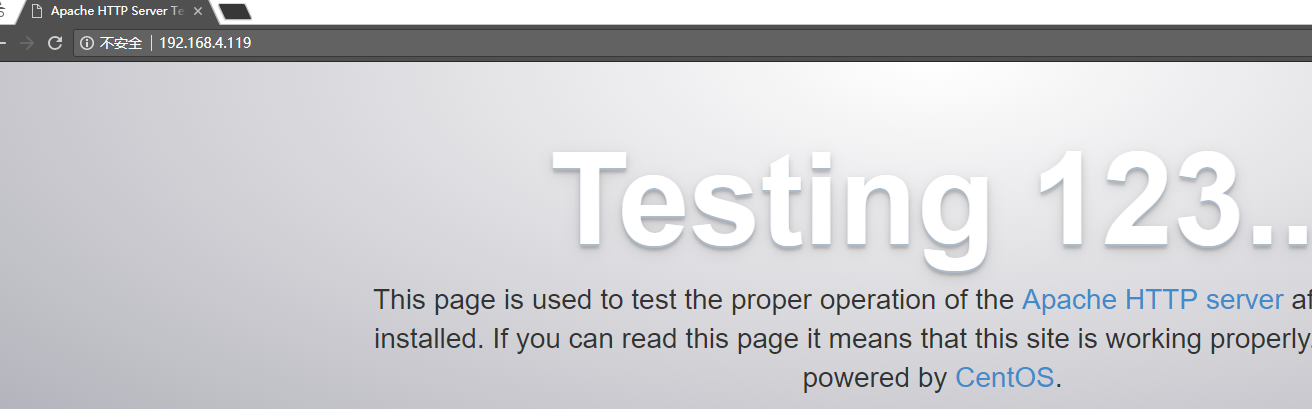
- 访问正常:
- 修改配置文件,添加2个虚拟主机,一个提供phpMyAdmin,一个提供wordpress:
[root@happiness ~]# vim /etc/httpd/conf/httpd.conf

#启用解析,加速httpd服务的启动

    ServerName localhost:80

#注销默认主目录

    #DocumentRoot "/var/www/html"

[root@happiness ~]# vim /etc/httpd/conf.d/vhost.conf

#默认主页

    DirectoryIndex index.php

#虚拟主机a,后期提供phpMyAdmin

    <VirtualHost 192.168.4.119:80>

        ServerName www.aaa.net

        DocumentRoot /var/www/aaa

        ProxyRequests off

        ProxyPassMatch ^/(.*\.php)$ fcgi://192.168.4.118:9000/var/www/php_aaa/$1

        <Directory "/var/www/aaa">

            Options None

            Allowoverride None

            Require all granted

        </Directory>

    </VirtualHost>

#虚拟主机b,后期提供wordpress

    <VirtualHost 192.168.4.119:80>

        ServerName www.bbb.net

        DocumentRoot /var/www/bbb

        ProxyRequests off

        ProxyPassMatch ^/(.*\.php)$ fcgi://192.168.4.118:9000/var/www/php_bbb/$1

        <Directory "/var/www/bbb">

            Options None

            Allowoverride None

            Require all granted

        </Directory>

    </VirtualHost>
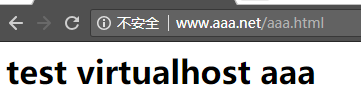
- 测试2个虚拟主机静态资源是否可用:
#在虚拟主机a中新建测试页aaa.html
[root@happiness ~]# vim /var/www/aaa/aaa.html
<h1>test virtualhost aaa</h1>
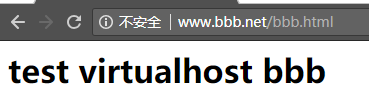
#在虚拟主机b中新建测试页bbb.html
[root@happiness ~]# vim /var/www/bbb/bbb.html
<h1>test virtualhost bbb</h1> 访问结果:(实验中没搭建dns服务,修改要访问Apache的主机的hosts文件,添加 192.168.4.119 www.aaa.net 和 192.168.4.119 www.bbb.net,来完成访问)
搭建php服务器
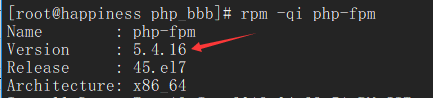
- 通过 yum -y install php-fpm php-mysql php-mbstring 搭建php:
- 修改php配置文件:
[root@happiness ~]# vim /etc/php-fpm.d/www.conf
#监听本地能与外部通信的地址
listen = 192.168.4.118:9000
#允许哪些主机访问
listen.allowed_clients = 192.168.4.119
#确保user、group跟Apache服务器httpd进程的user、group一致
user = apache
group = apache
#session目录不存在,需要手动创建
php_value[session.save_path] = /var/lib/php/session
[root@happiness ~]# mkdir /var/lib/php/session
[root@happiness ~]# chown apache:apache /var/lib/php/session
[root@happiness ~]# ll -hd /var/lib/php/session/
drwxr-xr-x. 2 apache apache 4.0K Jun 21 10:28 /var/lib/php/session/
#虚拟机a新建php测试页
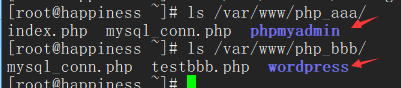
[root@happiness ~]# cat /var/www/php_aaa/index.php
<h1>a</h1>
<?php
phpinfo();
?>
#虚拟机b新建php测试页
[root@happiness ~]# cat /var/www/php_bbb/testbbb.php
<h1>b</h1>
<?php
phpinfo();
?> 访问结果:(注意,如果访问结果出现:File not found类似的提示时,需要关闭php服务器的selinux,临时关闭通过命令 setenforce Permissive 进行,永久关闭修改配置文件 vim /etc/sysconfig/selinux)


搭建Mariadb服务器
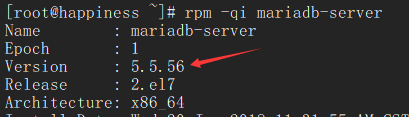
- 通过 yum -y install mariadb-server 安装mariadb:
- 创建mariadb用户访问权限:
MariaDB [(none)]> CREATE USER 'wpuser'@'192.168.4.118' IDENTIFIED BY 'wppasswd';

MariaDB [(none)]> GRANT ALL PRIVILEGES ON wordpressdb.* TO 'wpuser'@'192.168.4.118';

MariaDB [(none)]> CREATE USER 'pmauser'@'192.168.4.118' IDENTIFIED BY 'pmapasswd';

MariaDB [(none)]> GRANT ALL PRIVILEGES ON pmadb.* TO 'pmauser'@'192.168.4.118';

MariaDB [(none)]> FULSH PRIVILEGES;

MariaDB [(none)]> CREATE DATABASE wordpressdb DEFAULT CHARACTER SET utf8 COLLATE utf8_general_ci;

MariaDB [(none)]> CREATE DATABASE pmadb DEFAULT CHARACTER SET utf8 COLLATE utf8_general_ci;
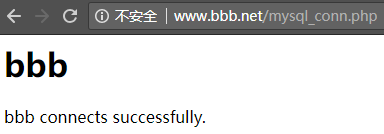
- 分别在虚拟机a和b中建立测试页,看能否成功连接mariadb服务器:
[root@happiness ~]# cat /var/www/php_aaa/mysql_conn.php

    <h1>aaa</h1>

    <?php

        $conn = mysql_connect('192.168.4.117','pmauser','pmapasswd');

        if($conn)

            echo "aaa connects successfully";

        else

            echo "aaa fails to connect.";

    ?>

[root@happiness ~]# cat /var/www/php_bbb/mysql_conn.php

    <h1>bbb</h1>

    <?php

        $conn = mysql_connect('192.168.4.117','wpuser','wppasswd');

        if($conn)

            echo "bbb connects successfully.";

        else

            echo "bbb fails to connect.";

    ?>

访问结果: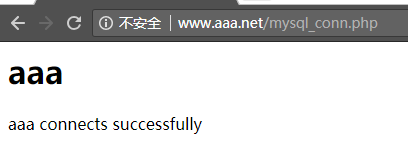
搭建phpMyAdmin和WordPress
- 分别从官网下载 phpMyAdmin 和 WordPress 源码包,分别解压于对应的虚拟机主目录下:(此时最新的 phpMyAdmin-4.8.1版本仅支持 PHP 5.5 to 7.2 and MySQL 5.5,而实验中PHP版本为5.4,故下载了 phpMyAdmin-4.4.15.10版本)
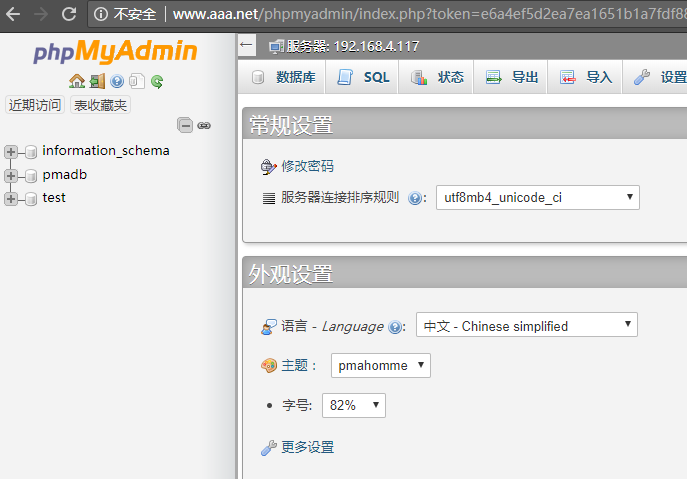
- 搭建phpMyAdmin:
#修改phpMyAdmin配置文件
[root@happiness ~]# vim /var/www/php_aaa/phpmyadmin/libraries/config.default.php

#可通过 openssl rand -base64 32 随机字符串

  $cfg['blowfish_secret'] = 'w14hLCZeyOtg4+9izK9O3oW8BLjTpJVAzF1GCAtJ7U4=';

  $cfg['Servers'][$i]['host'] = '192.168.4.117';

  $cfg['Servers'][$i]['user'] = 'pmauser';

  $cfg['Servers'][$i]['password'] = 'pmapasswd';

#修改完配置后复制一整份 phpmyadmin文件到Apache服务器

[root@happiness ~]# scp -r /var/www/php_aaa/phpmyadmin/ root@192.168.4.119:/var/www/aaa/

访问结果:
- 搭建WordPress:
#修改WordPress配置文件

[root@happiness ~]# cp /var/www/php_bbb/wordpress/wp-config-sample.php /var/www/php_bbb/wordpress/wp-config.php

[root@happiness ~]# vim /var/www/php_bbb/wordpress/wp-config.php

  define('DB_NAME', 'wordpressdb');

  define('DB_USER', 'wpuser');

  define('DB_PASSWORD', 'wppasswd');

  define('DB_HOST', '192.168.4.117');

#修改完配置后复制一整份wordpress到Apache服务器:

[root@happiness ~]# scp -r /var/www/php_bbb/wordpress root@192.168.4.119:/var/www/bbb/

访问结果:

借助php-xcache加速访问
- 没安装php-xcache进行的压力测试:
[root@happiness ~]# ab -n 10000 -c 1000 http://www.bbb.net/wordpress

This is ApacheBench, Version 2.3 <$Revision: 1430300 $>

Copyright 1996 Adam Twiss, Zeus Technology Ltd, http://www.zeustech.net/

Licensed to The Apache Software Foundation, http://www.apache.org/

Benchmarking www.bbb.net (be patient)

Completed 1000 requests

Completed 2000 requests

Completed 3000 requests

Completed 4000 requests

Completed 5000 requests

Completed 6000 requests

Completed 7000 requests

Completed 8000 requests

Completed 9000 requests

Completed 10000 requests

Finished 10000 requests

Server Software:        Apache/2.4.6

Server Hostname:        www.bbb.net

Server Port:            80

Document Path:          /wordpress

Document Length:        237 bytes

Concurrency Level:      1000

Time taken for tests:   12.966 seconds

Complete requests:      10000

Failed requests:        0

Write errors:           0

Non-2xx responses:      10000

Total transferred:      4650000 bytes

HTML transferred:       2370000 bytes

Requests per second:    771.26 [#/sec] (mean)

Time per request:       1296.588 [ms] (mean)

Time per request:       1.297 [ms] (mean, across all concurrent requests)

Transfer rate:          350.23 [Kbytes/sec] received

Connection Times (ms)

              min  mean[+/-sd] median   max

Connect:        0   47 206.0      0    1004

Processing:     5  136 1056.6     14   12899

Waiting:        1  136 1056.6     14   12899

Total:         10  183 1085.0     15   12947

Percentage of the requests served within a certain time (ms)

  50%     15

  66%     15

  75%     16

  80%     17

  90%     25

  95%   1208

  98%   1676

  99%   1679

 100%  12947 (longest request)
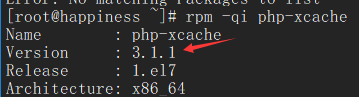
- 在php服务器上通过 yum -y install php-cache 安装cache:
- systemctl reload php-fpm.service,并进行压力测试,可以看到访问速度有了很大提升:
[root@happiness ~]# ab -n 10000 -c 1000 http://www.bbb.net/wordpress

This is ApacheBench, Version 2.3 <$Revision: 1430300 $>

Copyright 1996 Adam Twiss, Zeus Technology Ltd, http://www.zeustech.net/

Licensed to The Apache Software Foundation, http://www.apache.org/

Benchmarking www.bbb.net (be patient)

Completed 1000 requests

Completed 2000 requests

Completed 3000 requests

Completed 4000 requests

Completed 5000 requests

Completed 6000 requests

Completed 7000 requests

Completed 8000 requests

Completed 9000 requests

Completed 10000 requests

Finished 10000 requests

Server Software:        Apache/2.4.6

Server Hostname:        www.bbb.net

Server Port:            80

Document Path:          /wordpress

Document Length:        237 bytes

Concurrency Level:      1000

Time taken for tests:   1.973 seconds

Complete requests:      10000

Failed requests:        0

Write errors:           0

Non-2xx responses:      10000

Total transferred:      4650000 bytes

HTML transferred:       2370000 bytes

Requests per second:    5068.89 [#/sec] (mean)

Time per request:       197.282 [ms] (mean)

Time per request:       0.197 [ms] (mean, across all concurrent requests)

Transfer rate:          2301.79 [Kbytes/sec] received

Connection Times (ms)

              min  mean[+/-sd] median   max

Connect:        0   56 220.6      4    1011

Processing:     5   39  90.4     13    1102

Waiting:        1   36  90.5     10    1101

Total:         10   95 245.2     16    1222

Percentage of the requests served within a certain time (ms)

  50%     16

  66%     17

  75%     19

  80%     20

  90%    220

  95%   1019

  98%   1029

  99%   1213

 100%   1222 (longest request)
- 修改xcache配置文件,修改缓存大小为100M,再进行压力测试,可以看到访问速度略有提高:
[root@happiness ~]# vim /etc/php.d/xcache.ini

    xcache.size  =  100M

[root@happiness ~]# ab -n 10000 -c 1000 http://www.bbb.net/wordpress

This is ApacheBench, Version 2.3 <$Revision: 1430300 $>

Copyright 1996 Adam Twiss, Zeus Technology Ltd, http://www.zeustech.net/

Licensed to The Apache Software Foundation, http://www.apache.org/

Benchmarking www.bbb.net (be patient)

Completed 1000 requests

Completed 2000 requests

Completed 3000 requests

Completed 4000 requests

Completed 5000 requests

Completed 6000 requests

Completed 7000 requests

Completed 8000 requests

Completed 9000 requests

Completed 10000 requests

Finished 10000 requests

Server Software:        Apache/2.4.6

Server Hostname:        www.bbb.net

Server Port:            80

Document Path:          /wordpress

Document Length:        237 bytes

Concurrency Level:      1000

Time taken for tests:   1.642 seconds

Complete requests:      10000

Failed requests:        0

Write errors:           0

Non-2xx responses:      10000

Total transferred:      4650000 bytes

HTML transferred:       2370000 bytes

Requests per second:    6088.82 [#/sec] (mean)

Time per request:       164.235 [ms] (mean)

Time per request:       0.164 [ms] (mean, across all concurrent requests)

Transfer rate:          2764.94 [Kbytes/sec] received

Connection Times (ms)

              min  mean[+/-sd] median   max

Connect:        0   57 226.4      3    1011

Processing:     6   49 171.5     11    1613

Waiting:        1   47 171.7      8    1612

Total:          8  106 310.0     14    1636

Percentage of the requests served within a certain time (ms)

  50%     14

  66%     16

  75%     22

  80%     23

  90%    219

  95%   1028

  98%   1409

  99%   1418

 100%   1636 (longest request)
CentOS7部署LAMP+xcache (php-fpm模式)的更多相关文章
- Centos7部署LAMP平台之架构之路
部署LAMP平台搭建 一.源码安装LAMP 1. 安装apache [root@localhost ~]# yum -y install gcc* apr-devel apr-util-devel p ...
- FastCGI模式编译安装LAMP+Xcache
PHP的工作模式:php在lamp环境下共有三种工作模式:CGI模式.apache模块.FastCGI模式.CGI模式下运行PHP,性能不是很好.(已淘汰)FastCGI的方式和apache模块的不同 ...
- CentOS6编译LAMP基于FPM模式的应用wordpress
CentOS6编译LAMP基于FPM模式的应用wordpress 引言:其实我们可以直接使用yum安装LAMP(Linux+Apache[httpd]+Mysql+PHP),比手动编译安装LAMP要简 ...
- 阿里云服务器 ECS 部署lamp:centos+apache+mysql+php安装配置方法 (centos7)
阿里云服务器 ECS 部署lamp:centos+apache+mysql+php安装配置方法 (centos7) 1.效果图 1 2. 部署步骤 1 1. mysql安装附加(centos7) 7 ...
- 部署LAMP+NFS实现双Web服务器负载均衡
一.需求分析 1.前端需支持更大的访问量,单台Web服务器已无法满足需求了,则需扩容Web服务器: 2.虽然动态内容可交由后端的PHP服务器执行,但静态页面还需要Web服务器自己解析,那是否意味着多台 ...
- 部署lamp服务器
系统:CentOS 6.5 64位 1.卸载旧版本软件 rpm -qa | grep mysql #查询是否已经安装MySQL,如有执行下面的操作将其全部删除 rpm -e mysql --nodep ...
- CentOS6系统编译部署LAMP(Linux, Apache, MySQL, PHP)环境
我们一般常规的在Linux服务器中配置WEB系统会用到哪种WEB引擎呢?Apache还是比较常用的引擎之一.所以,我们在服务器中配置LAMP(Linux, Apache, MySQL, PHP)是我们 ...
- rhel6+apache2.4+mysql5.7+php5.6部署LAMP架构
rhel6+apache2.4+mysql5.7+php5.6部署LAMP架构 2017年10月01日 ~~~~~~~~~~~~~~~~~~~~~~~~~~~~~~~准备阶段~~~~~~~~~~~~~ ...
- centos7 部署 docker ce
=============================================== 2019/4/9_第1次修改 ccb_warlock === ...
随机推荐
- 亲测SQLServer的最大连接数
很多做架构设计.程序开发.运维.技术管理的朋友可能或多或少有这样的困惑: SQLServer到底支持多少连接数的并发? SQLServer是否可以满足现有的应用吗? 现有的技术架构支持多少连接数的并发 ...
- HDU 5340——Three Palindromes——————【manacher处理回文串】
Three Palindromes Time Limit: 2000/1000 MS (Java/Others) Memory Limit: 65536/65536 K (Java/Others ...
- HDU5366——The mook jong——dp
The mook jong Time Limit: 2000/1000 MS (Java/Others) Memory Limit: 65536/65536 K (Java/Others)Tot ...
- 左侧栏与右侧内容之锚点、offsetHeight、scrollTop()
常用功能 1.点击左侧,右侧相关内容随时点到. 2.滚动右侧信息,左侧标题随之显示背景. 第一点很简单,只要在左侧栏 <li><a href="#aaa"&g ...
- synchronized + volatile + ThreadLocal
线程的共享 synchronized + volatile + ThreadLocal <1> synchronized 锁住的是对象,当用它来锁住一个类时,实际上也是锁的一个对象. ...
- centos6 hadoop2.7.3分布式搭建
一.hadoop下载 apache所有的project都有自己的域名,可以通过apache官网下的project list去找,也可以直接定位project.apache.org,比如hadoop直接 ...
- WebSocket Demo
HTML 代码: <body> <h1>WebScoket示例</h1> <br /><br /> <input type=" ...
- ECMAScript Regex
Everything has its own regulation by defining its grammar. ECMAScript regular expressions pattern sy ...
- linux下查找字符串
如果你想在当前目录下 查找"hello,world!"字符串,可以这样: grep -rn "hello,world!" * * : 表示当前目录所有文件,也可 ...
- .net 使用Memcached
1.创建个人MemcachedHelper类 /// <summary> /// 页 面 名:缓存管理类<br/> /// 说 明:设置.获取.移除Cache<br/&g ...