
NGINX Cache Management (.imh nginx)
In this article, we will explore the various NGINX cache configuration options, and tips on tweaking your site to get the best performance out of the WordPress Optimized Stack. This guide covers all of the most common parameters you can tune via the Cache Manager Plugin.
- The information in this tutorial applies to our hosting plans that use NGINX Caching which includes our WordPress Hosting plans and certain VPS configurations.
- We also reference various settings pertaining to the Cache Manager Plugin for cPanel. Please see our tutorial on the Cache Manager Plugin for more information.
- For an in-depth explanation of how NGINX and the rest of the stack work together, please check out our WordPress Hosting Stack article.
Configuring Cache Parameters
The default cache parameters, configured via the Cache Manager Plugin, should work for most websites. However, in some cases, these values may need tweaking. For example, they may need to be adjusted to further improve performance for high-traffic websites or to allow caching to work correctly with certain eCommerce or dynamic content. We provide general usage suggestion and outline the major options that are tuneable below.
Cache Expiration
You can set page cache time via the Default Cache Time (cache_time_default) parameter. This parameter defines how long a page will remain valid after it has been cached by the server (by default, 4 hours). Once the age of the cached page has exceeded the expiration time, the server will fetch a new page from Apache or PHP, then cache the new result. In the event of a connection error or 500 error when attempting to fetch the updated page, NGINX will instead show the user the expired page from the cache. This allows your site to appear online, even if the backend is temporarily down or having problems.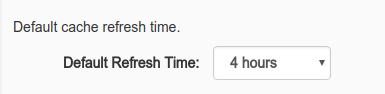
Bypass URLs
Most websites have certain pages that should never be cached, such as login pages or checkout pages. You can exclude pages or URI patterns from caching under the Bypass URLs section (cache_bypass_paths) in the Cache Manager Plugin. The default configuration already contains some common patterns and will exclude wp-login.php, wp-adminas well as a few others. If you find a page is being cached, but should not be, then adding it to this list should solve the problem.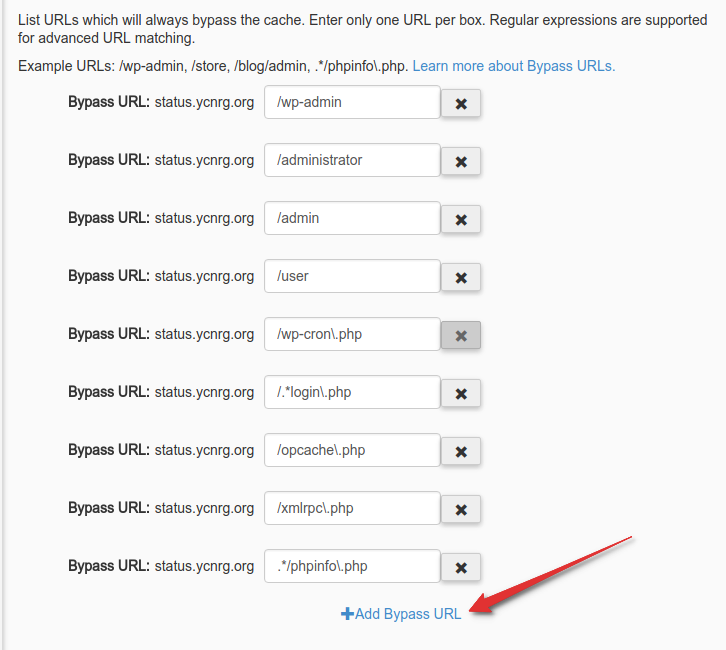
Static Content
Static content— such as images, Javascript, and stylesheets— typically do not change very often. Because of this, NGINX can quickly serve them when requested by visitors browsing your website. In the default configuration, NGINX will directly serve all static assets, rather than forwarding the request to Apache. This helps accelerate the requests, and prevents needlessly caching already static data. You can configure this setting via the Accelerate Static Content option (accel_static_content).
Specific static content paths can also be defined from within the Cache Manager interface. This is typically not required, as NGINX will serve static content based on the file extension (such as png, jpg, js, etc.). This option is provided primarily to allow serving additional static assets or downloads that use an uncommon file extension, or in combination with complex passthru rules. You can configure this setting via the Static Content Path option (static_content_paths).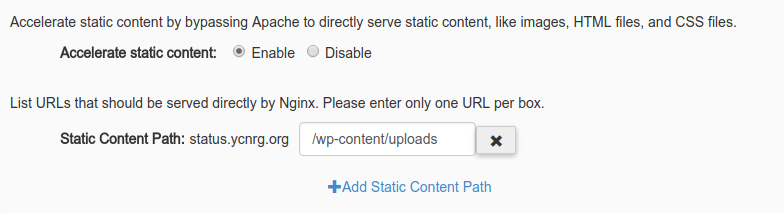
Force Passthru
The default handling of static content can potentially cause problems on websites that generate dynamic images or other files normally considered static. A telltale sign of this problem is a 404 Not Found error for dynamically generated content. In these cases, you can add the script or path to the Force Passthru list (force_passthru), found under the Advanced tab in the Cache Manager Plugin. For example, if your site generates dynamic thumbnails at http://example.com/thumbs/thumb01.png, then you would add /thumbs/ to the Force Passthru list. When a URI matches a pattern in this list, it always passes through to Apache, and normal caching rules still apply. If you need to bypass the cache for a particular page, you should use the Bypass URLs setting instead.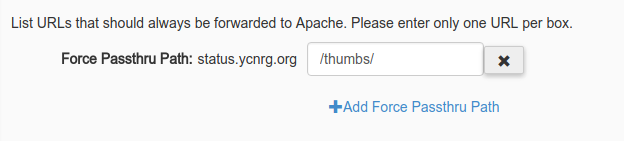
Bypass Cookies
If you run a website that allows both anonymous and logged-in users to browse at the same time, you will likely still want to cache pages for anonymous users, but not for logged-in users. In most cases, you can accomplish this by using the Bypass Cookies list (bypass_cookies) in the Cache Manager Plugin. By default, the system will automatically add patterns matching the WordPress login cookie (_logged_in_) and the WooCommerce "items in cart" indicator (items_in_cart).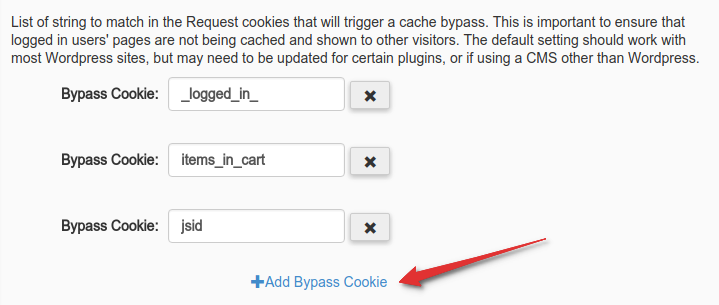
Cache-Control Headers
NGINX ignores cache control headers Cache-Control and Expires for the purposes of caching. This owes to the fact that most CMSs, including WordPress, will mark the page as uncacheable and add an expiration time in the past (to prevent caching). However, in most cases, the CMS can cache these pages without any problems, provided the page does not contain dynamically generated content that updates on every page load.
If your website migrated from a platform that made effective use of these headers, you can re-enable their use by setting the cache_honor_cc and cache_honor_expires options for enabling Cache-Control and Expires headers, respectively. Please note that you cannot currently change these options from within the Cache Manager Plugin. Although this option may be added in the future, at the moment you can only change the option in the config files, located at ~/.imh/nginx. Please reach out to our Support team if you would like assistance with changing these options. However, please note that most users will want to retain the default options for these settings. On the other hand, if you plan to write a custom application or plugin to manage caching, you should use the below-described X-Accel-Expiresheader (or a plugin which uses this method).
X-Accel Headers
Sometimes, you may need more granular control over cache expiration times. In this case, NGINX allows the use of X-Accel headers. For this discussion, we will focus on the X-Accel-Expires header. This allows each page to return the expiration time, in seconds, with zero (0) meaning that the system should not cache the page. Some plugins, such as NGINX Cache Controller, utilize the X-Accel-Expires header to explicitly set cache times for various page types.
Cache Management and Purging
To obtain the best performance, best practices typically call for setting a long cache time (4 hours, by default), then clearing pages from the cache after they have changed. Below are some examples of how to achieve this, depending upon your needs.
Automatic Expiration
Using a plugin, such as the NGINX Helper plugin for WordPress, you can set pages to automatically expire after you make changes to the site (such as posting a new article, new comments, etc.). We recommend this plugin for all WordPress sites utilizing the WordPress Optimized Stack, as it automates cache management for most day-to-day tasks.
Purging the Entire Cache
When you make major changes to your site, such as underlying code changes, or major updates, you may find it helpful to clear the entire cache to eliminate any potential problems. You can achieve this by using Purge Full Cache button in the Cache Manager Plugin.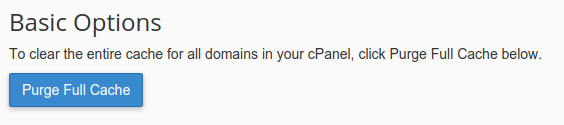
Clearing a Single Page
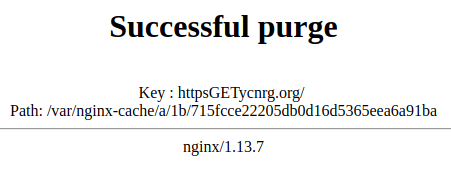
If you need to diagnose a problem with a page, but do not want to purge the entire cache, you can easily purge a single page. All you have to do is either use the Purge URL feature in the Cache Manager Plugin, or prefix the URI of the page you wish to purge with /purge, (as in the below examples).
| URL | Purge URL | What is Purged? |
|---|---|---|
| http://example.com/ | http://example.com/purge/ | Purges the homepage for example.com |
| http://example.com/2017/01/cool-article | http://example.com/purge/2017/01/cool-article | Purges the page at /2017/01/cool-article |
Troubleshooting Cache Issues
Sometimes you may find it difficult to track down caching problems -- especially if you have created a complex set of rules in the Cache Manager. Below, you will find a few tips on how to glean a page's cache status by using your web browser's built-in development tools, or by using cURL.
Using Browser Development Tools
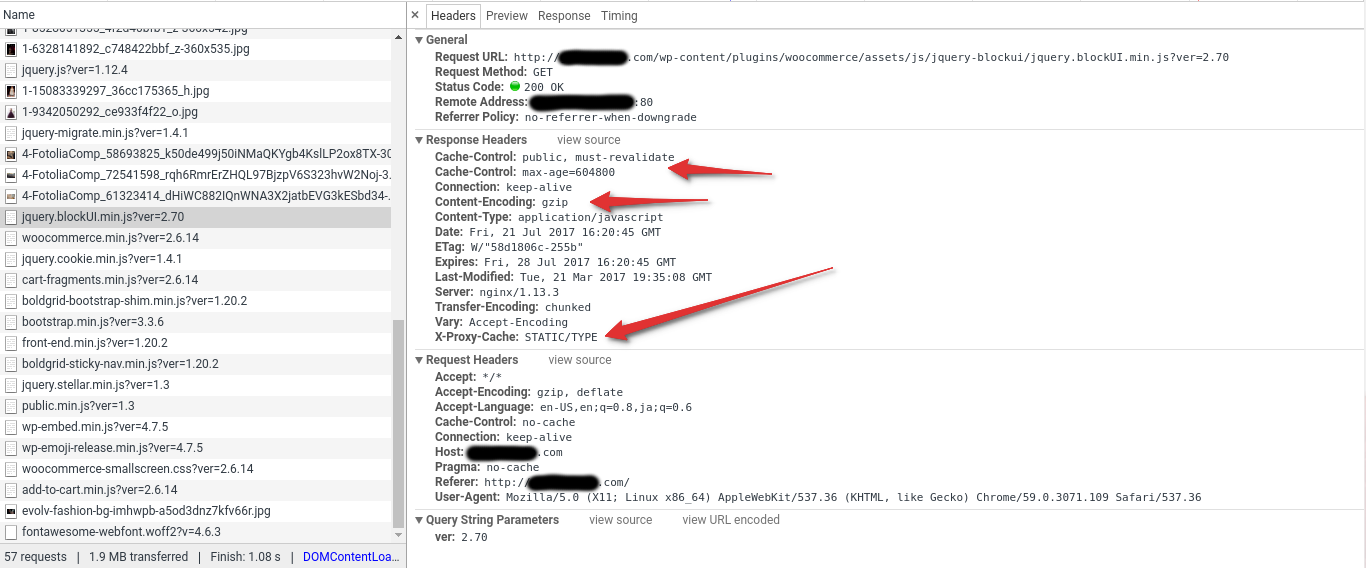
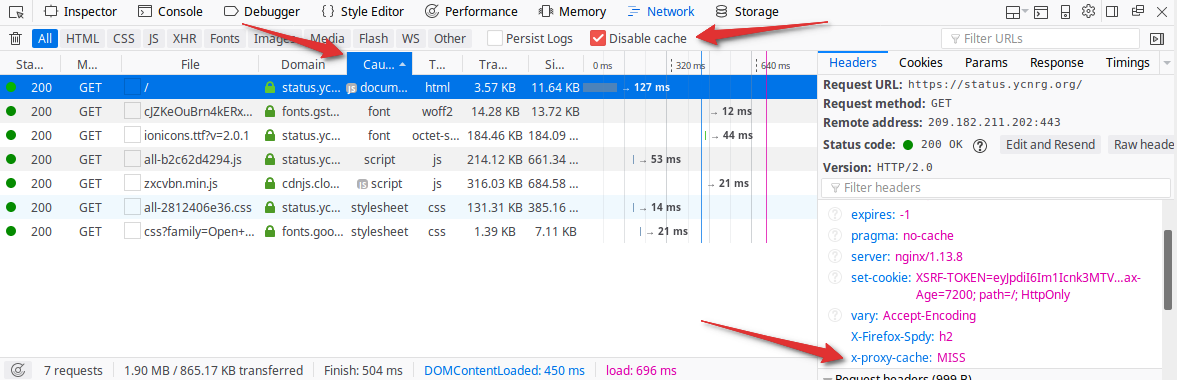
In Chrome/Chromium, Safari, Vivaldi, or Firefox, you can open the DevTools console by pressing F12. Then, click the Network tab to view a list of all requests for the current page. If nothing displays, ensure the console shows a check in the box for Disable Cache (this refers to the browser cache, not the server-side cache) then refresh the page. Once refreshed, select the first entry in the network list (be sure to sort by "Cause" in Firefox), which is typically the actual page request. Next, on the right-side panel under Response, a X-Proxy-Cache header will show you the cache status for this particular request. See the section below for an explanation of the various values.
Using cURL
If you have SSH access to your server, or a local terminal (on MacOS or Linux), you can use cURL to fetch the cache status very quickly. First, open up a terminal window or SSH session, then run the following command:
user@server ~ $ curl -A Mozilla -is http://example.com/ | head -15

HTTP/1.1 200 OK

Server: nginx/1.13.8

Date: Wed, 17 Jan 2018 15:07:12 GMT

Content-Type: text/html; charset=UTF-8

Transfer-Encoding: chunked

Connection: keep-alive

Vary: Accept-Encoding

Cache-Control: private, must-revalidate

pragma: no-cache

expires: -1

X-Proxy-Cache: HIT
Be sure to substitute the URL in the above example with the one you would like to test. This should provide a list of the response headers, including the X-Proxy-Cache header.
Using ngxutil
(VPS/Dedicated only)
A tool that we developed in-house for use with the WordPress Optimized Stack, ngxutil performs many useful tasks. For this discussion, we will focus on its --info functionality. This function makes a request to the provided URL, then shows the current state of the cache on disk, checks whether the page was served from cache, and provides general troubleshooting tips in case you run into problems or receive errors.
[root@vpsdedi ~]# ngxutil --info http://example.com/

GET http://example.com/

Elapsed: 0.157s

---

200 OK

Cache status: MISS

* NOT IN CACHE

---

* Content compressed/encoding via gzip

* Vary on Accept-Encoding enabled

* Client cache-control headers present:

        Cache-Control: private, must-revalidate

---

* One or more cookies are being set by the server

  TIP: Cookies will prevent the page from being cached, unless cache_honor_cookies

       is set to false in the ngxconf config for this domain (default: true).

       If session management is necessary, offloading these requests to an AJAX

       endpoint via client-side Javascript will provide the best performance.

    laravel_session = 'xxxyyyzzz'

    XSRF-TOKEN = 'xxxyyyzzz'

---
Cache Statuses
Below, you will find a table describing all possible values for the X-Proxy-Cache header. Use it along with the above techniques for checking cache status for your web pages.
| Status | Description |
|---|---|
- (Empty or no header) |
No caching configured for this URI, or the page was requested via a method other than GET, HEAD, or OPTIONS. This means that POST requests will always bypass the cache |
HIT |
NGINX found a matching page in the cache and returned it to the visitor. The returned page has not yet expired. |
MISS |
No matching fresh page was found in the cache. NGINX made a request to the origin (Apache, PHP-FPM), then cached the resulting page for subsequent requests. |
EXPIRED |
NGINX tried to retrieve an updated page from the origin (Apache, PHP-FPM), but encountered an error, so instead it served an expired page from the cache. |
UPDATING |
NGINX is currently waiting for a response from Apache to update the cache (from a previous request). In the meantime, NGINX served the visitor the existing (expired) page from the cache. This behavior can be controlled via the cache_lock_enable option (enabled by default; this option is not available via the Cache Manager Plugin interface, as it should remain enabled in most cases). |
BYPASS |
This page was passed directly to/from Apache without caching due to matching a pattern in the Bypass URLs list. Other options, such as Bypass Cookies, also influence whether or not the request bypassed the cache. |
STATIC/TYPE |
This asset was served directly by NGINX due to matching the file extension of the request URL with a predefined list in the server template. This is enabled or disabled via the Accelerate Static Content option. A URL can forcibly bypass this by being added to the Force Passthru list. |
STATIC/PATH |
This asset was served directly by NGINX due to matching a path in the Static Content Paths list. |
NGINX and the various cache options provided by the WordPress Optimized Stack make for powerful tools you can use to tune your website for optimal performance. With this guide, you should be able to start making changes to help optimize your website for the best performance!
NGINX Cache Management (.imh nginx)的更多相关文章
- nginx cache的玩法
一.简介 Nginx版本从0.7.48开始,支持了类似Squid的缓存功能.这个缓存是把URL及相关组合当做Key,用Md5算法对Key进行哈希,得到硬盘上对应的哈希目录路径,从而将缓存内容保存在 ...
- FastDFS_v5.05+nginx+cache集群安装配置手册
转载请出自出处:http://www.cnblogs.com/hd3013779515/ 1.FastDFS简单介绍 FastDFS是由淘宝的余庆先生所开发,是一个轻量级.高性能的开源分布式文件系统, ...
- 查看nginx cache命中率
一.在http header上增加命中显示 nginx提供了$upstream_cache_status这个变量来显示缓存的状态,我们可以在配置中添加一个http头来显示这一状态,达到类似squid的 ...
- 使用nginx cache缓存网站数据实践
Nginx本身就有缓存功能,能够缓存静态对象,比如图片.CSS.JS等内容直接缓存到本地,下次访问相同对象时,直接从缓存即可,无需访问后端静态服务器以及存储存储服务器,可以替代squid功能. 1 ...
- nginx(五)nginx与php的安装配置
经过前面学习,对nginx有个大概的了解,来配置LNMP;只要是在系统安装过程中选择安装比较齐全的包,基本上系统都能满足安装要求,下面是我一个一个测试的,基本上全部安装所需的库文件,放心安装: [ro ...
- Nginx实现负载均衡&Nginx缓存功能
一.Nginx是什么 Nginx (engine x) 是一个高性能的HTTP和反向代理服务器,也是一个IMAP/POP3/SMTP服务器.Nginx是由伊戈尔·赛索耶夫为俄罗斯访问量第二的Rambl ...
- Nginx系列0:Nginx学习历程
Nginx学习历程 一.初识Nginx 1.Nginx适用于哪些场景 (1)静态资源服务 通过本地文件系统提供服务 (2)反向代理服务 Nginx的强大性能 缓存 负载均衡 (3)API服务 Open ...
- Nginx缓存配置以及nginx ngx_cache_purge模块的使用
web缓存位于内容源Web服务器和客户端之间,当用户访问一个URL时,Web缓存服务器会去后端Web源服务器取回要输出的内容,然后,当下一个请求到来时,如果访问的是相同的URL,Web缓存服务器直接输 ...
- The server of Nginx(三)——Nginx企业级优化
相信看过我之前apache文章的朋友们,对服务优化也有了一个大概的了解,相比较而言,Nginx企业中应用的更多一些,因此今天也会详细阐述Nginx的优化,有人说,服务器不需要优化,开虚拟化,分分钟成倍 ...
随机推荐
- AppDir【创建缓存目录】【建议使用这个工具类】
版权声明:本文为HaiyuKing原创文章,转载请注明出处! 前言 创建缓存目录 public static String APP_CACHE = "";// /storage/e ...
- idea忽略并隐藏.idea文件夹.iml文件不提交到svn
File-->setting-->Editor-->File Types 选中.boringignore,添加*.iml;.idea;即可
- 给用过SAP CRM中间件的老哥老姐们讲讲SAP CPI
最近Jerry由于项目需要,又得学习一个新工具:SAP Cloud Platform Integration,简称CPI,以前又叫做HCI - HANA Cloud Platform Integrat ...
- 一道经典面试题,atoi函数的实现
参考资料 (1)atoi函数的实现 (2)<剑指offer> 题目分析 本题需要注意的有几个方面: (1)检查输入参数,指针是否为NULL: (2)去除字符串前面的空格 (3)处理正负符号 ...
- Mac电脑永久路由的添加方法是是什么? Mac校园网连接教程
学校校园网面向全校师生开放,无奈Windows用户基数大,学校只为Windows平台制作了内网连接工具,Mac平台资源较少,本人查阅相关资料后,总结整理出以下步骤,方便本校学生连接校园网. 有永久路由 ...
- Linux-普通用户切换为root身份
Linux 下普通用户免密码切换 root 用户 具体步骤: 1)编辑 su 文件打开第四行注释 # vim /etc/pam.d/su 2)将用户添加到 wheel 组 # usermod -G w ...
- ACAG 0x02-8 非递归实现组合型枚举
ACAG 0x02-8 非递归实现组合型枚举 之所以专门来写这道题的博客,是因为感觉从最根本处了解到了递归的机器实现. 主要的就是两个指令--Call和Ret. Call指令会将返回地址入栈(系统栈) ...
- 数据库索引数据结构总结——ART树就是前缀树
数据库索引数据结构总结 from:https://zhewuzhou.github.io/2018/10/18/Database-Indexes/ 摘要 数据库索引是数据库中最重要的组成部分,而索引的 ...
- linux的后台运行相关命令
screen -S name 创建一个名为name的后台,或者说bash面板,在这上面运行的任务不会因为连接断开而退出,且保留bash上的信息 screen -ls 列出所有的screen scree ...
- 关于input标签checkbox属性 和checked
我们设置了type的属性为checkbox时,记住以下3个关键点 1.点勾选时或者说点击时,checked为选中,在input标签中是checked=“checked”,注意这里面无论checked= ...