springboot其实并不推荐使用jsp作为视图模板,其默认采用Thymeleaf作为模板,出于对其没有研究,故考虑目前阶段仍然使用jsp作为视图模板。下面就展开实践案例过程:

1、首先创建一个jsp页面:
<!DOCTYPE html>

<%@ taglib prefix="spring" uri="http://www.springframework.org/tags"%>
<%@ taglib prefix="c" uri="http://java.sun.com/jsp/jstl/core"%>

<html lang="en">

<body>
<c:url value="/resources/text.txt" var="url"/>
<spring:url value="/resources/text.txt" htmlEscape="true" var="springUrl" />
Spring URL: ${springUrl} at ${time}
<br>
JSTL URL: ${url}
<br>
Message: ${message}
</body>

</html>

2、在springmvc中我们也需要定义InternalResourceViewResolver来描述相关页面的存放地址等属性,springboot中同样需要进行描述,在application.properties中配置如下:
# viewpage path
spring.mvc.view.prefix=/WEB-INF/jsp/
# suffix of view
spring.mvc.view.suffix=.jsp
# message
application.message=Hello Angel From application

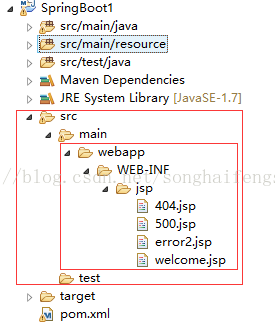
3、如此我们1中新建的页面存放路径为:


4、此时我们需要新增一个控制器类,通过控制控制类转发至我们的请求页面:
package com.shf.springboot.controller;

import java.util.Date;
import java.util.HashMap;
import java.util.Map;
import org.springframework.beans.factory.annotation.Value;
import org.springframework.http.HttpStatus;
import org.springframework.stereotype.Controller;
import org.springframework.web.bind.annotation.ExceptionHandler;
import org.springframework.web.bind.annotation.GetMapping;
import org.springframework.web.bind.annotation.RequestMapping;
import org.springframework.web.bind.annotation.ResponseBody;
import org.springframework.web.bind.annotation.ResponseStatus;
import org.springframework.web.servlet.ModelAndView;

@Controller
public class WelcomeController {

@Value("${application.message:Hello World}")
private String message = "Hello World";
@GetMapping("/welcome")
public String welcome(Map<String, Object> model) {
model.put("time", new Date());
model.put("message", this.message);
return "welcome";
}
}

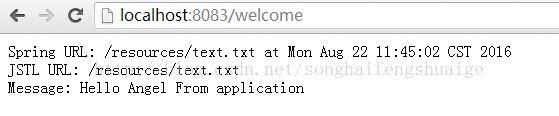
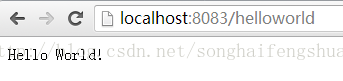
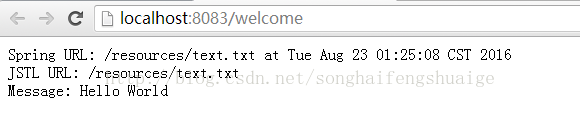
5、启动服务通过设定的请求地址访问:

注:可以发现打印的message消息为application.properties中的配置的message内容。
@Value("${application.message:Hello World}"):如果在当前类读取的资源文件中存在对应的key属性,则通过@Value能够获取其值。

6、下面删除application.properties中的message配置,查验结果:

打印信息:

验证发现,没有配置的情况下,则直接读取@Value注解中定义的值。

7、此时发现,开发环境下我们能够正常的访问我们的请求并转发至对应的jsp请求页面,但是我们部署环境如何呢,首先尝试通过打包成jar验证:
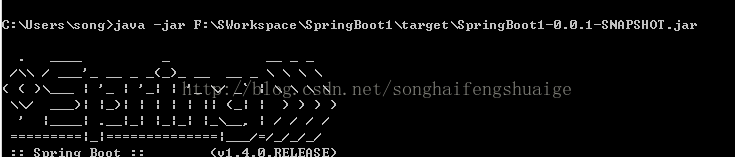
直接通过java -jar 方式启动jar服务

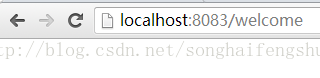
通过浏览器访问,

无法正常打开jsp页面请求。非jsp页面转发请求正常


8、通过maven直接打包成war包,然后部署至常规tomcat下:

验证发现404错误,没有找到对应的请求处理,通过继续了解发现启动类可以继承SpringBootServletInitializer类。

9、修改启动类继承自SpringBootServletInitializer,重新打包验证:
package com.shf.SpringBoot1;

import org.springframework.beans.factory.annotation.Autowired;
import org.springframework.boot.SpringApplication;
import org.springframework.boot.autoconfigure.EnableAutoConfiguration;
import org.springframework.boot.autoconfigure.SpringBootApplication;
import org.springframework.boot.autoconfigure.gson.GsonAutoConfiguration;
import org.springframework.boot.autoconfigure.jackson.JacksonAutoConfiguration;
import org.springframework.boot.builder.SpringApplicationBuilder;
import org.springframework.boot.context.embedded.ConfigurableEmbeddedServletContainer;
import org.springframework.boot.context.embedded.EmbeddedServletContainerCustomizer;
import org.springframework.boot.context.properties.EnableConfigurationProperties;
import org.springframework.boot.web.support.SpringBootServletInitializer;
import org.springframework.context.annotation.ComponentScan;
import org.springframework.context.annotation.Configuration;
import com.shf.springboot.controller.ServerConfig2;

@SpringBootApplication
@EnableConfigurationProperties({ServerConfig.class,ServerConfig2.class})
@ComponentScan(basePackages={"com.shf.SpringBoot1","com.shf.springboot.*"})
public class App
extends SpringBootServletInitializer //这个类的作用与在web.xml中配置负责初始化Spring应用上下文的监听器作用类似,如果需要打成war部署在tomcat下则需要
{
@Autowired
ServerConfig serverConfig;

public static void main(String[] args) throws Exception {
SpringApplication.run(App.class, args);
}
@Override
protected SpringApplicationBuilder configure(SpringApplicationBuilder builder) {
return builder.sources(App.class);
}
}
再次启动服务正常访问:


注:说明SpringBootServletInitializer对比传统的web项目构建,可以理解为web.xml的作用,集成后tomcat容器能够将其作为web项目进行加载。
通过跟踪源码可以发现,其实SpringBootServletInitializer实现了WebApplicationInitializer接口。

10、以上我们采用的是application.properties中配置相关jsp视图解析对应的参数值,那么我们是否可以通过一个普通的Java配置来实现呢,答案是肯定的,首先注释掉application.properties中的配置:
# viewpage path
#spring.mvc.view.prefix=/WEB-INF/jsp/
# suffix of view
#spring.mvc.view.suffix=.jsp

然后新增一个java配置类:
package com.shf.springboot.config;

import org.springframework.context.annotation.Bean;
import org.springframework.context.annotation.Configuration;
import org.springframework.web.servlet.view.InternalResourceViewResolver;
import org.springframework.web.servlet.view.JstlView;

@Configuration
public class ViewResolverConfiguration {

@Bean
public InternalResourceViewResolver getJspViewResolver(){
InternalResourceViewResolver jspViewResolver=new InternalResourceViewResolver();
jspViewResolver.setPrefix("/WEB-INF/jsp/");
jspViewResolver.setSuffix(".jsp");
jspViewResolver.setViewClass(JstlView.class);
return jspViewResolver;
}
}
验证请求响应

SpringBoot使用jsp作为视图模板&常规部署的更多相关文章

  1. springboot整合jsp模板

    springboot整合jsp模板 在使用springboot框架里使用jsp的时候,页面模板使用jsp在pom.xnl中需要引入相关的依赖,否则在controller中无法返回到指定页面 〇.搭建s ...

  2. 2016/5/6 thinkphp ①框架 ② 框架项目部署 ③MVC模式 ④控制器访问及路由解析 ⑤开发和生产模式 ⑥控制器和对应方法创建 ⑦视图模板文件创建 ⑧url地址大小写设置 ⑨空操作空控制器 ⑩项目分组

    真实项目开发步骤: 多人同时开发项目,协作开发项目.分工合理.效率有提高(代码风格不一样.分工不好) 测试阶段 上线运行 对项目进行维护.修改.升级(单个人维护项目,十分困难,代码风格不一样) 项目稳 ...

  3. SpringBoot整合Jsp和Thymeleaf (附工程)

    前言 本篇文章主要讲述SpringBoot整合Jsp以及SpringBoot整合Thymeleaf,实现一个简单的用户增删改查示例工程.事先说明,有三个项目,两个是单独整合的,一个是将它们整合在一起的 ...

  4. [Spring MVC] - JSP + Freemarker视图解释器整合

    Spring MVC中如果只使用JSP做视图,可以使用下面这段即可解决: <!-- 视图解释类 --> <bean class="org.springframework.w ...

  5. SpringBoot Web开发(4) Thymeleaf模板与freemaker

    SpringBoot Web开发(4) Thymeleaf模板与freemaker 一.模板引擎 常用得模板引擎有JSP.Velocity.Freemarker.Thymeleaf SpringBoo ...

  6. SpringBoot入门篇--Thymeleaf引擎模板的基本使用方法

    我们在使用SpringBoot框架的时候在前面已经介绍了Thymelea引擎模板,因为SpringBoot对JSP惨不忍睹的支持.那我们在使用引擎模板对前端页面进行渲染能够返回的情况下我们怎么才能在静 ...

  7. SpringBoot入门篇--使用Thymeleaf模板引擎进行页面的渲染

    在做WEB开发的时候,我们不可避免的就是在前端页面之间进行跳转,中间进行数据的查询等等操作.我们在使用SpringBoot之前包括我在内其实大部分都是用的是JSP页面,可以说使用的已经很熟悉.但是我们 ...

  8. [Spring MVC] - JSP + Freemarker视图解释器整合(转)

    Spring MVC中如果只使用JSP做视图,可以使用下面这段即可解决: <!-- 视图解释类 --> <bean class="org.springframework.w ...

  9. 【7】Django网页视图模板处理

    天下难事必作於易.天下大事必作於细.是以圣人终不为大,故能成其大 --老子<道德经> 本节内容 HTML页面的渲染 使用页面模板 异常处理 超链接路径处理 路由命名空间 1. HTML页面 ...

随机推荐

  1. 【习题 6-1 UVA-673】Parentheses Balance

    [链接] 我是链接,点我呀:) [题意] 在这里输入题意 [题解] 括号匹配. 栈模拟就好. 多种括号也是一样可以做的. [代码] #include <bits/stdc++.h> usi ...

  2. 【CS Round #46 (Div. 1.5) A】Letters Deque

    [链接]h在这里写链接 [题意] 在这里写题意 [题解] string类模拟 [错的次数] 0 [反思] 在这了写反思 [代码] /* */ #include <cstdio> #incl ...

  3. 洛谷 P2969 [USACO09DEC]音符Music Notes

    P2969 [USACO09DEC]音符Music Notes 题目描述 FJ is going to teach his cows how to play a song. The song cons ...

  4. Python中可避免读写乱码的一个强慷慨法

    昨天在帮同学解析一批从网络上爬取的文件时,遇到一个奇葩的问题,文件本身的编码是gbk,Eclipse编辑环境的默认编码是utf8,使用常规的open方法批量打开文件时,某些文件里存在一些不可被gbk识 ...

  5. ajax+客户端与服务器端的交互

    一. AJAX 原生JS var xhr=new XMLHttpRequest(); xhr.open("GET","[请求地址]",false); xhr.o ...

  6. 洛谷—— P1017 进制转换

    https://www.luogu.org/problem/show?pid=1017#sub 题目描述 我们可以用这样的方式来表示一个十进制数: 将每个阿拉伯数字乘以一个以该数字所处位置的(值减1) ...

  7. License控制实现原理(20140808)

    近期须要做一个License控制的实现,做了一个设计,设计图例如以下: watermark/2/text/aHR0cDovL2Jsb2cuY3Nkbi5uZXQvdGVjX2Zlbmc=/font/5 ...

  8. 英特尔投资:7200万美元投资12家创新公司,包括3家中国公司(www.intelcapital.com)

    集微网消息,英特尔投资——英特尔公司全球投资机构,今天在英特尔投资全球峰会上宣布向12家科技创业公司投资超过7200万美元.加上今天宣布的新投资,英特尔投资在2018年投资总额已超过1.15亿美元. ...

  9. 11、V4L2摄像头获取单幅图片测试程序

    #根据网上常见的一个测试程序修改而来 by rockie cheng#include <stdio.h>#include <stdlib.h>#include <stri ...

  10. 通过双重for循环来找到JSON中不反复的数据

    //通过双重for循环来找到JSON中不反复的数据 var count = 0; for ( i=0; i<json.length; i++) { for ( j=0; j<i; j++) ...